
FWD 4.3L V6 into a 4WD Cherokee


Thread Starter
|
Diesel Enthusiast
Joined: Dec 2009
Posts: 274
Likes: 7
From: Kent, WA
dude, the ingenuity on those manifolds is freikin' awesome..... they are crude, per say, but look like that will work awesome. have you done a volume calculation to see approx. what size exhaust that box tubing should flow? meaning will it outflow a 2 1/2" pipe or is it more like a 3"?

Last edited by CheaperJeeper; Mar 22, 2010 at 05:57 PM.
Thread Starter
|
Diesel Enthusiast
Joined: Dec 2009
Posts: 274
Likes: 7
From: Kent, WA
OK, in between the rain showers, made some more progress this weekend.
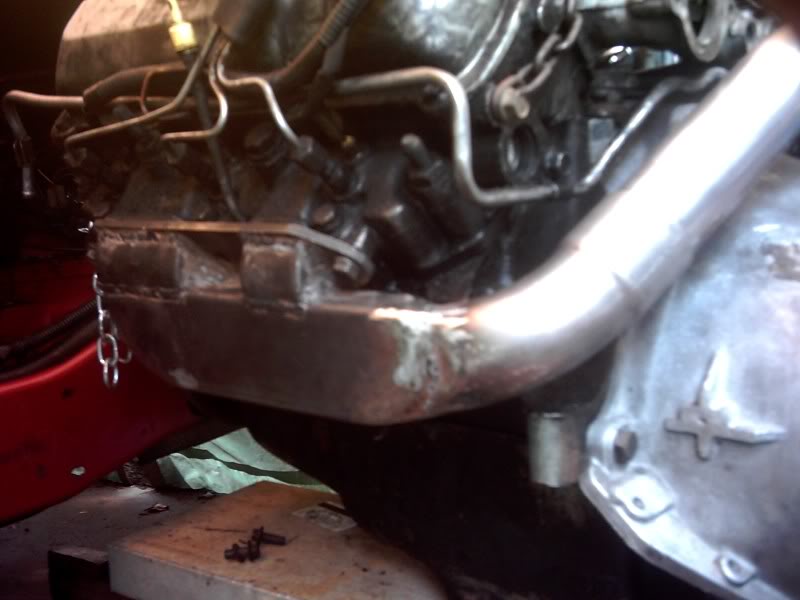

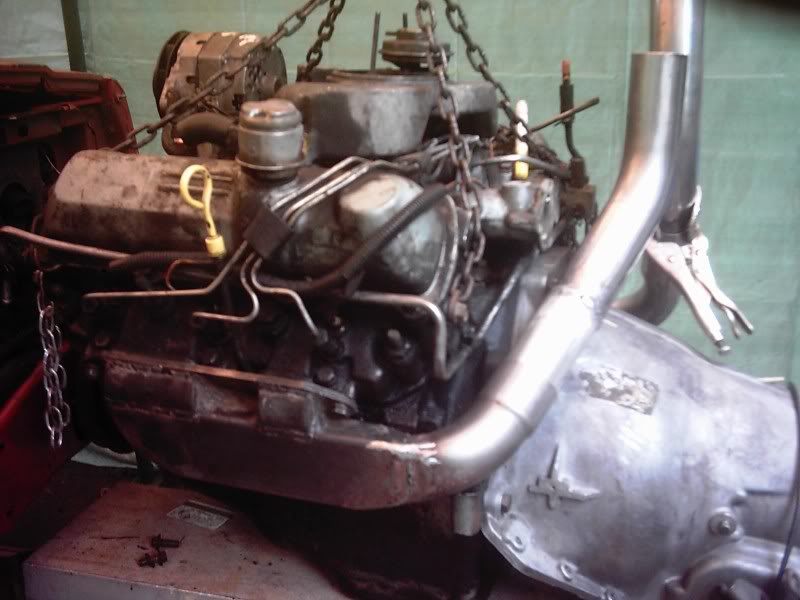
Exhaust goes from driver's side manifold...
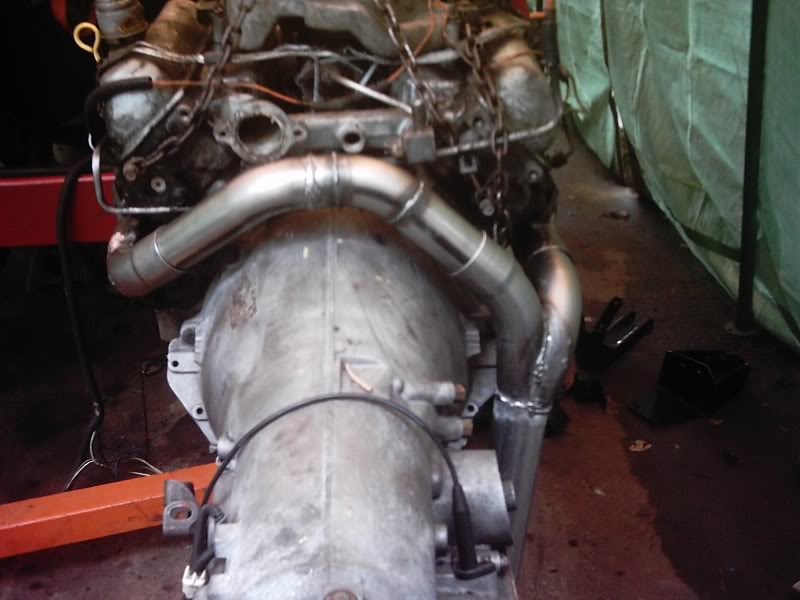
...up and over tranny bellhousing...
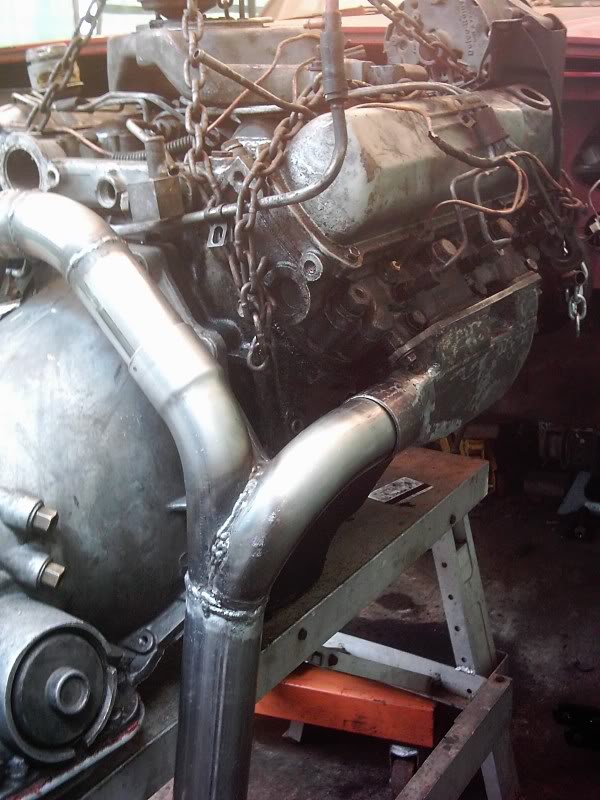
...and merges with the Passenger side into a 2.5" pipe.
This system is designed to be convertable for when I install the turbo
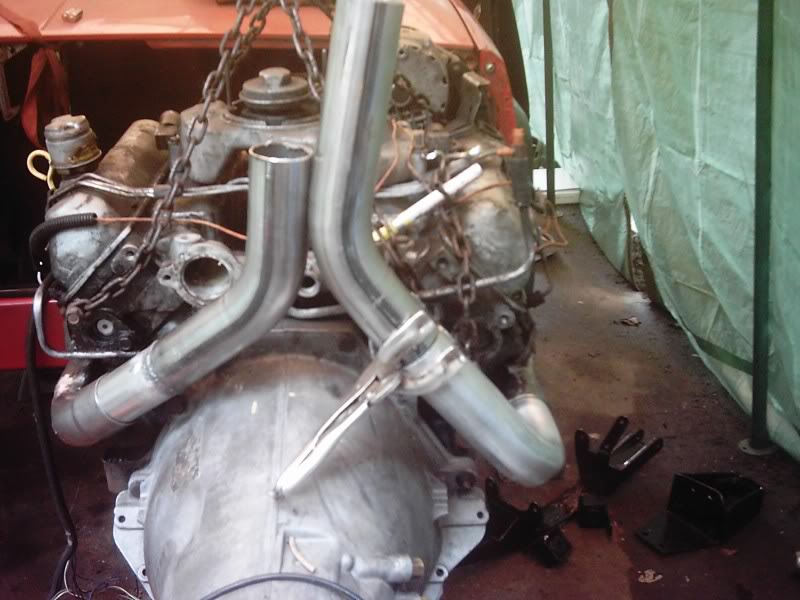
This is just a mock-up of the turbo pipes. I need another mandrel bent 90 for the passenger side before I weld it all
together. Actually it will be bent a little beyond 90* so upper end of the passenger side pipe is more side-by-side with the one from the driver's side. The two pipes will merge into one 3" pipe (to fit the size of the opening in the turbo mounting baseplate.
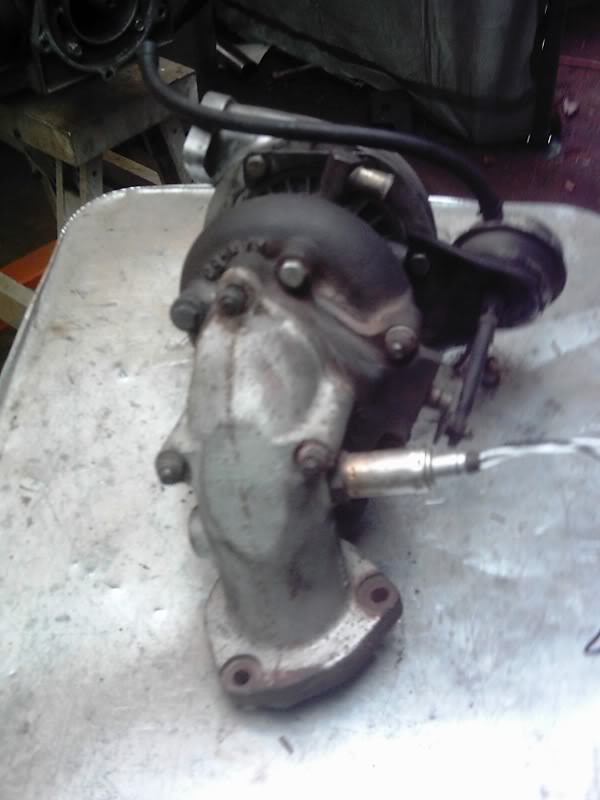
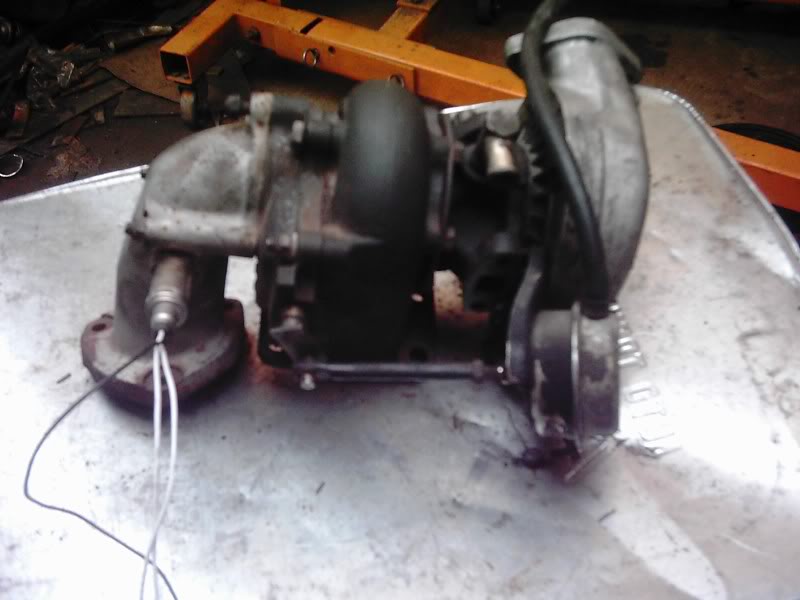
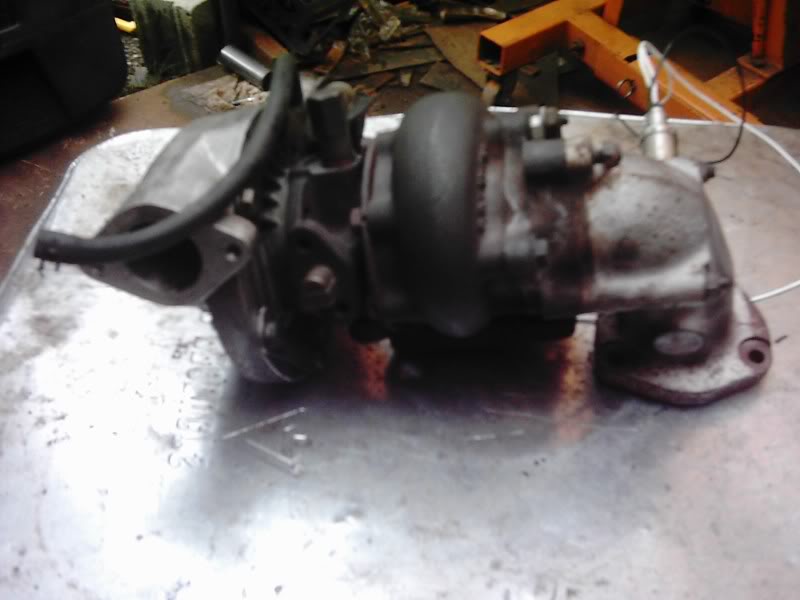
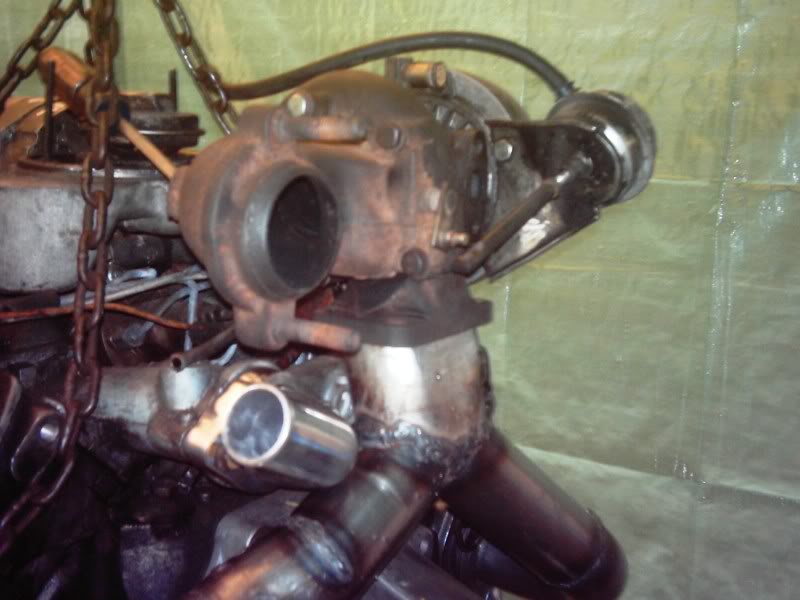
Here are a few pictures of the turbo itself...
Exhaust goes from driver's side manifold...
...up and over tranny bellhousing...
...and merges with the Passenger side into a 2.5" pipe.
This system is designed to be convertable for when I install the turbo
This is just a mock-up of the turbo pipes. I need another mandrel bent 90 for the passenger side before I weld it all
together. Actually it will be bent a little beyond 90* so upper end of the passenger side pipe is more side-by-side with the one from the driver's side. The two pipes will merge into one 3" pipe (to fit the size of the opening in the turbo mounting baseplate.
Here are a few pictures of the turbo itself...
Thread Starter
|
Diesel Enthusiast
Joined: Dec 2009
Posts: 274
Likes: 7
From: Kent, WA

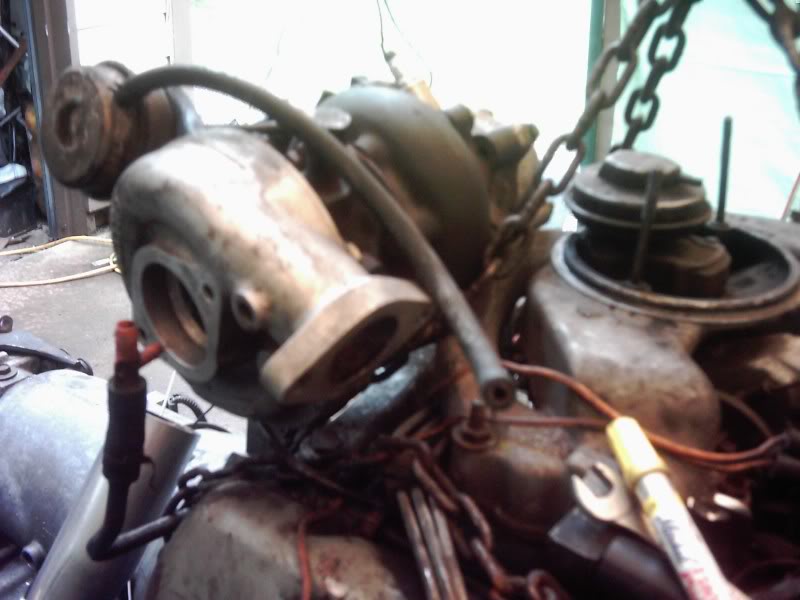
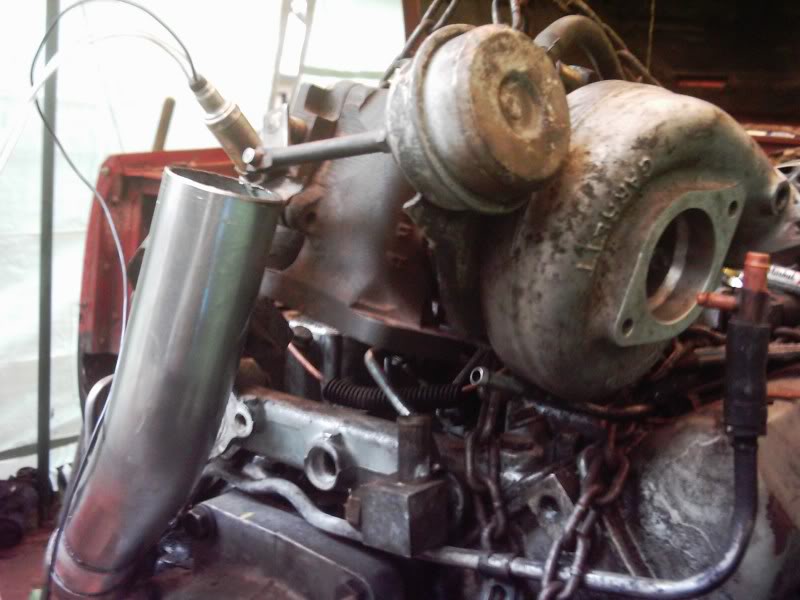
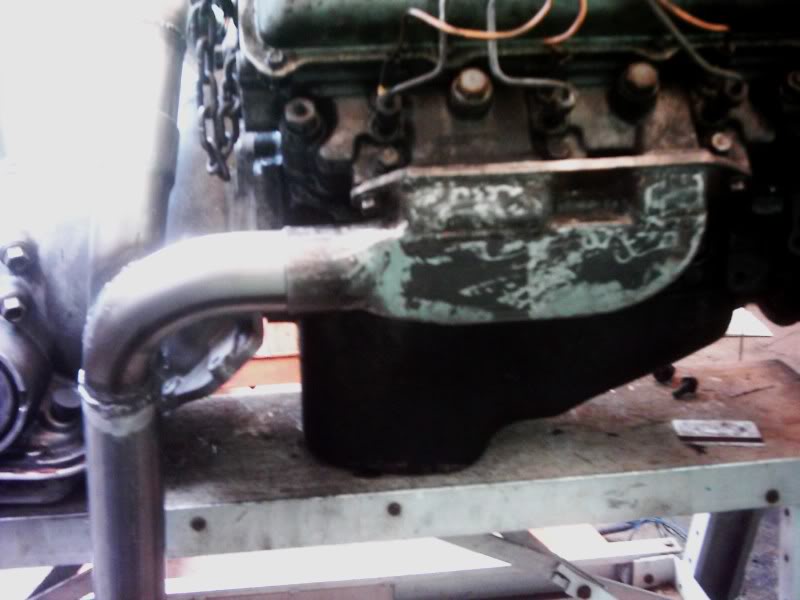
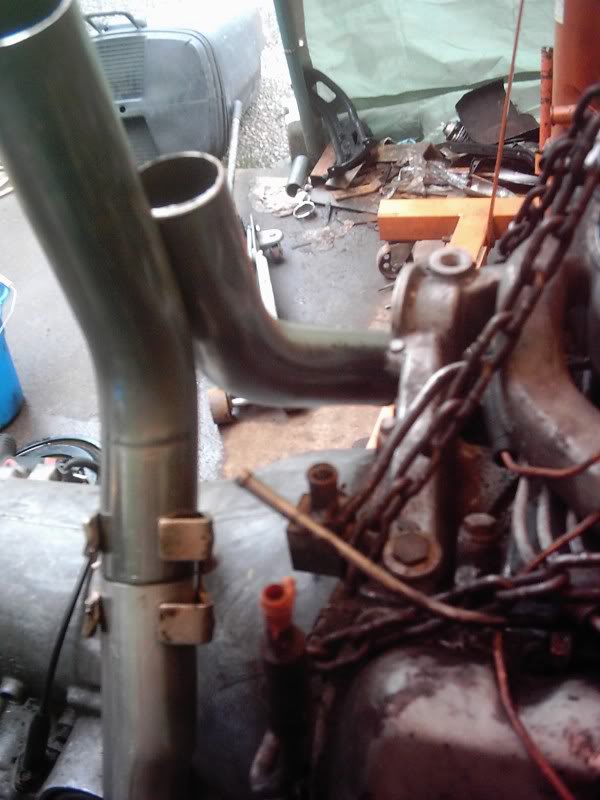
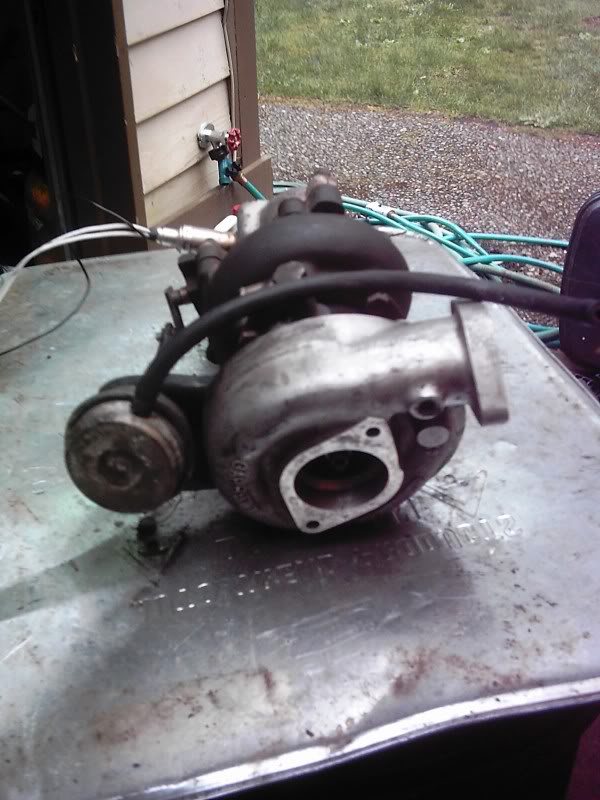
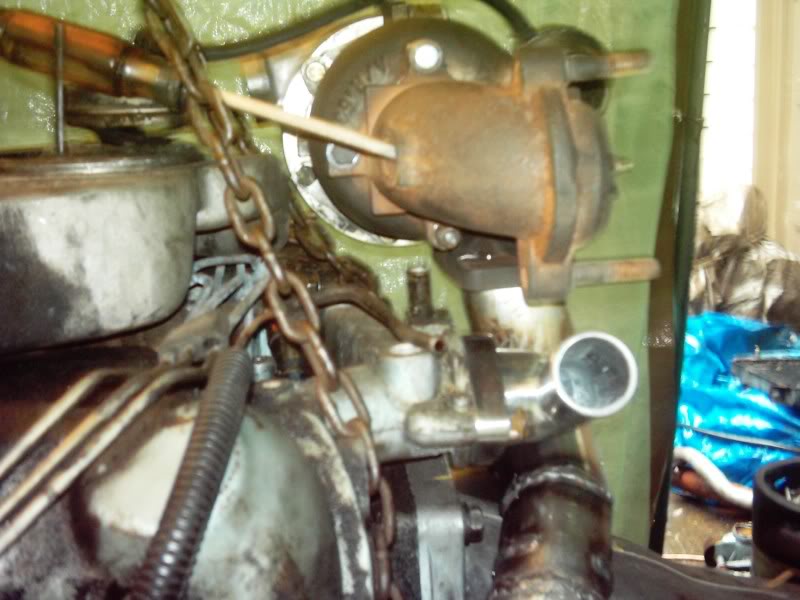
 ...and some shots showing the general location and position of the turbo - just behind and above the plane of the intake manifold. The exhaust flange from the turbo exits to the driver's side on a 45* down angle. I'll install a 90* elbow coming off the flange and down the back side of the bellhousing - running just behind and almost between the up-pipe from the passenger side and the bellhousing.
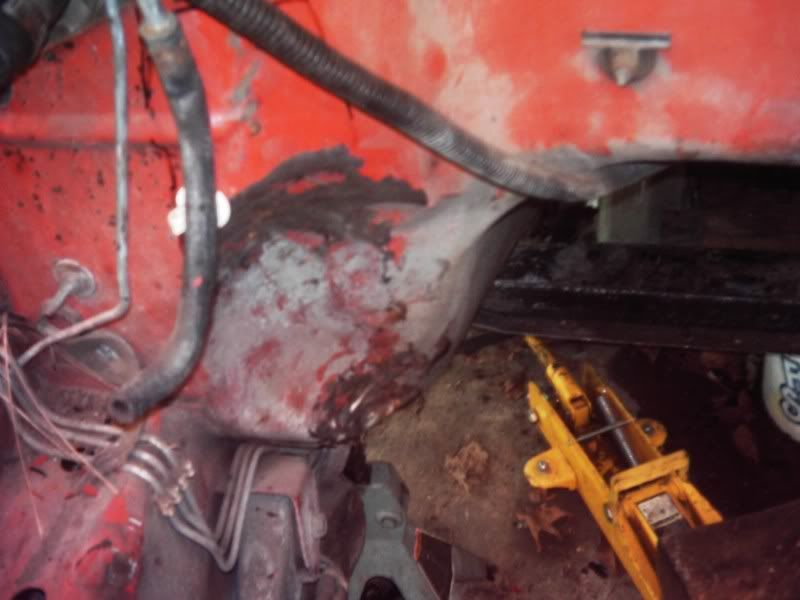
I used my 3-pound sledge to enlarge the "channel" that the factory molded into the edge of the tranny tunnel on the passenger side for the exhaust pipe. A little judicious pounding and VIOLA' I have the extra clearance I needed.
On the driver's side there was just a small flange that needed to be flattened out and rolled back around the edge into the tunnel.
So, after I finish fabbing the turbo pipes/mounting assembly, the next step is to separate the engine and tranny and bolt in the custom torque converter I had made...
Last edited by CheaperJeeper; Mar 29, 2010 at 12:55 AM.

Diesel Wrench
Joined: Dec 2009
Posts: 730
Likes: 33
From: Vancouver Wa
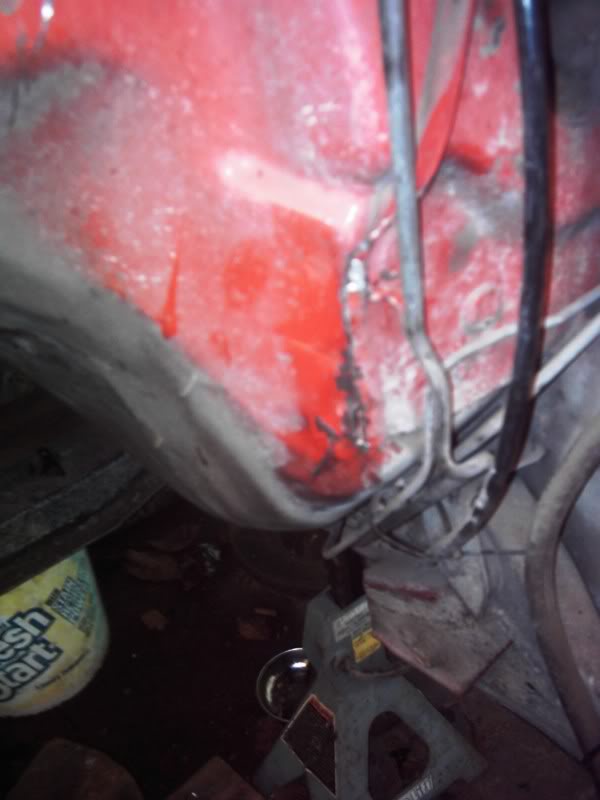
Nice work on the manifolds & pipes! I had to laugh at the pics of the "custom" firewall treatment, looks alot like mine. I had to make room for the wider bellhousing. Glad to see your feeling better and back to work!
Thread Starter
|
Diesel Enthusiast
Joined: Dec 2009
Posts: 274
Likes: 7
From: Kent, WA
My "massage" work was just needed in the area where the fire-wall meets the tranny-hump - and its mostly up behind the dash. Didn't even affect the foot well room on the passenger side.
Spray a little red paint on it and nobody would ever even notice
....
Thread Starter
|
Diesel Enthusiast
Joined: Dec 2009
Posts: 274
Likes: 7
From: Kent, WA
FINALLY! My entire "convertable" exhaust system is 100% complete
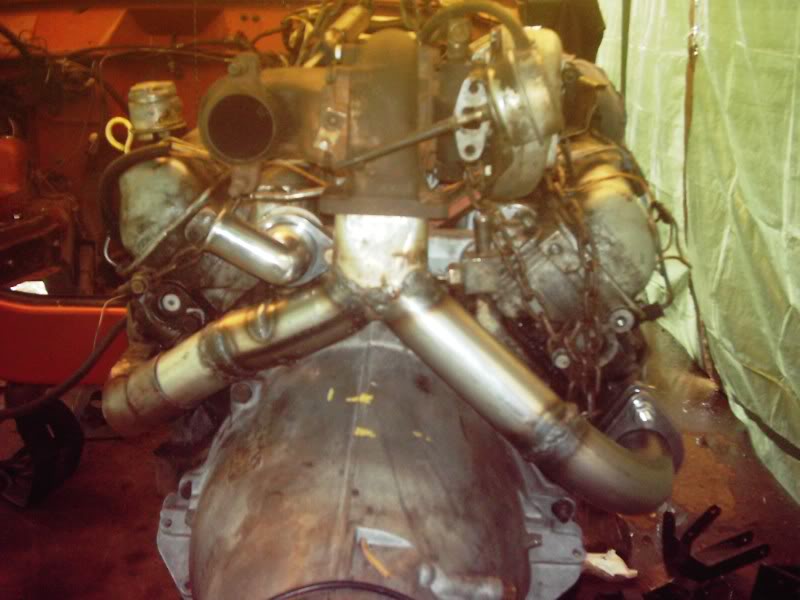
The 2-1/4" Pipes from both manifolds meet behind the top edge of the bellhousing and merge into one 3" pipe.
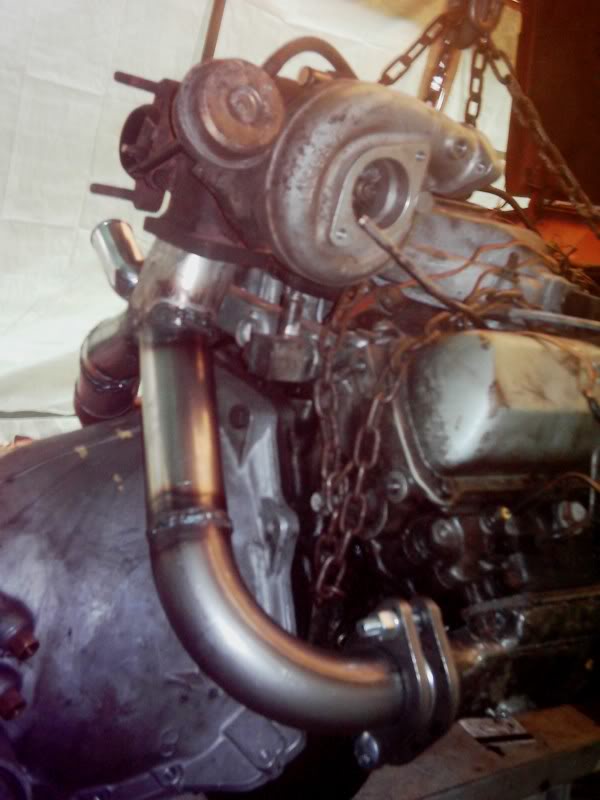
The 3" pipe has been reshaped to a 2" x 2-3/4" rectangular opening on top - ready to be welded to the turbo base flange.
Now that the exhaust is completed, I'm ready to put the non-turbo exhaust back on and put the drivetrain back into the Jeep.
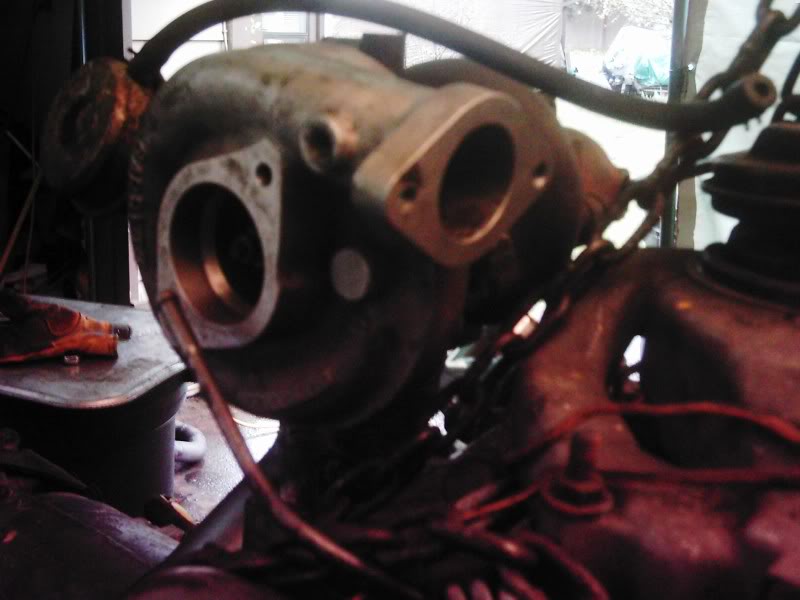
I also made some modifications to the intake bridge.
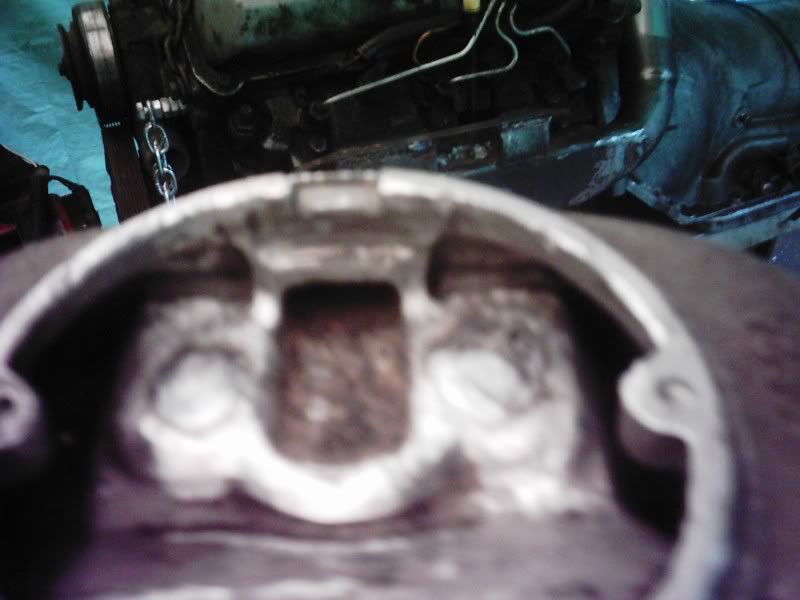
First, I got rid of the EGR that sat right in the throat of the intake (you can see it in the 2nd, 3rd, and 5th pictures in this post - and in some of the earlier pictures).
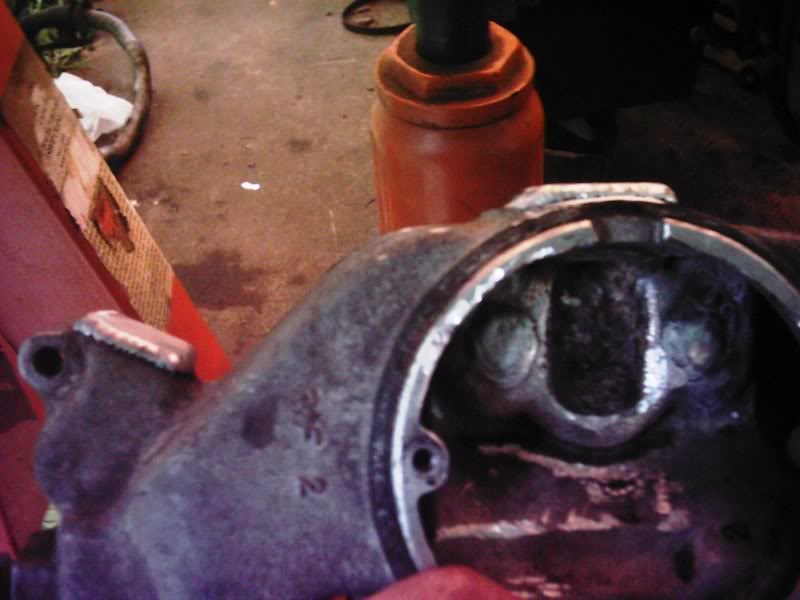
Next, using a carbide burr and a die grinder I milled the EGR mount down flush with the bottom plate inside and had the EGR mounting holes aluminim welded up.
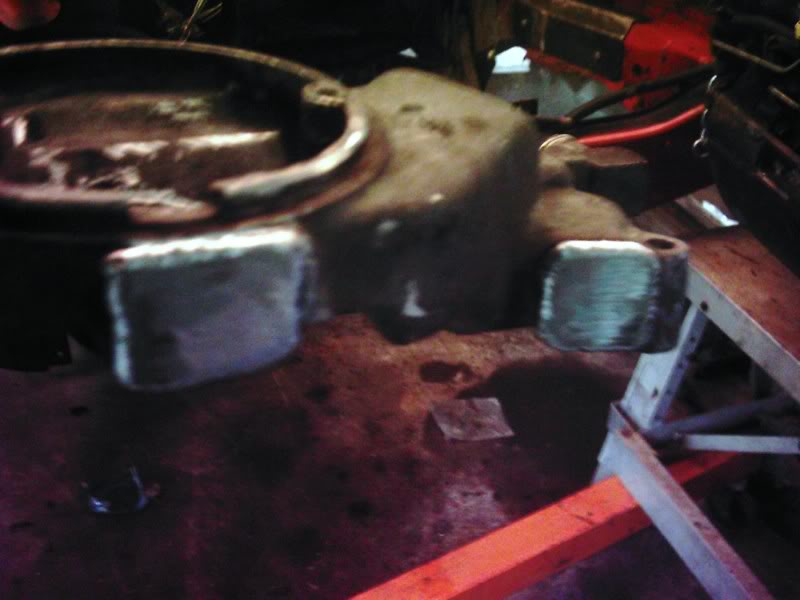
Lastly I removed the external EGR passage by cutting it off the intake at both ends and capped the openings with small plates of aluminum welded in place. That will give me some more room to work with in the area where the turbo will be mounted and ought to make the intake flow a lot better.
Next comes the tranny mount, shifters, and installing the t-case & drivelines...
The 2-1/4" Pipes from both manifolds meet behind the top edge of the bellhousing and merge into one 3" pipe.
The 3" pipe has been reshaped to a 2" x 2-3/4" rectangular opening on top - ready to be welded to the turbo base flange.
Now that the exhaust is completed, I'm ready to put the non-turbo exhaust back on and put the drivetrain back into the Jeep.
I also made some modifications to the intake bridge.
First, I got rid of the EGR that sat right in the throat of the intake (you can see it in the 2nd, 3rd, and 5th pictures in this post - and in some of the earlier pictures).
Next, using a carbide burr and a die grinder I milled the EGR mount down flush with the bottom plate inside and had the EGR mounting holes aluminim welded up.
Lastly I removed the external EGR passage by cutting it off the intake at both ends and capped the openings with small plates of aluminum welded in place. That will give me some more room to work with in the area where the turbo will be mounted and ought to make the intake flow a lot better.
Next comes the tranny mount, shifters, and installing the t-case & drivelines...
Thread Starter
|
Diesel Enthusiast
Joined: Dec 2009
Posts: 274
Likes: 7
From: Kent, WA
Well, I had a little setback. My torque converter turned out to have .550" endplay. It would move back .55" away from the flex plate before the pump drive "snout" would bottom out in the tranny.
I had to take it back in and they added 1/8" to the pads and pilot, and 1/4" to the pump drive "snout", leaving me with just under 3/16" worth of endplay (.175"). I have it back now and with a little luck, this weekend the engine and tranny will go back into place for the last time
While the engine was out, I got my turbo mount finished and clearanced the firewall for the downpipe (a little more work with the sledge).
Also, while I had the tranny unbolted I put the engine back on the stand and I got the oil pan on and all sealed up with new gaskets. Also made a set of exhaust manifold gaskets, and put the manifolds on for the last time. Lastly I made a set of gaskets for the intake "bridge" to manifold. So, the progress is steady but slow, and nothing exciting enough to take pictures of really
Last edited by CheaperJeeper; Apr 19, 2010 at 11:33 PM.
Thread Starter
|
Diesel Enthusiast
Joined: Dec 2009
Posts: 274
Likes: 7
From: Kent, WA
Over the weekend I worked on a bunch of small stuff.
Finished the mount brcket/brace for my turbo
Replaced the water pump
Fabricated the mount for the idler pulley to replace the AC compressor
Blocked off the EGR port in the manifold (with a little filing a 1-1/16" freeze plug fit perfectly)
Fabbed some load-spreaders for the oil pan bolts
Put the vacuum pump on.
Right now I'm waiting on some 2-1/2" mandrel pipe bends I ordered off eBay to finish the turbo down pipe so I can set the motor back in place and make sure the firewall is clearanced enough. After that I'll swap the NA exhaust back onto it and put in place for the last time.
Ready to start working on the new wiring harness vacuum lines, and coolant hoses next...
Last edited by CheaperJeeper; Apr 27, 2010 at 05:35 PM.
Super Moderator


Joined: Jan 2009
Posts: 2,611
Likes: 175
From: northern Germany
I was thinking about it the night.
And because of the V engine it might be easier to use two relative small turbocharger directly at the manifolds- which would result in a very quick and even boost.
It might also ease the built and avoid heat related problems. Exhaust would be easy to run too.
But it's just my personal opinion- maybe I have seen to many Banks twinturbo's
Does you engine already have piston oil jets to cool the underside of the pistons?
Do you already have an idea how much boost you want? Keep in mind that you will need an intercooler if you go higher than 7psi of boost.
My Jeep uses a small IHI RHB 59 turbocharger.
I plan to built a compound charger with the inducer housing of a Maserati Ghibli twinturbo.
It has been done already - just have a look at this video:
Last edited by Deezel Stink3r; Apr 28, 2010 at 08:25 AM.


