
Project Rusty Revival (56k no way!)


Thread Starter
|
Diesel Wrench
Joined: Mar 2010
Posts: 512
Likes: 22

Wish it wasn't winding down on finals time right now... I have 2 days off school this week and could get a boat load of stuff accomplished on the truck. OH WELL! Should be looking to roll her out around the second week of January... I HOPE!

Thread Starter
|
Diesel Wrench
Joined: Mar 2010
Posts: 512
Likes: 22
Now that my finals are officially over, I can get back to working on this thing! Dad got the speaker boxes done while I was at school, so I am working on finishing those up today and maybe getting the amp installed the rest of the way and POSSIBLY I can try out the sound system... 
These boxes were made to fit behind the seats and will point inward.
198298_10152383491150228_614424234_n.jpg?t=1355944607
I glue the oxite carpet onto the boxes because it's easy and relatively durable for the use.
15500_10152383493805228_2011816161_n.jpg?t=1355944652
And the back part of the box is finished! Waiting for the front part to dry then I will put them back together, pilot drill the holes for the speakers, and install the mid range and tweeters.
75546_10152383497800228_1199885820_n.jpg?t=1355944616
I will be working on the truck today and tomorrow around appointments, so I don't see a whole lot getting done. Next week I will be more free to do as I please and will be working on it much more.
---AutoMerged DoublePost---
Here is one of the speakers all finished:
I put the crossover on the back of the speaker to help hide them from thieves...
15380_10152383698555228_288798934_n.jpg?t=1355950584
Tweeter and midrange might give it away, but hopefully they will tuck back into the cab far enough to not really be seen...
598468_10152383695600228_1656305284_n.jpg?t=1355950591
Will hopefully finish the other one later tonight, then have to run the power to the amp, rewire the front speakers since they ended up too short, and reinstall the center console!
Last edited by mkriebs; Dec 19, 2012 at 02:58 PM. Reason: Automerged Doublepost
Thread Starter
|
Diesel Wrench
Joined: Mar 2010
Posts: 512
Likes: 22
Today was a very productive day. I got the stereo hooked up and, despite only being able to hook up 3 out of the 5 channels, it has already blown my mind. I just need a different cable or some adapters to be able to split it to 4 channels coming from my phone. This is the most crisp, clean noise my ears have ever heard!
We got the toolboxes hung in their respective spots as well. The toolboxes will be getting painted the same grey as the cab and bed. This is how we mocked them up and held them in place, we had welded the framework into the bed when we made it:
383765_10152399341775228_793289308_n.jpg?t=1356488155
Here it is all finished up:
578021_10152400755890228_1841648554_n.jpg?t=1356489357
Also got the template of the bed done so we can cut the actual bed to the right size and have the pockets for the stakes cut out and all that. Here are some pictures of the process and the finished product.
As you can see in this picture, we used just regular 1/2" wafer board since dad picked it up for free. We laid it in the bed and cut the spots out to clear the headache bar and the stake pockets. In this picture, dad is cutting out the front stake pocket:
379548_10152400743525228_1904697222_n.jpg?t=1356489011
This is after we were all done with the stake pockets and the stack cut out:
15767_10152400483345228_1910027440_n.jpg?t=1356488156
Tomorrow I will be going to the U-Pull lot to pick up some interior pieces, those will then need dyed and installed, which will likely happen next week. I will also be looking at how to install the radiator and what I can do about that. Probably will not actually start on the radiator til it's a bit warmer out, but never hurts to get an idea what I need to do.
Once I plate it and get it back from the paint shop, I will play with the VGT and the turbo some more. Looks like the second revision of the VGT actuator will need a longer arm to get more leverage, which hopefully will prevent it from getting clogged so easily. I will also clean the exhaust housing and tune the pump some more.
All in all, getting very close to a finished product!
---AutoMerged DoublePost---
In looking at the pictures, I have come up with a few more ideas I would like to implement onto the bed. Unfortunately, I think I am out of time to wait before getting it to the paint shop (and don't feel like taking it off and redoing some of the work. This would basically be simple tin work, though, which should be able to be completed after the bed is painted, then painted separately.
What I am thinking is that it would be kind of nice to integrate something from the rear bumper to the fender, and from the front of the fender to the tool box. On the front part, I would like to put a step between the fender and the tool box. Next time I am back in the shop, I may work up some plywood models of what I am thinking of, then I can get the sheetmetal to make it all.
I called the local U-Pull today and they have 8 trucks similar to mine for me to pull parts from. Will be pulling quite a few things if they are in good shape. Also will be pulling some newer model Ram/Van door handles and mirrors, since they come in black and I hate the OEM Chrome ones.
As you can probably tell, I am really excited to get this thing on the road!
For now, Merry (late) Christmas and I hope the New Year brings you blessings
Last edited by mkriebs; Dec 26, 2012 at 11:33 AM. Reason: Automerged Doublepost

Thread Starter
|
Diesel Wrench
Joined: Mar 2010
Posts: 512
Likes: 22
Well, ****! The lady at the junk yard thought I said "chevy" rather than "dodge" so they had 8 chevy pickups from 81-93 and 0 dodge pickups from 81-93. There were 2 sitting in the "waiting for titles" lot just taunting me, but nothing I could pick parts from. Really throws a hitch in my plans. 
Not sure what I will do now. I plan to call em up next week to see if either of those trucks moved over to the pickable lot...
Not sure what I will do now. I plan to call em up next week to see if either of those trucks moved over to the pickable lot...
Thread Starter
|
Diesel Wrench
Joined: Mar 2010
Posts: 512
Likes: 22
Pretty productive day today.
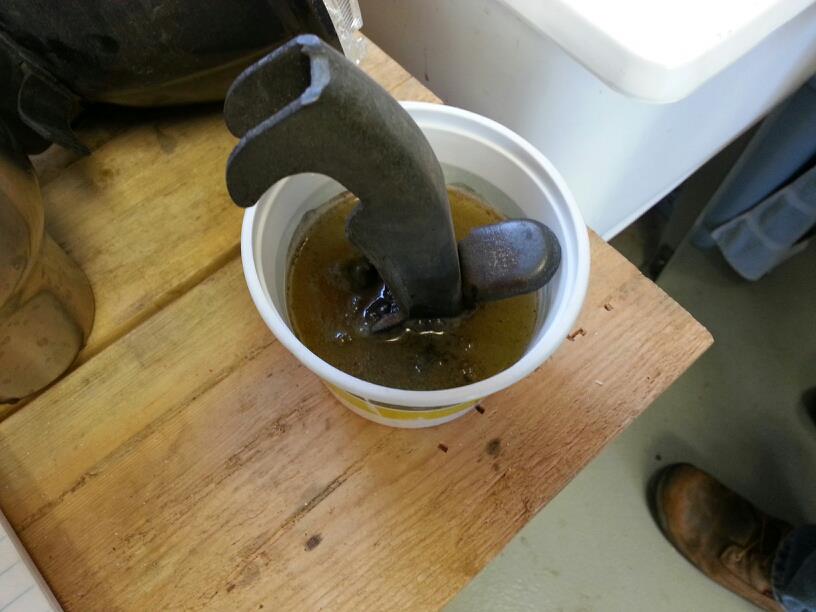
Started by soaking the hood safety latch in muriatic acid to strip off the substantial rust that had froze it up. This stuff works GREAT!
Next, I have finally decided that I want to make the side skirts for the bed with a step on each side. So, here is how it works...
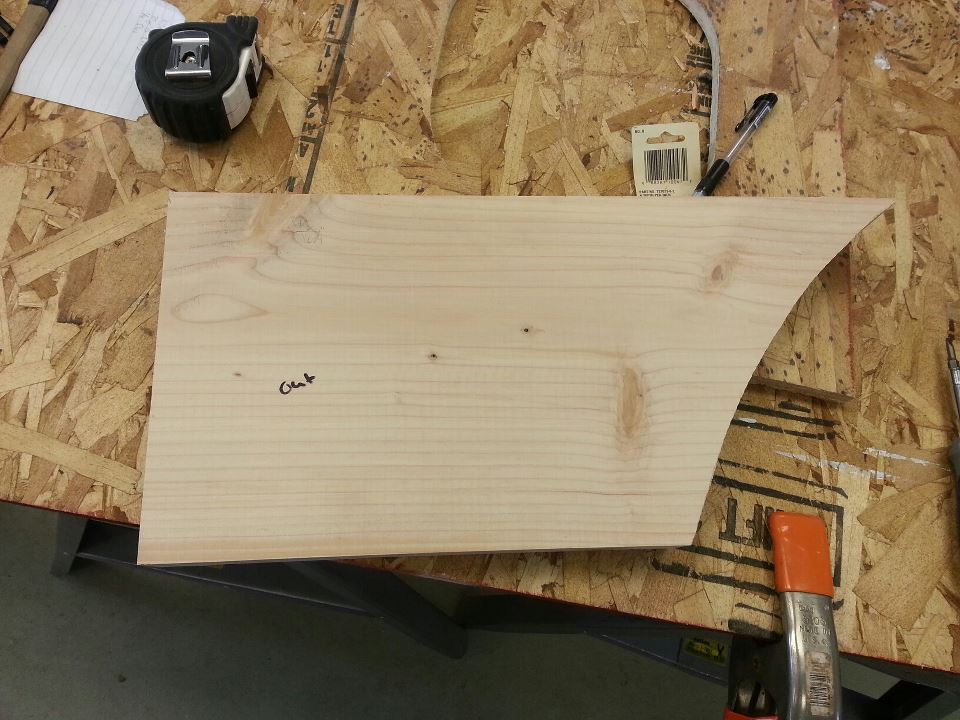
First I made a template of the radius of the fender. This is what will be used to bend the sheetmetal around:
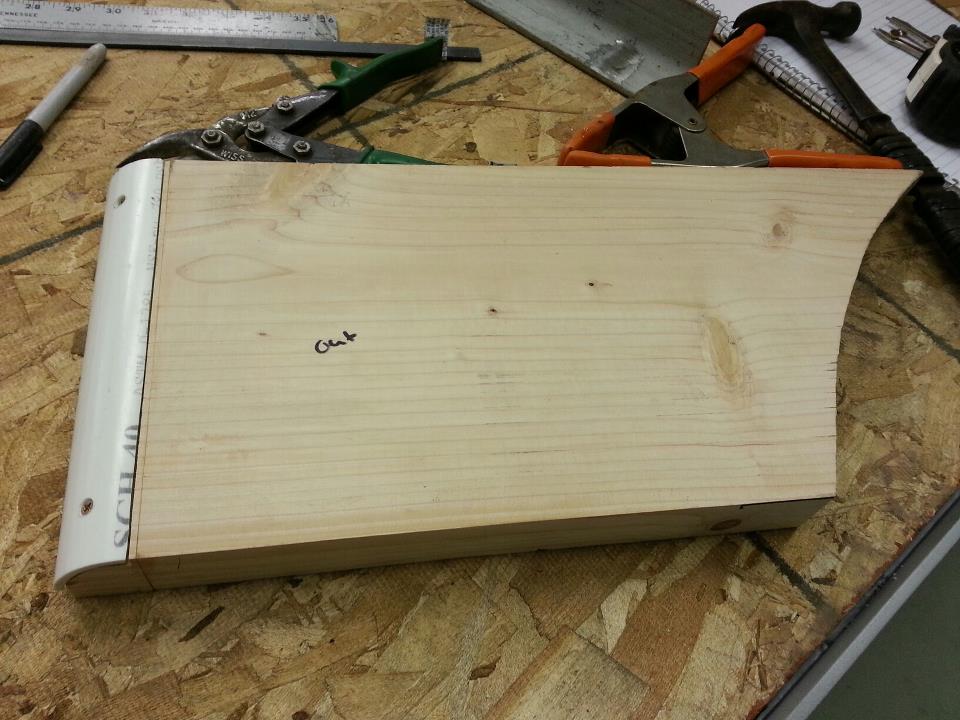
From there, we put a block on the end (because I cut the board too short, ) and cut a rough radius on the board. This is so we could screw a PVC quarter round on the template so we could get a nice clean radius on the front side that will be near the toolbox.
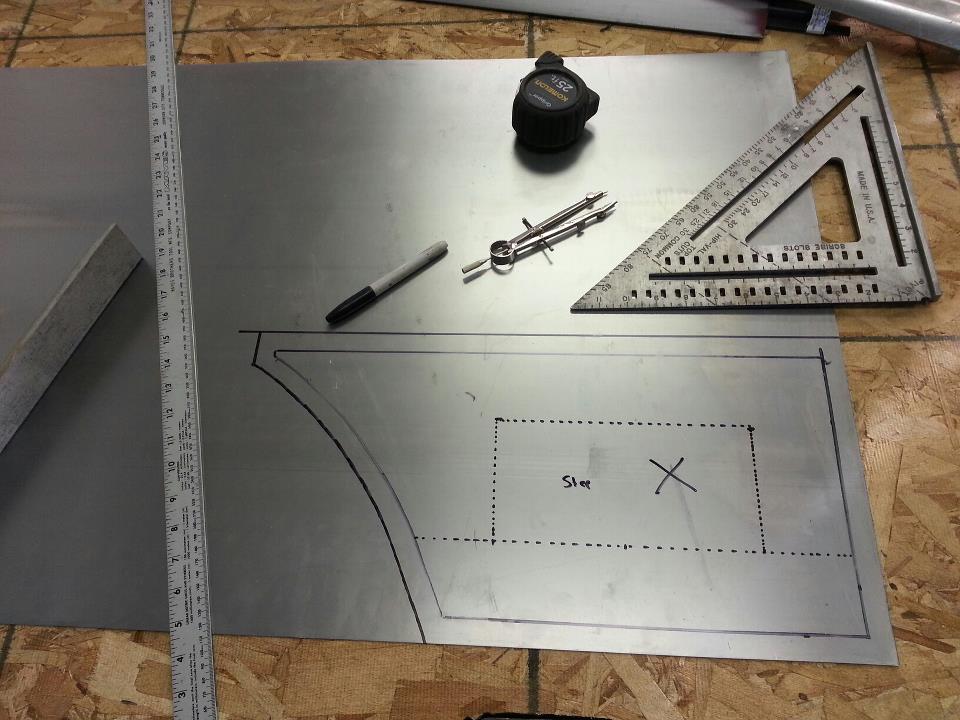
From there I started measuring out the steel so I could get it cut to shape:
From there, put the template in the vise and started bending the steel:
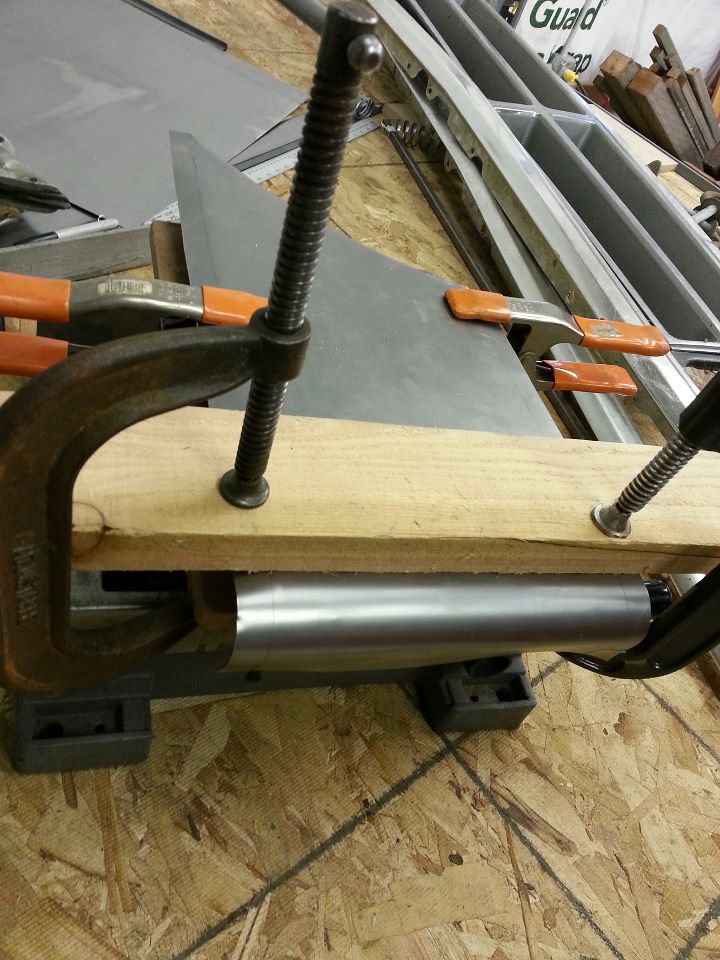
And then, this is the finished product:
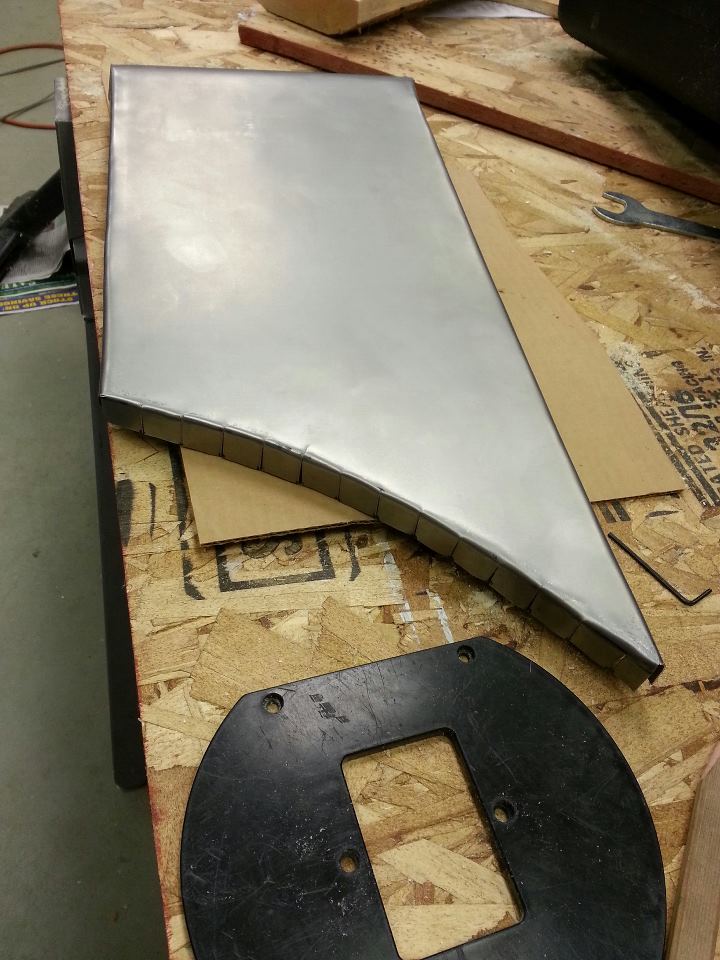
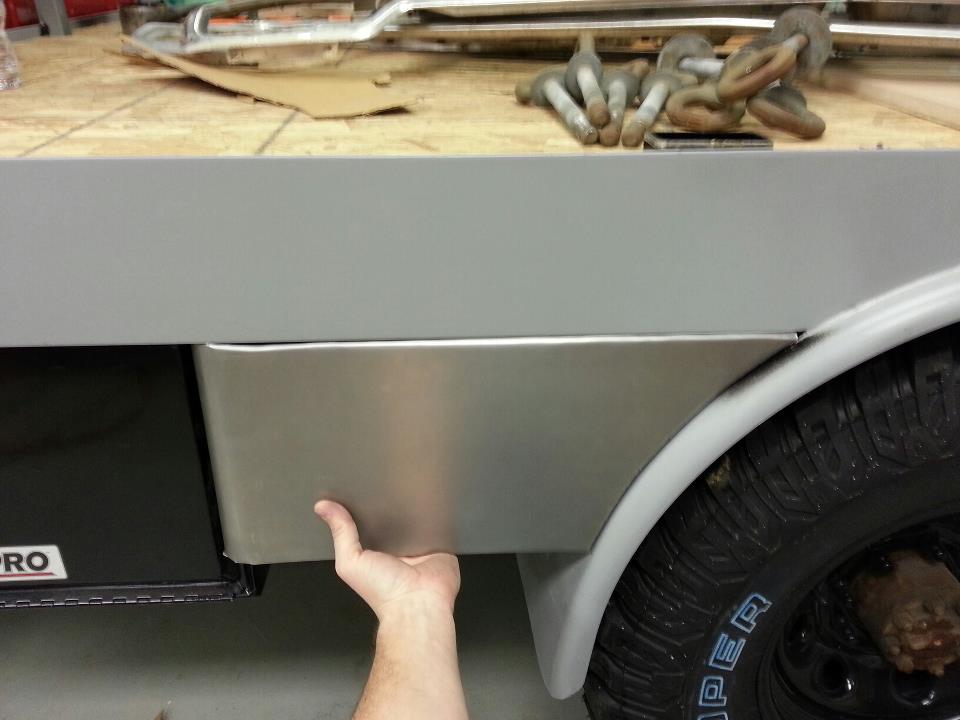
Then this is pretty much how it will end up going on the truck. Needs some fine adjustments, but I will make those when I weld the corners up. Shouldn't take a whole lot of adjustment, though:
I will be working on the rear side skirts tomorrow and welding up the corners of the front ones. Overall, very pleased with the progress. The plan is to take it to the paint shop on Thursday.
---AutoMerged DoublePost---
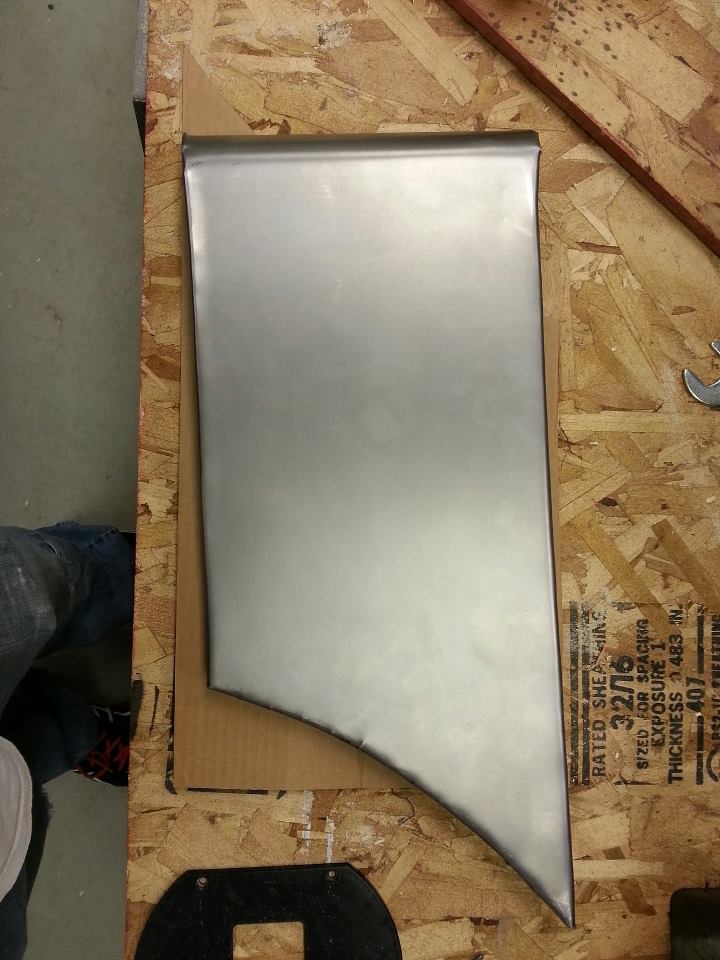
Also got the rear skirt formed:
541877_10152420625720228_1572552509_n.jpg?t=1357094129
This is it mocked up:
196960_10152420625675228_2076135836_n.jpg?t=1357094115
Started by soaking the hood safety latch in muriatic acid to strip off the substantial rust that had froze it up. This stuff works GREAT!
Next, I have finally decided that I want to make the side skirts for the bed with a step on each side. So, here is how it works...
First I made a template of the radius of the fender. This is what will be used to bend the sheetmetal around:
From there, we put a block on the end (because I cut the board too short,
) and cut a rough radius on the board. This is so we could screw a PVC quarter round on the template so we could get a nice clean radius on the front side that will be near the toolbox.From there I started measuring out the steel so I could get it cut to shape:
From there, put the template in the vise and started bending the steel:
And then, this is the finished product:
Then this is pretty much how it will end up going on the truck. Needs some fine adjustments, but I will make those when I weld the corners up. Shouldn't take a whole lot of adjustment, though:
I will be working on the rear side skirts tomorrow and welding up the corners of the front ones. Overall, very pleased with the progress. The plan is to take it to the paint shop on Thursday.
---AutoMerged DoublePost---
Also got the rear skirt formed:
541877_10152420625720228_1572552509_n.jpg?t=1357094129
This is it mocked up:
196960_10152420625675228_2076135836_n.jpg?t=1357094115
Last edited by mkriebs; Jan 1, 2013 at 08:44 PM. Reason: Automerged Doublepost
Thread Starter
|
Diesel Wrench
Joined: Mar 2010
Posts: 512
Likes: 22


No power the rear half of the truck, so it won't be going to the paint shop tomorrow.
Instead of trying to narrow it down, I think I am going to rewire the whole back end of the truck. Rather than messing with 23 year old wire and grounds that are sketchy, this sounds like the better way to do it. Besides, the new lights won't use the OEM plugs anyway.
New goal is to have it to the paint shop by the end of next week, I guess. Should have figured I was asking too much for the wires to still be good (they worked when I brought her home!).


