
One Way to Install A Powerstroke Intercooler

Thread Starter
|
Diesel Bomber
Joined: Aug 2009
Posts: 2,257
Likes: 186
From: CO
By popular Request
Originally posted by me on Weasletruckresource.com, May 2007...
There are three tricks to getting this done: 1) the condenser is recessed about an inch behind the front face of the core support mounting surface. 2) The IC is mounted as high as possible. And 3) The original lower IC mounts must be removed completely. The grill seems designed to kinda curve more outward towards the top, so there's a little more room behind it higher up. Mine is actually touching the IC and pulled in a half inch on each bottom corner with the mounting screws, so it's not exactly right, as it should be. If I had been able grind the original lower mounts flush with the support, the valence triming would have been really trivial if necessary at all and it would have went on perfectly. But it's close enough. Someone with a smaller grinder or plasma cutter could do this easily.
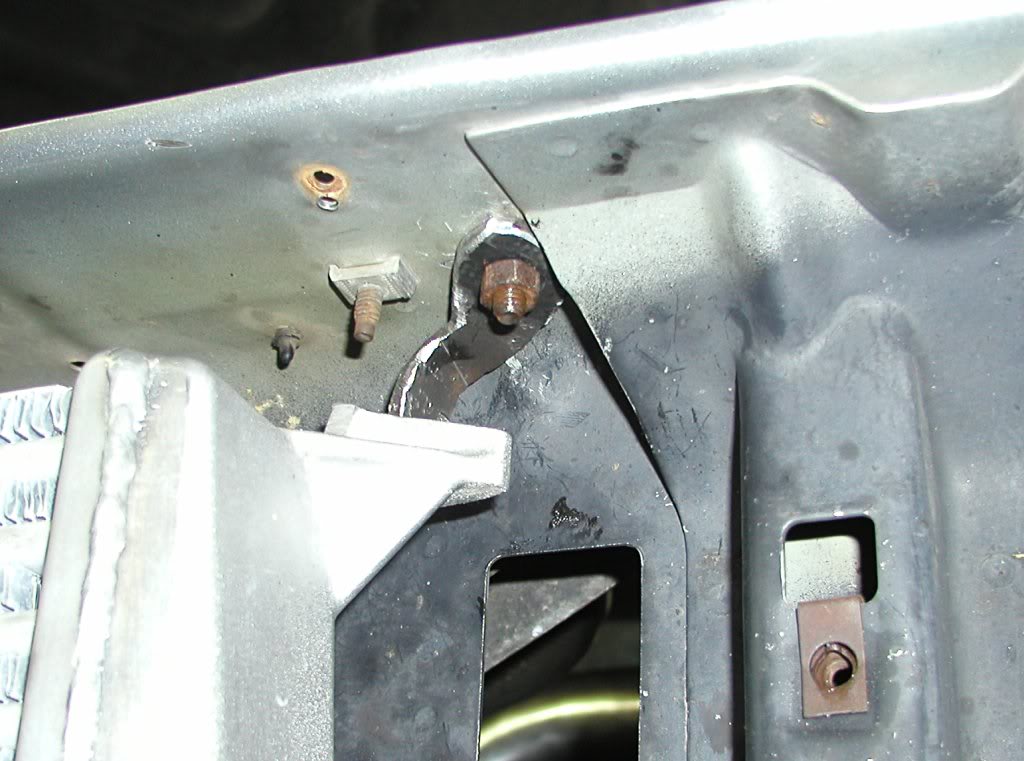
There is one "gotcha to look out for. The top passenger side mount is extremely close to the AC condeser line outlet. This required fabbing a braket with the nut welded on. The is no way to get a wrench in there. Also, you can do it without removing the bumper, but it's tricky. There is enough room to slide the condernser and the IC in and out together at the same time, but not seperately. That might be possible but probably would have required removing more of the condenser mounting bracket than I was comfortable with. I had to bend the bottom edge of the battery tray in a half inch or so as to not abrade the hump hose. No biggie.
So here it is, blow, by blow.
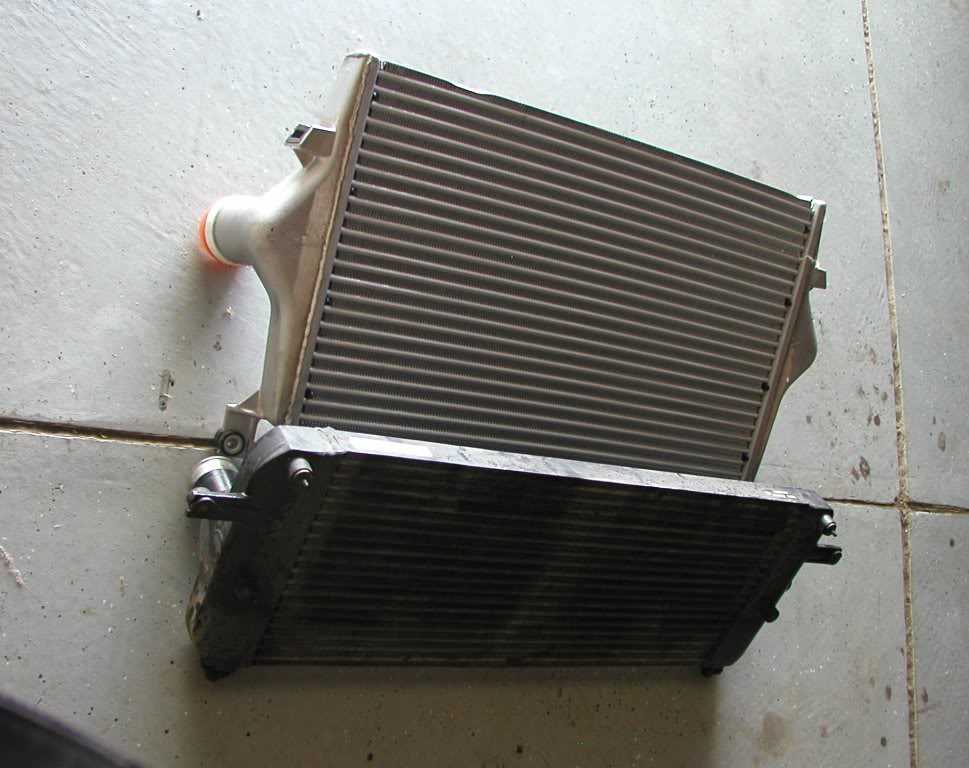
This is what we're talking about, in case you are wondering why anybody would want to do this:
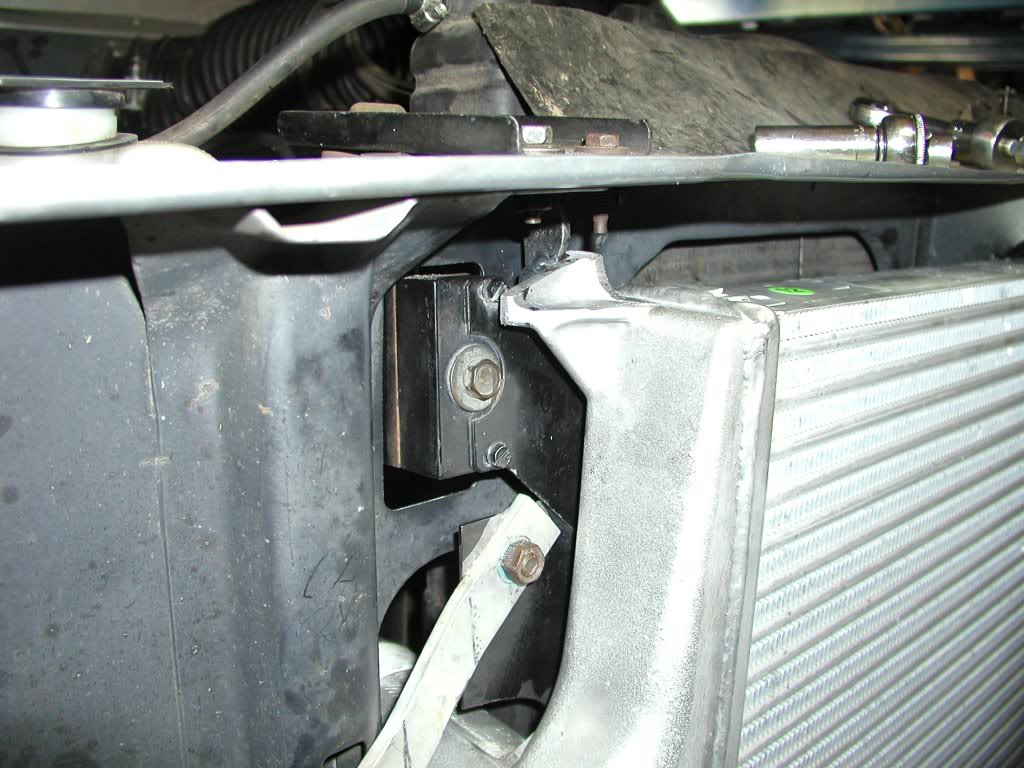
Here's how the condenser goes back in. The bottom piece is a soft mount whose only purpose is to stabilize the condenser, since the two side hard mounts are fairly high up. Maybe not necessary, but I wanted to make sure it wasn't blowing in the wind.
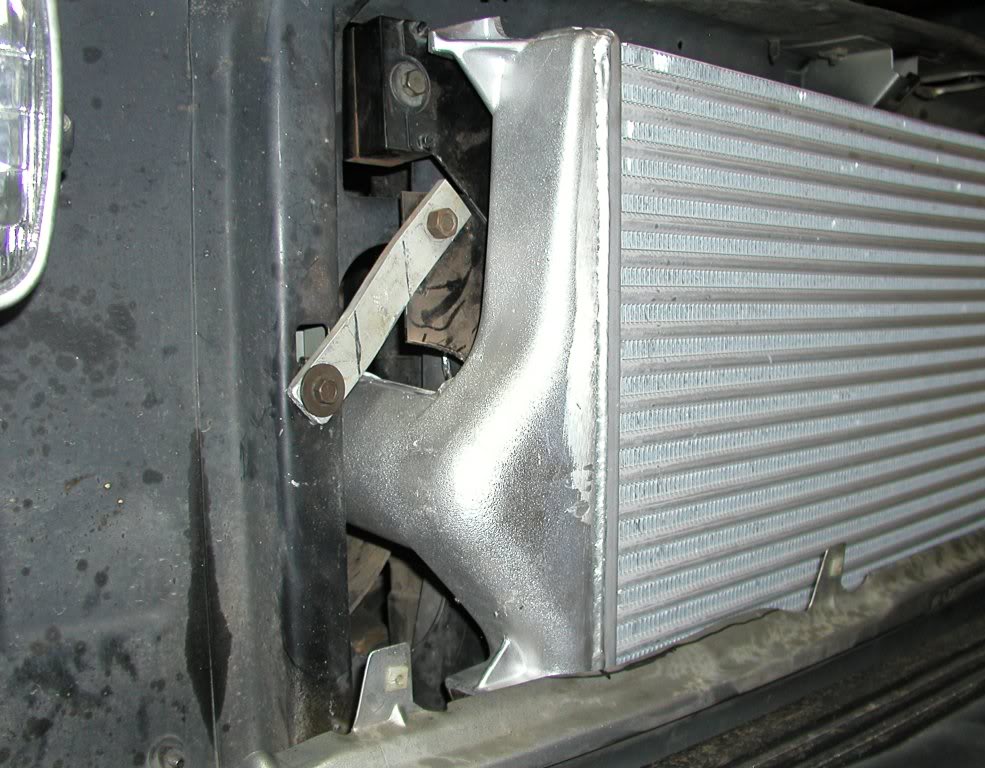
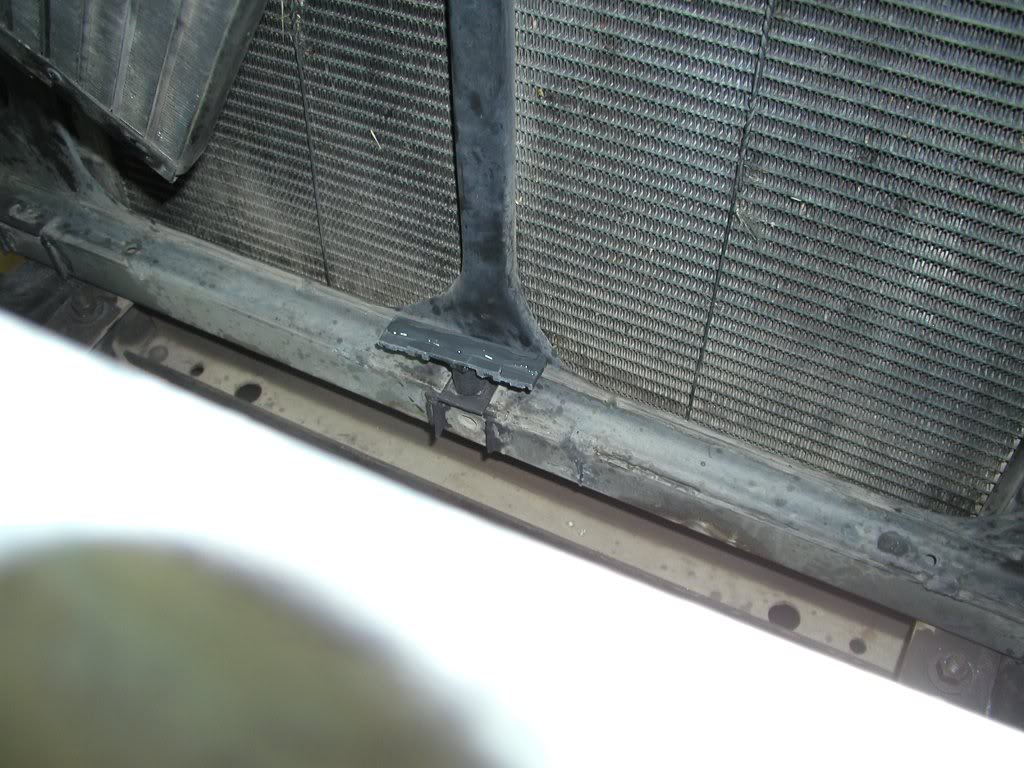
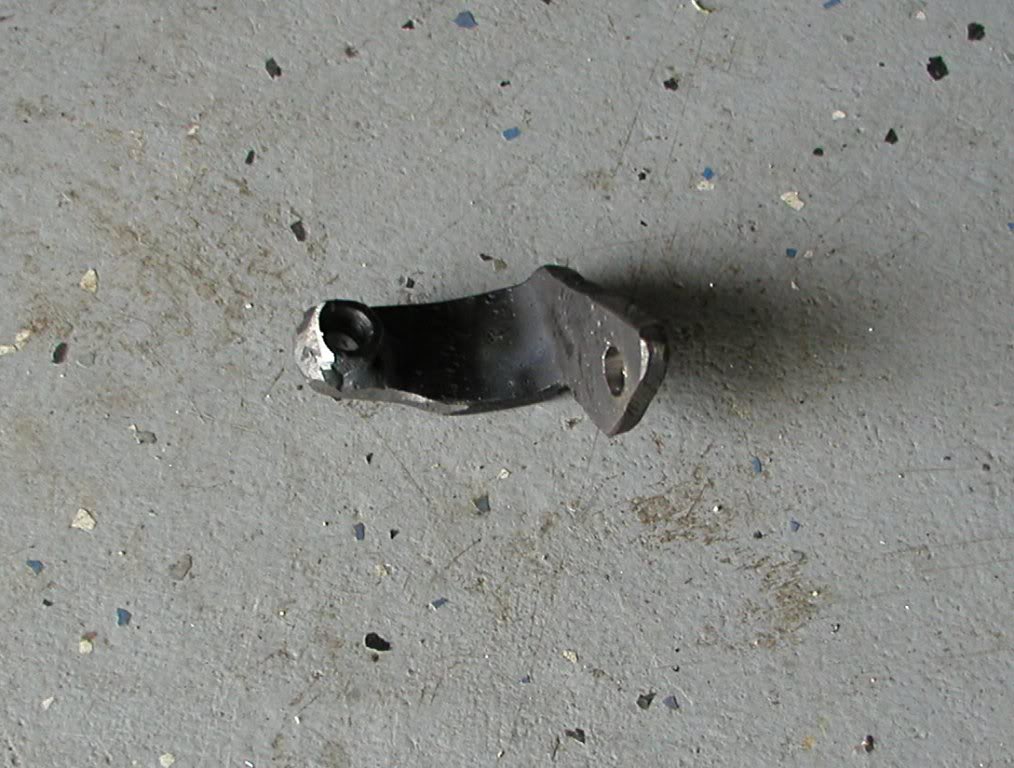
Here's the top mounts. I cut the large bushed brackets off and used the smaller hole in back (can't see it here. This is what enables it to be mounted higher. The trick piece for the passenger side must be that small to avoid abraiding the condenser line. This is fairly light hardware, but plenty adequate. The bottom mounts provide most of the support.
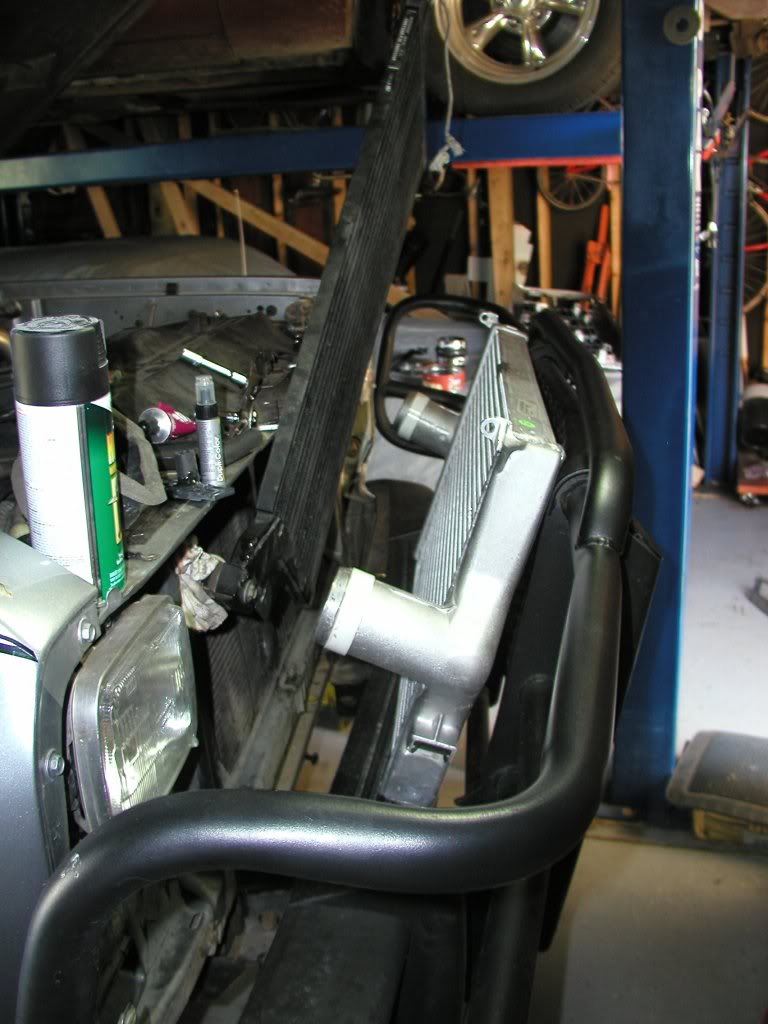
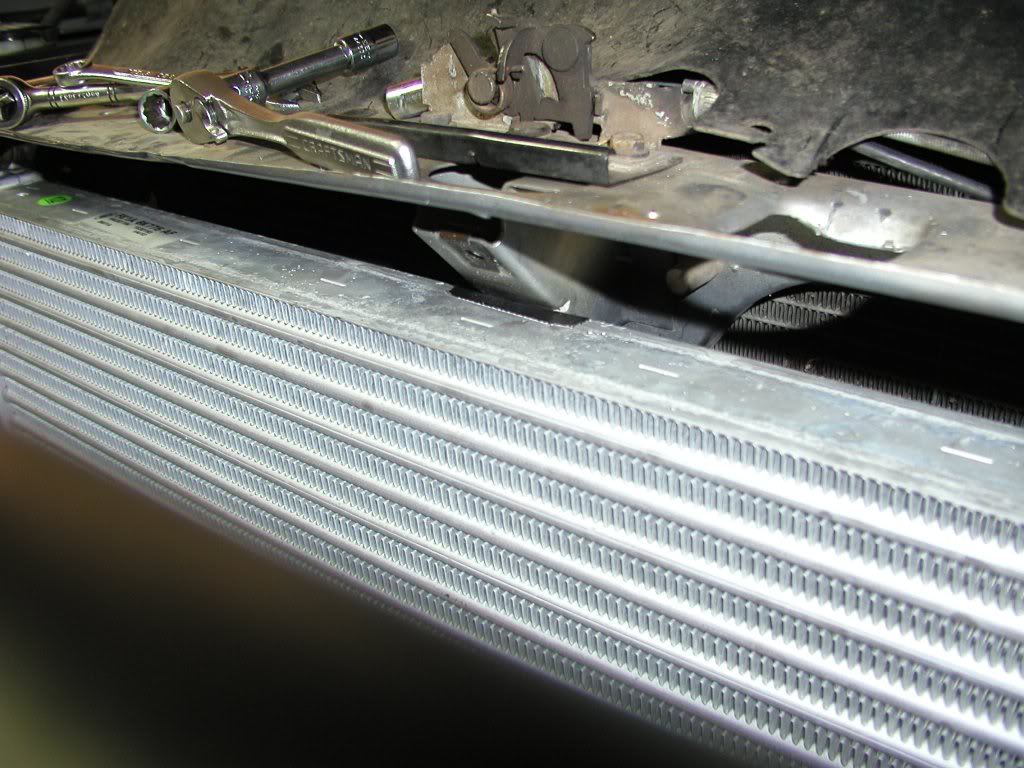
The IC must be tucked in this tight. There is about a quarter inch shaved off that back edge and it is right up against the middle support brace.
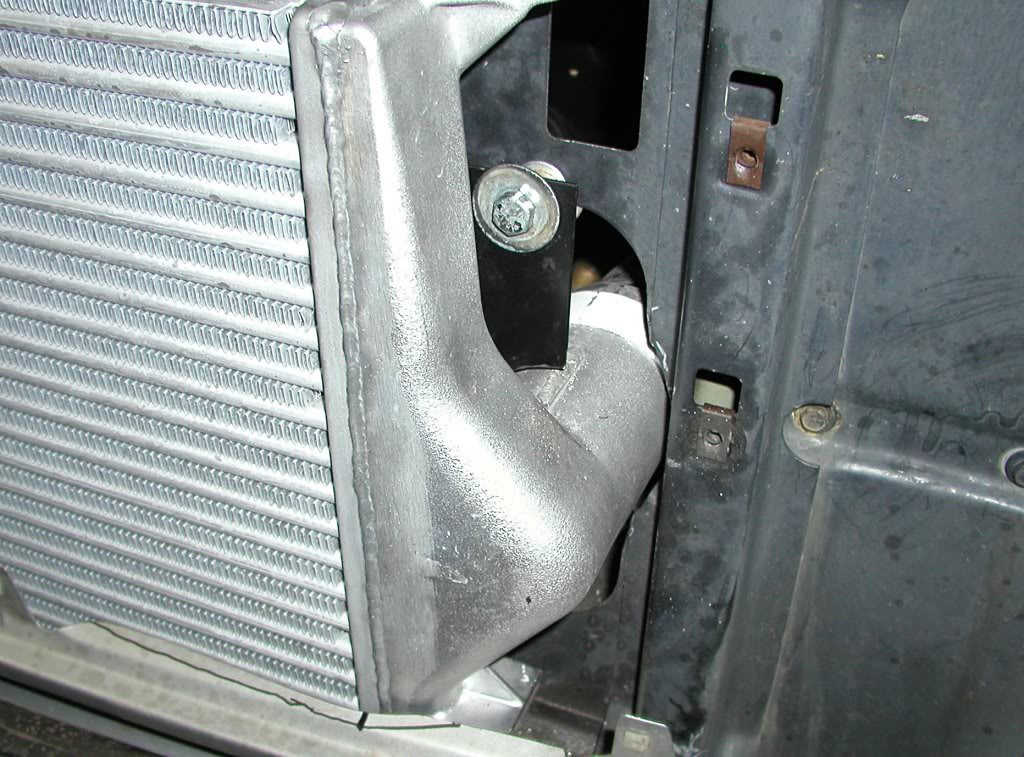
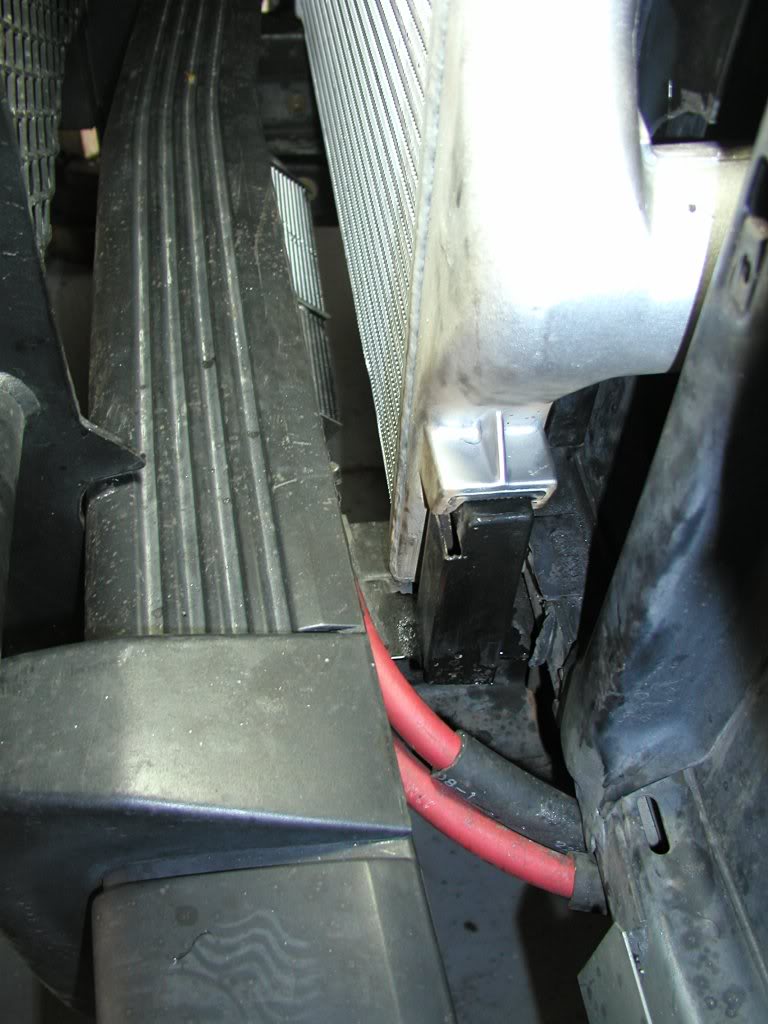
Bottom mount. You can also see the other Ford cooler behind the bumper. That goes to the power steering.
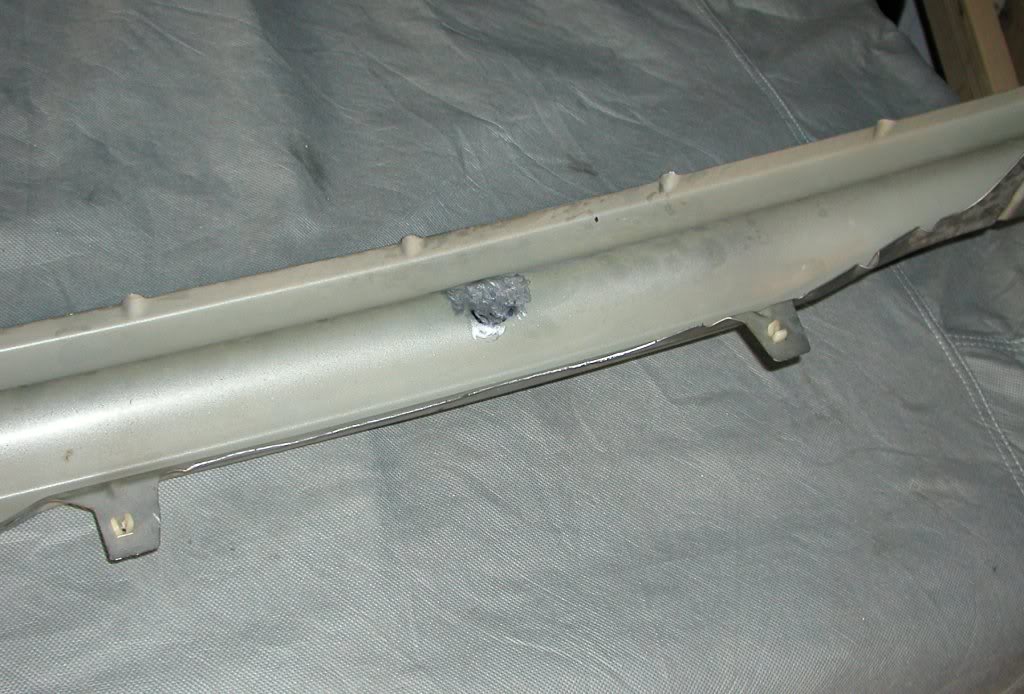
Here's what the valence needs. Minor really, a half x six inch piece off each side, more or less and a couple small dents.
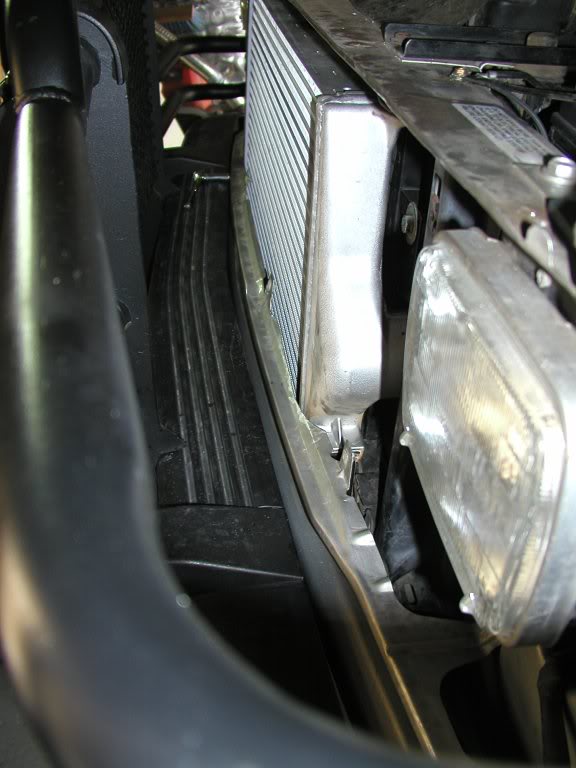
And there it is. Three inches all the way through now, save for the ol' H1C
http://i211.photobucket.com/albums/b...rcooler/13.jpg
http://i211.photobucket.com/albums/b...rcooler/14.jpg
http://i211.photobucket.com/albums/b...rcooler/15.jpg
It cools alot better. I only had it out a couple times today, and EGT seems to be averaging around 100 degrees cooler. But I lost about 5lbs boost. Guess I'm in the market for a compressor upgrade now. It should be able to sustain some really heavy towing. I'm not too impressed by engines that can only generate big numbers for a short period of time. It's ready for some real fuel and serious work one of these days.
Originally posted by me on Weasletruckresource.com, May 2007...
There are three tricks to getting this done: 1) the condenser is recessed about an inch behind the front face of the core support mounting surface. 2) The IC is mounted as high as possible. And 3) The original lower IC mounts must be removed completely. The grill seems designed to kinda curve more outward towards the top, so there's a little more room behind it higher up. Mine is actually touching the IC and pulled in a half inch on each bottom corner with the mounting screws, so it's not exactly right, as it should be. If I had been able grind the original lower mounts flush with the support, the valence triming would have been really trivial if necessary at all and it would have went on perfectly. But it's close enough. Someone with a smaller grinder or plasma cutter could do this easily.
There is one "gotcha to look out for. The top passenger side mount is extremely close to the AC condeser line outlet. This required fabbing a braket with the nut welded on. The is no way to get a wrench in there. Also, you can do it without removing the bumper, but it's tricky. There is enough room to slide the condernser and the IC in and out together at the same time, but not seperately. That might be possible but probably would have required removing more of the condenser mounting bracket than I was comfortable with. I had to bend the bottom edge of the battery tray in a half inch or so as to not abrade the hump hose. No biggie.
So here it is, blow, by blow.
This is what we're talking about, in case you are wondering why anybody would want to do this:
Here's how the condenser goes back in. The bottom piece is a soft mount whose only purpose is to stabilize the condenser, since the two side hard mounts are fairly high up. Maybe not necessary, but I wanted to make sure it wasn't blowing in the wind.
Here's the top mounts. I cut the large bushed brackets off and used the smaller hole in back (can't see it here. This is what enables it to be mounted higher. The trick piece for the passenger side must be that small to avoid abraiding the condenser line. This is fairly light hardware, but plenty adequate. The bottom mounts provide most of the support.
The IC must be tucked in this tight. There is about a quarter inch shaved off that back edge and it is right up against the middle support brace.
Bottom mount. You can also see the other Ford cooler behind the bumper. That goes to the power steering.
Here's what the valence needs. Minor really, a half x six inch piece off each side, more or less and a couple small dents.
And there it is. Three inches all the way through now, save for the ol' H1C
http://i211.photobucket.com/albums/b...rcooler/13.jpg
http://i211.photobucket.com/albums/b...rcooler/14.jpg
http://i211.photobucket.com/albums/b...rcooler/15.jpg
It cools alot better. I only had it out a couple times today, and EGT seems to be averaging around 100 degrees cooler. But I lost about 5lbs boost. Guess I'm in the market for a compressor upgrade now. It should be able to sustain some really heavy towing. I'm not too impressed by engines that can only generate big numbers for a short period of time. It's ready for some real fuel and serious work one of these days.
Last edited by RSWORDS; Jan 1, 2010 at 02:45 PM.

BOMBARDIER


Joined: Mar 2007
Posts: 11,159
Likes: 918
From: Gloucester, VA
AWESOME!! Nice write up!
I hope its ok with you that I changed the tags to image tags so that we didn't have to click all teh links. If not for some reason let me know and I can change them back.
I hope its ok with you that I changed the tags to image tags so that we didn't have to click all teh links. If not for some reason let me know and I can change them back.
BOMBARDIER
Joined: Mar 2007
Posts: 11,159
Likes: 918
From: Gloucester, VA
Quick question, What did you do about the intake plumbing? I see yuo run cooler tubes but I assume the end in teh stock location, if that makes sence. What did you do to plumb the PS I/Cer in? Any pics?
Bobby
Bobby
Thread Starter
|
Diesel Bomber
Joined: Aug 2009
Posts: 2,257
Likes: 186
From: CO
You need need to find boots to join up with whatever you have. In my case, I used a reducer boot (3-to-2.5", IIRC) on the turbo outlet. It's a damn near straight shot to the I/C on the turbo side, nothing hard at all there. Then I needed a slightly longer boot to connect the I/C and went with a factory Ford boot on the turbo side. The other side was able to fit up nicely with a standard generic3"x3.25" silicone boot.
This is all somewhat variable depending on exactly how you get the cooler fitted. That's just how it worked in this case. Basically you need a reducer to connect the turbo and 3.25" boots to connect the I/C. The inlets on the I/C are slightly larger than 3" due to the thickness of the casting, I believe.
This is all somewhat variable depending on exactly how you get the cooler fitted. That's just how it worked in this case. Basically you need a reducer to connect the turbo and 3.25" boots to connect the I/C. The inlets on the I/C are slightly larger than 3" due to the thickness of the casting, I believe.
BOMBARDIER
Joined: Mar 2007
Posts: 11,159
Likes: 918
From: Gloucester, VA
You need need to find boots to join up with whatever you have. In my case, I used a reducer boot (3-to-2.5", IIRC) on the turbo outlet. It's a damn near straight shot to the I/C on the turbo side, nothing hard at all there. Then I needed a slightly longer boot to connect the I/C and went with a factory Ford boot on the turbo side. The other side was able to fit up nicely with a standard generic3"x3.25" silicone boot.
This is all somewhat variable depending on exactly how you get the cooler fitted. That's just how it worked in this case. Basically you need a reducer to connect the turbo and 3.25" boots to connect the I/C. The inlets on the I/C are slightly larger than 3" due to the thickness of the casting, I believe.
This is all somewhat variable depending on exactly how you get the cooler fitted. That's just how it worked in this case. Basically you need a reducer to connect the turbo and 3.25" boots to connect the I/C. The inlets on the I/C are slightly larger than 3" due to the thickness of the casting, I believe.

Diesel Enthusiast
Joined: Oct 2009
Posts: 106
Likes: 3
ummm i have to admit somthing???? 
i have had a pic of your truck as my background for a long time!! hahahahah
i got the pic from just googling 1st gen cummins!!!
anyway thats a beautiful truck you have there
nice pic!!!
http://i661.photobucket.com/albums/u...dieseldawg.jpg
i have had a pic of your truck as my background for a long time!! hahahahah
i got the pic from just googling 1st gen cummins!!!
anyway thats a beautiful truck you have there
nice pic!!!
http://i661.photobucket.com/albums/u...dieseldawg.jpg
Thread Starter
|
Diesel Bomber
Joined: Aug 2009
Posts: 2,257
Likes: 186
From: CO
Diesel Enthusiast
Joined: Oct 2009
Posts: 106
Likes: 3

Thread
Thread Starter
Forum
Replies
Last Post
Rooster24v
Price Quote - Request A Price
0
Aug 26, 2015 06:24 PM


