Project Rusty Revival (56k no way!)
#531
 03-04-2013, 08:30 PM


---AutoMerged DoublePost---

Last edited by mkriebs; 03-04-2013 at 08:30 PM. Reason: Automerged Doublepost
#532
03-08-2013, 12:27 PM
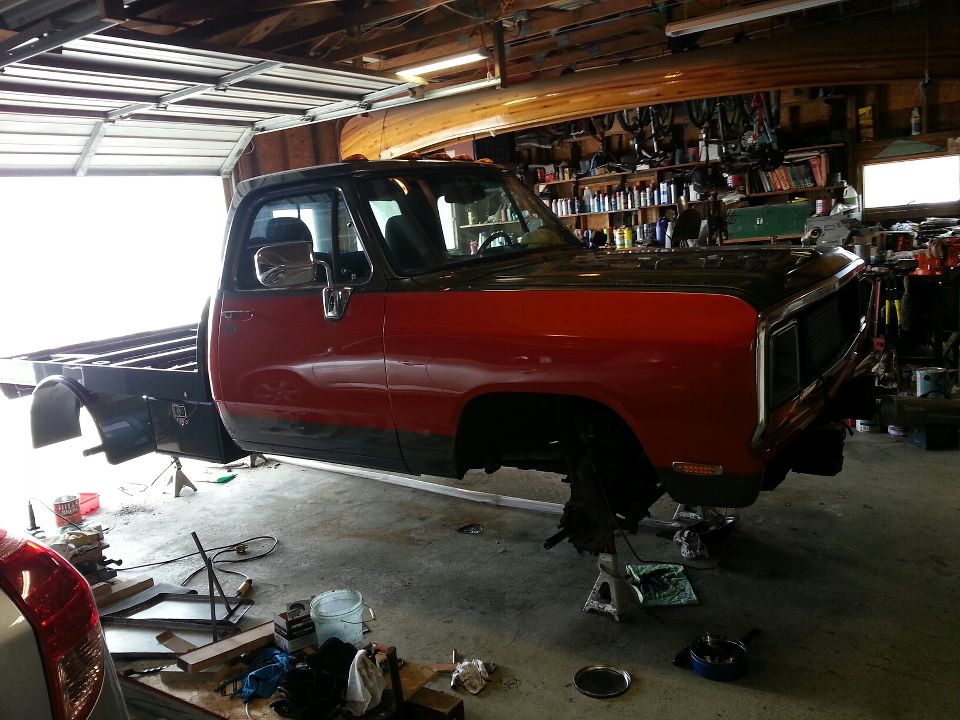
Getting everything lined up for a bonzai of a week next week. Aluminum for the core support should be in Monday, so that is high on the list. Will likely have to change the intercooler pipes around because of the radiator moving back.
Umm, brakes are all here, just need front U joints and possibly some more wheel studs.
I know dad has been working on the bed a little bit, trying to finish the epoxy so we can drop it in the bed frame.
Got a plan in my head for some nerf bar/steps. I am already sick of climbing in the truck, so I need to look into material for that.
So yeah, stay tuned for pics, it should be an interesting week!
#533
03-11-2013, 04:45 PM
Gonna be starting today off with front and rear brakes and U-Joints. Have to press out and back in 32 wheel studs... without a press. It's going to be an interesting day.
Stay tuned!
---AutoMerged DoublePost---
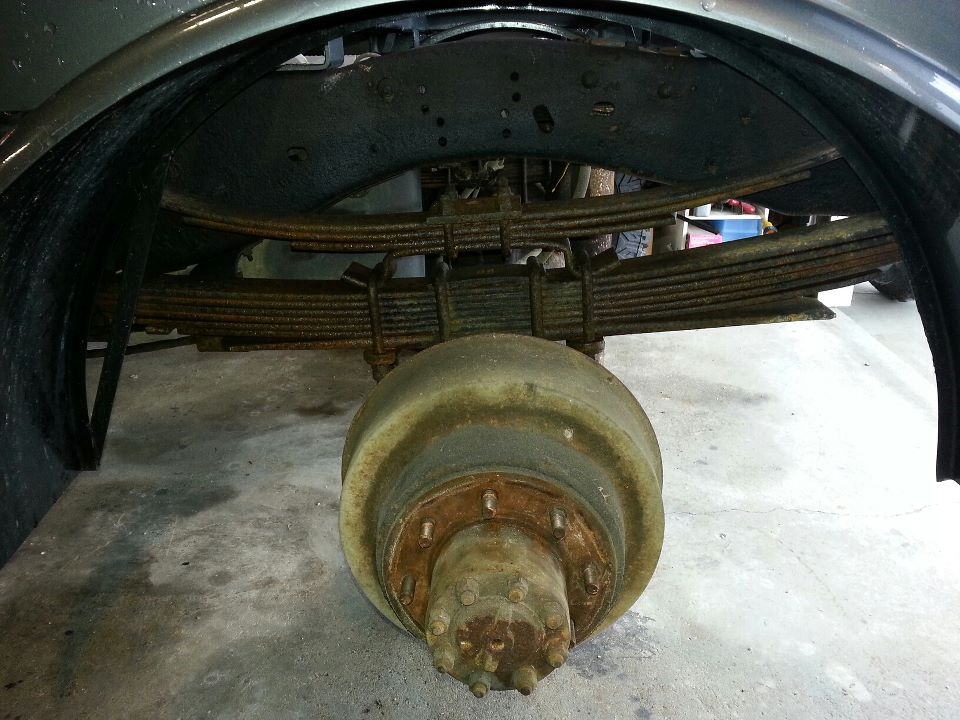
Good progress so far today, despite having a cold, wet start to the day. Don't have the right size socket for the bearing nuts, so we're borrowing one (hopefully), but this is how far we got so far...
Got the rear wheels off and IDK about you guys, but I feel like I have more springs than normal... What say you?
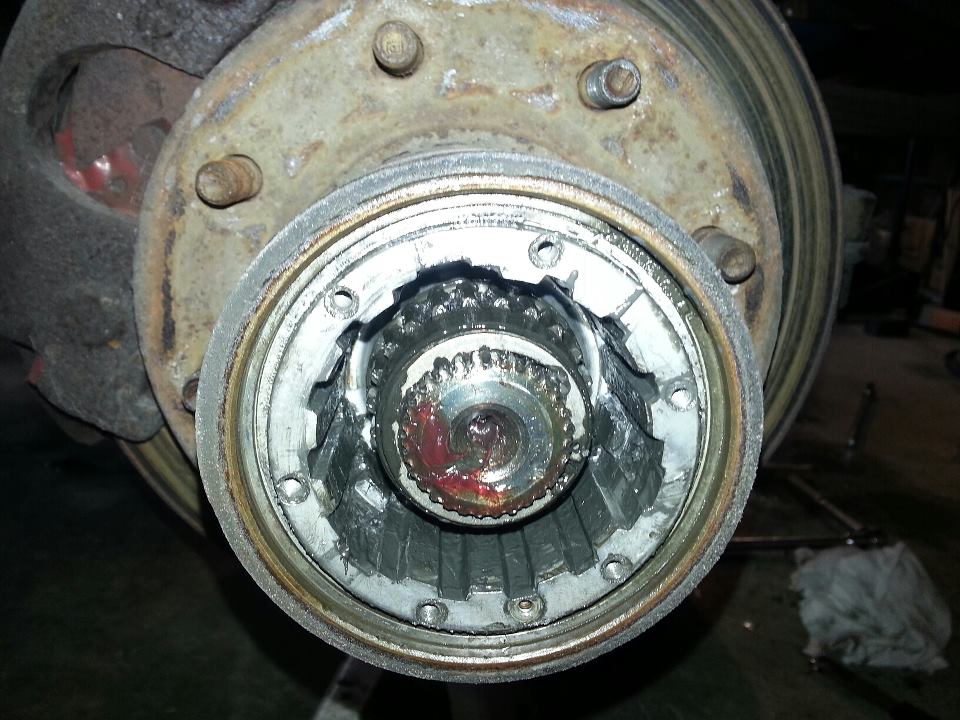
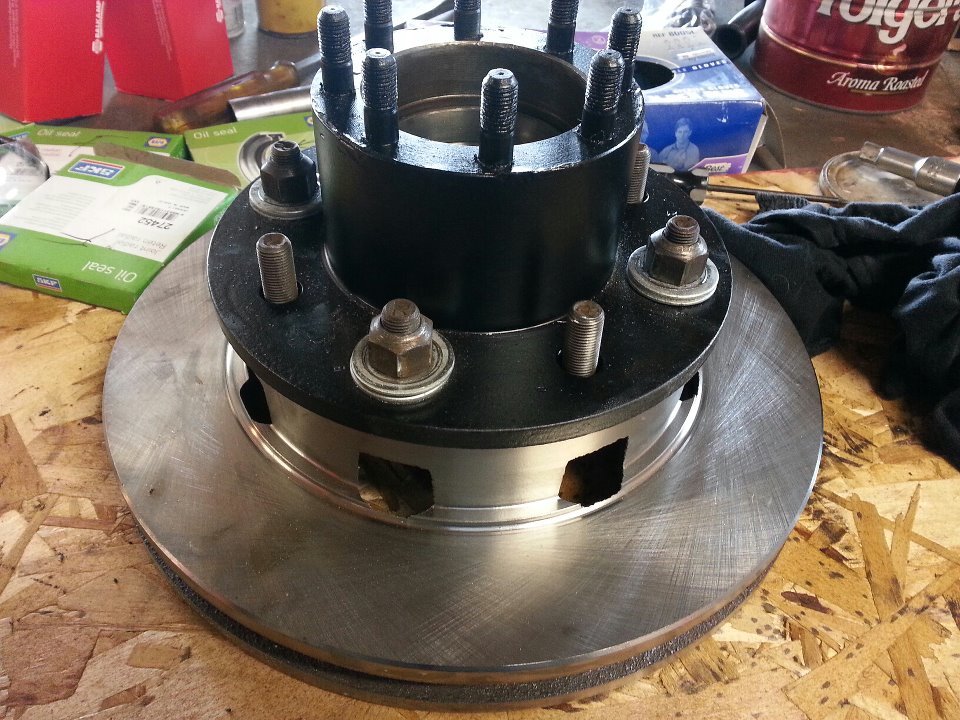
Got the front hub and locker off too...
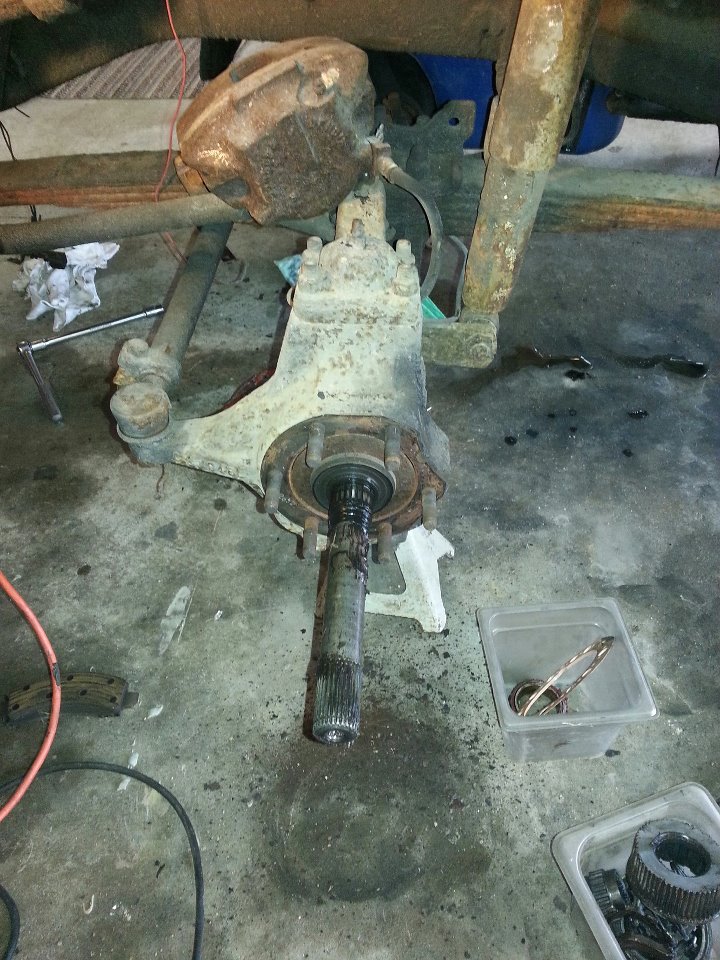
And the spindle...
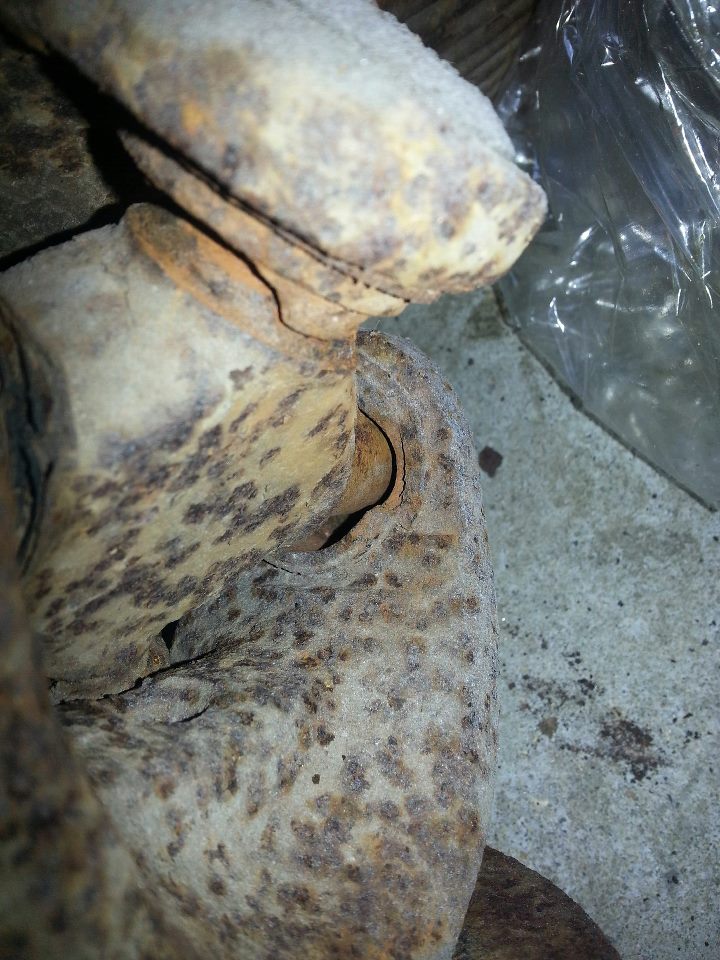
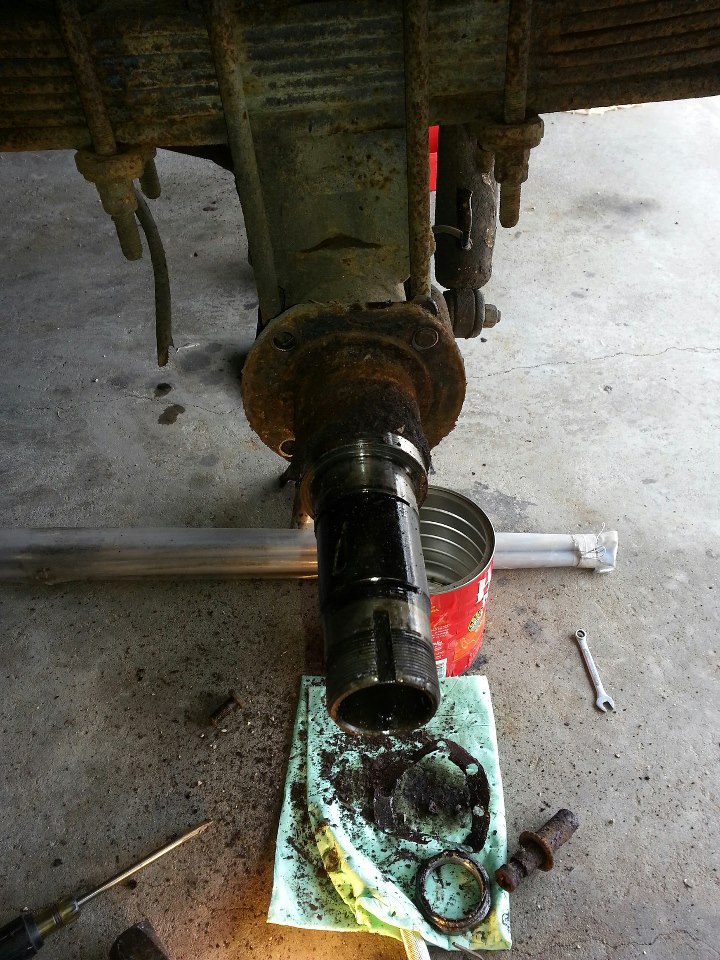
Pulled the front Axle out and sure enough... the U-joint is ummm....... SHOT!
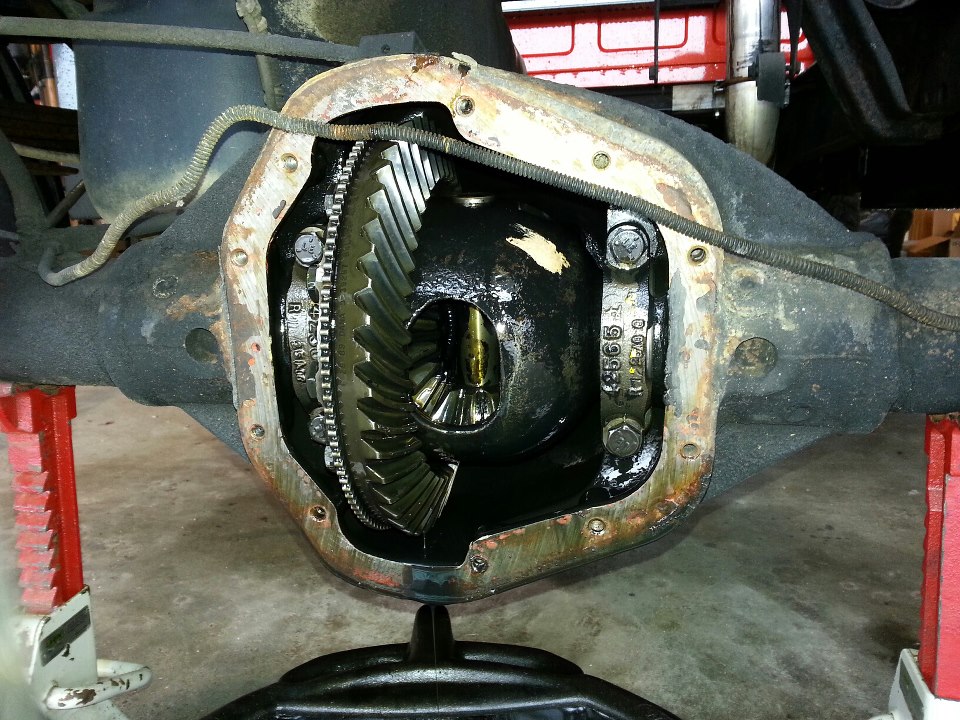
Also pulled the front and rear diff cover to check the gears and replace the fluid. Turns out I have 3.54 gears which is exactly what I wanted!
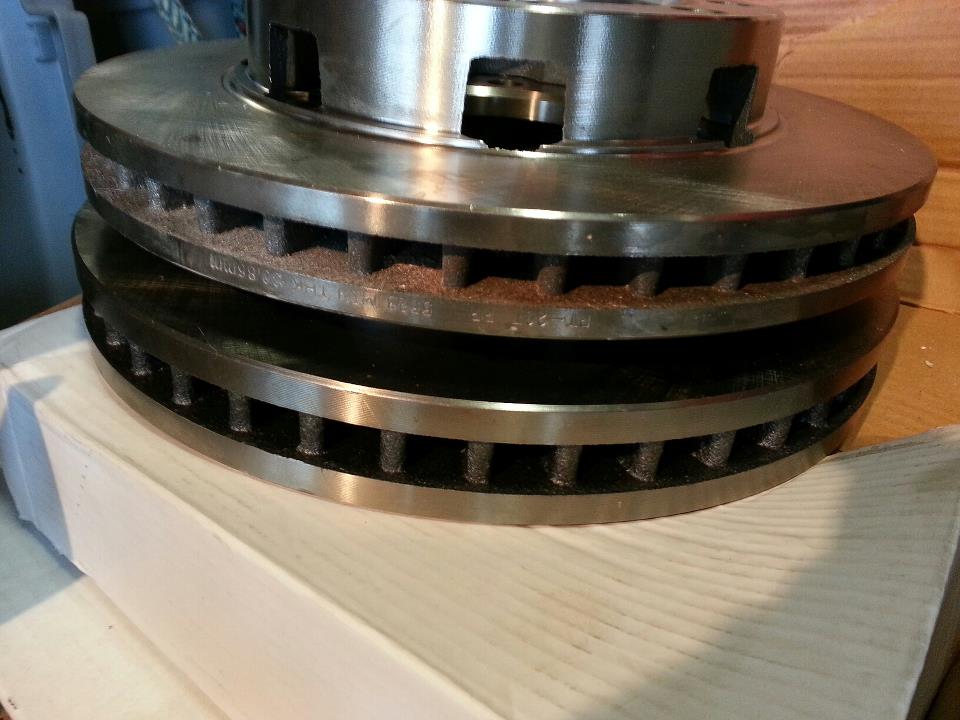
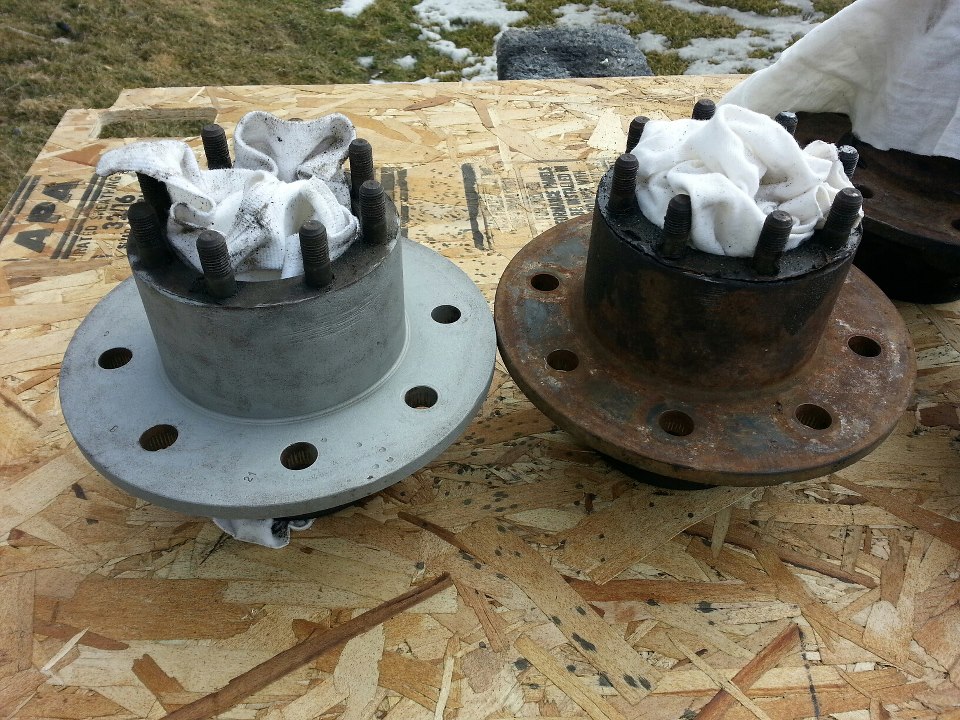
And, comparing the front and rear rotors (thought they were the same for a second), the fronts for the Dodge are a bit thicker than the rears (which came from a K20 front end).
Got a pile of "to be sandblasted" parts so far, but it's damp today so will get those done tomorrow when its nicer. Gonna shoot them with some single stage black, should work well.
Running to borrow a few wheel bearing nut sockets then gotta go get new U-joints for the front end.
Will have more pics later in the day.
---AutoMerged DoublePost---
Well, this pretty much sums up the second half of the day...
Stay tuned!
---AutoMerged DoublePost---
Good progress so far today, despite having a cold, wet start to the day. Don't have the right size socket for the bearing nuts, so we're borrowing one (hopefully), but this is how far we got so far...
Got the rear wheels off and IDK about you guys, but I feel like I have more springs than normal... What say you?
Got the front hub and locker off too...
And the spindle...
Pulled the front Axle out and sure enough... the U-joint is ummm....... SHOT!
Also pulled the front and rear diff cover to check the gears and replace the fluid. Turns out I have 3.54 gears which is exactly what I wanted!
And, comparing the front and rear rotors (thought they were the same for a second), the fronts for the Dodge are a bit thicker than the rears (which came from a K20 front end).
Got a pile of "to be sandblasted" parts so far, but it's damp today so will get those done tomorrow when its nicer. Gonna shoot them with some single stage black, should work well.
Running to borrow a few wheel bearing nut sockets then gotta go get new U-joints for the front end.
Will have more pics later in the day.
---AutoMerged DoublePost---
Well, this pretty much sums up the second half of the day...
Last edited by mkriebs; 03-11-2013 at 04:45 PM. Reason: Automerged Doublepost


#535
03-12-2013, 05:14 PM
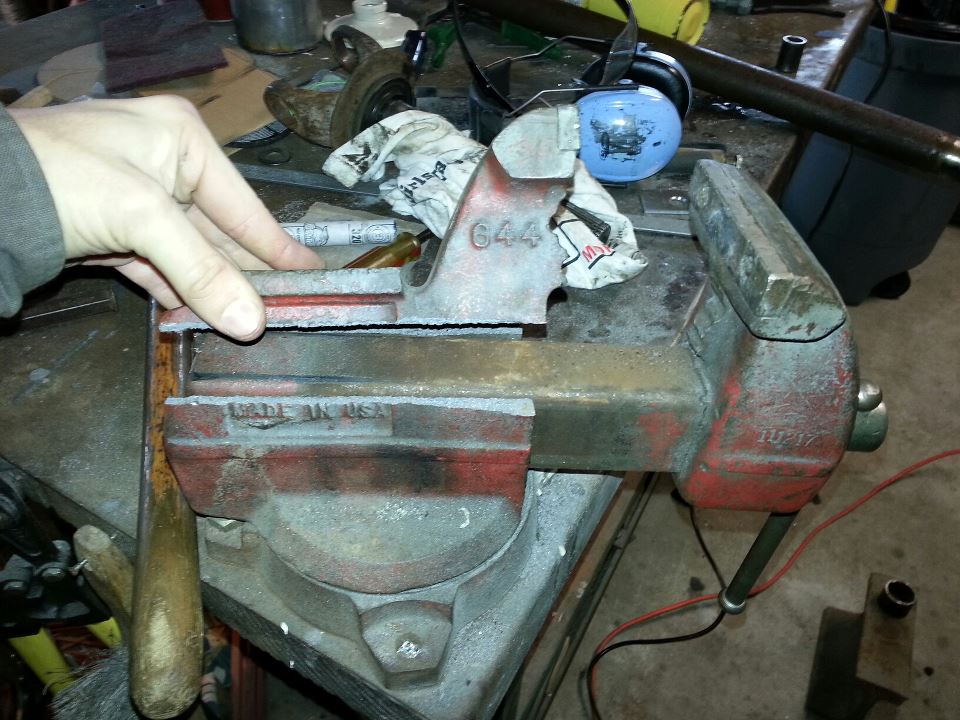
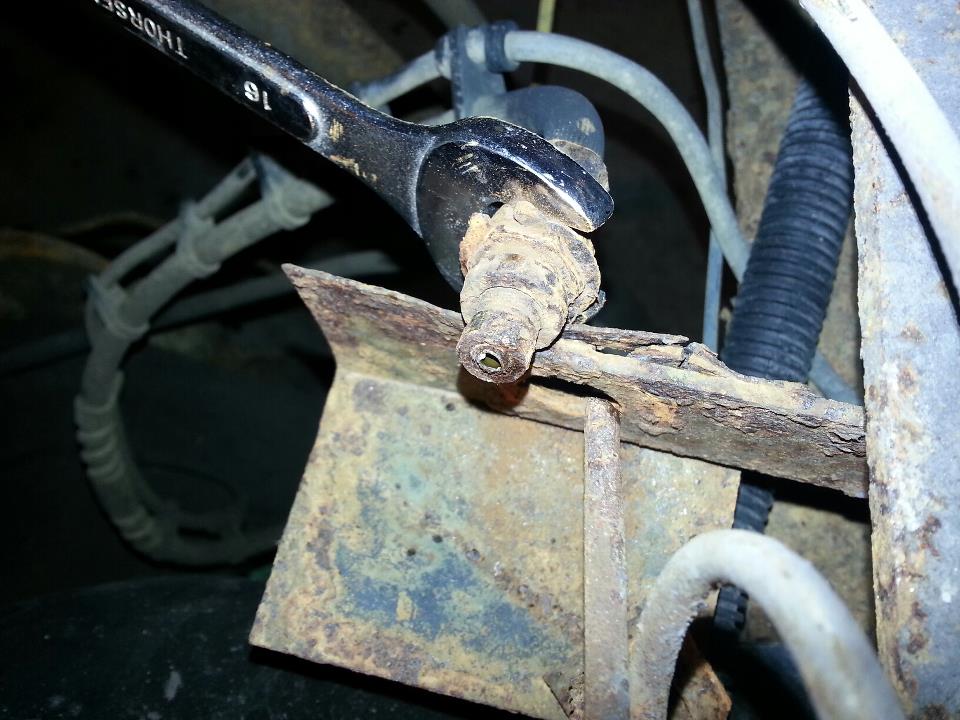
We lack a press to press out the U-Joints from the front axles, so dad was hitting the vise with a hammer to get the u joint to break free. I am sure the 45 years of abuse this vise has seen led to the breakage, but still, impressive nonetheless. I told dad I should have known better than hiring the Hulk to help out, haha.
---AutoMerged DoublePost---
Well, it just hasn't been my day today... from stripping the hub nut off on the rear end (spindle is fine, but the nut is junk), to breaking the brake line on the rear end, to a flash blizzard, I am tossin' in the towel.
Still made decent progress, got the front axles back in and U-joints done, got the rear drums off, and started sand blasting the parts I could get done before this freak blizzard. Started to get the brake lines off so we would be able to build the lines from the center soft line to the calipers and that's pretty much where nothing could go right any more.
So, some pics of the progress:
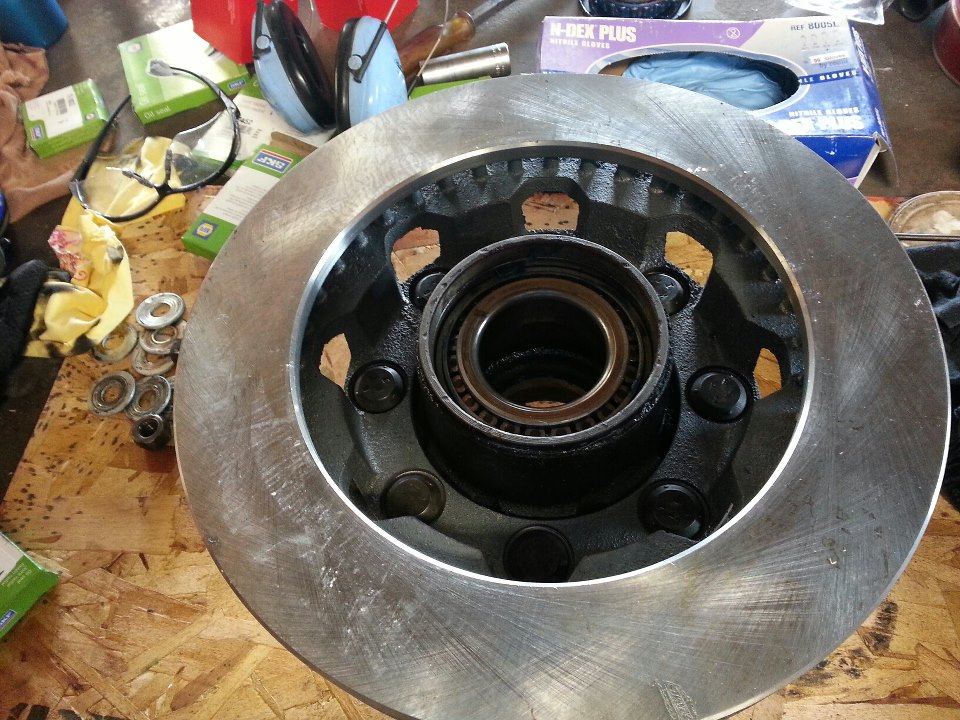
Rear drums are off, the hub is getting sand blasted, primed, and sprayed with a single stage black. Should look very nice.
Started sand blasting the hubs, the front end will get done just as the rear is.
And then just barely twisted the fitting on the brake line and she snapped. Decided we are just going to replace all of the line because none of the old line could be flared properly due to rust.
All in all a frustrating day, but I still need to look at the progress that was made, as it was decent. Sad that what I had planned to take 2 days will now take 4. Everything should come together smoothly from here though (I pray).
---AutoMerged DoublePost---
Well, it just hasn't been my day today... from stripping the hub nut off on the rear end (spindle is fine, but the nut is junk), to breaking the brake line on the rear end, to a flash blizzard, I am tossin' in the towel.
Still made decent progress, got the front axles back in and U-joints done, got the rear drums off, and started sand blasting the parts I could get done before this freak blizzard. Started to get the brake lines off so we would be able to build the lines from the center soft line to the calipers and that's pretty much where nothing could go right any more.
So, some pics of the progress:
Rear drums are off, the hub is getting sand blasted, primed, and sprayed with a single stage black. Should look very nice.
Started sand blasting the hubs, the front end will get done just as the rear is.
And then just barely twisted the fitting on the brake line and she snapped. Decided we are just going to replace all of the line because none of the old line could be flared properly due to rust.
All in all a frustrating day, but I still need to look at the progress that was made, as it was decent. Sad that what I had planned to take 2 days will now take 4. Everything should come together smoothly from here though (I pray).
Last edited by mkriebs; 03-12-2013 at 05:14 PM. Reason: Automerged Doublepost
#536
03-14-2013, 06:47 PM
Well, the weather has been playing games with me, but we had enough sun this afternoon to get out and paint the hubs and things. Got to NAPA to get the fittings and line to redo the brake lines. Everything is coming together slowly but surely.
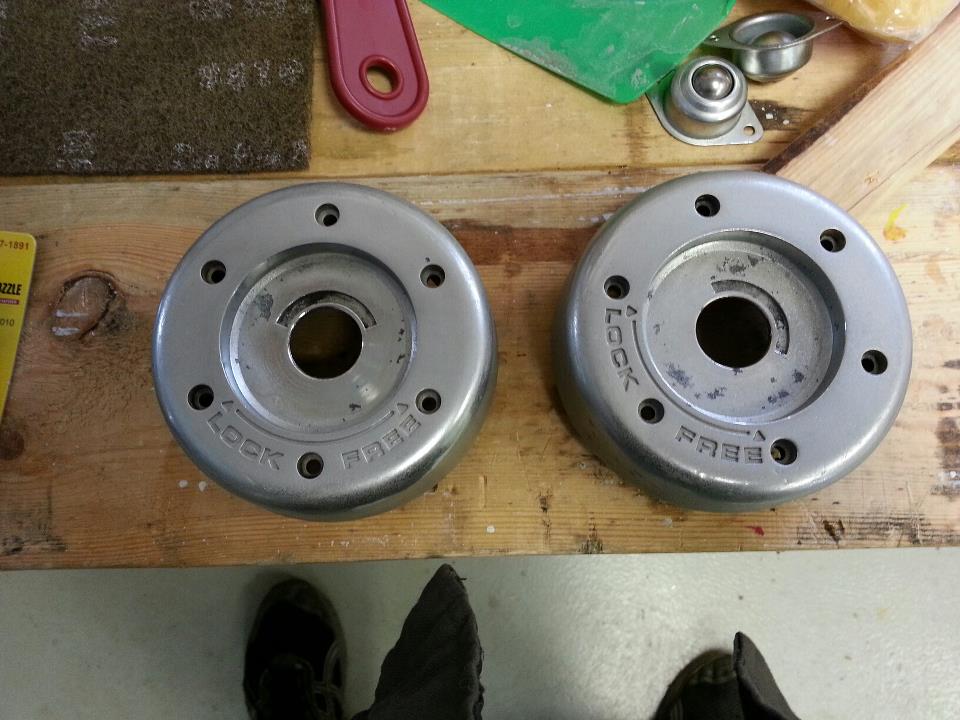
Blasted the locker covers:
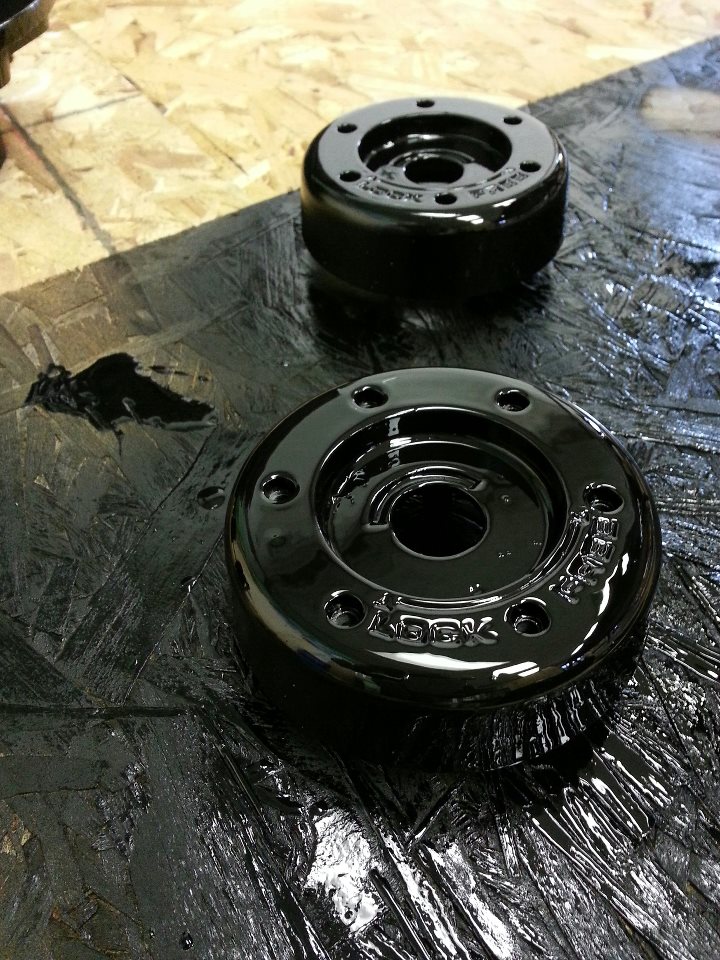
Painted em black:
And painted all the hubs and caliper brackets, too:
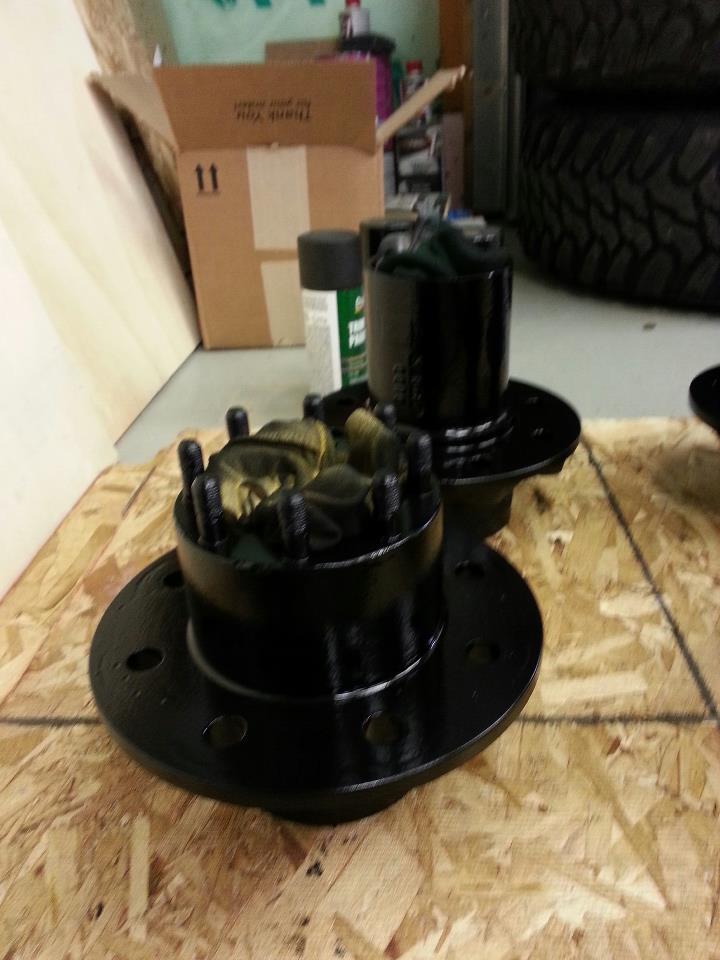
Plan for tomorrow is to get all the bearings packed with grease, put them in the hubs, press in the wheel studs and rotors, and hopefully get all 4 corners done. BUT, that's prolly too much to ask for...
Blasted the locker covers:
Painted em black:
And painted all the hubs and caliper brackets, too:
Plan for tomorrow is to get all the bearings packed with grease, put them in the hubs, press in the wheel studs and rotors, and hopefully get all 4 corners done. BUT, that's prolly too much to ask for...
#538
03-15-2013, 02:29 PM
Thanks for following! Hopefully I will have some more interesting pictures tomorrow. Rear brake hoses should be in so the disc brake conversion should be more interesting. All this crap is boring right now.
---AutoMerged DoublePost---
Well, today the weather was fantastic, but we still ran into the road blocks that have become the running joke of this project.
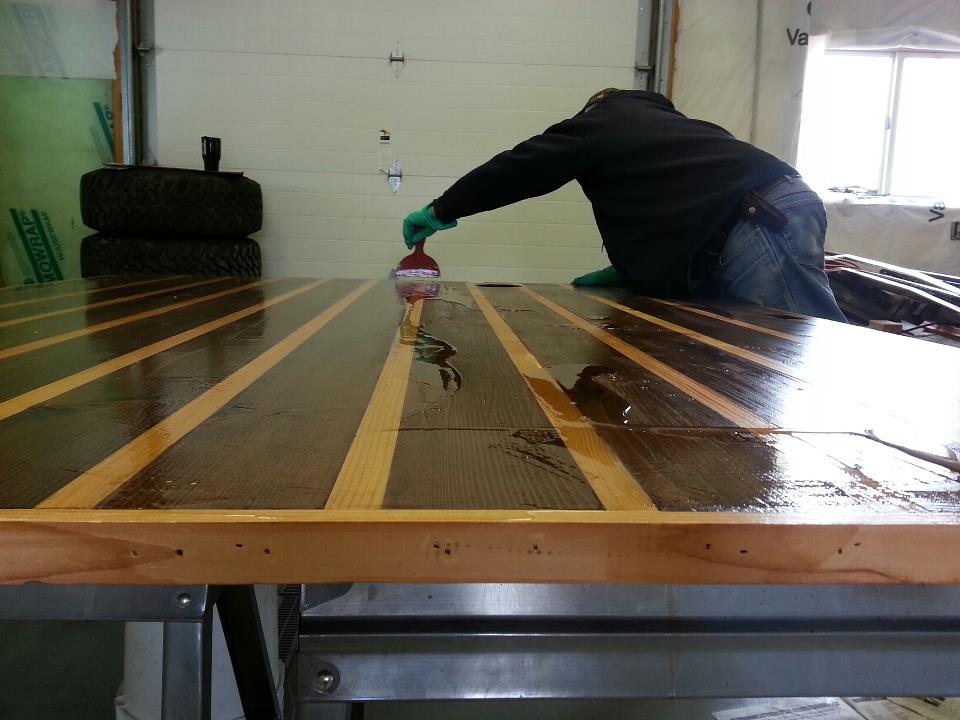
First, dad did a coat of epoxy on the wood last night. Turned out pretty good, needs sanded and will get one more coat, we suspect.
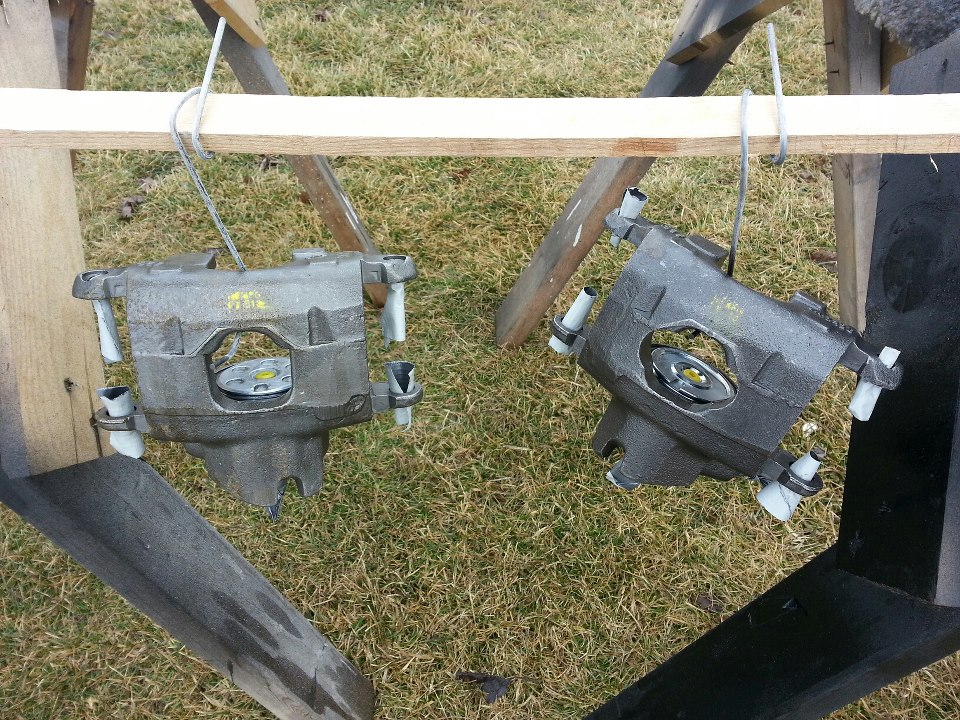
This morning, I started with cleaning the calipers so I could paint them black. Did all four corners and forgot to grab pics of the finished product.
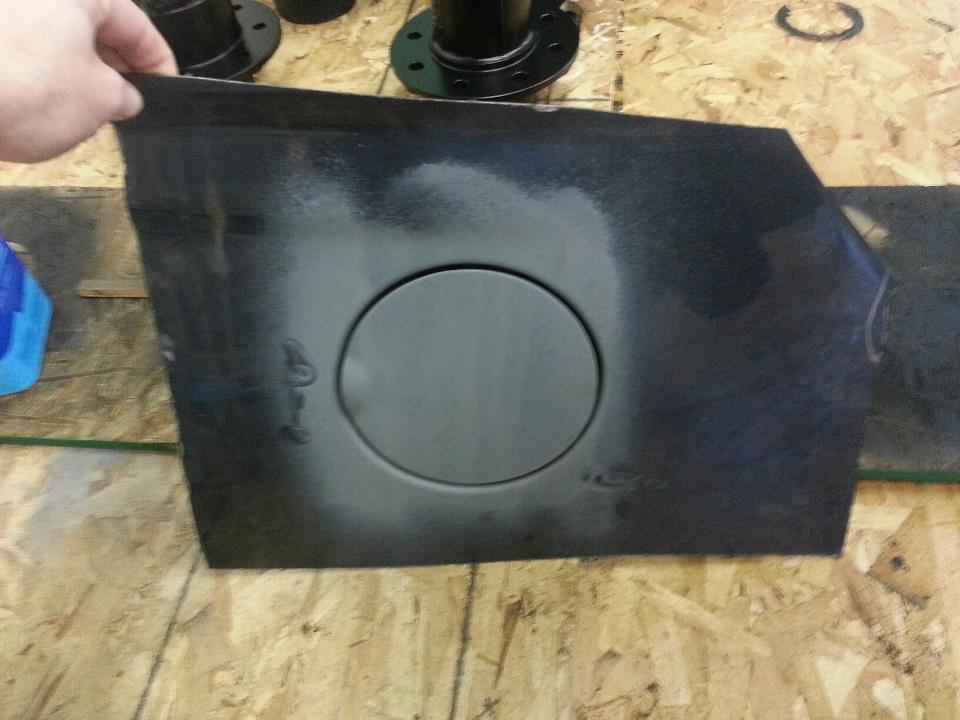
Also, snagged this from the junkyard the other day. It's a fuel filler door to a Ford Expedition. We will be working to integrate this into the wood of the bed.
Then, when we got back to the garage, we finished up the hovercraft conversion
Since the hovercraft conversion wouldn't take off, I decided to press the wheel studs into the hubs. Started with the front and packed the bearings in and replaced the wheel seals. These pictures are of the rear hubs and rotors though...
Used the impact to tighten the lug nuts down which in turn pulled the wheel studs through and seated the knurls.
Dropped in the bearings with only a little bit of grease since the rear bearings are oil soaked.
And now, it was time to get the rear brake conversion underway!!!
I installed the hub, tightened it down, and was spinning it to check if there was any play and well...
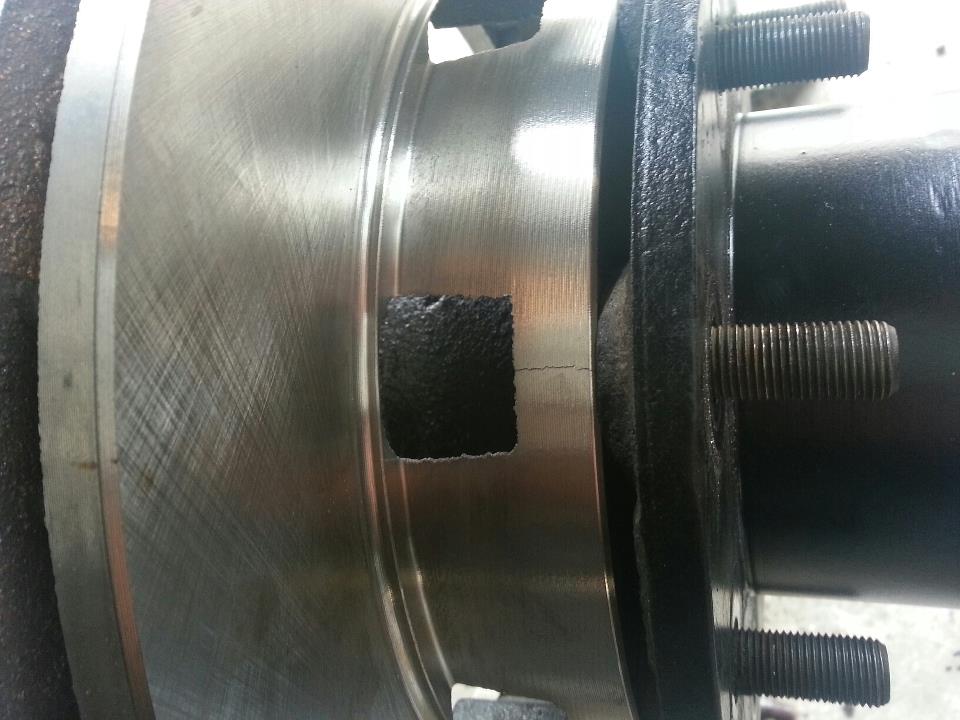
So yeah, apparently something didn't go well. I think the shoulder on the wheel stud is too big, but I don't understand why it only happened in one place. But, no big deal, we will press the studs back out and replace the rotor. I decided to leave it on for now to check the caliper bracket and see how much of a spacer I would need.
Turns out I need much more than the kit provides for.
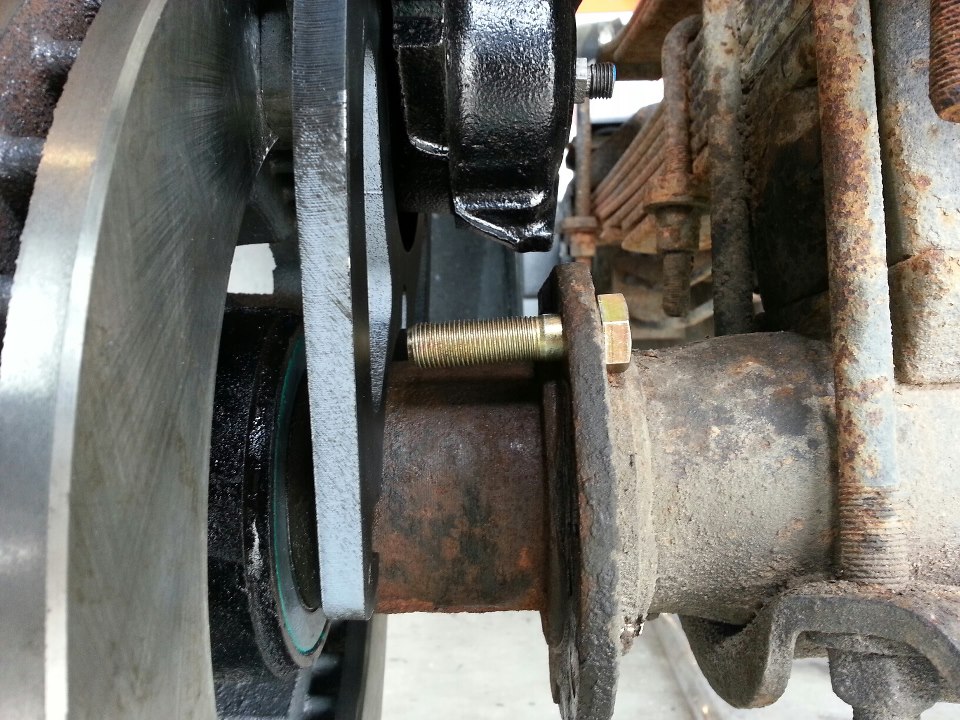
From my minute amount of research, it looks like the dually axles have a backing plate mount that is further in board than a single wheel. I will need to replace the bolts with much longer ones, but I don't feel safe just hanging the bracket on 3.5" bolts. This will be remedied by welding the spacers on the bracket and reinforcing them. I have seen some bent brackets online somewhere, but I don't feel like spending the money twice when I have a TIG welder in the garage, the skill to use it, and ultimately the ability to make the bracket strong enough.
So, now spring break is over, I didn't even get half of what I wanted to accomplish accomplished, but whatever. It wouldn't be custom if it was easy!
So... I have a 1990 dodge W250 for sale, best offer so far is a soda and a burger.
---AutoMerged DoublePost---
Well, today the weather was fantastic, but we still ran into the road blocks that have become the running joke of this project.
First, dad did a coat of epoxy on the wood last night. Turned out pretty good, needs sanded and will get one more coat, we suspect.
This morning, I started with cleaning the calipers so I could paint them black. Did all four corners and forgot to grab pics of the finished product.
Also, snagged this from the junkyard the other day. It's a fuel filler door to a Ford Expedition. We will be working to integrate this into the wood of the bed.
Then, when we got back to the garage, we finished up the hovercraft conversion
Since the hovercraft conversion wouldn't take off, I decided to press the wheel studs into the hubs. Started with the front and packed the bearings in and replaced the wheel seals. These pictures are of the rear hubs and rotors though...
Used the impact to tighten the lug nuts down which in turn pulled the wheel studs through and seated the knurls.
Dropped in the bearings with only a little bit of grease since the rear bearings are oil soaked.
And now, it was time to get the rear brake conversion underway!!!
I installed the hub, tightened it down, and was spinning it to check if there was any play and well...
So yeah, apparently something didn't go well. I think the shoulder on the wheel stud is too big, but I don't understand why it only happened in one place. But, no big deal, we will press the studs back out and replace the rotor. I decided to leave it on for now to check the caliper bracket and see how much of a spacer I would need.
Turns out I need much more than the kit provides for.
From my minute amount of research, it looks like the dually axles have a backing plate mount that is further in board than a single wheel. I will need to replace the bolts with much longer ones, but I don't feel safe just hanging the bracket on 3.5" bolts. This will be remedied by welding the spacers on the bracket and reinforcing them. I have seen some bent brackets online somewhere, but I don't feel like spending the money twice when I have a TIG welder in the garage, the skill to use it, and ultimately the ability to make the bracket strong enough.
So, now spring break is over, I didn't even get half of what I wanted to accomplish accomplished, but whatever. It wouldn't be custom if it was easy!
So... I have a 1990 dodge W250 for sale, best offer so far is a soda and a burger.
Last edited by mkriebs; 03-15-2013 at 02:29 PM. Reason: Automerged Doublepost

#540
03-16-2013, 10:01 AM
Lol! Totally kidding! I have friends that keep telling me to sell Rusty so I can fund my Mustang project, I don't think this truck will ever get sold, even for the right price. I may consider it if someone offered me $20k cash, but anything lower than that, I have too much time, money and heart into this thing.


