
Project: WUT DPF


Taking some time off this week and working on the truck. Yesterday was "Rear Door Day". I started by pulling the power window regulator assemblies out and cleaning the inside surfaces of the doors (inner skin where door panel mounts, and inside of outer skin as well).

Then I changed out the power lock actuators and installed new outer door handles with Jimmy Jammers. Sorry, no pics, didn't seem interesting enough.
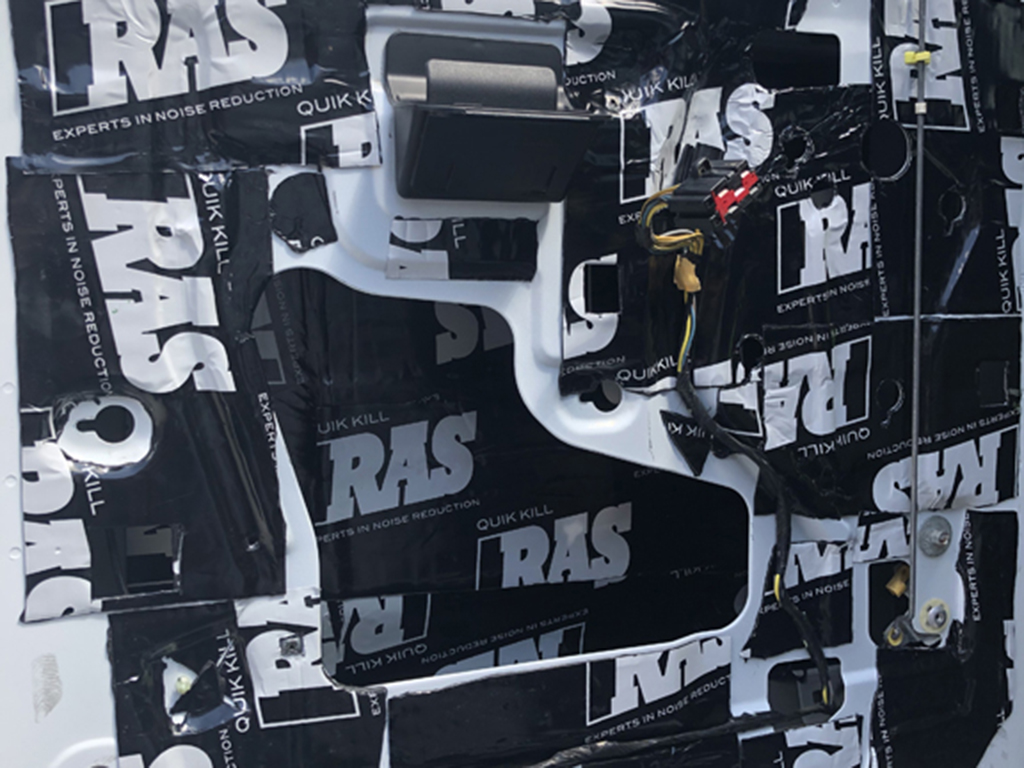
Then I put in my sound deadening, on both the inner door skin as well as the inside of the outer door skin.
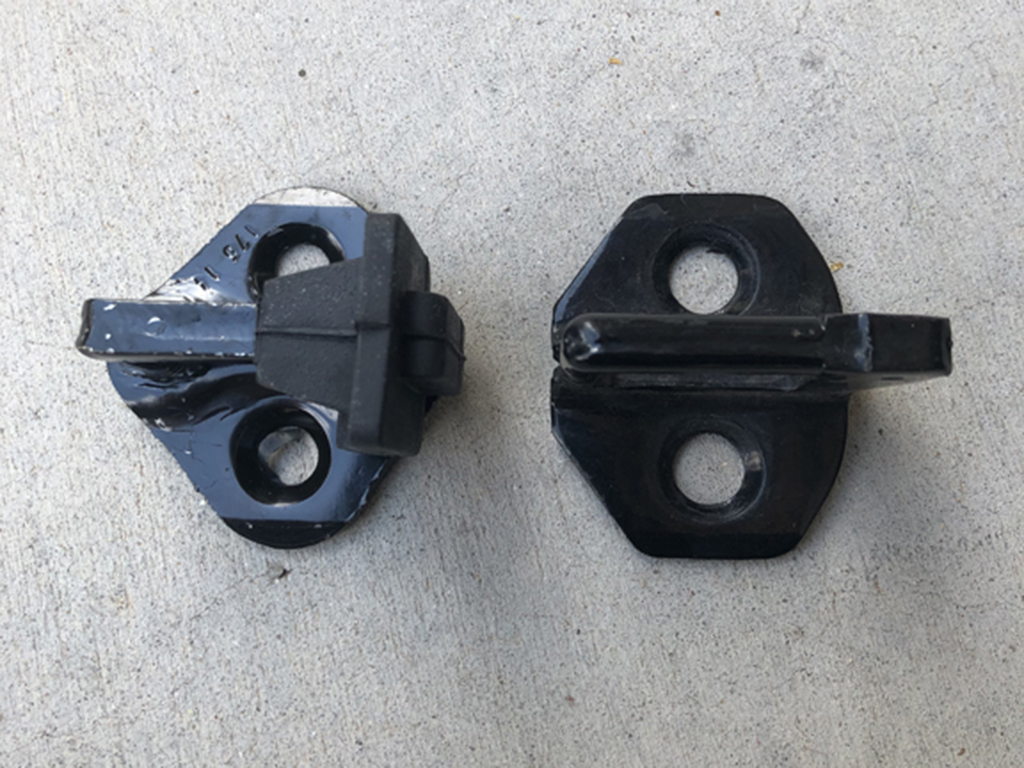
After installing the New OE power window regulator assemblies, reinstalling the OE vapor barrier and buttoning up the door panel, I installed new (updated) OE weatherstripping on the door opening and upgraded the door strikers to the Mustang units with the rubber bumpers.
The difference in sound when you close the door is so noticeable! I will get to the front doors later this week. It will be nice to have all of the windows and locks working right again, and the sound deadening is such a nice upgrade. Eventually I will make the time to gut the rest of the interior, pull the dash and sound deaden the rest of the cab.
Then I changed out the power lock actuators and installed new outer door handles with Jimmy Jammers. Sorry, no pics, didn't seem interesting enough.
Then I put in my sound deadening, on both the inner door skin as well as the inside of the outer door skin.
After installing the New OE power window regulator assemblies, reinstalling the OE vapor barrier and buttoning up the door panel, I installed new (updated) OE weatherstripping on the door opening and upgraded the door strikers to the Mustang units with the rubber bumpers.
The difference in sound when you close the door is so noticeable! I will get to the front doors later this week. It will be nice to have all of the windows and locks working right again, and the sound deadening is such a nice upgrade. Eventually I will make the time to gut the rest of the interior, pull the dash and sound deaden the rest of the cab.
Finally finished the front doors. Same deal as the rears, new OE lock actuators, new OE window regulator assemblies, everything cleaned and sound deadening added to the outer and inner surfaces. Fronts also got rear door handles without lock cylinders, Jimmy Jammers, Mustang strikers and new weatherstripping (not pictured). No real new info here, just pictures of the front door work.


So, it would appear that my CCV setup will need some additional work. I do think this engine is a bit tired, but it hasn't been worth the time to actually compression test it. It does have a miss that isn't injectors, wiring or IDM. I guess I will reserve judgement on the CCV setup until I get a fresh bullet in place.

The canister is catching some oil. This is about 3000 miles worth.

The problem is, it is still allowing enough of it to make it back up to the intake. No way to really know how much, but enough to be visible.
The canister is mounted down low, behind the drivers front tire. There's a good 3-4' of hose down and then back up. I was really hoping that this would be enough hose and a good enough canister setup to do a better job than this.
Could be that the canister is too small. Could be that running both valve covers to one canister is too much for it. Could be that this old turd has more blowby than this setup can efficiently handle. At some point I will need to remove the charge air tubes, it will be interesting to see how much oil is making it to those.
Not the best update, but all I've got for now.
The canister is catching some oil. This is about 3000 miles worth.
The problem is, it is still allowing enough of it to make it back up to the intake. No way to really know how much, but enough to be visible.
The canister is mounted down low, behind the drivers front tire. There's a good 3-4' of hose down and then back up. I was really hoping that this would be enough hose and a good enough canister setup to do a better job than this.
Could be that the canister is too small. Could be that running both valve covers to one canister is too much for it. Could be that this old turd has more blowby than this setup can efficiently handle. At some point I will need to remove the charge air tubes, it will be interesting to see how much oil is making it to those.
Not the best update, but all I've got for now.
Finally got around to swapping out the transmission. I had kept the fully built John Wood unit from my race truck, so now my old dinosaur has a trans that cost me almost as much as I paid for the truck! Oh well, one less thing to worry about. We do have to fine tune the VB as the shifting is a bit firm for a low power street truck (was previously behind a compound turbo'd, twin pump, 400cc setup).

Was a good time to check out the up-pipes for leaks and tighten a few loose exhaust manifold bolts.

This flexplate was on its way out, glad I got to it before it broke.

Billet flexplate from the race truck took care of the impending failure nicely!

Out with the old...

In with the...er...somewhat new!
Will have to pull the VB apart some weekend and see which way it is setup. We changed it so many times due to adding nitrous, removing nitrous, etc...who the heck remembers how it's setup now. I was hoping that the TC would have a bit higher stall, but apparently I had too much taken out of it when I had it refreshed (it was a lot higher in the race truck, so I had some taken out for the street build...probably should have left it alone). No biggie, will just have to pull it and have it restalled again later if I decide I'm not happy with it.
Was a good time to check out the up-pipes for leaks and tighten a few loose exhaust manifold bolts.
This flexplate was on its way out, glad I got to it before it broke.
Billet flexplate from the race truck took care of the impending failure nicely!
Out with the old...
In with the...er...somewhat new!
Will have to pull the VB apart some weekend and see which way it is setup. We changed it so many times due to adding nitrous, removing nitrous, etc...who the heck remembers how it's setup now. I was hoping that the TC would have a bit higher stall, but apparently I had too much taken out of it when I had it refreshed (it was a lot higher in the race truck, so I had some taken out for the street build...probably should have left it alone). No biggie, will just have to pull it and have it restalled again later if I decide I'm not happy with it.
I got my hands on a decent 08-10 Tailgate in the right color. Looks much nicer than the beat up stocker! I tried using the Tailgate Handle Backup Camera in my stock tailgate, but the quality of that piece was horrible and the handle wouldn't stay in place when you used it to open the tailgate. The 08-10 Tailgate Handle with Backup Camera is much nicer, and it stays put (so far).
I also installed a power tailgate lock from Pop-N-Lock and a Jimmy Jammers tailgate guard while I was at it. Sorry, no pictures of those. The wiring for the camera and lock were the worst part, as both had to go inside the cab, but to 2 different places.

08-10 Tailgate - Used But Looks Good

Amazon Tailgate Handle with Backup Camera

View From Backup Camera on Double DIN Kenwood Head Unit
The camera is certainly a "nice to have" when you back into just about everywhere you park. The angle of this one is good, I can tell when I'm right up on a wall or tree, or getting close to the nose of a car.
This weekend...have to tear into the valve body and see what we've got. Definitely setup for more power than this truck is making!
I also installed a power tailgate lock from Pop-N-Lock and a Jimmy Jammers tailgate guard while I was at it. Sorry, no pictures of those. The wiring for the camera and lock were the worst part, as both had to go inside the cab, but to 2 different places.
08-10 Tailgate - Used But Looks Good
Amazon Tailgate Handle with Backup Camera
View From Backup Camera on Double DIN Kenwood Head Unit
The camera is certainly a "nice to have" when you back into just about everywhere you park. The angle of this one is good, I can tell when I'm right up on a wall or tree, or getting close to the nose of a car.
This weekend...have to tear into the valve body and see what we've got. Definitely setup for more power than this truck is making!
I just realized that I have a truck update that I totally forgot about. I actually haven't had much time to work on the truck lately, due to other projects (personal and work related). I did manage to get my headlight upgrade installed a few weeks ago though, I just spaced posting the updates here when I did it.
The factory 05-07 headlights look OK, but the lighting sucks, even with upgraded bulbs. Having had Projector HIDs in the past, I knew that was what this thing needed. I ordered a set of brand new OEM headlights from Ford and shipped them off to Dan Cordoba of DC Customs for all of the upgrades (see list below). Dan did a Killer Job on these, I couldn't be happier!
-G5-BRT Projectors
-Osram CBB D2S Bulbs
-Apollo 2.0 Flat Shrouds
-Oxford White and Black paint
-Tinted Klearz Reflector
-XD Xtreme Digital Ballasts
-DC Customs H13 Harness
-XD Ceramic 3157 Switchback Park/Turn Indicators

Headlights Installed - Close Up

Headlights Installed

Headlights Installed

Standard Bulb (Left) vs Projector HID (Right) - This is LOW BEAM ONLY (notice the nice cutoff on the top of the HID)
Here's a link to the DC Customs post on Facebook with a few more pictures of Dans work on my lights. Check him out if you are in the market for some light work!
The factory 05-07 headlights look OK, but the lighting sucks, even with upgraded bulbs. Having had Projector HIDs in the past, I knew that was what this thing needed. I ordered a set of brand new OEM headlights from Ford and shipped them off to Dan Cordoba of DC Customs for all of the upgrades (see list below). Dan did a Killer Job on these, I couldn't be happier!
-G5-BRT Projectors
-Osram CBB D2S Bulbs
-Apollo 2.0 Flat Shrouds
-Oxford White and Black paint
-Tinted Klearz Reflector
-XD Xtreme Digital Ballasts
-DC Customs H13 Harness
-XD Ceramic 3157 Switchback Park/Turn Indicators
Headlights Installed - Close Up
Headlights Installed
Headlights Installed
Standard Bulb (Left) vs Projector HID (Right) - This is LOW BEAM ONLY (notice the nice cutoff on the top of the HID)
Here's a link to the DC Customs post on Facebook with a few more pictures of Dans work on my lights. Check him out if you are in the market for some light work!
Facebook Post
This update is SOOOOOO LOOOONNNNGGGGG overdue. I've been referring to this as "The Longest Stereo Install Ever" (that isn't some kind of crazy, high end, show build). Anyway, a quick bit about the system and then TONS OF PICTURES. Sorry for the length of this, I have it split into multiple posts.
System Consists of:
Kenwood DNX-696S Double DIN Head Unit (custom mount)
Zapco ASP-Q1 Pre-Amp/Crossover (custom mount in AC controls location)
Rockville 50 Farad Capacitor
(2) Old School Orion 2150GX Amps (600W ea)
(2) Old School Orion 400BDG Bridging Modules
(3) Old School Orion 280GX Amps (160W ea)
(2) JL Audio 10TW3-D8 Subs (custom sealed enclosure)
(2) Sets a/d/s/ A6is Component Sets (front stage)
- (4) Total 6.5" Midbass (2/door)
- (4) Total 1" Soft Dome Tweeter (1/door + 1/pillar)
(1) Set Pioneer TS-D68F 6x8 Direct Fit Speakers (rear fill)
2/0 Custom Battery/Starter/Alternator/Ground Cables
DC Power 370A Alternator

Gutting The Interior for Sound Deadening

More Gutting...

Expanding Foam Used (carefully) in Key Places (the roof is solid and tight now)

Roof Getting CLD.

Back Wall of Cab Getting CLD.

Roof Getting a Sound Blocking Type Product (can't say if MLV or other)

I used Tons of Tesa Tape on OEM and other Harnesses

While I had Easy Access, I Installed some S&B Body Mounts


Dash on the Stand for Repairs, Security System and Audio Work

Bare Firewall Ready for CLD

Firewall Covered in CLD (OEM Pad was Reinstalled Over the CLD)

Dash Mount Tabs Covered in Tesa Tape
Continued in next post...
System Consists of:
Kenwood DNX-696S Double DIN Head Unit (custom mount)
Zapco ASP-Q1 Pre-Amp/Crossover (custom mount in AC controls location)
Rockville 50 Farad Capacitor
(2) Old School Orion 2150GX Amps (600W ea)
(2) Old School Orion 400BDG Bridging Modules
(3) Old School Orion 280GX Amps (160W ea)
(2) JL Audio 10TW3-D8 Subs (custom sealed enclosure)
(2) Sets a/d/s/ A6is Component Sets (front stage)
- (4) Total 6.5" Midbass (2/door)
- (4) Total 1" Soft Dome Tweeter (1/door + 1/pillar)
(1) Set Pioneer TS-D68F 6x8 Direct Fit Speakers (rear fill)
2/0 Custom Battery/Starter/Alternator/Ground Cables
DC Power 370A Alternator
Gutting The Interior for Sound Deadening
More Gutting...
Expanding Foam Used (carefully) in Key Places (the roof is solid and tight now)
Roof Getting CLD.
Back Wall of Cab Getting CLD.
Roof Getting a Sound Blocking Type Product (can't say if MLV or other)
I used Tons of Tesa Tape on OEM and other Harnesses
While I had Easy Access, I Installed some S&B Body Mounts
Dash on the Stand for Repairs, Security System and Audio Work
Bare Firewall Ready for CLD
Firewall Covered in CLD (OEM Pad was Reinstalled Over the CLD)
Dash Mount Tabs Covered in Tesa Tape
Continued in next post...
Continued from Previous Post...

Pioneer 6x8s in Factory Rear Location

Starting the CLD on the Floor.

05-07 Dash Center Pieces getting Painted

Upgrading to 11-16 Center Console too.

Floor CLD Done!

Laying out RCA Cables Up the Center of the Floor

Power, Ground and Turn-On Run Up Floor with 4" Gap. Every component in the system get Power and Ground from the Amp Rack. Key-on for the Head Unit is Amp Rack power switched by a relay. No audio connected component has ANY power or ground from ANY other location.

Sound Blocking Material Installed on Floor

Working On Custom Head Unit Mounting Brackets

Head Unit Solid Mounted (the plastic dash kit sucked)

Head Unit and Pre-Amp Test Fit

Head Unit and Pre-Amp Brackets

Test Fit of Bezel for Relocated AC Controls

Underdash Aux Fuse Panel for Center Console, Inverter, Upfitter Switches plus Relays for Audio and Alarm Functions (unfortunately, you have to take half the interior apart to change a fuse...oh well).

Assembled Dash with AC Bezel and Pre-Amp Brackets Powdercoated

Upfitter Switch Wires Labeled for Future Use (switch 4 controls center console inverter)
Continued in next post...
Pioneer 6x8s in Factory Rear Location
Starting the CLD on the Floor.
05-07 Dash Center Pieces getting Painted
Upgrading to 11-16 Center Console too.
Floor CLD Done!
Laying out RCA Cables Up the Center of the Floor
Power, Ground and Turn-On Run Up Floor with 4" Gap. Every component in the system get Power and Ground from the Amp Rack. Key-on for the Head Unit is Amp Rack power switched by a relay. No audio connected component has ANY power or ground from ANY other location.
Sound Blocking Material Installed on Floor
Working On Custom Head Unit Mounting Brackets
Head Unit Solid Mounted (the plastic dash kit sucked)
Head Unit and Pre-Amp Test Fit
Head Unit and Pre-Amp Brackets
Test Fit of Bezel for Relocated AC Controls
Underdash Aux Fuse Panel for Center Console, Inverter, Upfitter Switches plus Relays for Audio and Alarm Functions (unfortunately, you have to take half the interior apart to change a fuse...oh well).
Assembled Dash with AC Bezel and Pre-Amp Brackets Powdercoated
Upfitter Switch Wires Labeled for Future Use (switch 4 controls center console inverter)
Continued in next post...
Continued from Previous Post...

Designing the Amp Rack

Amp Rack (v1) After WaterJet and Bending (ended up having to build a v2 with a few minor changes)

Test Fitting Amp Rack Behind Rear Seat

First Amplifier Test Fit on Amp Rack

ALL Wires Pass Through Grommets. All Components Attached with Machine Screws to PEM Threaded Inserts in Amp Rack

Rivnuts Used to Attach Amp Rack to Truck Body

2D Side View CAD Design of Sub Enclosure (it was a trick to get the airspace I needed under the seat)

Once I had the Profile Figured Out, I went to 3D Software to Finish the Design


17 Total Pieces for the Sub Enclosure, ALL Cut on a WaterJet Machine (best fitting enclosure I've ever built)

About 80% Assembled

Ready for Rhino Liner

Back from Rhino Liner, Subs Installed

Baffle Plates Installed (so subs are not firing into carpet)

Installing Sub Enclosure in Truck

Sub Enclosure and Seat Installed (with LMI Welding Rear Seat Spacers)
Continued in next post...
Designing the Amp Rack
Amp Rack (v1) After WaterJet and Bending (ended up having to build a v2 with a few minor changes)
Test Fitting Amp Rack Behind Rear Seat
First Amplifier Test Fit on Amp Rack
ALL Wires Pass Through Grommets. All Components Attached with Machine Screws to PEM Threaded Inserts in Amp Rack
Rivnuts Used to Attach Amp Rack to Truck Body
2D Side View CAD Design of Sub Enclosure (it was a trick to get the airspace I needed under the seat)
Once I had the Profile Figured Out, I went to 3D Software to Finish the Design
17 Total Pieces for the Sub Enclosure, ALL Cut on a WaterJet Machine (best fitting enclosure I've ever built)
About 80% Assembled
Ready for Rhino Liner
Back from Rhino Liner, Subs Installed
Baffle Plates Installed (so subs are not firing into carpet)
Installing Sub Enclosure in Truck
Sub Enclosure and Seat Installed (with LMI Welding Rear Seat Spacers)
Continued in next post...
Last edited by Strictly Diesel; May 9, 2022 at 06:30 PM.
Continued from Previous Post...

Amps Getting New 8ga Power and Ground Cables

Amps and Other Components Final Mounted on Amp Rack (hung up for easy wiring on both sides)

Test Fit of Dual Speaker Mount from Custom Speaker Pods

Fitting the Tweeter in the Door Pod

Steel Reinforcement Rings with Threaded Inserts for Speaker Pods (so I'm not attaching speakers to plastic)

Test Fitting Speakers with Reinforcement Rings

Pods Painted and Reinforcement Rings Attached

Pods Attached to Door Panel and Speakers Installed (still need to paint the screw heads)

Amp Rack and Equipment Fully Installed and Wired in the Truck! (this was a LOONNNGGG Time Coming)

Amp Rack with Seat Installed and Folded Forward
Sorry again for the length of these updates. Been going too many directions and this build took way too long to complete. I started the bulk of this in January of 2021. The truck was down for about 6 months with all of the interior out and everything I did inside, then it was on the road again while I designed and built the sub enclosure and amp rack. I took it down again in December of 2021 to work on mounting the speakers in the doors, battery cables, power and ground for the audio equipment, alternator and lots of other little details...and it just came together this past weekend. At this point, I'm driving and listening and adjusting until I can get with a close friend and spend time with his ears and his analyzer to dial it in. All in all, I'm damn happy with how it came out and how it sounds, and all of the "old school" equipment I wanted to use so badly is working great!
Amps Getting New 8ga Power and Ground Cables
Amps and Other Components Final Mounted on Amp Rack (hung up for easy wiring on both sides)
Test Fit of Dual Speaker Mount from Custom Speaker Pods
Fitting the Tweeter in the Door Pod
Steel Reinforcement Rings with Threaded Inserts for Speaker Pods (so I'm not attaching speakers to plastic)
Test Fitting Speakers with Reinforcement Rings
Pods Painted and Reinforcement Rings Attached
Pods Attached to Door Panel and Speakers Installed (still need to paint the screw heads)
Amp Rack and Equipment Fully Installed and Wired in the Truck! (this was a LOONNNGGG Time Coming)
Amp Rack with Seat Installed and Folded Forward
Sorry again for the length of these updates. Been going too many directions and this build took way too long to complete. I started the bulk of this in January of 2021. The truck was down for about 6 months with all of the interior out and everything I did inside, then it was on the road again while I designed and built the sub enclosure and amp rack. I took it down again in December of 2021 to work on mounting the speakers in the doors, battery cables, power and ground for the audio equipment, alternator and lots of other little details...and it just came together this past weekend. At this point, I'm driving and listening and adjusting until I can get with a close friend and spend time with his ears and his analyzer to dial it in. All in all, I'm damn happy with how it came out and how it sounds, and all of the "old school" equipment I wanted to use so badly is working great!


