
04' down for the count


Thread Starter
|
Diesel Enthusiast

Joined: Feb 2009
Posts: 420
Likes: 16
From: St. Marys, PA
was driving home to day from work to go to a tire garage to get some new skins and had to call and cancel. 6 miles past the ford garage it started to miss and blow excessive black smoke, couldn't get outa 2nd gear. egts were running towards 1200 with minimum throttle while i limped it back to the ford garage for a tremendous bill i'm sure. truck has 195,500 miles on it, injectors have 15k on them and the head gaskets have 35k on them.i have the banks six gun installed but haven't turn it on in 6 monthes. any ideas as to what might ale it.
Diesel Bombers Sponsor

Joined: Mar 2007
Posts: 3,791
Likes: 367
From: Blowing Rock,NC
Notes
TSB 08-20-1
10/13/08
6.0L ENGINE - MISFIRE, LACK OF POWER, BUCK /
JERK, EXCESSIVE SMOKE, CRANK / NO START -
DIAGNOSTICS FOR FUEL SYSTEM - SERVICE TIPS
FORD:
2003-2005 Excursion
2003-2007 F-Super Duty
2004-2008 E-350, E-450, E-550
This article supersedes TSB 08-16-9 to update the Part List.
ISSUE
Some 2003-2005 Excursion, 2003-2007 F-Super Duty and 2004-2008 E-Series vehicles equipped with a 6.0L engine may exhibit a misfire, lack of power, buck / jerk, excessive smoke or crank / no start. There are several potential causes for these symptoms.
ACTION
Follow the Service Procedure steps to correct the condition.
LOW OR NEGATIVE FUEL PRESSURE
If normal diagnostics lead to an injector concern use the following diagnostics to confirm the cause of injector failure and I or to rule out other conditions which may cause the same symptoms as a failed injector.
NOTE IF DIAGNOSING A LACK OF POWER CONDITION, BE AWARE 2005 AND FORWARD MODEL YEAR VEHICLES HAVE A "FORCED LIMITED POWER" STRATEGY WHICH LIMITS INJECTION CONTROL PRESSURE (ICP) WHEN THE FUEL LEVEL IN THE TANK GETS VERY LOW (WELL AFTER THE LOW FUEL LIGHT COMES ON). WHEN THIS OCCURS, DIAGNOSTIC TROUBLE CODE (DTC) P115A WILL BE STORED IN THE POWERTRAIN CONTROL MODULE (PCM).
Low Or Negative Fuel Pressure
Internal injector damage can be caused by lack of fuel system supply pressure. Restricted fuel filters and / or fuel line(s), or an inoperative fuel pump can create a low or negative fuel supply pressure. Low or negative pressures may hinder the return stroke of the injector intensifier plunger to its rest position, leading to internal injector damage. To diagnose for low or negative fuel pressure and to confirm if any injectors have been damaged:
1. Perform standard diagnostic procedures including verification of supply fuel pressure using the Powertrain Controls / Emissions Diagnosis (PC/ED) Performance Diagnostic Procedure - Fuel System Delivery Test 10a. This test uses Diesel Fuel Flow Tester 310-193 to verify proper fuel pressure while simulating wide open throttle (WOT) (full load) fuel flow.
2. Repair causes for low pressure on the supply side of the fuel system.
3. Diagnose for failed injector(s) only after rectifying fuel supply pressure.
4. Recheck the fuel pressure after repairs by repeating the Fuel System Delivery Test 10a.
COMBUSTION GAS ENTERING THE FUEL SYSTEM
Inert combustion gas in an injector can cause a random misfire in one or many cylinders. Combustion gas may leak past the injector's needle and seat, or the copper combustion seal. Once the combustion gas enters the fuel rail in the cylinder head, it then distributes to other injectors, typically on the same bank. To diagnose for combustion gas entering the fuel system:
1. Remove outlet fuel lines from the fuel filter housing on top of engine.
2. Install a balloon over each fuel line with a zip tie.
3. Disable the fuel pump and fuel injection control module (FICM) relays.
4. Crank engine and watch for compression pulses in the balloon.
5. For each line where compression pulses are evident, remove all but one (1) of the glow plugs from the affected cylinder head(s).
6. Crank engine and watch again for compression pulses.
7. Remove the glow plug and transfer it to the next cylinder in the head and repeat Step 6. Repeat this step for all four (4) cylinders on the effected bank, do not stop repeating until all four (4) cylinders are checked.
8. For each cylinder where compression pulses are evident remove injector(s) and inspect copper gasket and lower 0-ring, replace if necessary. If gasket(s) and 0-ring(s) are okay replace injector(s) to address leakage past the injector pintle (needle). Re-test to confirm repair.
NOTE ANY TIME AN INJECTOR CLAMP IS LOOSENED AND / OR INJECTOR REMOVED, THE COPPER GASKET AND 0-RINGS MUST BE REPLACED, THEY CAN NEVER BE REUSED.
Copper Gasket Inspection
1. Remove the suspect injector and inspect for a missing or damaged copper washer. Review repair history as a missing injector copper washer is most likely caused by improper injector torque at a prior repair for injector replacement.
2. Using an injector, that is not damaged, install a new copper washer and install the injector per Workshop Manual Procedure 303-04C and tighten to 24 lb-ft (33 N.m).
NOTE F-SUPER DUTY VEHICLES BUILT 1/16/2006 AND LATER AND E-SERIES VEHICLES BUILT 1/23/2006 AND LATER, INJECTOR TORQUE IS 26 LB-FT (35 N.m) AND UTILIZES A T-45 TORX BIT.
3. Remove injector and inspect copper washer crush pattern. An even circular crush pattern should be visible on sealing surface of copper washer. If the crush pattern is not visible or not a complete even circular pattern (c shape pattern), the copper injector washer can leak or fail prematurely.
4. Possible causes of damage to the copper washer could be:
a. Damaged injector hold down.
b. Hold down bolt stretched from improper torque.
c. Damaged injector.
d. Damaged injector cup.
NOTE AFTER REPLACEMENT OF ANY FAULTY COMPONENTS - WITH NEW COPPER WASHER REPEAT INJECTOR COPPER WASHER CRUSH TEST TO VERIFY CORRECT CRUSH PATTERN.
NOTE ANY TIME AN INJECTOR CLAMP IS LOOSENED AND / OR INJECTOR REMOVED, THE COPPER GASKET AND 0-RINGS MUST BE REPLACED, THEY CAN NEVER BE REUSED. THE INJECTOR CLAMP AND HOLD DOWN BOLT CAN BE REUSED IF THEY WERE PROPERLY TORQUED, BUT IF THERE IS INDICATION OF PREVIOUS IMPROPER TORQUING, THESE MUST BE REPLACED.
ERRATIC HIGH PRESSURE OIL SUPPLY
Erratic supply of high pressure oil to injectors may cause a rough running engine. High pressure oil flow can be disrupted by faulty check valve(s) or a faulty injection pressure regulator (IPR) valve.
To diagnose, first perform a slow neutral run up in park / neutral. If the engine runs rough between 1200 and 2300 RPM proceed to Check Valve Diagnosis; if the engine runs rough between 3000 and 4000 RPM, perform PC/ED pinpoint test Q, if the engine continues to run rough between 3000 and 4000 RPM after having validated the ICP sensor and connector, then replace the IPR valve.
Check Valve Diagnosis
1. To isolate the bank with the faulty check valve, disconnect all of the injector electrical connectors on one bank.
2. Perform a Power Balance test. Engine misfires should be constant on the four disconnected cylinders and the operational cylinders should be contributing evenly.
3. Repeat Steps 1 and 2 on the opposite bank.
4. If the operating contribution is erratic on one bank, replace the check valve on that bank.
TSB 05-22-3
11/14/05
LOW POWER - COLD SIDE CHARGE AIR COOLER
(CAC) DISCONNECTED - OIL LEAK AT CAC
CONNECTIONS - 6.0L ENGINE - VEHICLES BUILT
4/1/2004 THROUGH 2/20/2005
FORD:
2004-2005 Excursion, F-Super Duty
This article supercedes TSB 05-14-8 to update the Service Procedure.
ISSUE
Some 2004-2005 F-Super Duty and Excursion vehicles built 4/1/2004 through 2/20/2005 equipped with a 6.0L diesel engine may exhibit an oil leak from the cold side charge air cooler (CAC) duct connections, or low power/low boost performance due to the plastic charge air cooler duct becoming disconnected (blowing off).
ACTION
Determine the specific issue with the CAC duct on the vehicle that is being serviced, and perform one (1)of the following:
^ If the CAC duct has separated from the engine intake manifold, or leaks oil excessively at the engine intake manifold elbow connection, install a reinforcing ring. Refer to the Reinforcing Ring Installation Service Procedure.
^ If the CAC duct has separated from the CAC, leaks oil excessively at the CAC connection, or has a hole or other defect in the duct, replace the duct with a CAC Metal Duct Kit. Refer to the Metal Duct Kit Installation Service Procedure.
SERVICE PROCEDURE
NOTE OIL FOUND IN 6.0L CAC SYSTEM MAY BE GREATER THAN AMOUNTS PREVIOUSLY FOUND IN THE 7.3L ENGINE, DUE TO HIGHER BOOST LEVELS. A RESTRICTED AIR FILTER CAN ALSO CONTRIBUTE TO GREATER AMOUNTS OF OIL IN THE CAC SYSTEM. ENGINE OPERATION WITH A RESTRICTED AIR FILTER INCREASES THE AIR FLOW THROUGH THE OIL SEPARATOR, LEADING TO GREATLY INCREASED OIL IN THE BLOW-BY GAS AND RESULTING IN OIL PUDDLING IN THE DUCTS. PROPER AIR FILTER MAINTENANCE IS IMPORTANT. DUSTINESS AROUND THE CAC DUCT CONNECTIONS IS CONSIDERED NORMAL.
NOTE IF A CAC DUCT CLAMP IS BROKEN, A SERVICE CLAMP IS AVAILABLE (1C3Z-6K786-BA). IT IS NOT NECESSARY TO ORDER A DUCT KIT TO OBTAIN A CLAMP.
REINFORCING RING INSTALLATION
1. Clean the connecting port and the inside surface of the duct that is being serviced with Motorcraft Metal Brake Parts Cleaner (PM-4).
2. Place the reinforcing ring in the groove under the clamp at the engine end of the duct. Place the gap in the ring on the side of the duct opposite from where the bolt on the clamp will be located (Figure 1).
3. After installing the engine end of the duct, position the internal bead of the duct into the groove in the engine elbow and hand torque the clamp to 106 lb-in (12 N.m).
CAUTION DO NOT OVER-TORQUE THE CLAMP.
4. Verify the torque on the CAC end of the duct is 106 lb-in (12 N.m).
METAL DUCT KIT INSTALLATION
1. Remove residue from both connecting ports and the inside surface on both ends of the duct with Motorcraft Metal Brake Parts Cleaner (PM-4).
2. Install CAC Metal Duct Kit.
3. After installing new duct on both ports, position the internal bead of the duct into the groove in the engine elbow. Hand torque the clamp to 106 lb-in (12 N.m).
4. Push the other end squarely and fully onto the CAC port. Hand torque the clamp to 106 lb-in (12 N.m).
NOTE MAKE SURE THAT THE CLAMP BOLT IS POSITIONED SO THAT IT WILL NOT BE STRUCK BY THE HOOD WHEN CLOSED.

Diesel Bombers Sponsor
Joined: Mar 2007
Posts: 3,791
Likes: 367
From: Blowing Rock,NC
They've got a "EGR" service, I think its junk compared to the induction cleaner.
Are you using BG or Wynns in your shop? We're trying to setup a tech squad to help members! You should be involved!
---AutoMerged DoublePost---
Come to think of it, I dont think they even carry the EGR chemical anymore!
Are you using BG or Wynns in your shop? We're trying to setup a tech squad to help members! You should be involved!
---AutoMerged DoublePost---
Come to think of it, I dont think they even carry the EGR chemical anymore!
Last edited by mysterync; Aug 20, 2009 at 08:19 PM. Reason: Automerged Doublepost

Thread Starter
|
Diesel Enthusiast
Joined: Feb 2009
Posts: 420
Likes: 16
From: St. Marys, PA
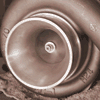
it started running very rough and blowing excessive black smoke in low through 3rd gear. i don't have any way to get codes for you. sucks that the garage won't get to it till monday or tuesday. i have never seen it do this before. maybe time for a turbo upgrade if it is a turbo problem.


