
3rd gen front brakes on 2nd gen*


Thread Starter
|
Diesel Bombers Sponsor

Joined: Dec 2007
Posts: 520
Likes: 62
Okay,
the 3rd gen brakes to a second gen has been completed. I have been taking it easy on the brakes to bed them in, but they are much better than before!
Here's a little show and tell for you guys.
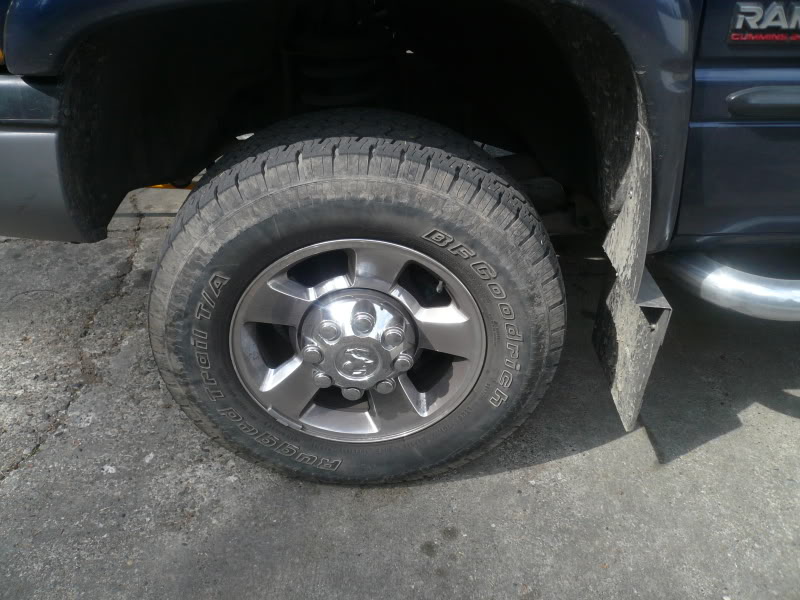
Okay, what I am starting off with is an '02 Dodge Ram 2500 4X4. I have already added 17" third gen wheels. I would think most wheels that fit a 3rd gen would work for this swap. You MUST have proper clearance for the caliper. That means 17" or larger. And my disclaimer, Dodge didn't build this swap for my truck. I did. Any problems, loss of income or life, mutilation or embarrassment from having small rotors is on you. I am only showing you what I did, not telling you what to do.
And another important note. Safety! It should be your first concern for every step you take. Wear safety glasses, support your rig the right way and NEVER, EVER take chances or get under ANY component that is in the air. Work in a safe and orderly manner using the right tools, the right torque and the right choices.
Also, In many of the steps below I have omitted the cleaning I do and take for granted. Get several cans of brake clean, a wire brush or two and a drain pan. I actually rinse off everything before starting, while breaking down and even during reassembly. The last steps I take are washing down the rotor before the pads go on and then again before the wheel goes on. Just habit.
The list of components required are:
2000-2002 2nd gen front axle with factory dual piston calipers. 2000-2002. I am told some late model '99's also, but not confirmed.
17" or larger wheels.
3rd gen rotors. '03+
3rd gen caliper adapter brackets. '03+ Dodge part# 5093268 AA and 5093270 AA
3rd gen pads. '03+
I sourced all my parts through Vulcan Performance Supply. I chose Powerslot rotors, factory adapters and performance Friction pads.
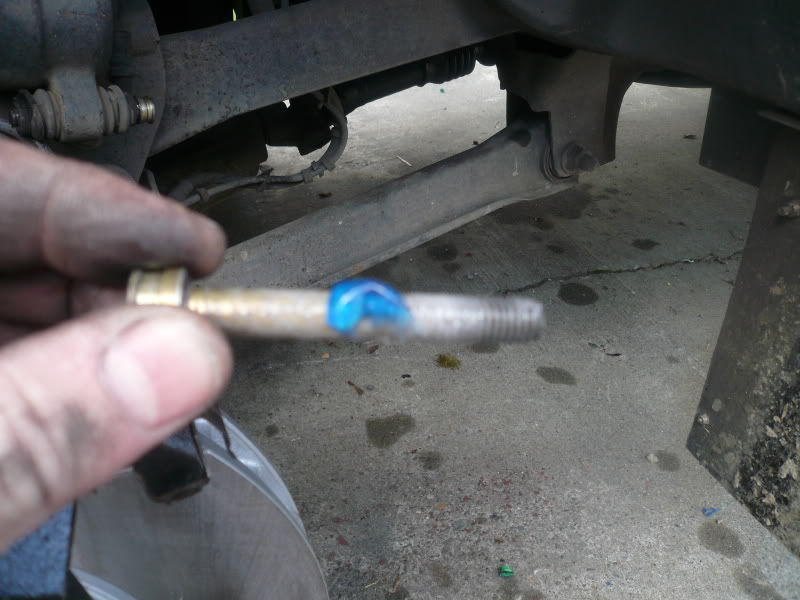
The only 2nd gen component that is reused is the caliper. It has a different banjo bolt thread size to the 3rd gen, but is otherwise identical. The brake line input, the bleeder location, puck diameter and placement and mounting pin placement are the same as the 2000-2002 models.
This will work on all 2 wheel drive and 4 wheel drive models. (2000-2002)
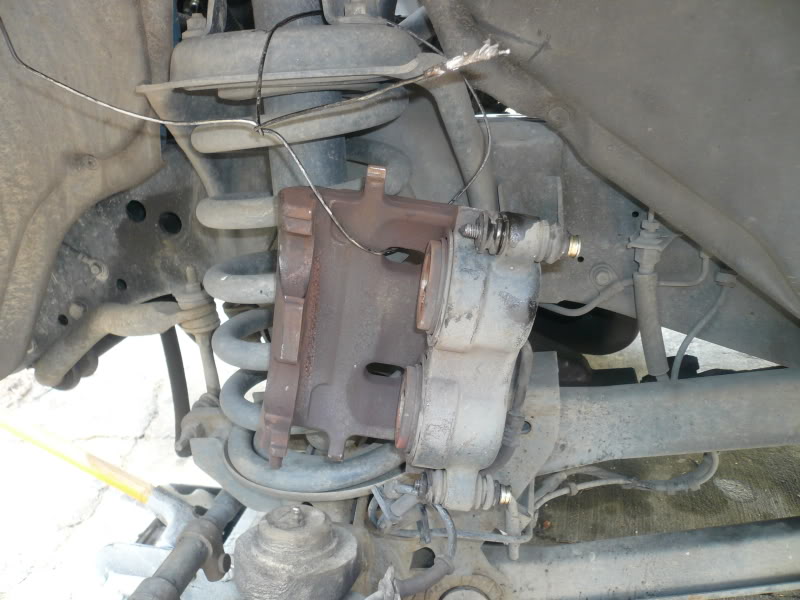
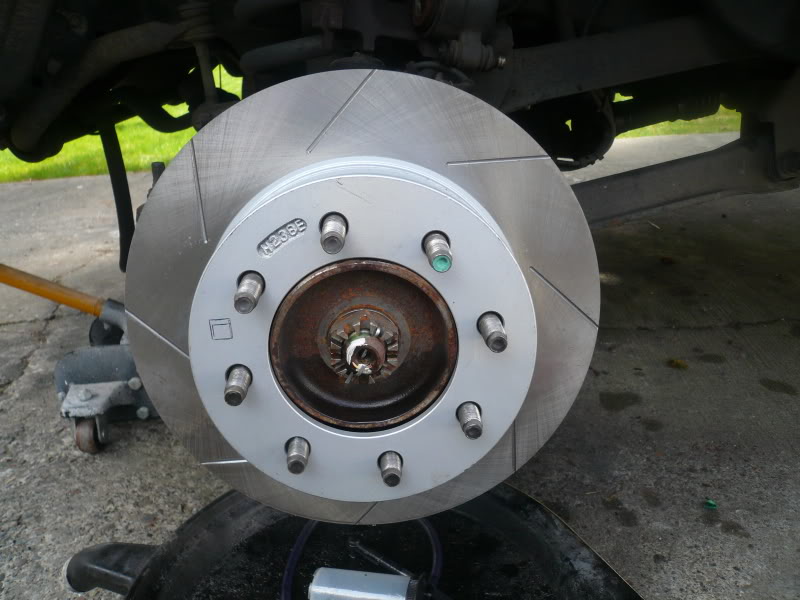
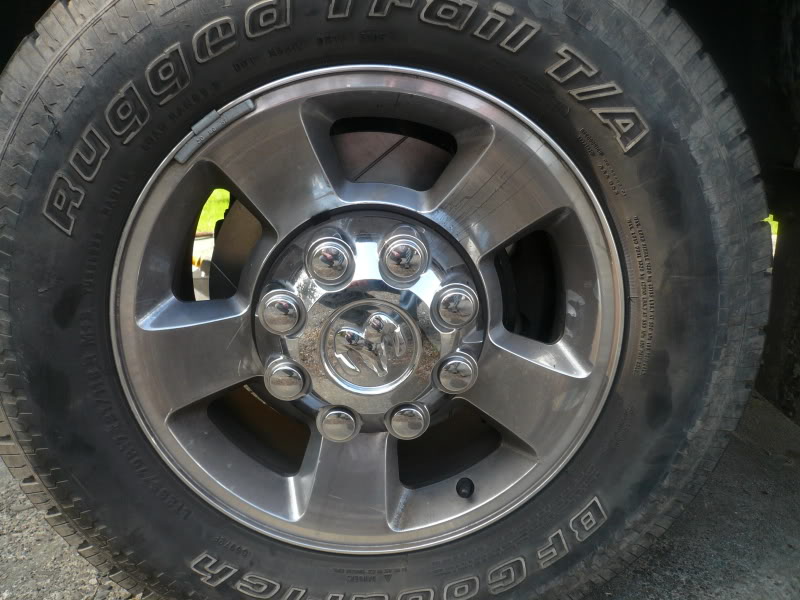
Here's what I am starting out with.
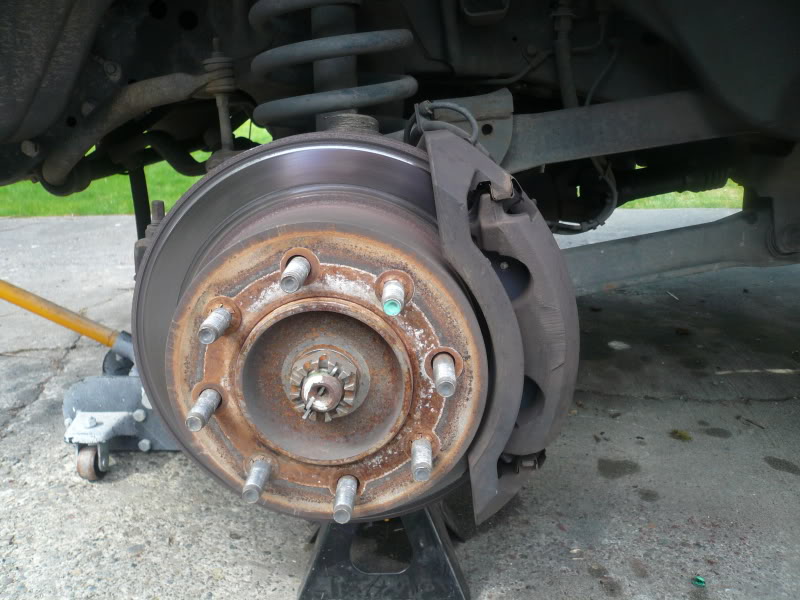
And to get the project going, remove the tire/ wheel.
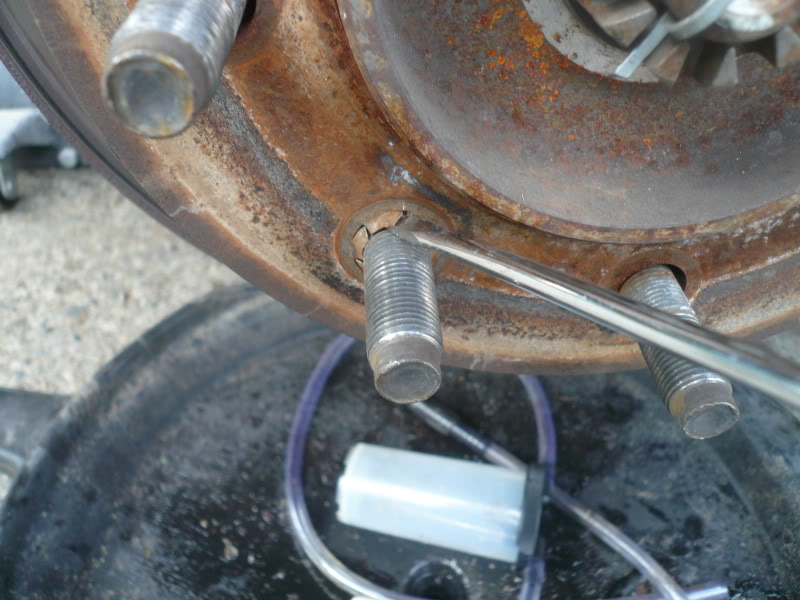
Next, you will need to remove any of the star lock washers on the lug bolts, if you still have them on there. I have found that a small screwdriver used to pry up the individual "locks" works well and allows for reuse.

Next, remove the caliper, pads and mounting bracket. In my case, I removed the caliper first and hung it from a coat hanger run through the shock tower. This keeps the brake line and ABS sensor lead safe.


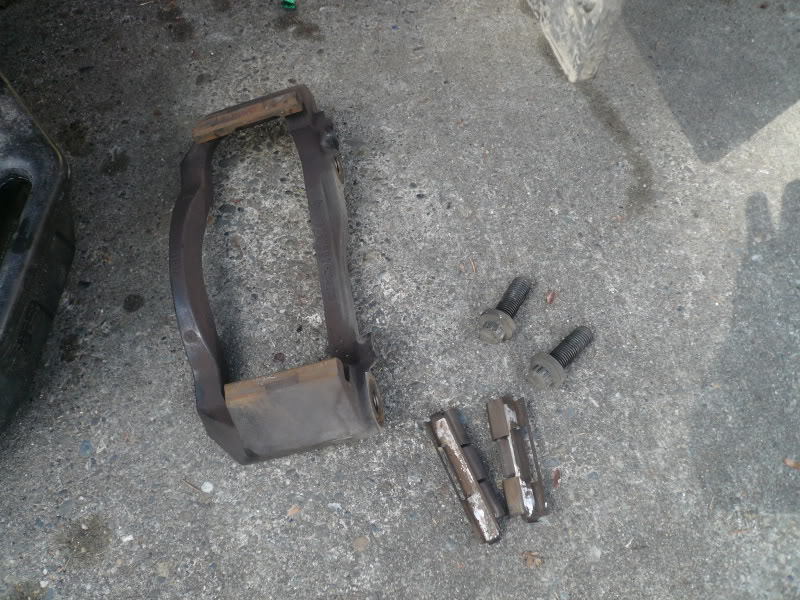
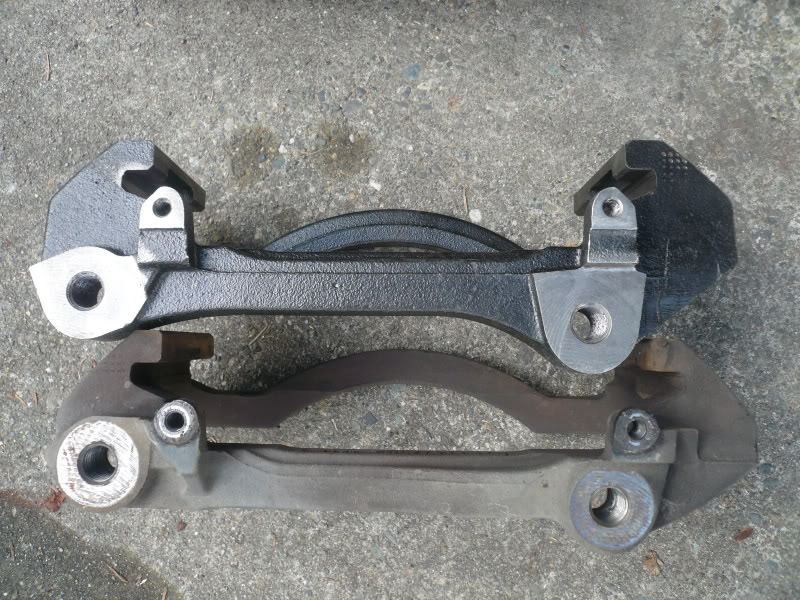
Now, I am sure you are wondering what the real difference is in the caliper mounts. They are virtually identical except for minor machining differences and a greater offset for the caliper.

And finally, the rotor can come off.
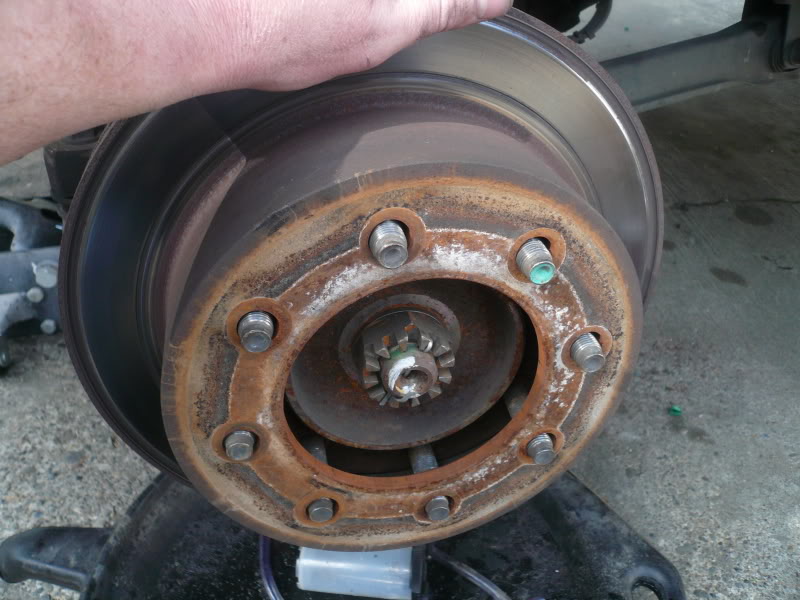
That takes care of disassembly.
the 3rd gen brakes to a second gen has been completed. I have been taking it easy on the brakes to bed them in, but they are much better than before!
Here's a little show and tell for you guys.
Okay, what I am starting off with is an '02 Dodge Ram 2500 4X4. I have already added 17" third gen wheels. I would think most wheels that fit a 3rd gen would work for this swap. You MUST have proper clearance for the caliper. That means 17" or larger. And my disclaimer, Dodge didn't build this swap for my truck. I did. Any problems, loss of income or life, mutilation or embarrassment from having small rotors is on you. I am only showing you what I did, not telling you what to do.
And another important note. Safety! It should be your first concern for every step you take. Wear safety glasses, support your rig the right way and NEVER, EVER take chances or get under ANY component that is in the air. Work in a safe and orderly manner using the right tools, the right torque and the right choices.
Also, In many of the steps below I have omitted the cleaning I do and take for granted. Get several cans of brake clean, a wire brush or two and a drain pan. I actually rinse off everything before starting, while breaking down and even during reassembly. The last steps I take are washing down the rotor before the pads go on and then again before the wheel goes on. Just habit.
The list of components required are:
2000-2002 2nd gen front axle with factory dual piston calipers. 2000-2002. I am told some late model '99's also, but not confirmed.
17" or larger wheels.
3rd gen rotors. '03+
3rd gen caliper adapter brackets. '03+ Dodge part# 5093268 AA and 5093270 AA
3rd gen pads. '03+
I sourced all my parts through Vulcan Performance Supply. I chose Powerslot rotors, factory adapters and performance Friction pads.
The only 2nd gen component that is reused is the caliper. It has a different banjo bolt thread size to the 3rd gen, but is otherwise identical. The brake line input, the bleeder location, puck diameter and placement and mounting pin placement are the same as the 2000-2002 models.
This will work on all 2 wheel drive and 4 wheel drive models. (2000-2002)
Here's what I am starting out with.
And to get the project going, remove the tire/ wheel.
Next, you will need to remove any of the star lock washers on the lug bolts, if you still have them on there. I have found that a small screwdriver used to pry up the individual "locks" works well and allows for reuse.
Next, remove the caliper, pads and mounting bracket. In my case, I removed the caliper first and hung it from a coat hanger run through the shock tower. This keeps the brake line and ABS sensor lead safe.
Now, I am sure you are wondering what the real difference is in the caliper mounts. They are virtually identical except for minor machining differences and a greater offset for the caliper.
And finally, the rotor can come off.
That takes care of disassembly.
Thread Starter
|
Diesel Bombers Sponsor
Joined: Dec 2007
Posts: 520
Likes: 62
Okay,
the 3rd gen brakes to a second gen has been completed. I have been taking it easy on the brakes to bed them in, but they are much better than before!
Here's a little show and tell for you guys.
Okay, what I am starting off with is an '02 Dodge Ram 2500 4X4. I have already added 17" third gen wheels. I would think most wheels that fit a 3rd gen would work for this swap. You MUST have proper clearance for the caliper. That means 17" or larger. And my disclaimer, Dodge didn't build this swap for my truck. I did. Any problems, loss of income or life, mutilation or embarrassment from having small rotors is on you. I am only showing you what I did, not telling you what to do.
And another important note. Safety! It should be your first concern for every step you take. Wear safety glasses, support your rig the right way and NEVER, EVER take chances or get under ANY component that is in the air. Work in a safe and orderly manner using the right tools, the right torque and the right choices.
Also, In many of the steps below I have omitted the cleaning I do and take for granted. Get several cans of brake clean, a wire brush or two and a drain pan. I actually rinse off everything before starting, while breaking down and even during reassembly. The last steps I take are washing down the rotor before the pads go on and then again before the wheel goes on. Just habit.
The list of components required are:
2000-2002 2nd gen front axle with factory dual piston calipers. 2000-2002. I am told some late model '99's also, but not confirmed.
17" or larger wheels.
3rd gen rotors. '03+
3rd gen caliper adapter brackets. '03+ Dodge part# 5093268 AA and 5093270 AA
3rd gen pads. '03+
I sourced all my parts through Vulcan Performance Supply. I chose Powerslot rotors, factory adapters and performance Friction pads.
The only 2nd gen component that is reused is the caliper. It has a different banjo bolt thread size to the 3rd gen, but is otherwise identical. The brake line input, the bleeder location, puck diameter and placement and mounting pin placement are the same as the 2000-2002 models.
This will work on all 2 wheel drive and 4 wheel drive models. (2000-2002)
Here's what I am starting out with.

And to get the project going, remove the tire/ wheel.

Next, you will need to remove any of the star lock washers on the lug bolts, if you still have them on there. I have found that a small screwdriver used to pry up the individual "locks" works well and allows for reuse.


Next, remove the caliper, pads and mounting bracket. In my case, I removed the caliper first and hung it from a coat hanger run through the shock tower. This keeps the brake line and ABS sensor lead safe.
Now, I am sure you are wondering what the real difference is in the caliper mounts. They are virtually identical except for minor machining differences and a greater offset for the caliper.
And finally, the rotor can come off.

That takes care of disassembly.
the 3rd gen brakes to a second gen has been completed. I have been taking it easy on the brakes to bed them in, but they are much better than before!
Here's a little show and tell for you guys.
Okay, what I am starting off with is an '02 Dodge Ram 2500 4X4. I have already added 17" third gen wheels. I would think most wheels that fit a 3rd gen would work for this swap. You MUST have proper clearance for the caliper. That means 17" or larger. And my disclaimer, Dodge didn't build this swap for my truck. I did. Any problems, loss of income or life, mutilation or embarrassment from having small rotors is on you. I am only showing you what I did, not telling you what to do.
And another important note. Safety! It should be your first concern for every step you take. Wear safety glasses, support your rig the right way and NEVER, EVER take chances or get under ANY component that is in the air. Work in a safe and orderly manner using the right tools, the right torque and the right choices.
Also, In many of the steps below I have omitted the cleaning I do and take for granted. Get several cans of brake clean, a wire brush or two and a drain pan. I actually rinse off everything before starting, while breaking down and even during reassembly. The last steps I take are washing down the rotor before the pads go on and then again before the wheel goes on. Just habit.
The list of components required are:
2000-2002 2nd gen front axle with factory dual piston calipers. 2000-2002. I am told some late model '99's also, but not confirmed.
17" or larger wheels.
3rd gen rotors. '03+
3rd gen caliper adapter brackets. '03+ Dodge part# 5093268 AA and 5093270 AA
3rd gen pads. '03+
I sourced all my parts through Vulcan Performance Supply. I chose Powerslot rotors, factory adapters and performance Friction pads.
The only 2nd gen component that is reused is the caliper. It has a different banjo bolt thread size to the 3rd gen, but is otherwise identical. The brake line input, the bleeder location, puck diameter and placement and mounting pin placement are the same as the 2000-2002 models.
This will work on all 2 wheel drive and 4 wheel drive models. (2000-2002)
Here's what I am starting out with.
And to get the project going, remove the tire/ wheel.
Next, you will need to remove any of the star lock washers on the lug bolts, if you still have them on there. I have found that a small screwdriver used to pry up the individual "locks" works well and allows for reuse.
Next, remove the caliper, pads and mounting bracket. In my case, I removed the caliper first and hung it from a coat hanger run through the shock tower. This keeps the brake line and ABS sensor lead safe.
Now, I am sure you are wondering what the real difference is in the caliper mounts. They are virtually identical except for minor machining differences and a greater offset for the caliper.
And finally, the rotor can come off.
That takes care of disassembly.
Thread Starter
|
Diesel Bombers Sponsor
Joined: Dec 2007
Posts: 520
Likes: 62
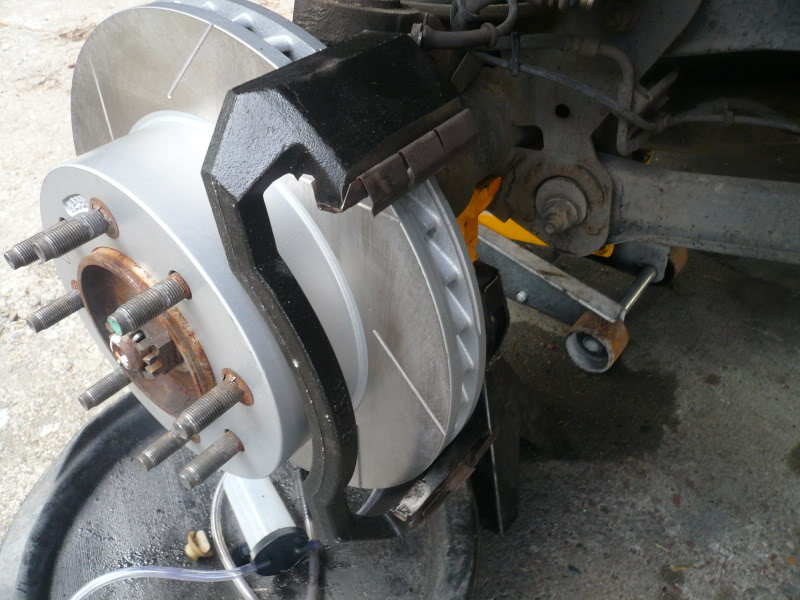
Now all you have to do is start reassembling everything.
So, start with the rotor. Drop in on the studs and replace the star washers if you choose to use them. I decided to reuse them.
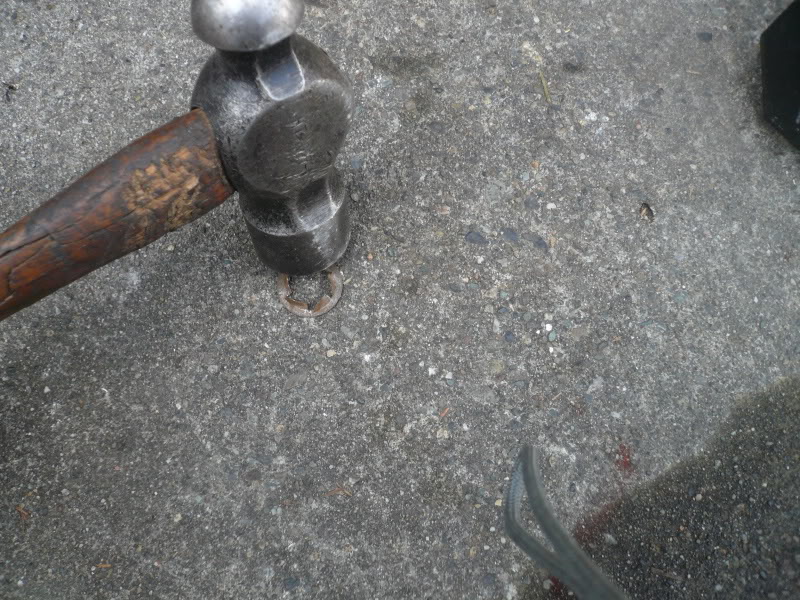
Here's an easy way to get the star washers to fit snug again.
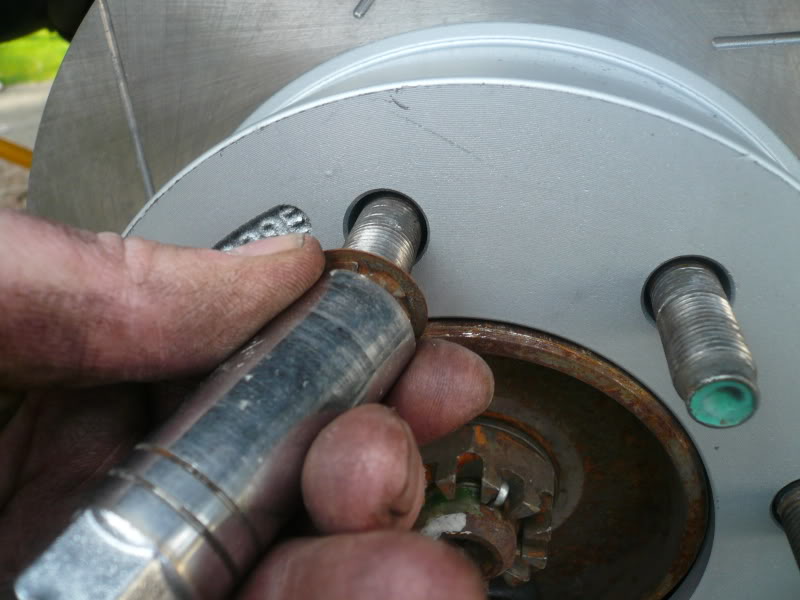
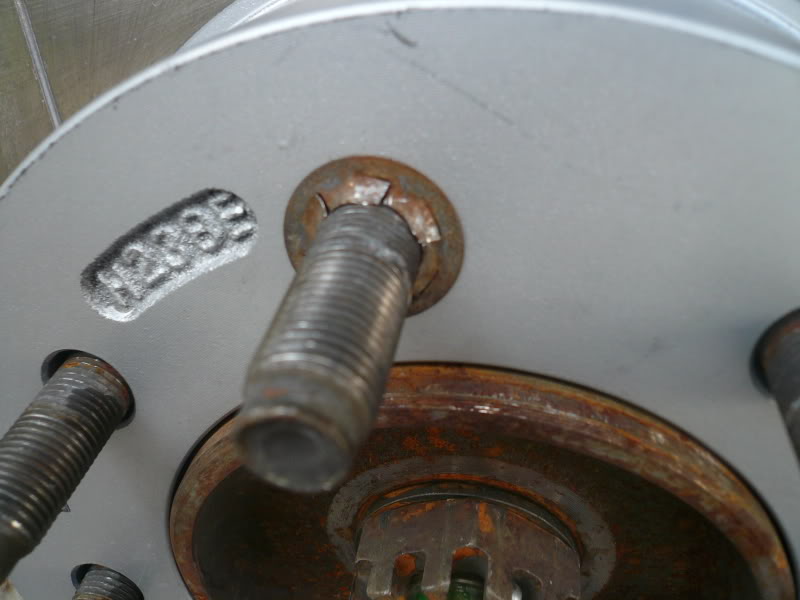
And reinstall the washer over the studs. I use a socket just slightly larger than the stud to drive them all the way flush. The wheel will most likely do this as well, I just wanted to get the rotor flat from the start.
Now that the rotor is on, we can install the new 3rd gen caliper mount adapter. I use a small dab of locktite on these threads as the factory did the same thing. Torque these bolts to the factory spec.
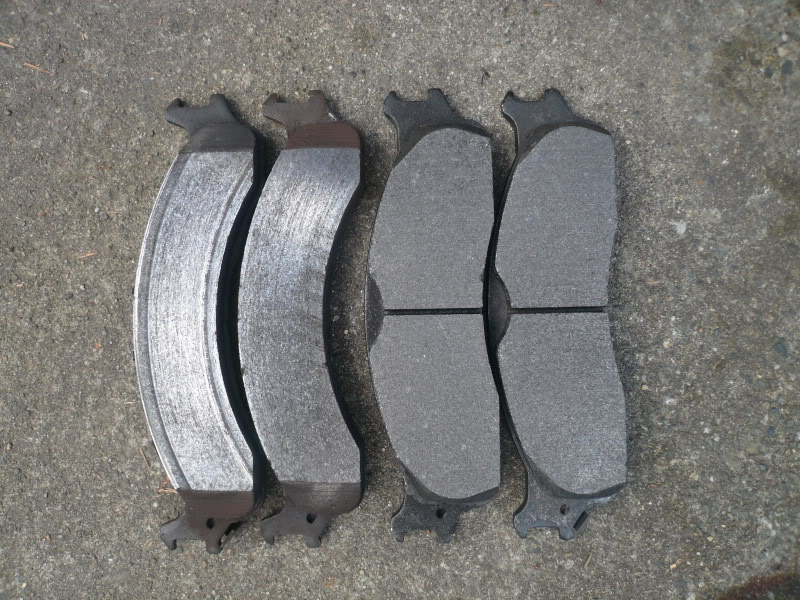
Next, the pads can get loaded in the caliper. Here's a shot of the difference between the 2nd gen pads and the 3rd gen pads.
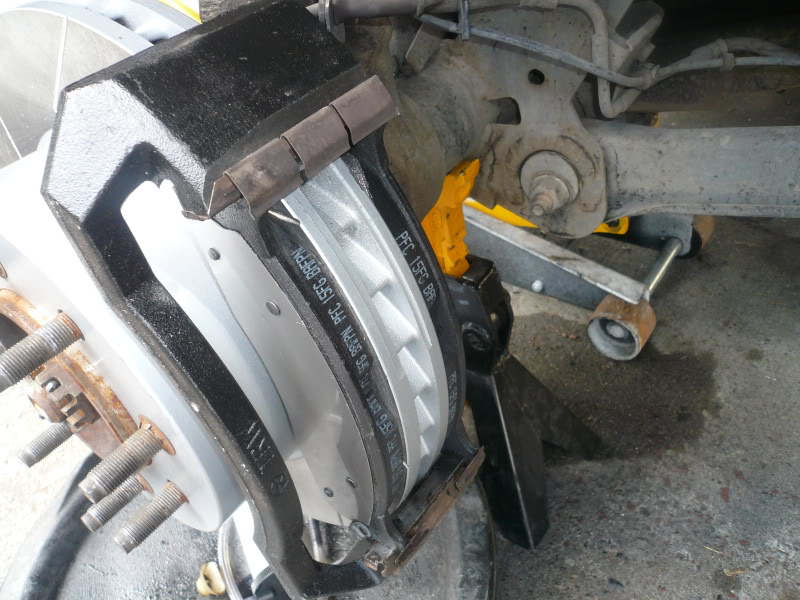
Now the caliper mounting hardware can be installed. I always put a little caliper slide grease on the stainless steel slides top and bottom. Being careful not to apply inboard to the rotor side. Also. I put a small dab on the caliper where it contacts these points. Don't forget to also put some on the caliper mounting pins before torquing to spec.
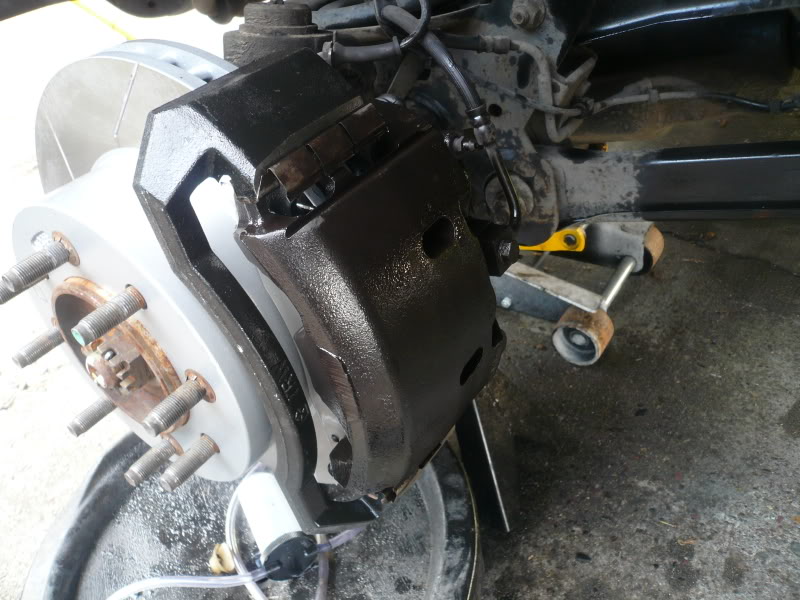
Now all you have to do is to remount the tire/ wheel and step on the brakes. I always bleed a small amount of fluid out of the caliper to rid the heat soaked stuff out. If you are replacing the calipers, obviously you will need to bleed them as well.
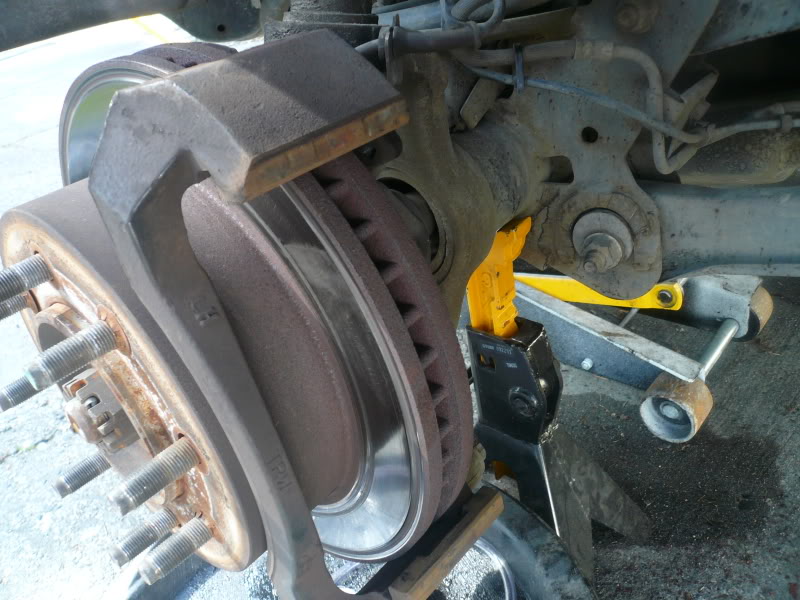
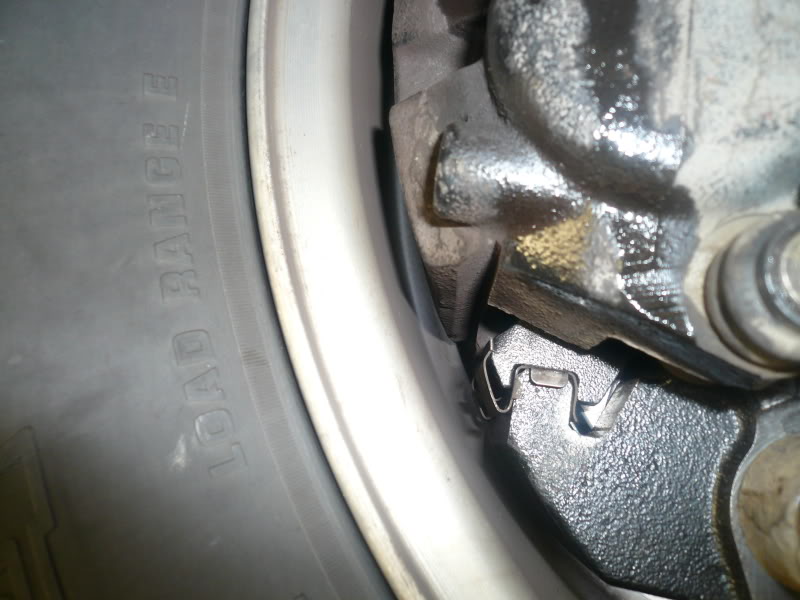
So how much clearance do you have? This is the best pic I could take under the truck.
Just a note.
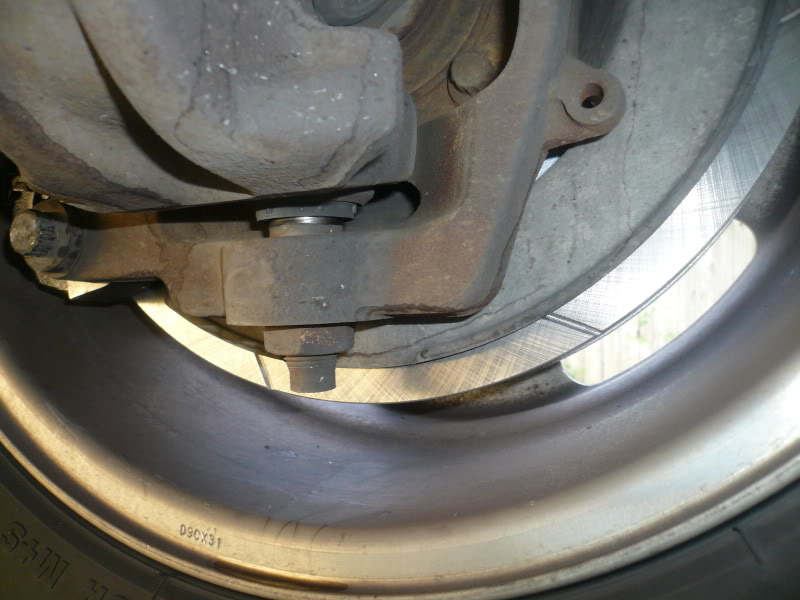
You can also add the 3rd gen dust shields. As I did not plan on pulling off the hub, I chose to wait until I did bearings. Here's what it will look like if you don't.
I hope this info helps some of my fellow BOMBers out!
So, start with the rotor. Drop in on the studs and replace the star washers if you choose to use them. I decided to reuse them.
Here's an easy way to get the star washers to fit snug again.
And reinstall the washer over the studs. I use a socket just slightly larger than the stud to drive them all the way flush. The wheel will most likely do this as well, I just wanted to get the rotor flat from the start.
Now that the rotor is on, we can install the new 3rd gen caliper mount adapter. I use a small dab of locktite on these threads as the factory did the same thing. Torque these bolts to the factory spec.
Next, the pads can get loaded in the caliper. Here's a shot of the difference between the 2nd gen pads and the 3rd gen pads.
Now the caliper mounting hardware can be installed. I always put a little caliper slide grease on the stainless steel slides top and bottom. Being careful not to apply inboard to the rotor side. Also. I put a small dab on the caliper where it contacts these points. Don't forget to also put some on the caliper mounting pins before torquing to spec.
Now all you have to do is to remount the tire/ wheel and step on the brakes. I always bleed a small amount of fluid out of the caliper to rid the heat soaked stuff out. If you are replacing the calipers, obviously you will need to bleed them as well.
So how much clearance do you have? This is the best pic I could take under the truck.
Just a note.
You can also add the 3rd gen dust shields. As I did not plan on pulling off the hub, I chose to wait until I did bearings. Here's what it will look like if you don't.
I hope this info helps some of my fellow BOMBers out!
Diesel Fan
Joined: Oct 2008
Posts: 42
Likes: 3
From: Brampton Ontario
Thanks , i just ordered all the parts and waiting for them now, i have a 2002 and with the 22.5 on them they sure burn up some brakes! the dust is thick on the back of the front wheels, i got the sp slotted with the holes, heres a part list
2 front rotors drilled and slotted F53-012 $284.60
2 rear rotors drilled and slotted F53-011 $299.5
2 front pads MD965 $86.99
2 rear pads MD702A $63.59
2 adapters 5080557ac $208 for 2 either front or back
2 dust shields $67.20 front only rear has none
2 adapters $5093258aa $92.80 for 2 either front or back
these are the new part numbers from dodge for the adapters
well ill let you know if i have any problems looking forward to stopping!
Thanks, fred
Diesel Fan
Joined: Oct 2008
Posts: 42
Likes: 3
From: Brampton Ontario
wrong part number# on the caliper adapters this is for a 1500 series 5080557ac for a 3500 series 5093268aa and 5093270aa for 3/4 and 1 ton truck please find your style and match your own part numbers as they vary with truck size!!!!!
Thanks
---AutoMerged DoublePost---
http://netself.com/gallery/main.php?...2_itemId=27446
this is a part list for you
Thanks
---AutoMerged DoublePost---
http://netself.com/gallery/main.php?...2_itemId=27446
this is a part list for you
Last edited by Feerless Fred; Dec 22, 2009 at 11:03 AM. Reason: Automerged Doublepost

Thread
Thread Starter
Forum
Replies
Last Post
CGwill
24 Valve 2nd Gen Dodge Cummins 98.5-02
0
Jan 26, 2015 02:10 AM
Cumminsfreak24
24 Valve 2nd Gen Dodge Cummins 98.5-02
0
Jan 21, 2015 09:10 AM
JustAnother_cummins_guy
Wanted To Buy (WTB) - Used
0
Oct 21, 2014 05:35 PM
myago92
1st Generation Dodge Cummins 89-93
3
Oct 17, 2014 08:50 AM


