
1999 Jeep Wrangler V2203 Build Overview


Thread Starter
|
Diesel Enthusiast
Joined: Apr 2012
Posts: 143
Likes: 10
I get a lot of questions about my Wrangler build, so I decided to start a build thread to provide a point of reference and hopefully help some folks out.
Jeep OEM Information
General Swap Overview Information
Oil PanSensors
ElectricalVacuum
Jeep OEM Information
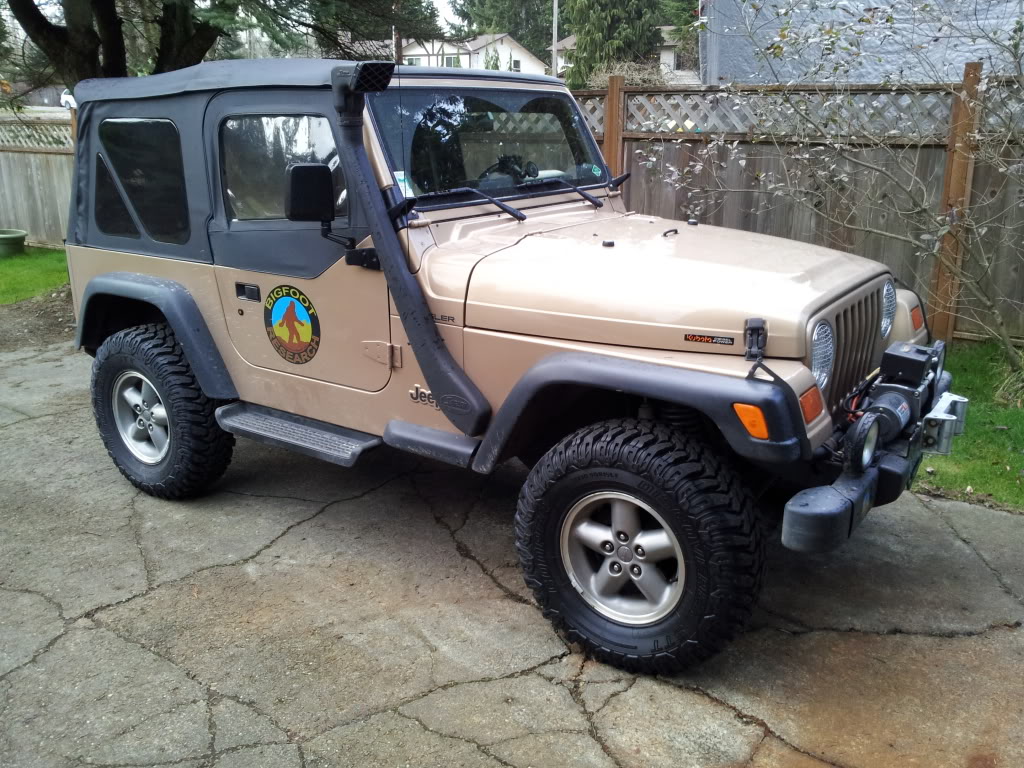
Year: 1999
Make: Jeep
Model: Wrangler
Submodel: Sport
Engine: 4.0 6-Cylinder
Transmission: 5-Speed Manual
Dana 44 rear end with limited slip differential
Color: Desert Sand Perl
Make: Jeep
Model: Wrangler
Submodel: Sport
Engine: 4.0 6-Cylinder
Transmission: 5-Speed Manual
Dana 44 rear end with limited slip differential
Color: Desert Sand Perl
General Swap Overview Information
Transmission Adapter
Oil System- Custom machined
- Fabricated to bolt to stock Jeep mounts
- Stock
- Stock
- Stock
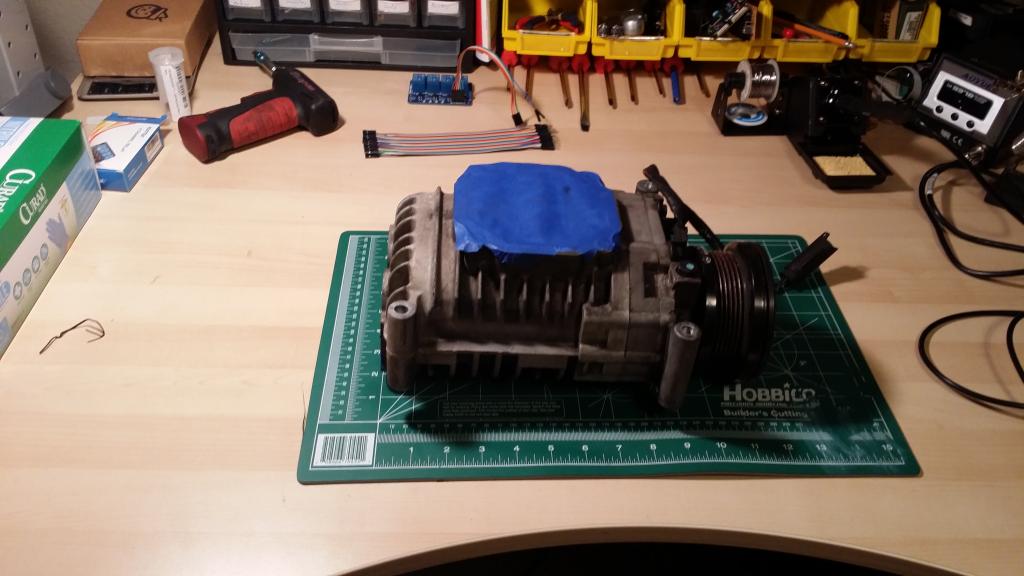
- 136A from Grand Cherokee with aftermarket v-belt pulley
- TRW electric pump from 2005 Volvo
- Hydroboost from Astro van
- TD04L-10K from Cummins B3.3
- AWIC Frozen Boost type 13
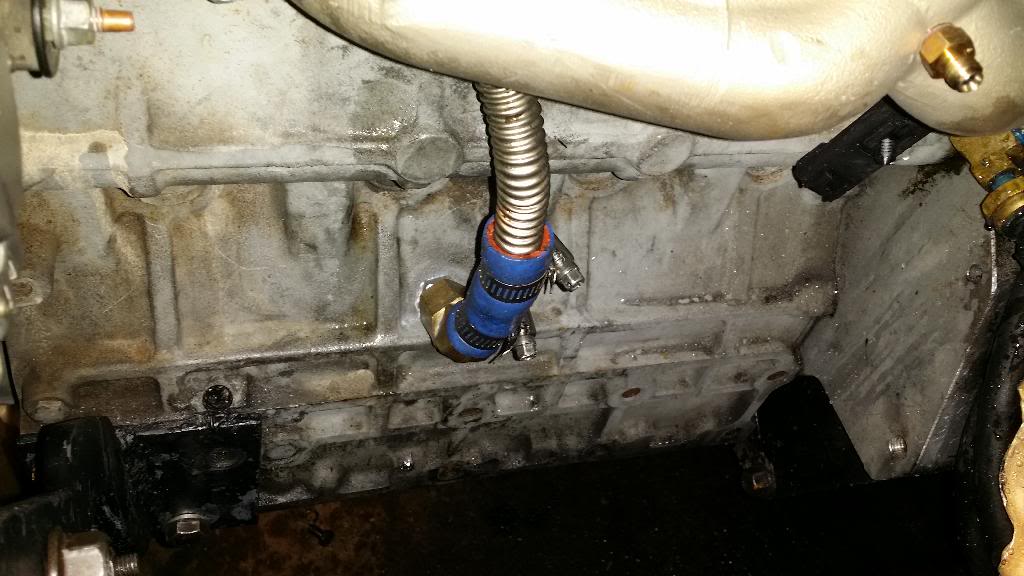
Oil Pan
- Factory Kubota Part #15434-0161-3
- Custom braided stainless steel -4AN to ⅛ NPT hose from North Sound Hose and Fitting
- Stock Jeep filter - NAPA 1085 or WIX 51085
- Requires factory Kubota threaded adapter Kubota Part # 1a021-3229-0
Jeep oil pressure
Adapter- Adapted tee�d from turbo oil feed port in block
- Jeep OEM installed in thermostat housing
- Exhaust manifold drilled and tapped for ⅛ NPT
- Intercooler radiator water temp
- Intake manifold drilled and tapped
- ⅛ NPT threads (11/32 drill bit) - Gauge Boost Sensor
- Cam sensor signal wire spliced into crank sensor signal wire.
- 1v signal required for cruise control operation. Does not need to be connected to throttle.
Transmission adapter plate
Cooling- 1.25� aluminum plate
- Plate to Engine
- Six socket head cap screws - 10mm x 1.25 - 40mm long
- Five socket head cap screws - 10mm x 1.25 - 35mm long
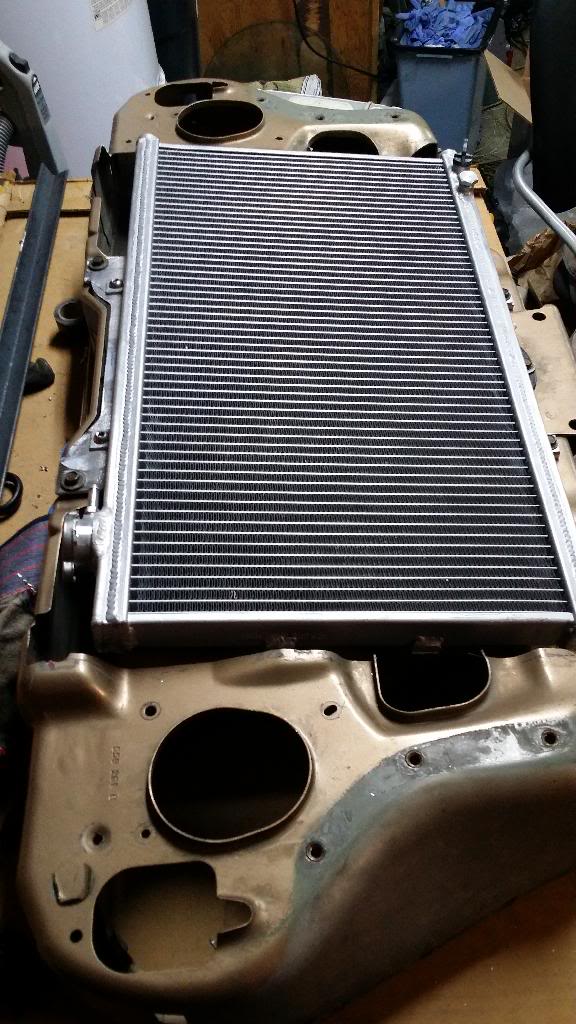
- Stock Radiator
- Radiator Inlet Upper 1.25� or 31.75mm
- Radiator Outlet Lower 1.5� or 38mm
- Kubota Outlet Upper 35mm
- Kubota Inlet Lower 34mm
- Frozen boost stainless steel flexible radiator hoses with silicone adapter couplers
- Heater core is pass-through.
- Bypass hose routed from water neck through heater core then to water pump.
- Jeep uses one ⅝ hose and one 11/16 hose. 11/16 hose is not readily available, but ⅝ hose fits both without any problems.
- Hoses adapted using Gates 268610 ⅝ to �� hose adapters
Electrical
Fan
Fuel System- NAPA 12� electric
- Black to ground on engine mount
- White spliced into starter signal wire
- Red connected to fuel pump wire from PDC
Main Filters
Supply Line
Brakes - Napa 3005 or Wix 33005
- Napa FIL4770 or Wix 24770 - same thing
- NAPA 3270 or WIX 33270
Supply Line
- Doubled original hard lines from tank to firewall.
- Dorman 800-084 5/16 steel tubing quick connect with ⅜ barb
- ⅜ fuel line from quick connect barb to pre filter
- NAPA 3270 or WIX 33270 pre-filter
- ⅜ fuel line from pre-filter to lift pump
- ⅜ fuel line from lift pump to main fuel filter
- ⅜ fuel line from main filter to IP
- Hydroboost booster from �99 Astro Van
- Adapter from Elliott at custompowerbrake.com
- Master Cylinder from �99 Astro Van
- Original Jeep flare nuts were metric m10 and m12 on 3/16 hard line
- Cut off original flare nuts, and used one original from the Astro MC that had a stock 3/16 line, and a 3/16 flare nut and adapter to the other larger MC port
For HVAC control and cruise control actuator
- Ford Superduty electric vacuum pump
Thread Starter
|
Diesel Enthusiast
Joined: Apr 2012
Posts: 143
Likes: 10
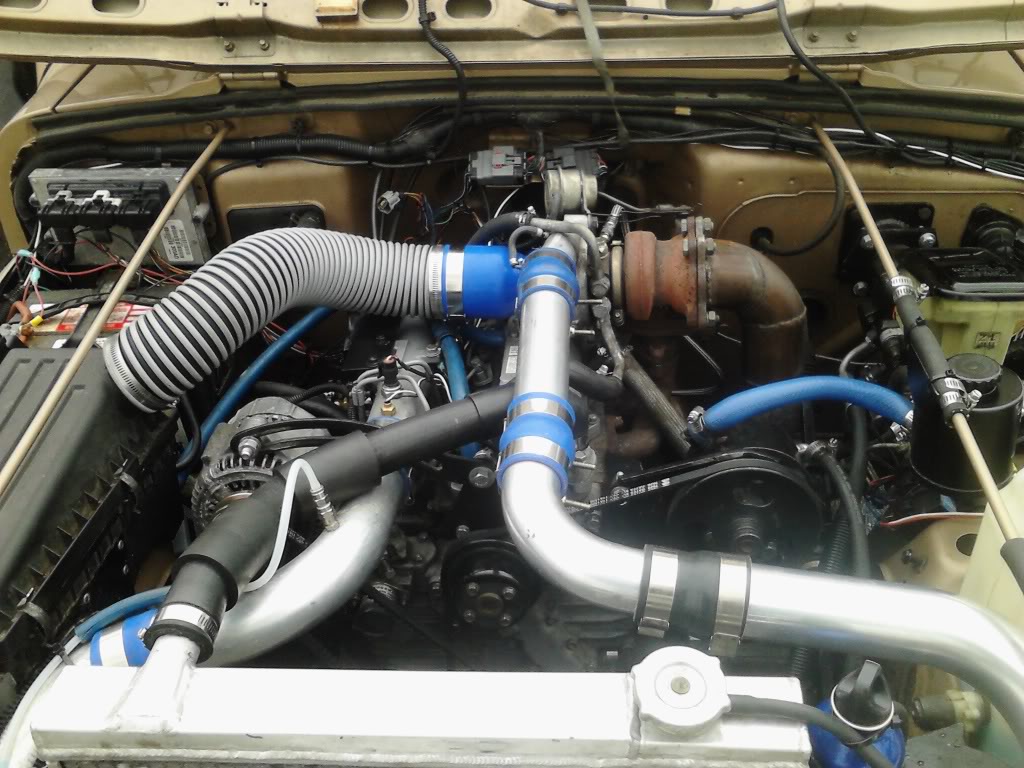
My original configuration was with a TD04L-13G turbo from an '04 WRX and a small FMIC.
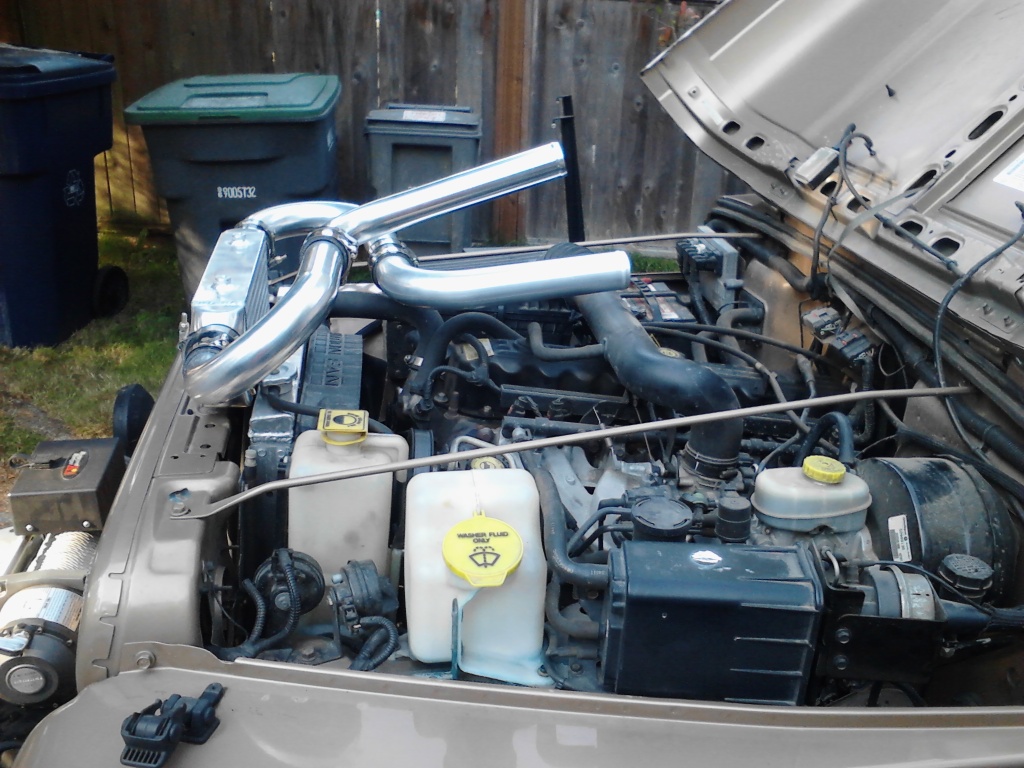
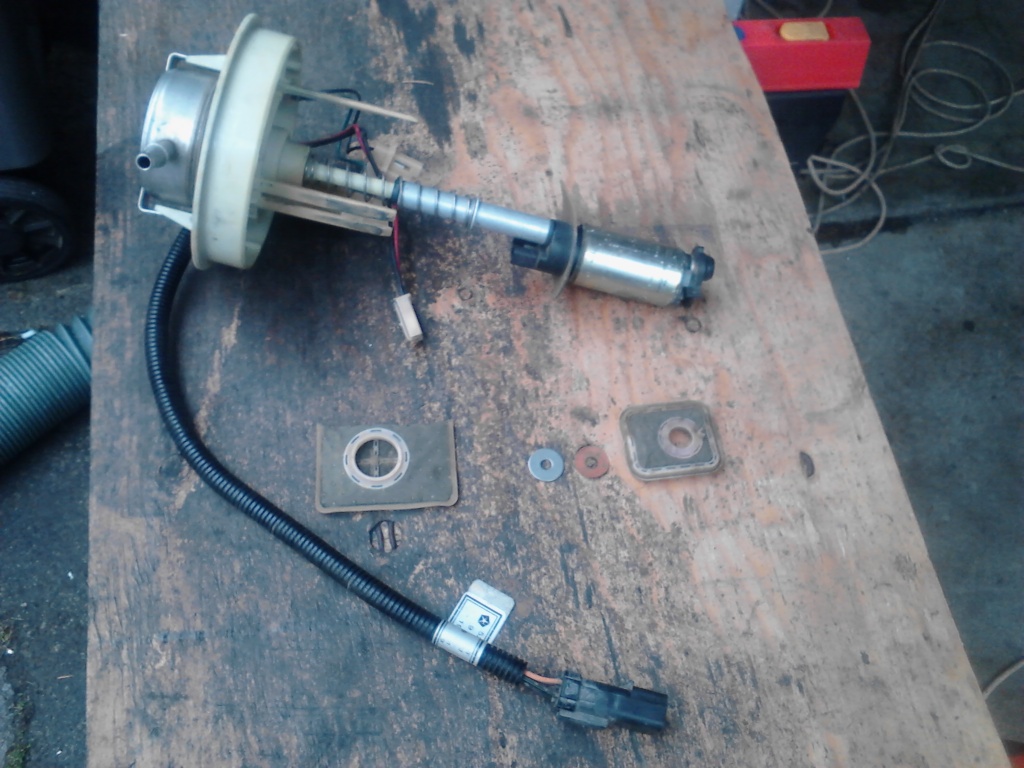
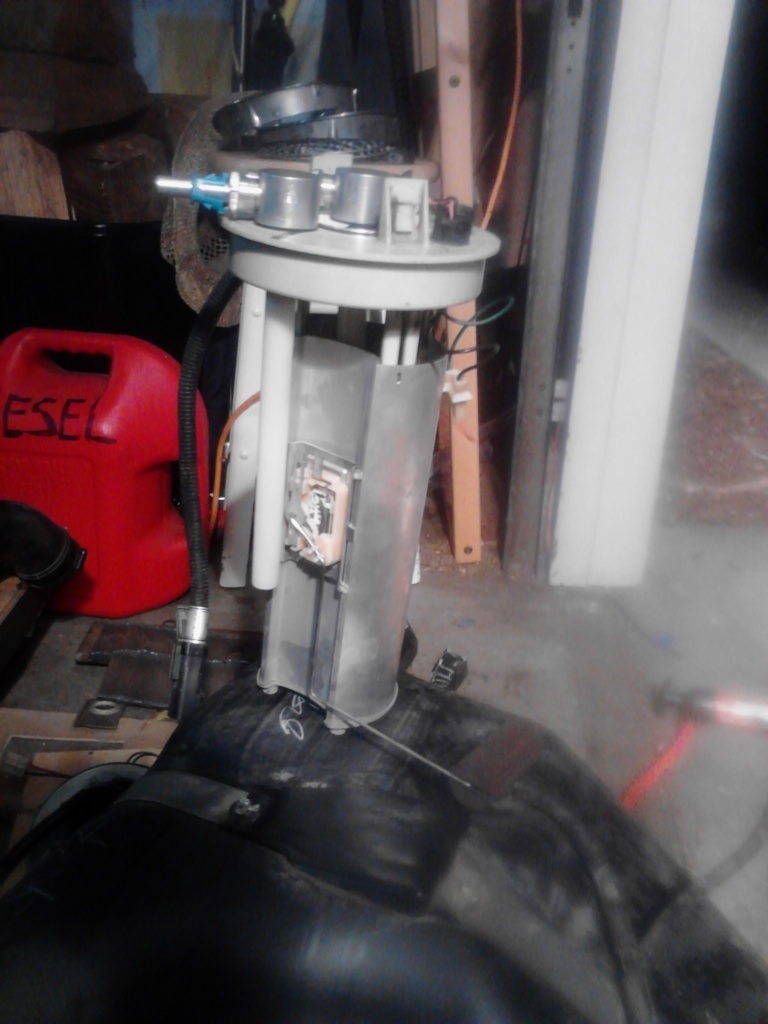
For the fuel system I removed the fuel pump and check valve, then installed Vulcan DrawStraws. They're pricey, and I used them mostly to save the time of having to do the research and piece something together myself. If I were to do it again I'd probably get stuff from the hardware store.
I also ran a full separate return line so the vent line would remain free, but knowing what I do now I'd just use a filter head with the return built in if I did it again.

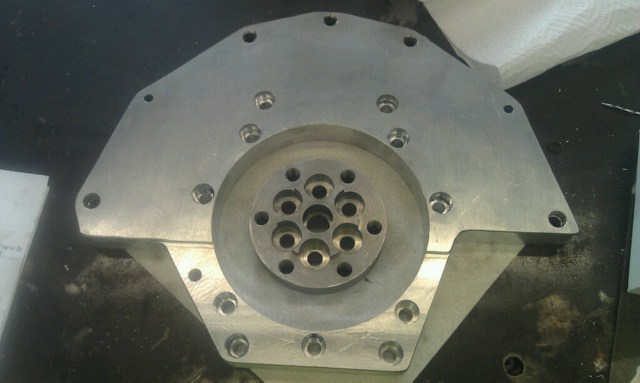
A friend machined the adapter plate and flywheel adapter for me. I used the stock Jeep flywheel, clutch, and AX-15 transmission, which allowed me to keep the original crank sensor to keep the PCM happy.
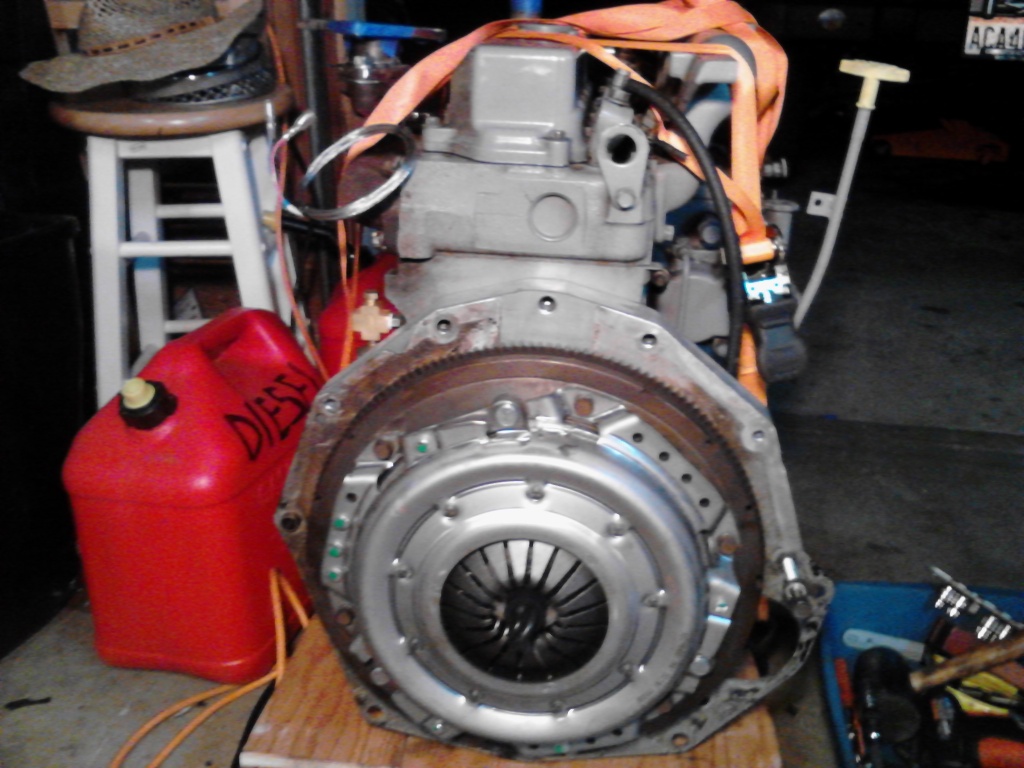
It's pretty amazing to me looking back through these and seeing how crude it was and everything I've changed.
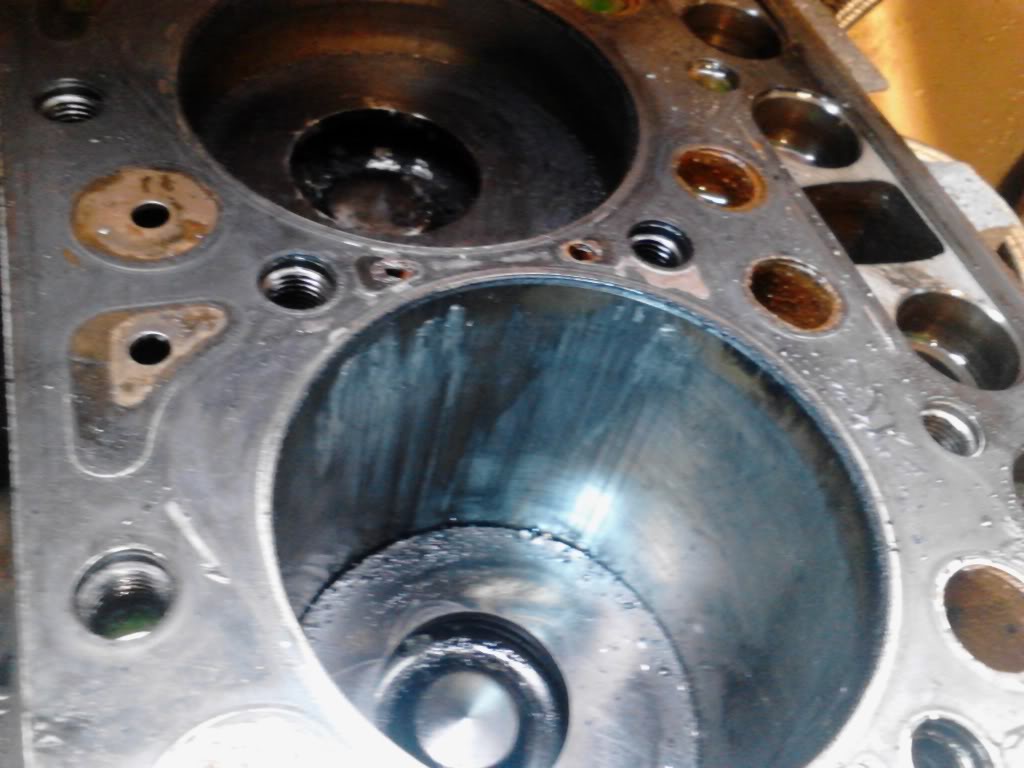
The WRX turbo ended up being too large. That combined with inexperience and lack of sleep spelled disaster on the first run. I had an exhaust appointment with a shop I've dealt with in the past 100 miles away on the other side of a mountain pass, I didn't get it completely buttoned up until after 2AM and was on the road before 5AM. It melted down right at the 50 mile mark while pulling the pass. I still think something on the reman was out of spec. I ran the exact same setup on another engine for thousands of miles after this without any catastrophic failure.
OUCH

More to come
For the fuel system I removed the fuel pump and check valve, then installed Vulcan DrawStraws. They're pricey, and I used them mostly to save the time of having to do the research and piece something together myself. If I were to do it again I'd probably get stuff from the hardware store.
I also ran a full separate return line so the vent line would remain free, but knowing what I do now I'd just use a filter head with the return built in if I did it again.
A friend machined the adapter plate and flywheel adapter for me. I used the stock Jeep flywheel, clutch, and AX-15 transmission, which allowed me to keep the original crank sensor to keep the PCM happy.
It's pretty amazing to me looking back through these and seeing how crude it was and everything I've changed.
The WRX turbo ended up being too large. That combined with inexperience and lack of sleep spelled disaster on the first run. I had an exhaust appointment with a shop I've dealt with in the past 100 miles away on the other side of a mountain pass, I didn't get it completely buttoned up until after 2AM and was on the road before 5AM. It melted down right at the 50 mile mark while pulling the pass. I still think something on the reman was out of spec. I ran the exact same setup on another engine for thousands of miles after this without any catastrophic failure.
OUCH
More to come
Thread Starter
|
Diesel Enthusiast
Joined: Apr 2012
Posts: 143
Likes: 10
Part II
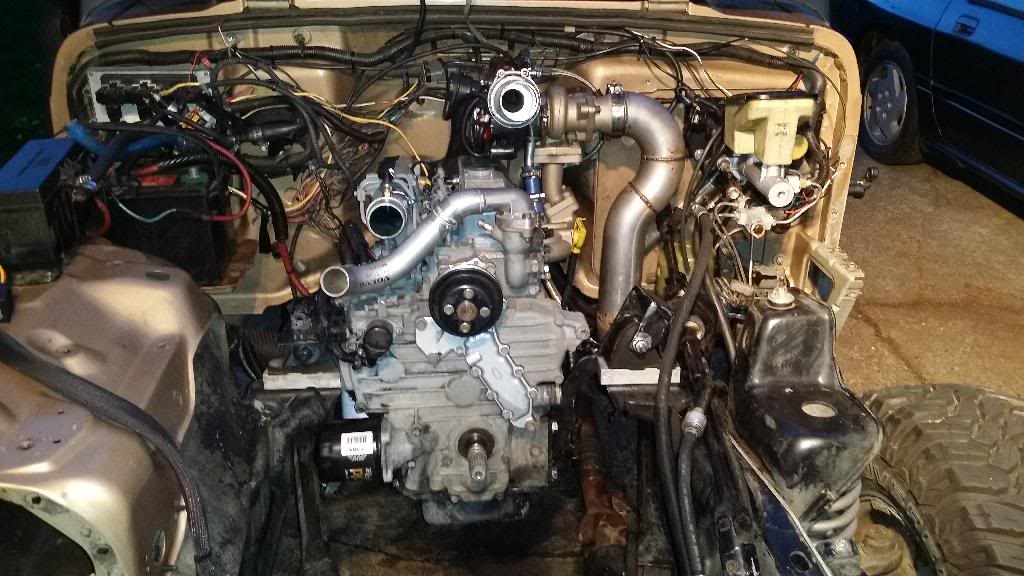
I picked up a nice lower hours engine from Rangmar and made a few refinements to the configuration as I got it buttoned back up with the new engine.
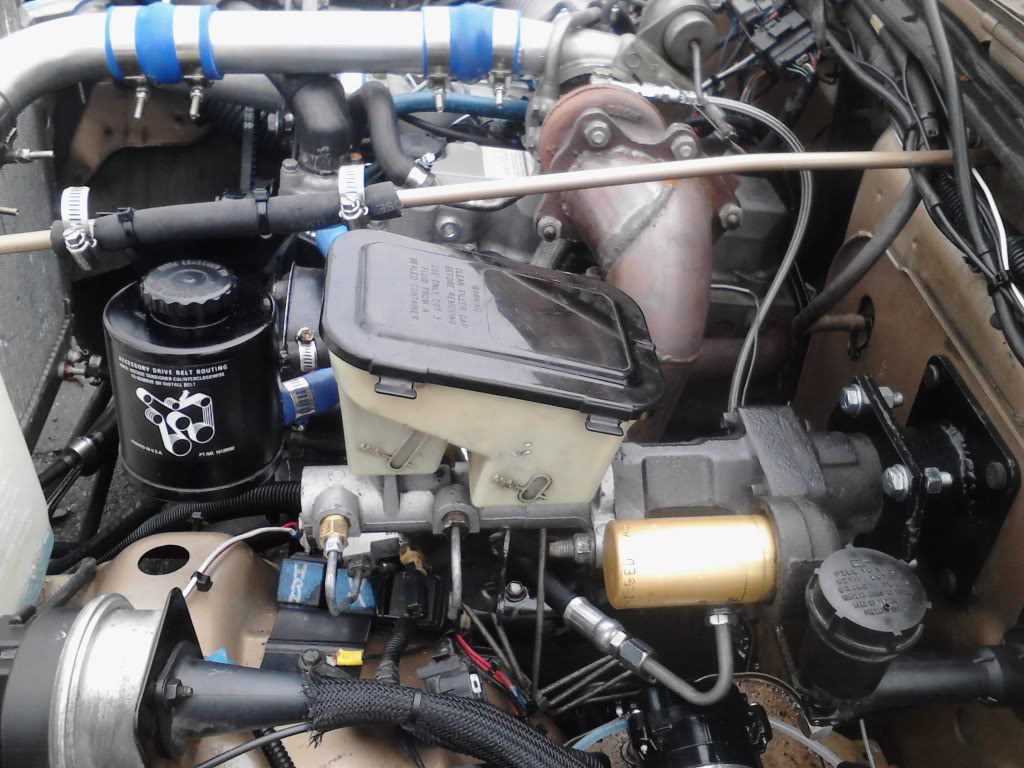
The after a while I got tired of the belt driven vacuum pump for the power brakes, which had issues shaking the bracket to pieces, so I converted to Hydroboost.
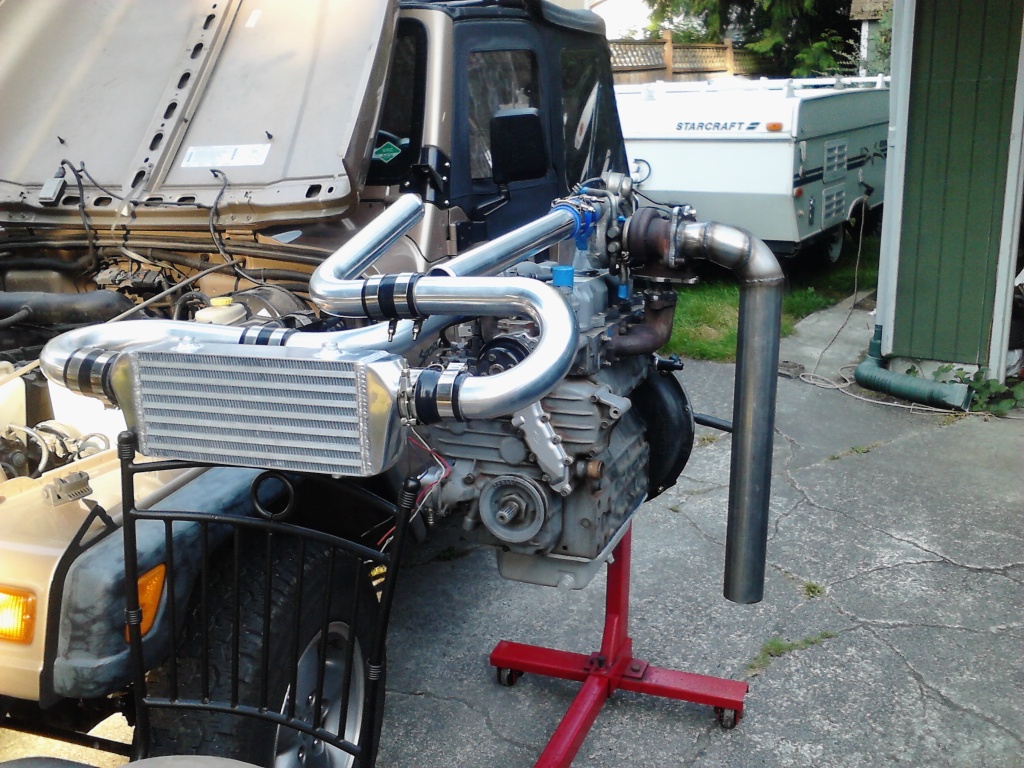
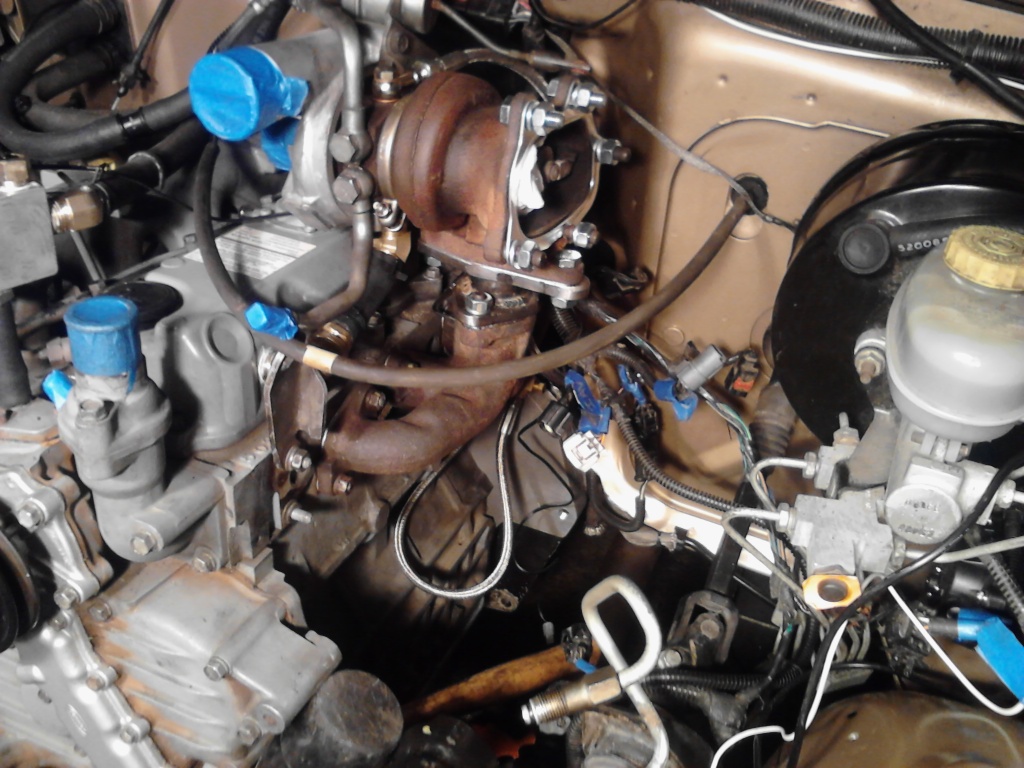
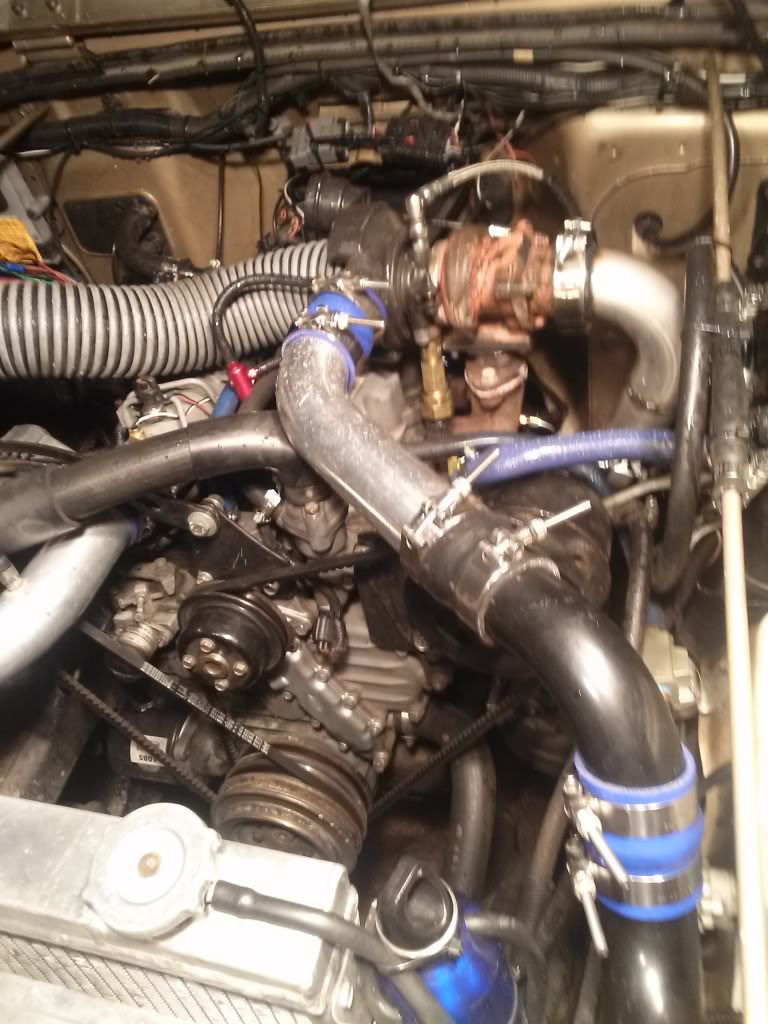
I finally decided that I wanted a turbo that was more efficient at lower RPM, the WRX turbo would build boost under 2000RPM, but wasn't really happy until it was over 2500. Being a masochist, I decided to try a compound turbo setup with a TD03-08 from a Volvo twin turbo as the small turbo, and the WRX turbo as the large one.
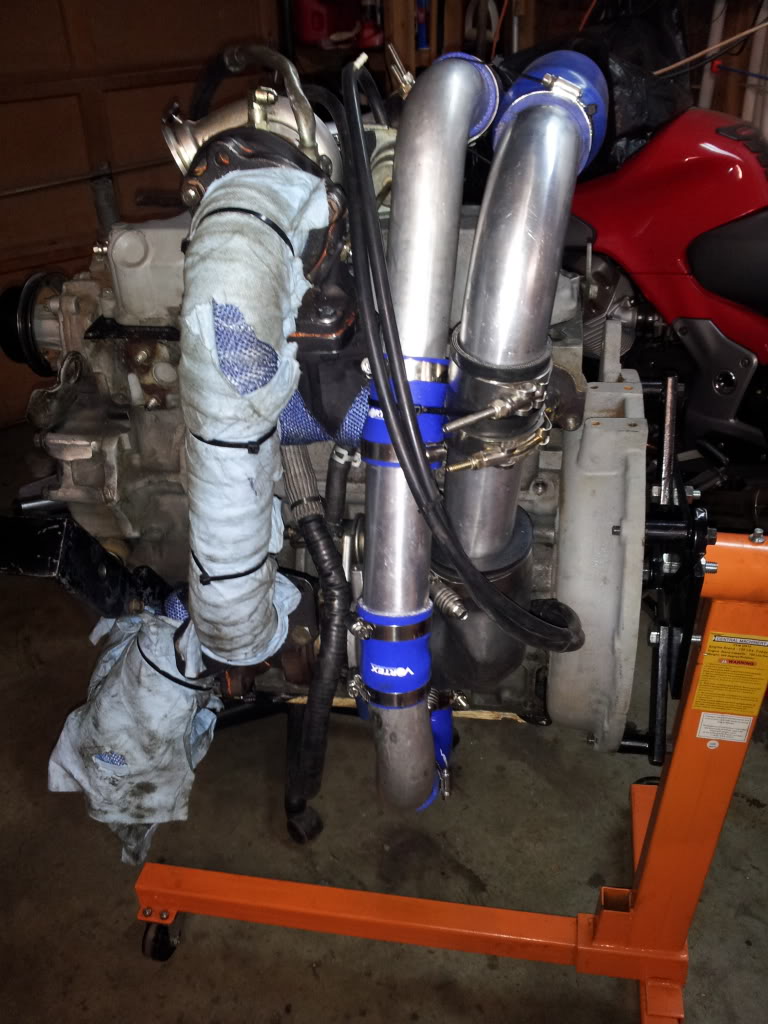
The twin setup was definitely not ideal. It built about 6PSI around 1300RPM, but wouldn't build any more than that before 2000RPM when the big turbo started to build boost. I saw up to 30PSI with this setup, but I also saw a lot of blow-by and not a lot more power, making me think that there was likely a lot of drive pressure.
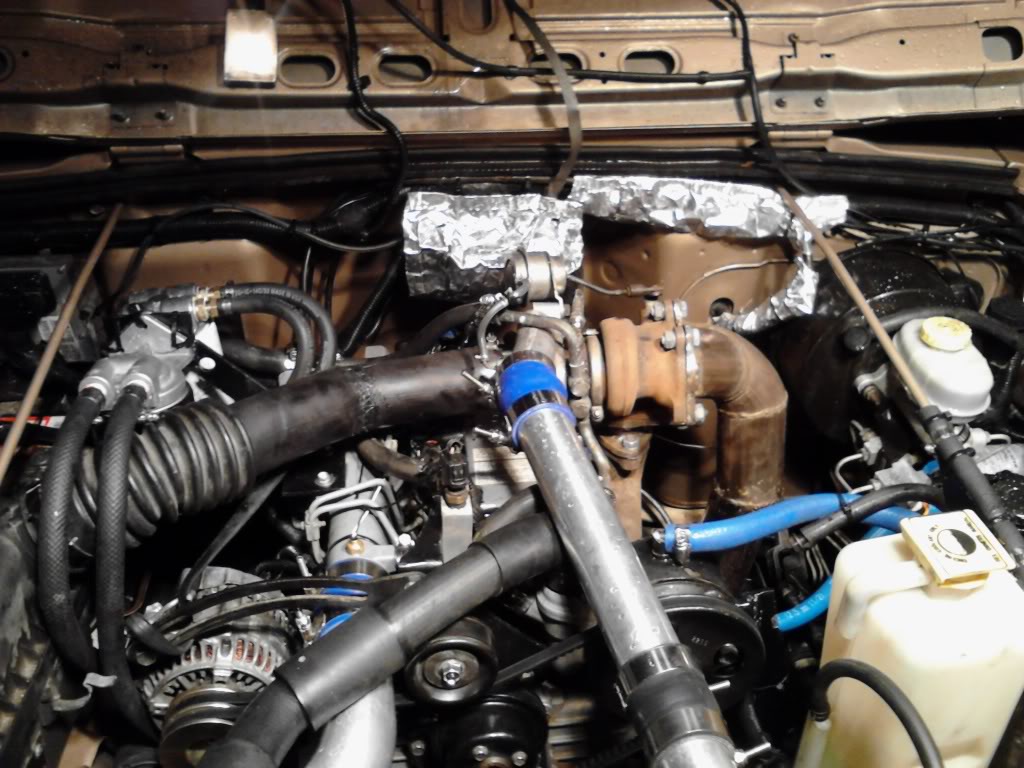
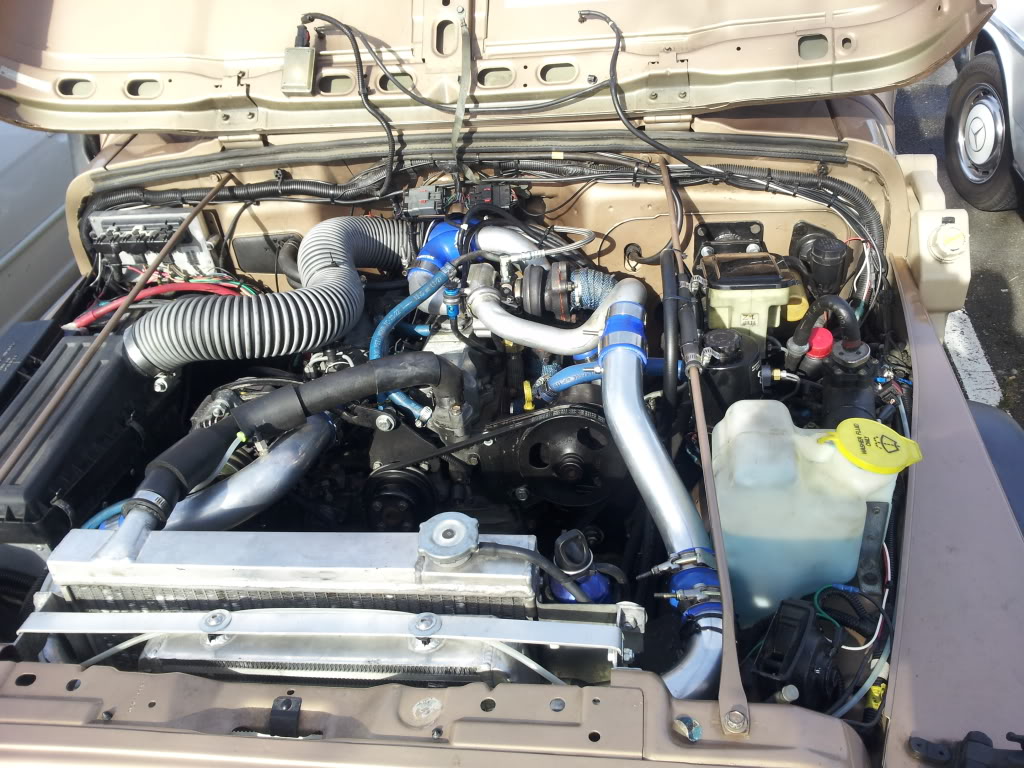
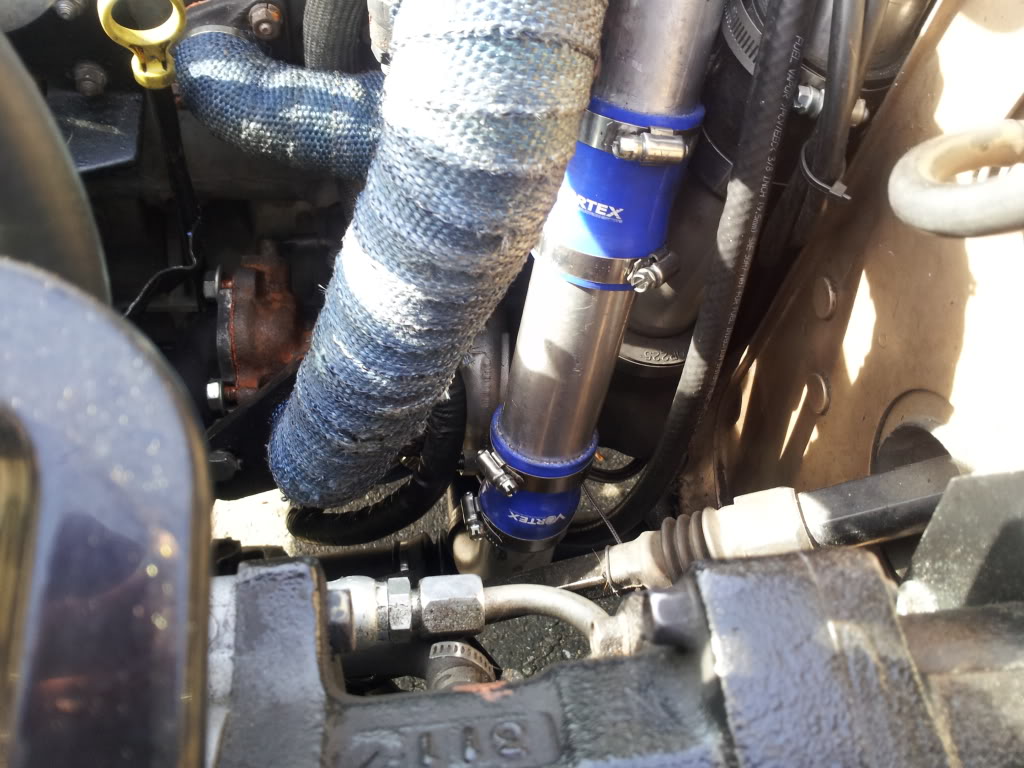
About this time FTE started teasing with his B3.3 turbo, so the hunt was on. I eventually found one, and it worked great, but I started having problems keeping the plumbing together, and it also became clear that the little FMIC wasn't going to keep up with the heat this thing throws out at higher boost levels.
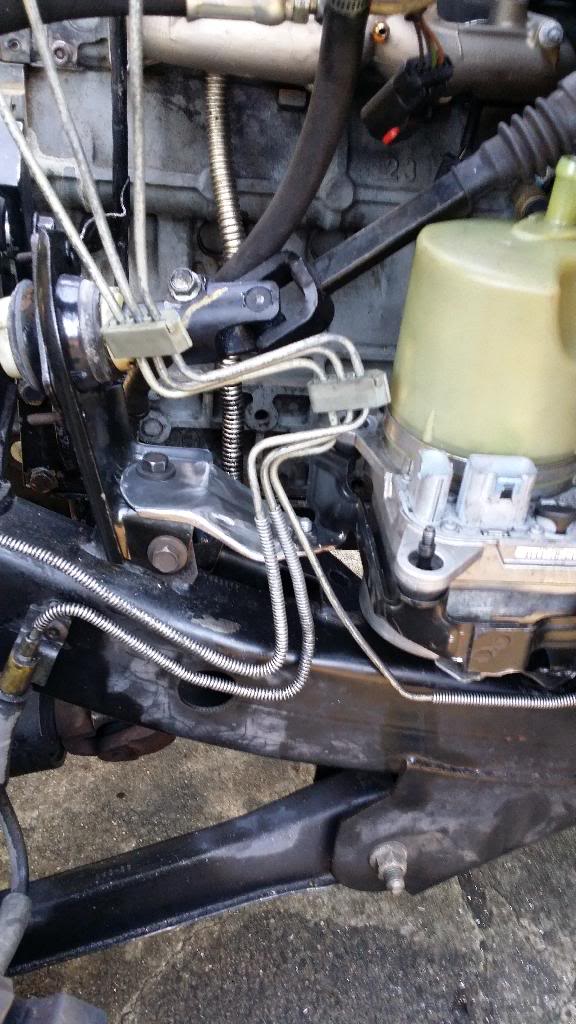
I was also having trouble with power steering line failure at the hard line on the pump end. After being stranded several times by this, I did what any reasonable person would do, and tore it completely apart again.
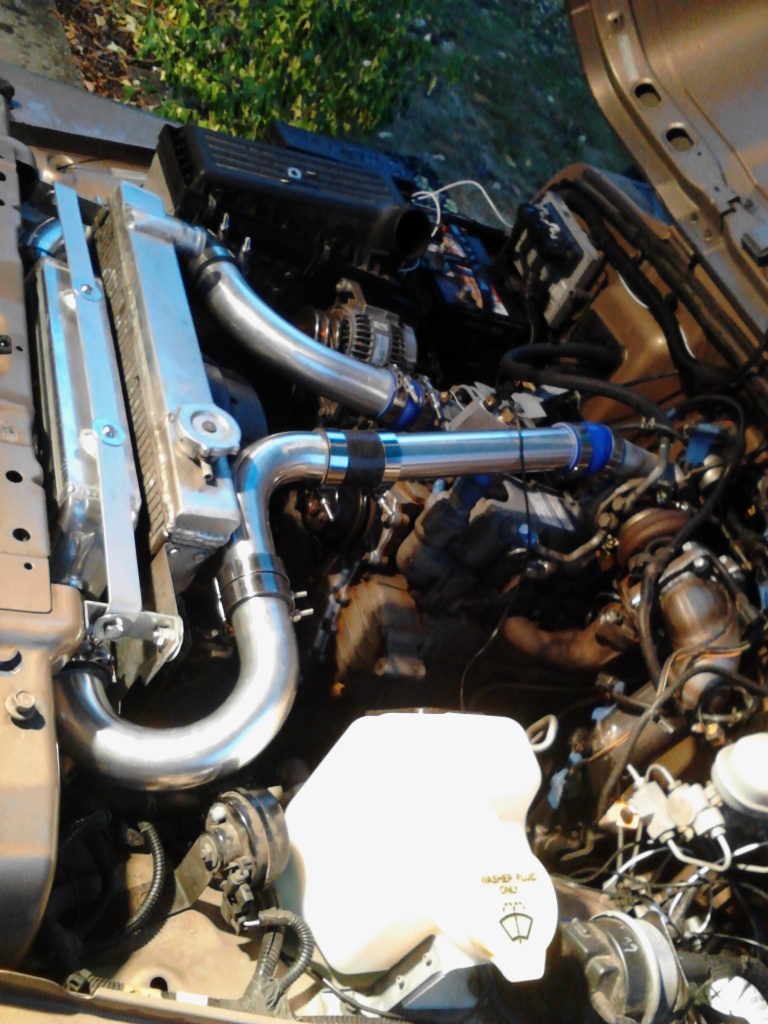
This time it got a new air/water intercooler with the biggest heat exchanger I could find in front of the radiator. Ever since the initial build it's had issues with leaks at the dipstick, oil drain, and coolant hoses, so I completely redid all of this with the factory Kubota dipstick replacing my hokey junk yard thing, the drain hose moved from the oil pan to a hole in the block, and all new coolant hoses. I made a thermostat housing from some aluminum plate and one of the Volvo boost tubes, and had a buddy TIG weld it up for me to clear the intake.
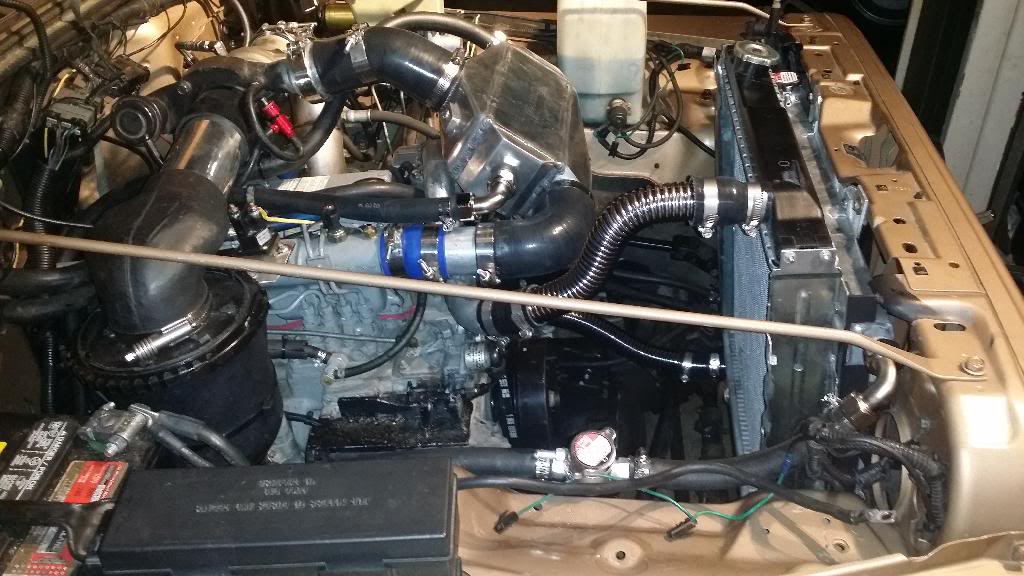
I went with a TRW electric power steering pump from a Volvo to separate the power steering from the engine and avoid cracking lines.
After a few teething problems with my turbo adapter cracking, it seems to be working pretty well now. I'm apparently not capable of leaving things alone though...
I picked up a nice lower hours engine from Rangmar and made a few refinements to the configuration as I got it buttoned back up with the new engine.
The after a while I got tired of the belt driven vacuum pump for the power brakes, which had issues shaking the bracket to pieces, so I converted to Hydroboost.
I finally decided that I wanted a turbo that was more efficient at lower RPM, the WRX turbo would build boost under 2000RPM, but wasn't really happy until it was over 2500. Being a masochist, I decided to try a compound turbo setup with a TD03-08 from a Volvo twin turbo as the small turbo, and the WRX turbo as the large one.
The twin setup was definitely not ideal. It built about 6PSI around 1300RPM, but wouldn't build any more than that before 2000RPM when the big turbo started to build boost. I saw up to 30PSI with this setup, but I also saw a lot of blow-by and not a lot more power, making me think that there was likely a lot of drive pressure.
About this time FTE started teasing with his B3.3 turbo, so the hunt was on. I eventually found one, and it worked great, but I started having problems keeping the plumbing together, and it also became clear that the little FMIC wasn't going to keep up with the heat this thing throws out at higher boost levels.
I was also having trouble with power steering line failure at the hard line on the pump end. After being stranded several times by this, I did what any reasonable person would do, and tore it completely apart again.
This time it got a new air/water intercooler with the biggest heat exchanger I could find in front of the radiator. Ever since the initial build it's had issues with leaks at the dipstick, oil drain, and coolant hoses, so I completely redid all of this with the factory Kubota dipstick replacing my hokey junk yard thing, the drain hose moved from the oil pan to a hole in the block, and all new coolant hoses. I made a thermostat housing from some aluminum plate and one of the Volvo boost tubes, and had a buddy TIG weld it up for me to clear the intake.
I went with a TRW electric power steering pump from a Volvo to separate the power steering from the engine and avoid cracking lines.
After a few teething problems with my turbo adapter cracking, it seems to be working pretty well now. I'm apparently not capable of leaving things alone though...

Thread Starter
|
Diesel Enthusiast
Joined: Apr 2012
Posts: 143
Likes: 10
Haha, ok ok!
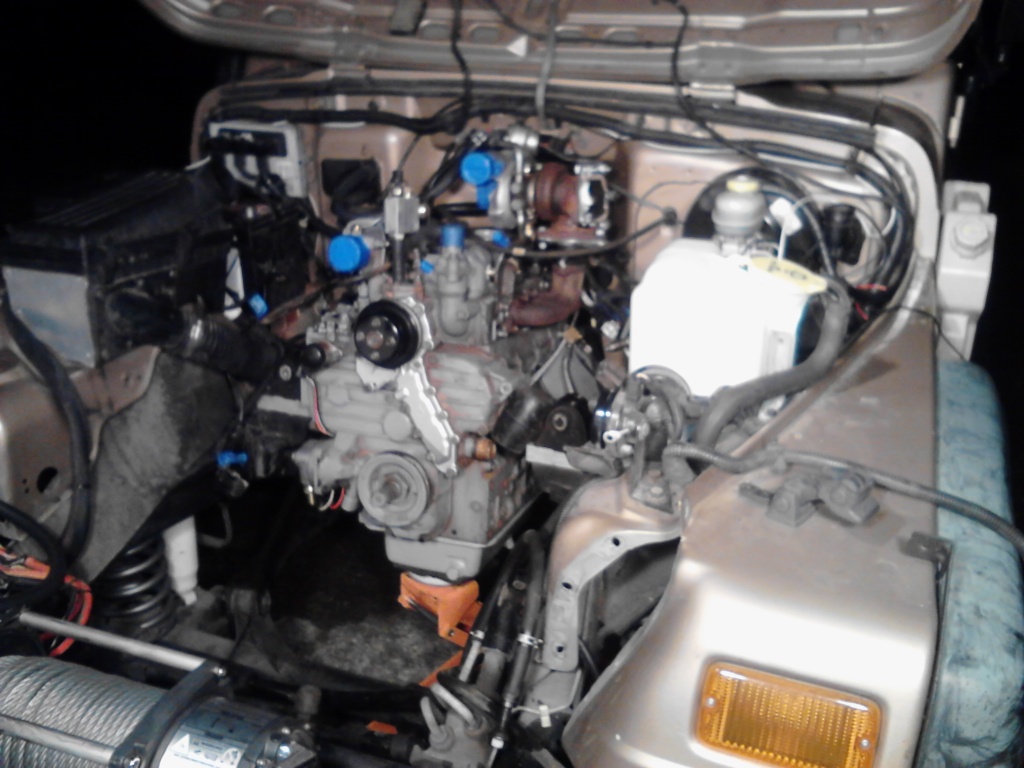
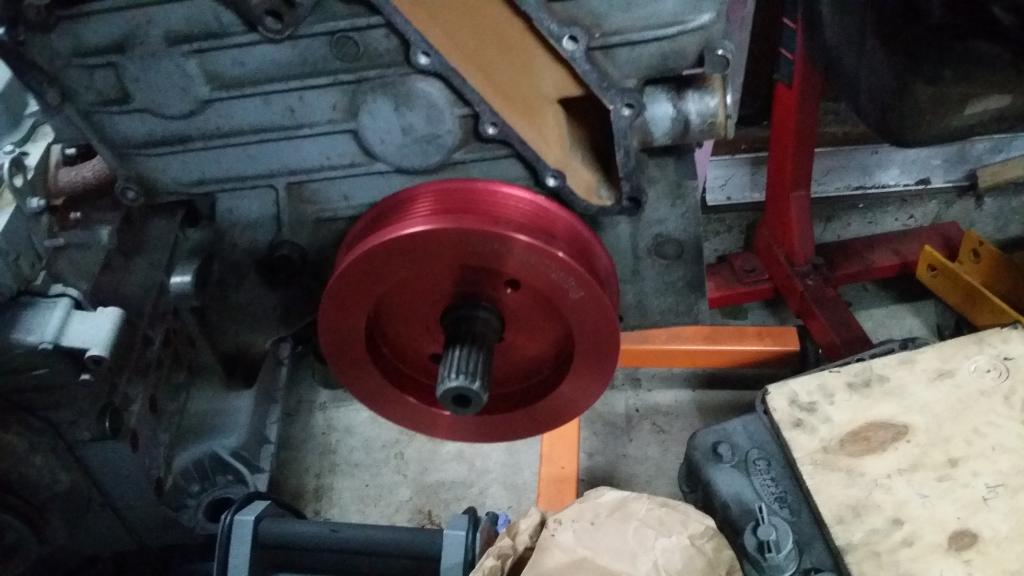
After some research, I figured out the crank snout on the Toyota 1GR-FE 4.0 V6 as found in the 2nd generation Tacoma, FJ Cruiser, etc has the same diameter as the Kubota's. I lucked out and found a nice aftermarket aluminum pulley used on ebay for $40, so I ordered it to test.
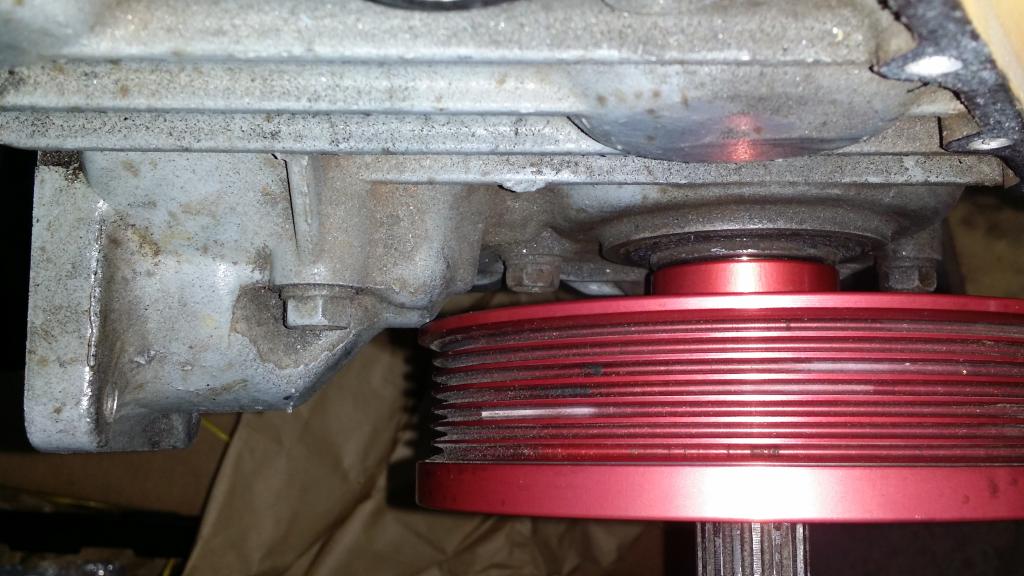
It's definitely a snug fit, I had to use some light persuasion with the rubber mallet to get it on, and a puller to get it off, but it definitely fits. It's just a hair shy of seating completely, and the keyway is a little narrower than the Kubota key, but those are nothing that a couple licks with a file won't easily solve.
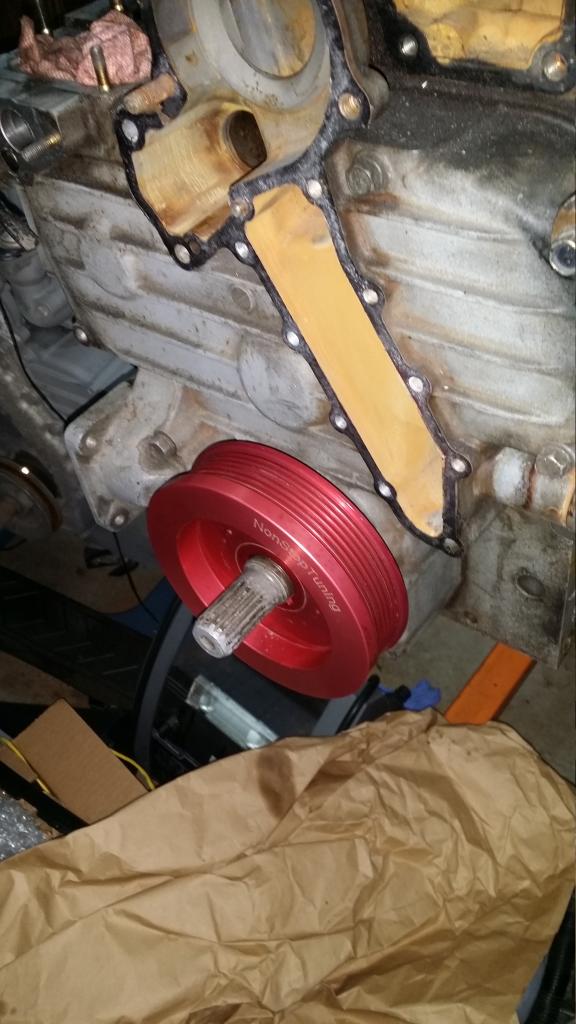
This picture shows where it contacts the cover and how close it is to seating. Very little material will need to be removed from the cover for clearance to seat completely.
After some research, I figured out the crank snout on the Toyota 1GR-FE 4.0 V6 as found in the 2nd generation Tacoma, FJ Cruiser, etc has the same diameter as the Kubota's.
I lucked out and found a nice aftermarket aluminum pulley used on ebay for $40, so I ordered it to test.It's definitely a snug fit, I had to use some light persuasion with the rubber mallet to get it on, and a puller to get it off, but it definitely fits. It's just a hair shy of seating completely, and the keyway is a little narrower than the Kubota key, but those are nothing that a couple licks with a file won't easily solve.
This picture shows where it contacts the cover and how close it is to seating. Very little material will need to be removed from the cover for clearance to seat completely.


Thread Starter
|
Diesel Enthusiast
Joined: Apr 2012
Posts: 143
Likes: 10
Thought I'd post an update. I took the Jeep on a 1400 mile round trip drive to Northern California and back a couple weeks ago, and it performed flawlessly. Freeway mileage was 27, the same as always, for the trip down. It did that leg on one tank, fueling up to begin with in Everett, WA, with the fuel light coming on right as I pulled into the gas station in Yreka, CA. I think it was something like 530 miles off the top of my head.
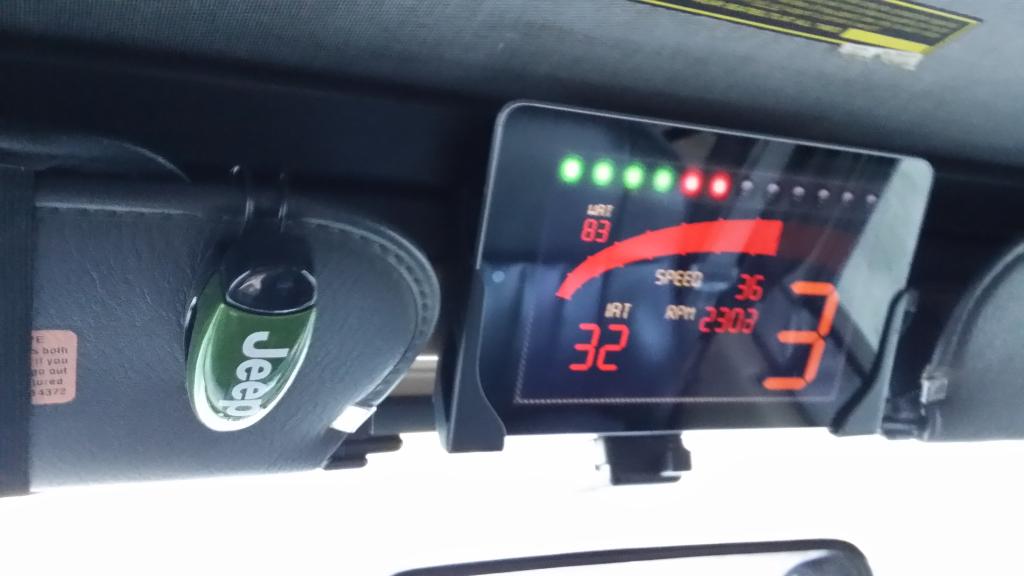
Before the trip I had decided that I didn't want to rely on my phone for the Torque Pro app so I could keep track of intake air temp, and a few other things that are nice to see. I recently replaced my old Nexus 7 tablet, so I loaded a lightweight ROM onto it set to boot directly into Torque, and made a mount. I also mounted a Mobius Action Camera (seen below the tablet) as a 'dash cam'. It runs continuously with ignition power, and makes 5 minute hd video files with a slight overlap, overwriting the oldest file when the card gets full.
My parents came along on the trip driving their '00 TJ 4.0 auto, and fuel was always a concern. At one point we had about an hour drive to the point where we were getting off the highway followed by somewhere around 50 miles of back country roads. It was a bit of a nail biter getting to a town with gas before they ran out once we got back on the highway, but my gauge had just dropped down to the full mark IIRC.
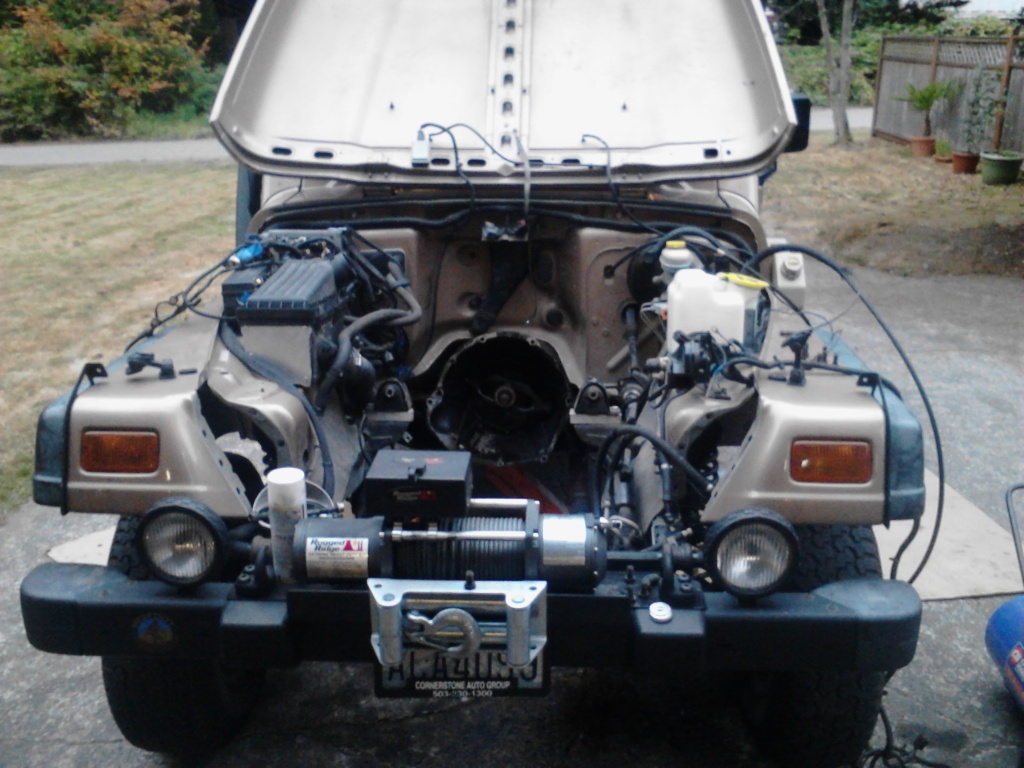
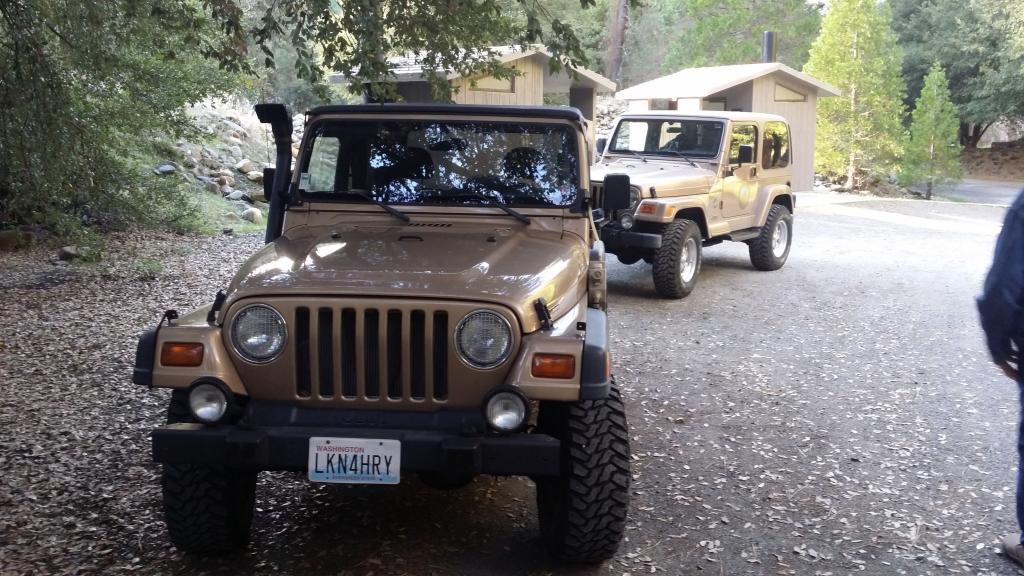
Here are the two Jeeps. In case you can't tell, mine is in front. I had an issue with my winch a day before leaving, so I removed it for the trip. I liked the way it drove without it so much more that I may just leave it off and figure out a different recovery option.
For the way back up I took the tires up to maximum pressure and it made a huge difference in power at speed. It pulled all of the passes in Southern Oregon at 65 or 70 with power to spare. I wasn't able to get an accurate mileage for that leg of the trip though, because we ran into a massive windstorm in central Oregon that I fought all the way home. That made for an exhausting 15 hours of driving! I was about 1/4 tank below where it would usually be for the distance when I got home late on the 11th, but it was actually catching up during the remainder of the tank commuting between then and when I filled it on Sunday 11/23. End mileage for that tank was 25.8MPG.
Here's a picture I took of the tree debris from the windstorm at a rest area just south of Portland. It was mostly headwind with some strong side gusts thrown in to keep me on my toes.
Before the trip I had decided that I didn't want to rely on my phone for the Torque Pro app so I could keep track of intake air temp, and a few other things that are nice to see. I recently replaced my old Nexus 7 tablet, so I loaded a lightweight ROM onto it set to boot directly into Torque, and made a mount. I also mounted a Mobius Action Camera (seen below the tablet) as a 'dash cam'. It runs continuously with ignition power, and makes 5 minute hd video files with a slight overlap, overwriting the oldest file when the card gets full.
My parents came along on the trip driving their '00 TJ 4.0 auto, and fuel was always a concern. At one point we had about an hour drive to the point where we were getting off the highway followed by somewhere around 50 miles of back country roads. It was a bit of a nail biter getting to a town with gas before they ran out once we got back on the highway, but my gauge had just dropped down to the full mark IIRC.
Here are the two Jeeps. In case you can't tell, mine is in front. I had an issue with my winch a day before leaving, so I removed it for the trip. I liked the way it drove without it so much more that I may just leave it off and figure out a different recovery option.
For the way back up I took the tires up to maximum pressure and it made a huge difference in power at speed. It pulled all of the passes in Southern Oregon at 65 or 70 with power to spare. I wasn't able to get an accurate mileage for that leg of the trip though, because we ran into a massive windstorm in central Oregon that I fought all the way home. That made for an exhausting 15 hours of driving! I was about 1/4 tank below where it would usually be for the distance when I got home late on the 11th, but it was actually catching up during the remainder of the tank commuting between then and when I filled it on Sunday 11/23. End mileage for that tank was 25.8MPG.
Here's a picture I took of the tree debris from the windstorm at a rest area just south of Portland. It was mostly headwind with some strong side gusts thrown in to keep me on my toes.

Diesel Enthusiast
Joined: Apr 2013
Posts: 195
Likes: 28
From: Tracy Ca
Haha, ok ok!
After some research, I figured out the crank snout on the Toyota 1GR-FE 4.0 V6 as found in the 2nd generation Tacoma, FJ Cruiser, etc has the same diameter as the Kubota's. I lucked out and found a nice aftermarket aluminum pulley used on ebay for $40, so I ordered it to test.
It's definitely a snug fit, I had to use some light persuasion with the rubber mallet to get it on, and a puller to get it off, but it definitely fits. It's just a hair shy of seating completely, and the keyway is a little narrower than the Kubota key, but those are nothing that a couple licks with a file won't easily solve.

This picture shows where it contacts the cover and how close it is to seating. Very little material will need to be removed from the cover for clearance to seat completely.


After some research, I figured out the crank snout on the Toyota 1GR-FE 4.0 V6 as found in the 2nd generation Tacoma, FJ Cruiser, etc has the same diameter as the Kubota's.
I lucked out and found a nice aftermarket aluminum pulley used on ebay for $40, so I ordered it to test.It's definitely a snug fit, I had to use some light persuasion with the rubber mallet to get it on, and a puller to get it off, but it definitely fits. It's just a hair shy of seating completely, and the keyway is a little narrower than the Kubota key, but those are nothing that a couple licks with a file won't easily solve.
This picture shows where it contacts the cover and how close it is to seating. Very little material will need to be removed from the cover for clearance to seat completely.
Do you remember the dimensions of the crank pulley snout? going to start putting together the front of my motor and want to run a harmonic balancer. going to see if i can find any others that are compatible or I can modify to make fit.
Thanks
Ken


