
Om617 96 Jeep Cherokee build thread


Thread Starter
|
Diesel Enthusiast
Joined: Nov 2012
Posts: 249
Likes: 40
I upgraded the stock 64amp Mercedes alternator to a Bosch AL129X 115amp unit out of a 90's Saab 9000, it bolts on without any mounting modifications. Besides the power increase the AL129X has conventional wiring lugs instead of the spade harness of the 64amp unit.
These Bosch alternators are of two wire design and are self exciting with built in voltage regulator, the Jeep is three wire and require the computer to both excite the alternator and regulate the voltage. The Jeep alternators black wire with gray stripe goes to the +battery terminal, the dark green wire goes to the to the Jeep ECM, and the green with orange stripe also goes to the ECM.
The information I found online state:
Jeep Mercedes
Black w/gray stripe > Red
Dark green > 3amp diode> Blue
Green with orange stripe > Not used
I installed a very accurate digital volt meter behind my information panel by wiping the paint off the factory panel and installing my gauge in place of the "check engine light". This allowed me to monitor what my alternator was doing. I found that if wired as above the Bosch alternator is not excited by the dark green Jeep wire, revving the engine above 1600rpm creates enough magnetism to excite the slip rings in the alternator and thus self excite the alternator. Wiring the Jeep green wire does however work the "GEN" light in the information panel. I found that if not run for awhile the alternator would not as easily self excite and after not charging for about 1 minute the Jeeps computer would throw the "GEN" light on. If not run for awhile It takes about three quick revs above 3000 rpm to excite the alternator or about 30min of normal driving. Once the ECM turns the "GEN" light on the ignition will have to be cycled to reset the computer.
I believe this happens because the jeep ECM uses the dark green wire to monitor voltage output in conjunction with battery temperature sensor in the battery tray to calculate voltage output needed then sends a varied current down the green wire with the orange stripe to the alternator thus adjusting output.
If where to do this again I would test the green wire with orange stripe for power with ignition on, wire it in conjunction with the dark green wire and perhaps use this to excite the alternator. If That didn't work I would just run an ignition hot wire to excite the alternator and retain the dark green wire to run the "GEN" light. It's no big deal to rev the engine or just wait for the alternator to excite itself, I just don't like looking at the "GEN" light.

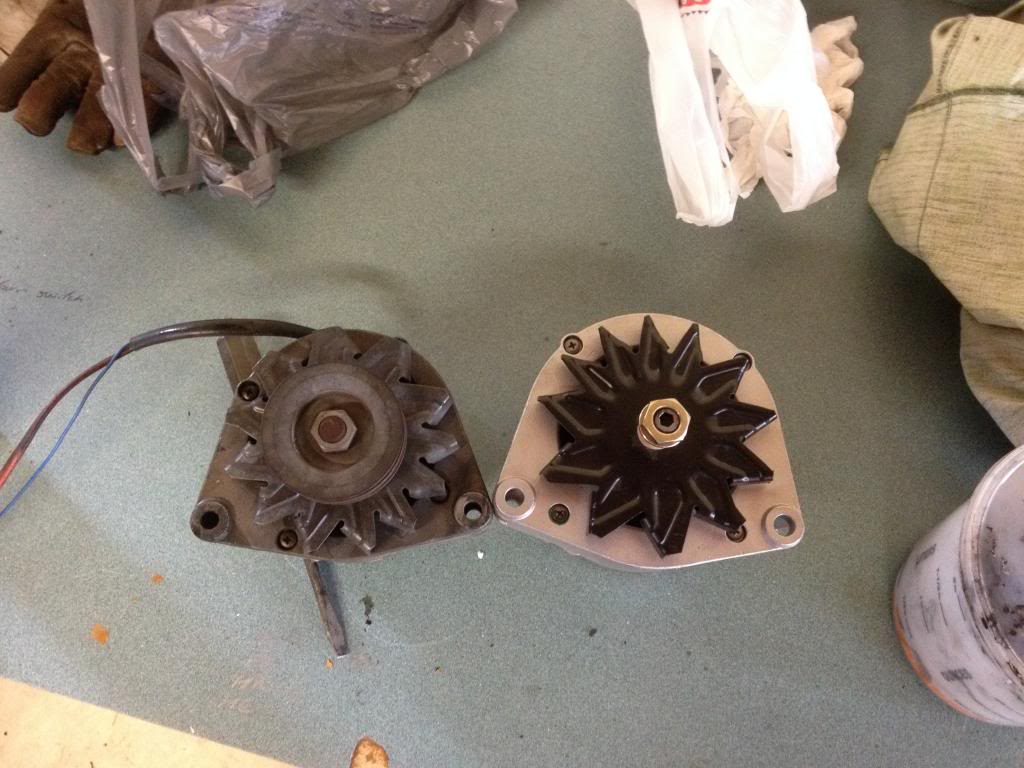
Size difference, stock 64amp vs 115amp
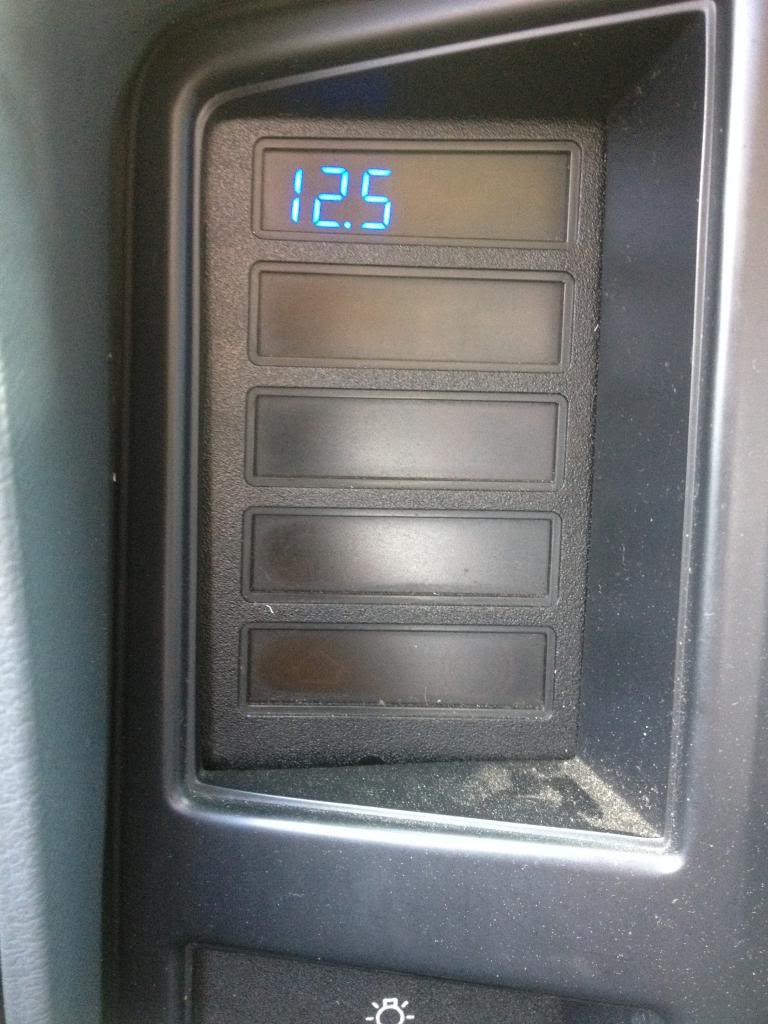
12.5volts at idle(not charging), about 60sec later the "GEN" light turned on
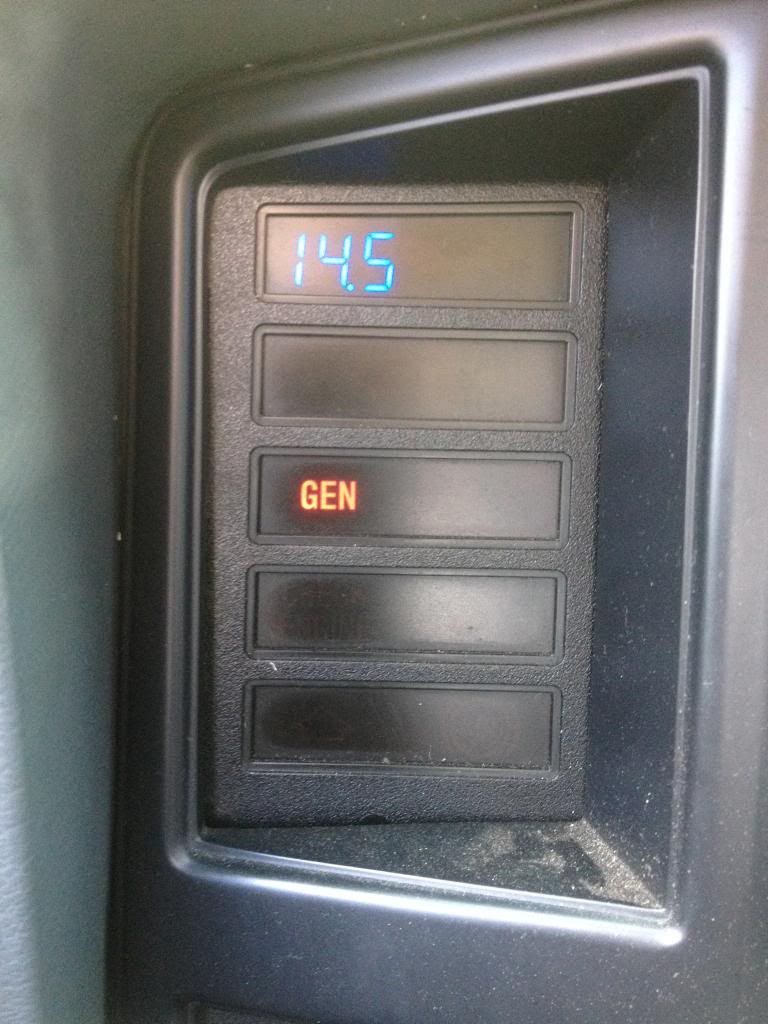
14.4volts at idle after revving to get the alternator to "wake up", this light will remain on until ignition is reset.
The alternator feeds a Diehard 850CCA AGM battery, this setup with 00aut cables and gear reduction starter has no problem turning over the engine.
---AutoMerged DoublePost---
In my opinion the most important aspect of this successful conversion is the gearing, I believe gearing is the single most common reason people abandon the conversion soon after completion. Seems most people sell their 617 conversions and end up installing a more "conventional" diesel. The most common misconception of this diesel is that it needs to be lugged down like most other diesels, this thinking is completely incorrect for this engine. The Germans engineered this engine to spin high RPM thus giving it a wide usable torque curve. In true German fashion the engineering effort put into this engine was no small task and would blow most peoples minds. Research and engineering on this scale cannot be duplicated without an engineering team and great funds.
For this reason I did not attempt to re-invent the wheel and tried to keep the RPM of the engine as close to the original German spec as possible. My 300D would turn 1500rpm at 30mph, 2000rpm at 42.5mph, 2500rpm at 55mph, 3000rpm at 65mph, 3500rpm at 77mph. It would cruise at 70mph all day for the next 350,000 miles. This engines peak horse power and torque are at about 2400rpm, it doesn't even start to boost until 1800rpm. Most diesel guys have a hard time understanding this is what the engine was designed to do, and try to gear it down the result is an "under powered engine" and ultimately an unhappy owner.
The only regret I have is that I didn't go with 4.88 gears, As it sits now with 4.56gears and 31" tires the jeep spins at about 2600rpm at 65mph, just into it's power band and I assure you would be overall better if this power band could be brought down a bit. Truth be told I planned on going with 33" tires later on but am now limited to 31" do to RPM constraints.
The Dana 30 in the jeep can only go to 4.88 gears as far as I know, if doing this in another vehicle where even lower gears are possible DO IT! Keep engine RPM as close as possible to engine design.
The 700R4 is far superior to the Mercedes unit and offers a low first gear and efficiency. I planned on using the lock up function on the converter but that is entirely out of the question due to gearing.
It is my opinion and that of GM's that if you do not follow the specified geometry for the TV cable you are doing it wrong. This doesn't mean it won't work and the transmission will explode it just means the transmission will never run as intended at the very least, and most likely you won't be happy with it. Again do not try to re-invent the wheel and try to stick to GM design as much as possible, they put millions of dollars into this.
---AutoMerged DoublePost---
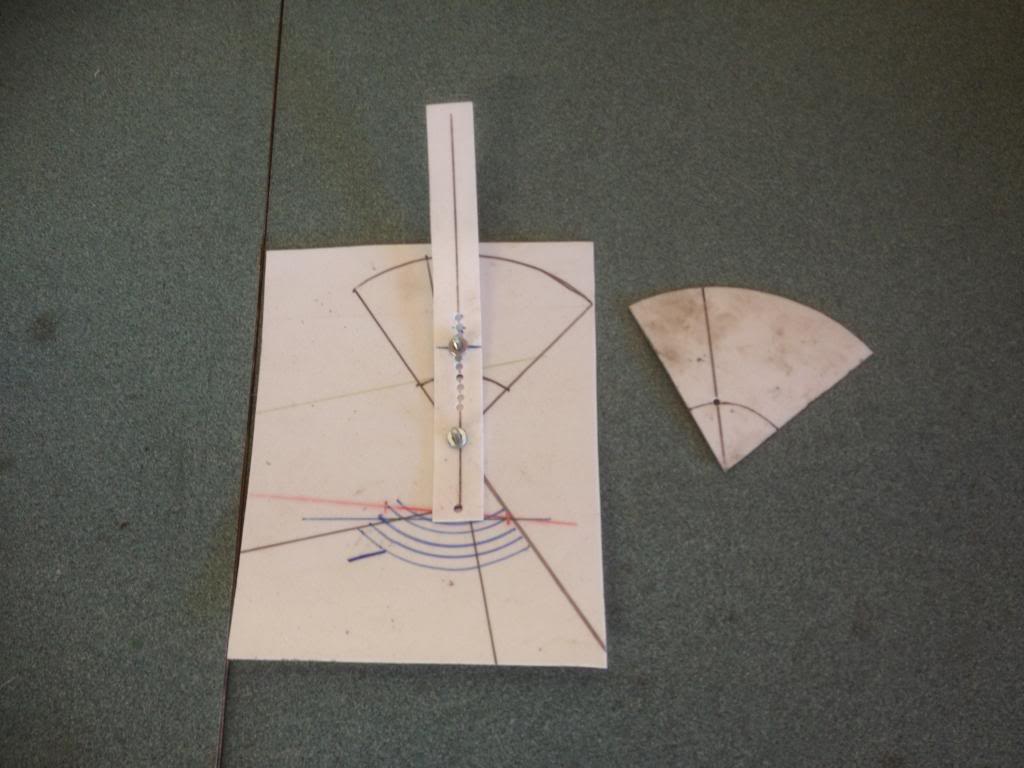
Took me three days to get this to GM spec but it was worth every second, the transmission feels and shifts great. These are the templates I made to make sure everything was as close to GM spec as possible. These templates are 1.125" with 78* arc with a mark locating the 90* relationship to the TV cable at 25% throttle.
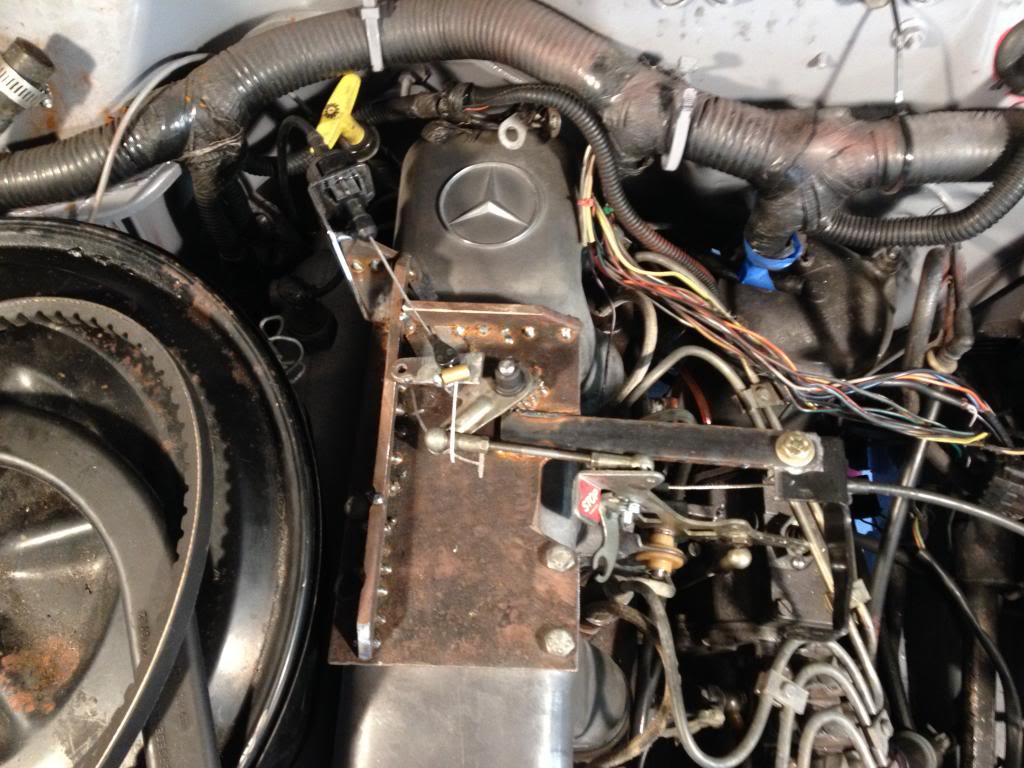
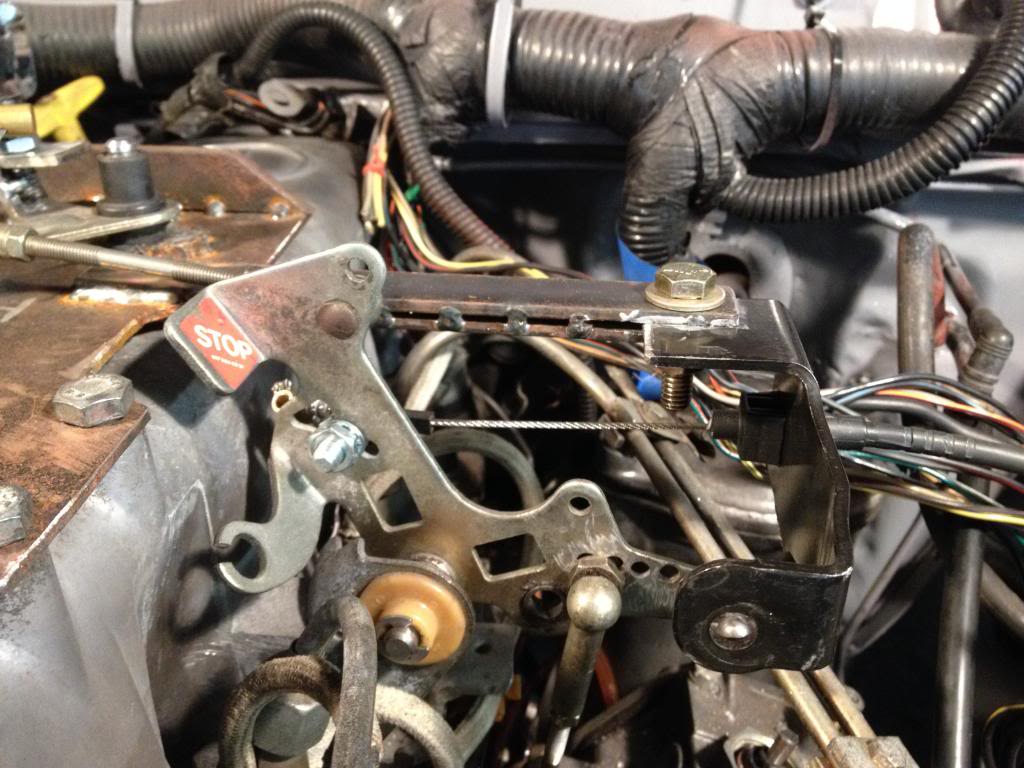
I used brackets from the Jeep, pivoting points and linkage from the Mercedes and a universal TV cable.
The hardest part was figuring how to get the stock Mercedes 50* throttle throw to the needed 78* for the 700r4, I accomplished this by moving the lower injection pump linkage closer to the center pivot by drilling small holes and moving it in slowly until it produced a 78* throw.
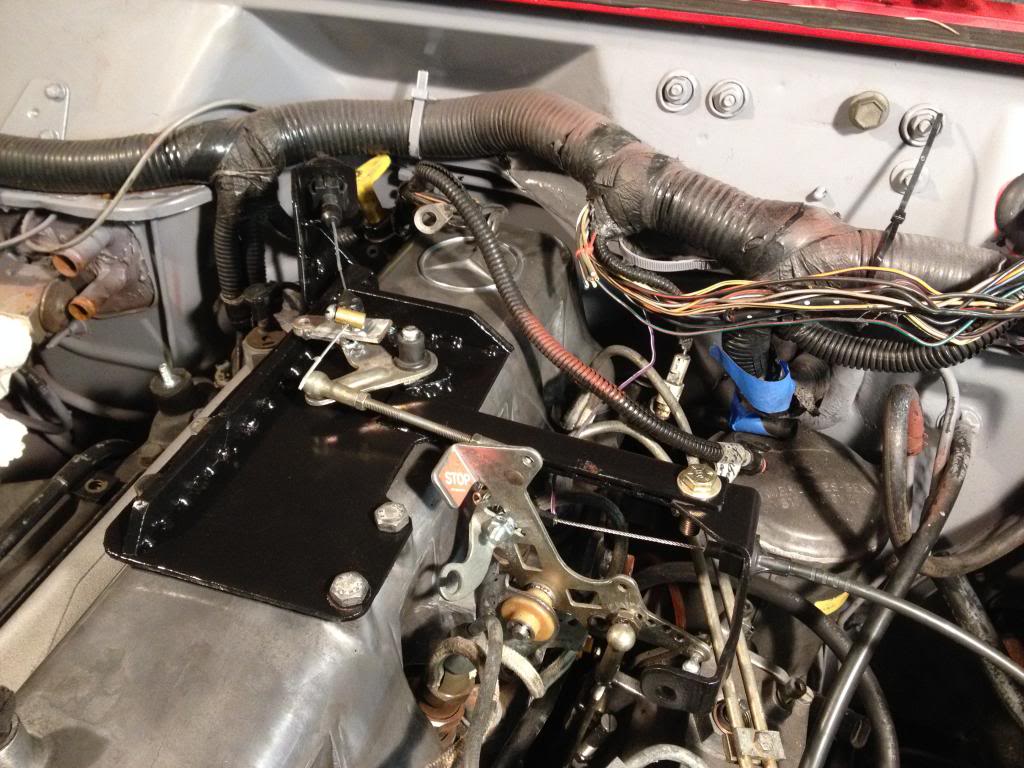
The last thing to do was locate the jeep throttle cable so that the foot pedal had the proper travel i.e. Throttle fully depressed = injection pump throttle bottomed out.
---AutoMerged DoublePost---

Last edited by Evenglass; Feb 11, 2014 at 11:52 PM. Reason: Automerged Doublepost
Thread Starter
|
Diesel Enthusiast
Joined: Nov 2012
Posts: 249
Likes: 40
No, not stock. The Factory one works fine I just wanted something more accurate. Ive got I sub and nice speakers so my truck ends up being the sound system for parties, I wanted something that I could just glance at and say "Oh 9Volts time to charge". Plus it was only like $12 on Amazon.
"I installed a very accurate digital volt meter behind my information panel by wiping the paint off the factory panel and installing my gauge in place of the "check engine light". This allowed me to monitor what my alternator was doing."
"I installed a very accurate digital volt meter behind my information panel by wiping the paint off the factory panel and installing my gauge in place of the "check engine light". This allowed me to monitor what my alternator was doing."

Diesel Fan
Joined: Jan 2014
Posts: 94
Likes: 3
From: AZ
What a great thread! Thanks for all the pictures and info! I'm just getting started on my 97 Wrangler Mercedes swap, and was wondering how to get the gauges working. Is that a Cherokee A/C compressor, or some other type? Do you have pics of how the engine shocks are mounted? Also, it looks like you lost quite a bit of oil capacity with your mod. Is that something to worry about?
Thread Starter
|
Diesel Enthusiast
Joined: Nov 2012
Posts: 249
Likes: 40
What a great thread! Thanks for all the pictures and info! I'm just getting started on my 97 Wrangler Mercedes swap, and was wondering how to get the gauges working. Is that a Cherokee A/C compressor, or some other type? Do you have pics of how the engine shocks are mounted? Also, it looks like you lost quite a bit of oil capacity with your mod. Is that something to worry about?
I have not installed the engine shocks yet(shame on me!) because I need new upper grommets on them and they are very hard to find. 3000 miles no harsh vibrations or anything else to note regarding the motor mounts, it runs incredibly smooth.
The OM617 takes 2 gallons of engine oil or about 7.9 quarts, I figure I'm about 1 quart short due to the pan mod, I think I should be fine.
There are many little things to modify on this conversion, let me know if I can help.
---AutoMerged DoublePost---


For the oil cooler lines I bought some 8AN weld on fittings and 8AN stainless braided line from Summit Racing. I kept the important bends from the Mercedes hard lines and welded my fittings to them, worked out very well.

I mounted the cooler behind the bumper, after a long run down the road you can feel the difference in temperature between the incoming oil line(Hot) and the outgoing oil line (cool), very noticeable difference.
---AutoMerged DoublePost---
No more room for the puller fan behind the radiator so I added the pusher in front mainly for the condenser as this radiator is huge and really doesn't need it, I also added an override switch for this fan inside just for creeping off road if needed. To the Left is the Grand Cherokee plate style transmission cooler. There is so little space behind the grille with the thicker radiator that I had to carve alot of the material away in the area of the fan.
---AutoMerged DoublePost---

Modified Jeep Shifter cable with Lokar 700r4 adjustable shift arm.

Modified transfer case bracket with plate expoxied and bolted to side of 700r4


The Down pipe will have to be shortened the that the upper 90* is closer to the turbo and the lower part will need some tweaking.

This was a Mercedes exhaust mount I re-used.
---AutoMerged DoublePost---


There is a problem running the radiator lines do to the configuration of the return being on the opposite side of the Mercedes engine. The Mercedes is on the left and the jeeps return is on the right. Care must be taken to keep this line low as not to cause air locks in the system, this posed a problem. My solution was to run an 1/14" cooper pipe with correct fittings on the ends directly across the radiator. I'll post better pictures of these if anybody needs them.
---AutoMerged DoublePost---


This is how it ended up, been driving it everyday. I'll post my mileage and general impressions as they come.
Last edited by Evenglass; Feb 25, 2014 at 03:34 PM. Reason: Automerged Doublepost
Diesel Fan
Joined: Jan 2014
Posts: 94
Likes: 3
From: AZ
Thanks for the help offer, I'm sure I'll need to pick your brain a bit with this project. This is the second evolution of my Jeep. I'll be swapping out the current 5.2 liter Magnum and automatic for the OM617 and the original AX15, so it should be interesting! Funny, I had the same thought about the hose ends (weld on AN fittings)!
Thread Starter
|
Diesel Enthusiast
Joined: Nov 2012
Posts: 249
Likes: 40
Thanks for the help offer, I'm sure I'll need to pick your brain a bit with this project. This is the second evolution of my Jeep. I'll be swapping out the current 5.2 liter Magnum and automatic for the OM617 and the original AX15, so it should be interesting! Funny, I had the same thought about the hose ends (weld on AN fittings)!
Diesel Fan
Joined: Jan 2014
Posts: 94
Likes: 3
From: AZ
I'm not much into rock crawling, I am a trail runner and need 4x4 to get where I want to go on occasion. I am currently running 4:10's on 33" tires. I figure if i need to i can drop down a tire size and be closer to Ideal. Or just keep it in 4th! The thing is this: I have done the horsepower, aggressive, speed when I want it, 4 wheel drive sports car thing and had a blast doing it. Now i want to see whats over the next hill without worrying about the size of my fuel tank.

Newbie
Joined: Dec 2012
Posts: 2
Likes: 0
New here. Don't care if flamed or not. while I'm sure your JB Weld solution to the oil sender will not leak, I'm not entirely sure the engine will like any trash that might break loose. My solution was to disassemble the factory MB oil sender. Find a matching hex head nut to protect the thread while doing this work, it should be M12x1.5, we found one in the MB pile,o,parts. The first step involves a die grinder and bench grinder to remove the rolled edge. After that step systematically destroy everything but the threads and the hex cap portion via bench grinder. Wire brush, clean for next step. Drill a 11/32 pilot for a 1/8 npt tap making sure to check for depth as you go so as not to get into the shoulder and threaded area. You will want to keep withing the hex cap area. Trim off 40% of the bottom of a 1/8 npt tap and put a slight taper on it. An unmodified tap will bottom out before cutting the correct threads for a 1/8 npt fitting Wire brush said tap and clean. Tap, checking as you go for depth and fit. Wala you saved $23 plus shipping and spent $3 on a fitting and $10 for a tap, however you didn't have to order off of mercedes4x4.com's unsecured website or deal with trying to get ahold of him on the phone or email him. Just my 2 cents.
Last edited by CSW1982; Feb 27, 2014 at 08:21 PM. Reason: typo


