
Fixing Your KDP On The Cheap


Thread Starter
|
BOMBARDIER


Joined: Mar 2007
Posts: 11,159
Likes: 918
From: Gloucester, VA
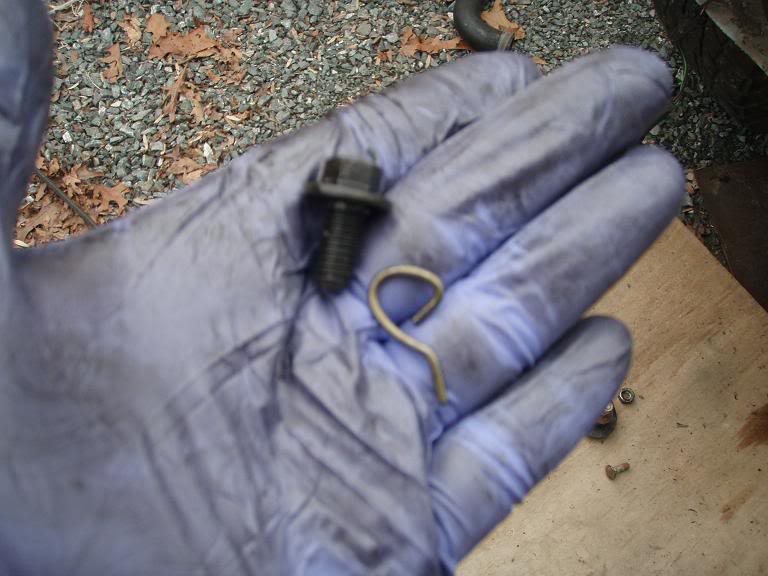
All the 12v and 24v Cummins engines have one deadly, fatal flaw... The KDP! 2001 and up are less likely to have the problem due to a case change but it is still worth a look!
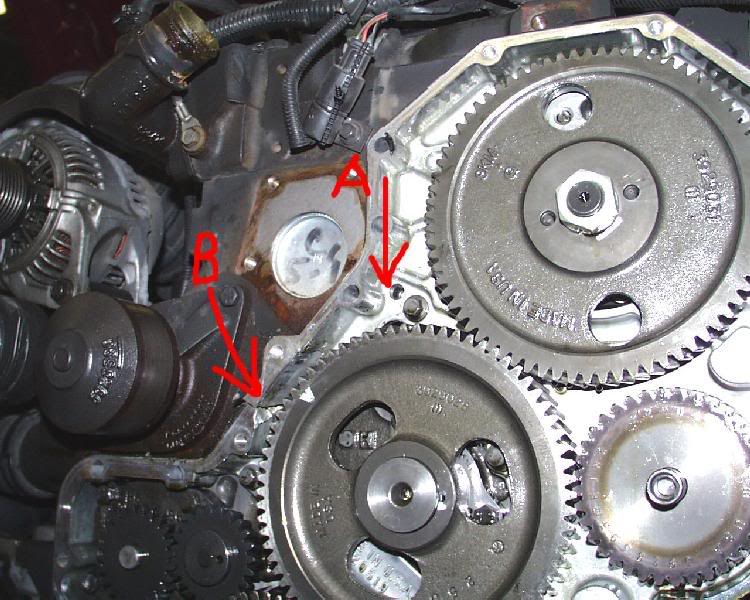
This small steal pin is used during assembly to locate the timing housing on the front of the engine. The problem though is that after many years and miles the vibrations of the engine work the pin loose and it can fall into the gear case and do ALOT of damage.
Here you can see some damage caused by a KDP. (A) Is were the pin was once located and (B) is the damage done. (I found this pic on the net along time ago and am not sure whos it is, if you know please let me know)
There are kits on the market to fix this problem or you can do it yourself, I'm a cheap *** so I went the DIY route, if you want a nice kit with new seals and all hit up the sponsors here on the site, they can get you straight! Price Quote - Request A Price - Diesel Bombers
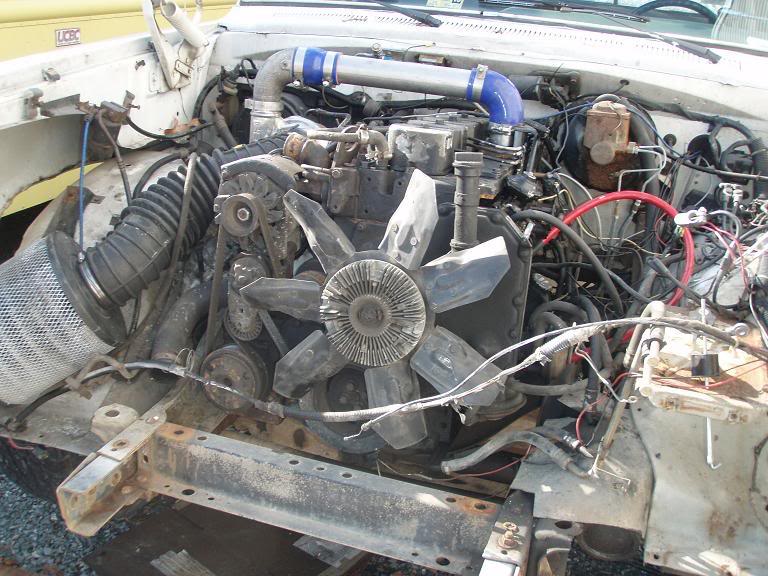
I already had the front of my truck off for some other work but you can do this with just removing the radiator.
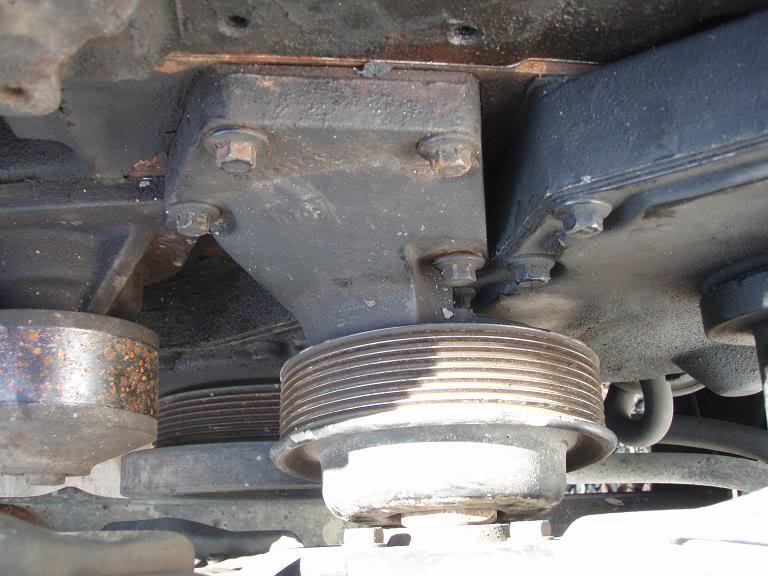
First you need to remove the belt, then go after the four bolts holding the fan support to the block, I find it easier to remove the six bolts that hold the fan pulley to the shaft, slid the pulley forward so you have room to get to the bottom bolt, and take it off as one assembly.
Here the six bolt have been removed and the pulley moved toward the front of the truck for access.
And here is the front of the engine with the whole assembly gone
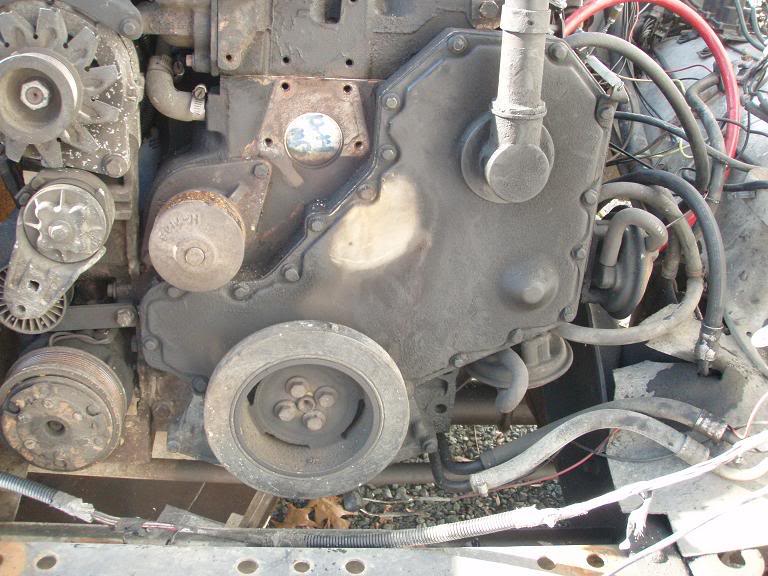
Next we need to go after the crank pulley, its just four 15mm bolts. The easiest way to remove them is with a impact. If not you will need to keep the engine from rotating some how while you go at the with a 1/2' ratchet. Also go ahead and remove the oil fill tube. Un-bolt the mounting bracket at the head and then rotate th whole assembly counter-clockwise to unscrew it.
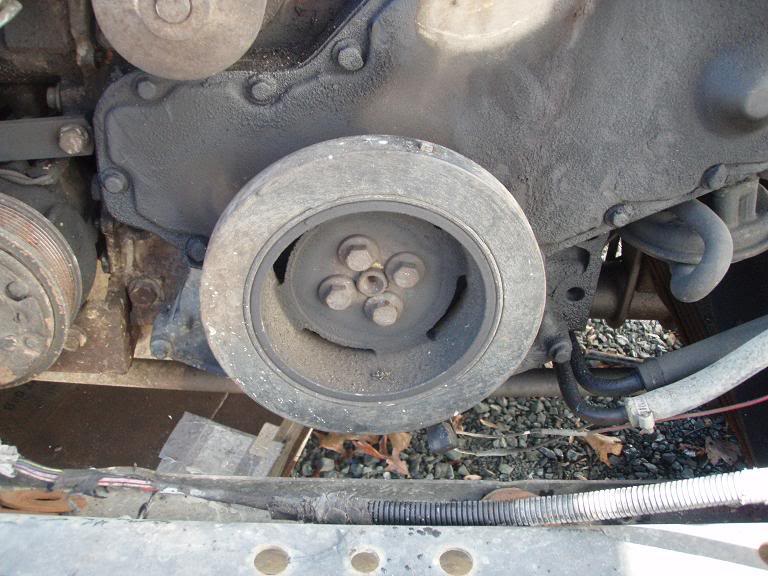
Gone! Now start removing the 20 10mm bolts that hold the cover on, keep track because there are two lengths.
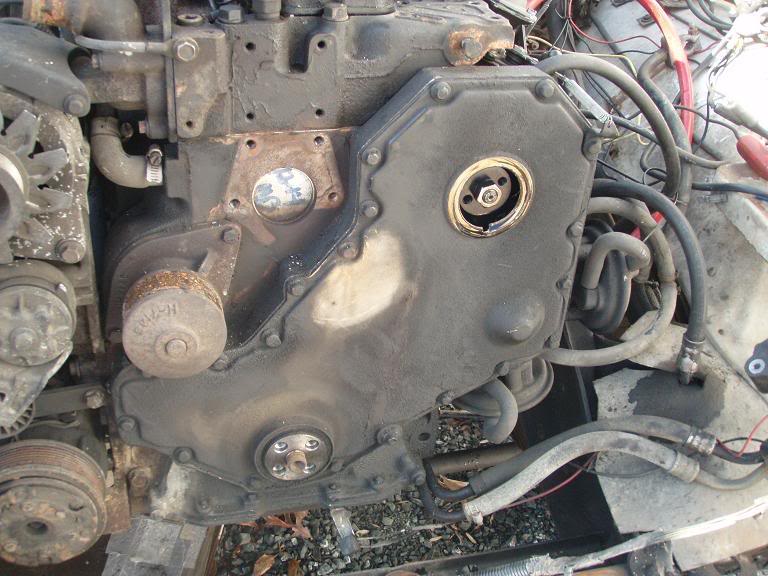
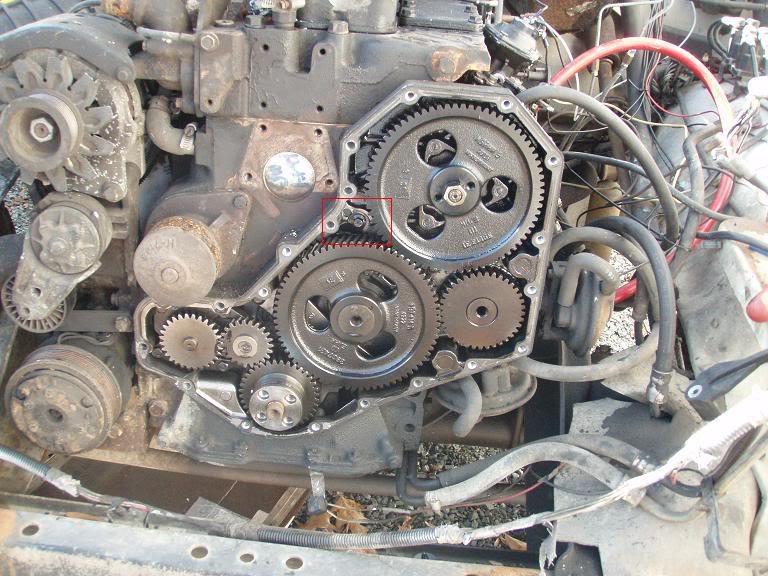
Here is were you should be at! I put a red box around the area we will be concentrating on.
Here is a close up, mine is still in place and has not moved. Yours may or may not be, go ahead and take a punch and hammer and tap it till it sits flush with the case.
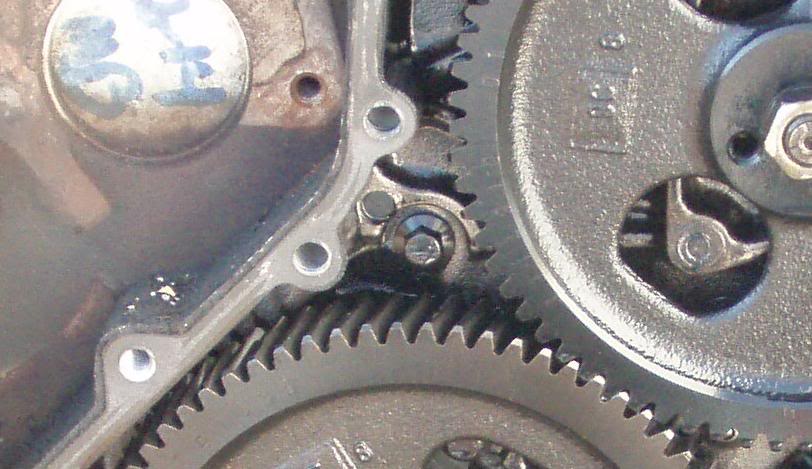
Now we are going to tab it. I got this idea from BC847 from apicture in one of his posts. Thanks David!!! Remove the bolt next to the pin, then take a coat hanger and cut a small piece. Using some pliers bend up your piece of coat hanger to resemble this shape. Make sure the loop is a snug fit around the bolt.
Now with your tab in place replace the bolt, put some red thread locking compound on the bolt and torque it to 18 ft/lbs.
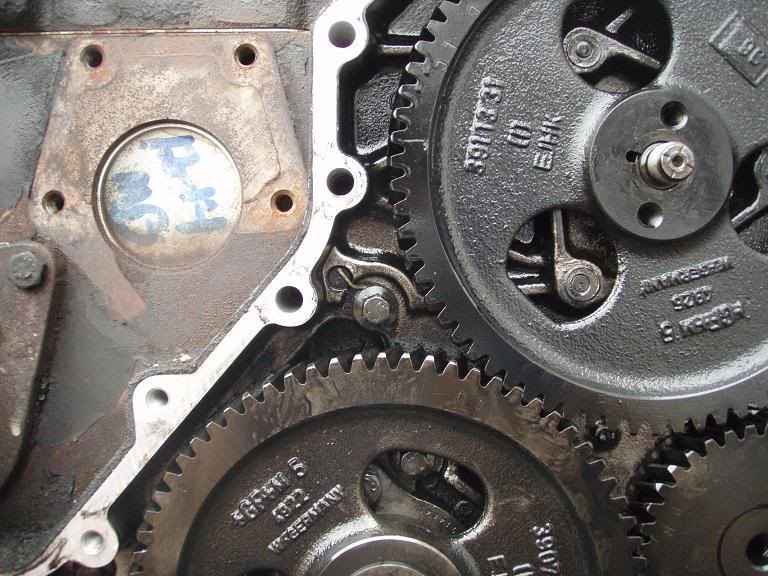
It would be a good time also now to remove the rest of the case bolts and put thread lock on them also, one of mine was not even snug any more... That would have been as bad as the KDP! There are two hidden behind the cam gear, don't forget them! You will have to rotate the engine till you can access them through the holes in the gear. I circled them in red here.

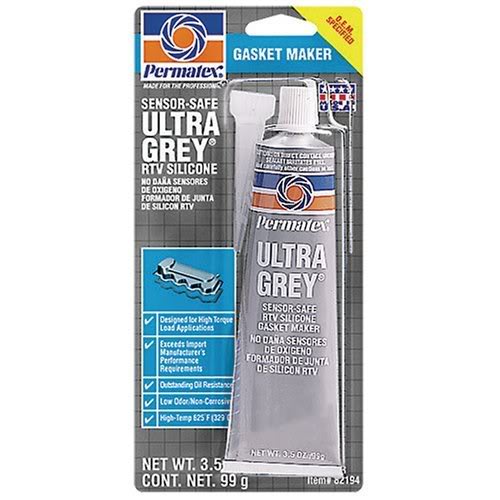
Now its time to replace the cover, make sure all the old gasket material is removed and everything is REALLY clean. Then grab some RTV and run a bead around the lip and around all the bolt holes, you want NO gaps. Replace the cover and snug the bolts down. This is the RTV I use.
Finally simply replace everything you took apart and enjoy your truck knowing that a 1/4" piece of steal wont kill your pride and joy!
This small steal pin is used during assembly to locate the timing housing on the front of the engine. The problem though is that after many years and miles the vibrations of the engine work the pin loose and it can fall into the gear case and do ALOT of damage.
Here you can see some damage caused by a KDP. (A) Is were the pin was once located and (B) is the damage done. (I found this pic on the net along time ago and am not sure whos it is, if you know please let me know)
There are kits on the market to fix this problem or you can do it yourself, I'm a cheap *** so I went the DIY route, if you want a nice kit with new seals and all hit up the sponsors here on the site, they can get you straight! Price Quote - Request A Price - Diesel Bombers
I already had the front of my truck off for some other work but you can do this with just removing the radiator.
First you need to remove the belt, then go after the four bolts holding the fan support to the block, I find it easier to remove the six bolts that hold the fan pulley to the shaft, slid the pulley forward so you have room to get to the bottom bolt, and take it off as one assembly.
Here the six bolt have been removed and the pulley moved toward the front of the truck for access.
And here is the front of the engine with the whole assembly gone
Next we need to go after the crank pulley, its just four 15mm bolts. The easiest way to remove them is with a impact. If not you will need to keep the engine from rotating some how while you go at the with a 1/2' ratchet. Also go ahead and remove the oil fill tube. Un-bolt the mounting bracket at the head and then rotate th whole assembly counter-clockwise to unscrew it.
Gone! Now start removing the 20 10mm bolts that hold the cover on, keep track because there are two lengths.
Here is were you should be at! I put a red box around the area we will be concentrating on.
Here is a close up, mine is still in place and has not moved. Yours may or may not be, go ahead and take a punch and hammer and tap it till it sits flush with the case.
Now we are going to tab it. I got this idea from BC847 from apicture in one of his posts. Thanks David!!! Remove the bolt next to the pin, then take a coat hanger and cut a small piece. Using some pliers bend up your piece of coat hanger to resemble this shape. Make sure the loop is a snug fit around the bolt.
Now with your tab in place replace the bolt, put some red thread locking compound on the bolt and torque it to 18 ft/lbs.
It would be a good time also now to remove the rest of the case bolts and put thread lock on them also, one of mine was not even snug any more... That would have been as bad as the KDP! There are two hidden behind the cam gear, don't forget them! You will have to rotate the engine till you can access them through the holes in the gear. I circled them in red here.
Now its time to replace the cover, make sure all the old gasket material is removed and everything is REALLY clean. Then grab some RTV and run a bead around the lip and around all the bolt holes, you want NO gaps. Replace the cover and snug the bolts down. This is the RTV I use.
Finally simply replace everything you took apart and enjoy your truck knowing that a 1/4" piece of steal wont kill your pride and joy!
Last edited by RSWORDS; Jan 25, 2010 at 09:08 PM.


BOMBARDIER
Joined: Oct 2009
Posts: 4,366
Likes: 240
From: arizona
thanks a good write up and pictures and have you ever thought of having a playboy bunny in your pictures you know to help point out the things you are talking about instead of circling them with your red marker also that would help our post count for the next couple of months
BOMBARDIER
Joined: Mar 2007
Posts: 12,854
Likes: 1,112
From: Illinois?
A great write up here Bobby. How about more info on getting the front crank seal in right. I've done it a few times now and still haven't found an easy way to get it done so it sits in there right.

Diesel Enthusiast
Joined: Nov 2008
Posts: 438
Likes: 108
From: In an old bus, down
Nice work. 
BE AWARE!! There are people who're PO'ed right now that you've shown them how to fix the KDP with a coat-hanger. Many of them have payed a lot of money for equal results. Therefore, the coat-hanger trick is by default suspicious and in no way capable of duplicating that of a $20 screwed-up washer.
BE AWARE!! There are people who're PO'ed right now that you've shown them how to fix the KDP with a coat-hanger. Many of them have payed a lot of money for equal results. Therefore, the coat-hanger trick is by default suspicious and in no way capable of duplicating that of a $20 screwed-up washer.
Last edited by BC847; Jan 24, 2010 at 09:47 PM.


