
Installation of an AirDog or Fass fuel system part 2

Thread Starter
|
Diesel Bomber
Joined: Aug 2009
Posts: 1,981
Likes: 347
From: Georgia
This is Part two of the AirDog Installation
Next use care to cut the fuel filler neck large hose at a location that will allow you to install the new fuel return adapter supplied in the AirDog kit and still clear the tank when installed.
Clamp the hose adapter and install the end of the fuel return line.
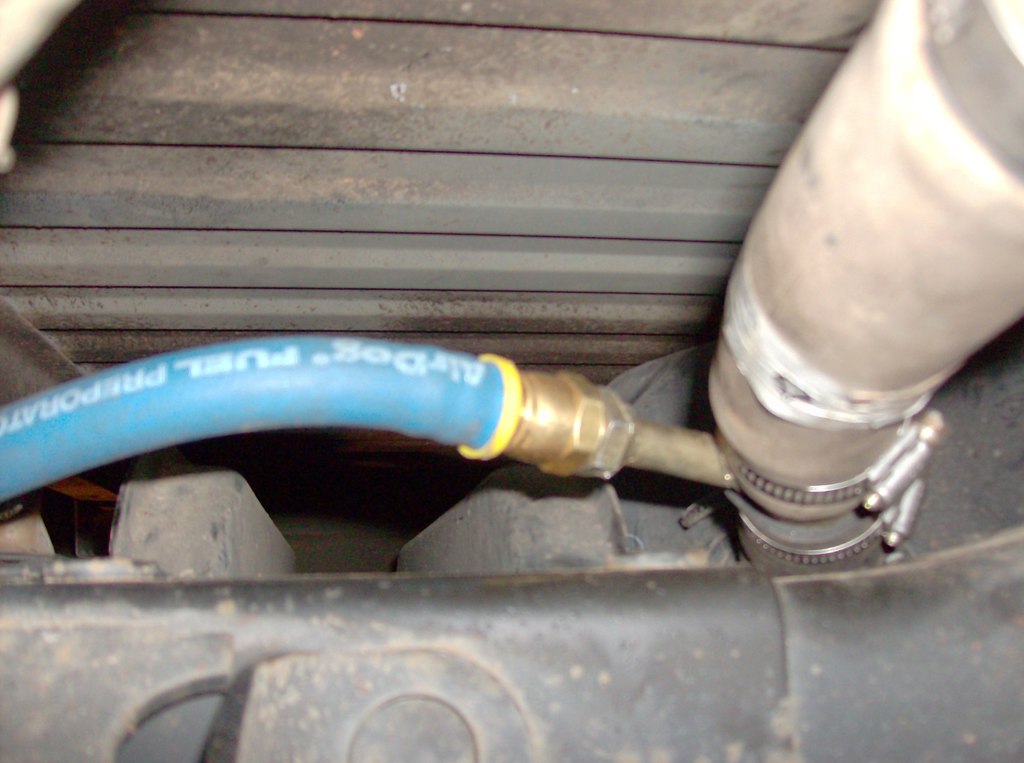
Reinstall the tank, adjust return line adapter angle as necessary being careful not to pinch a hose, wire ect.
Your hose routing may look like the above picture.
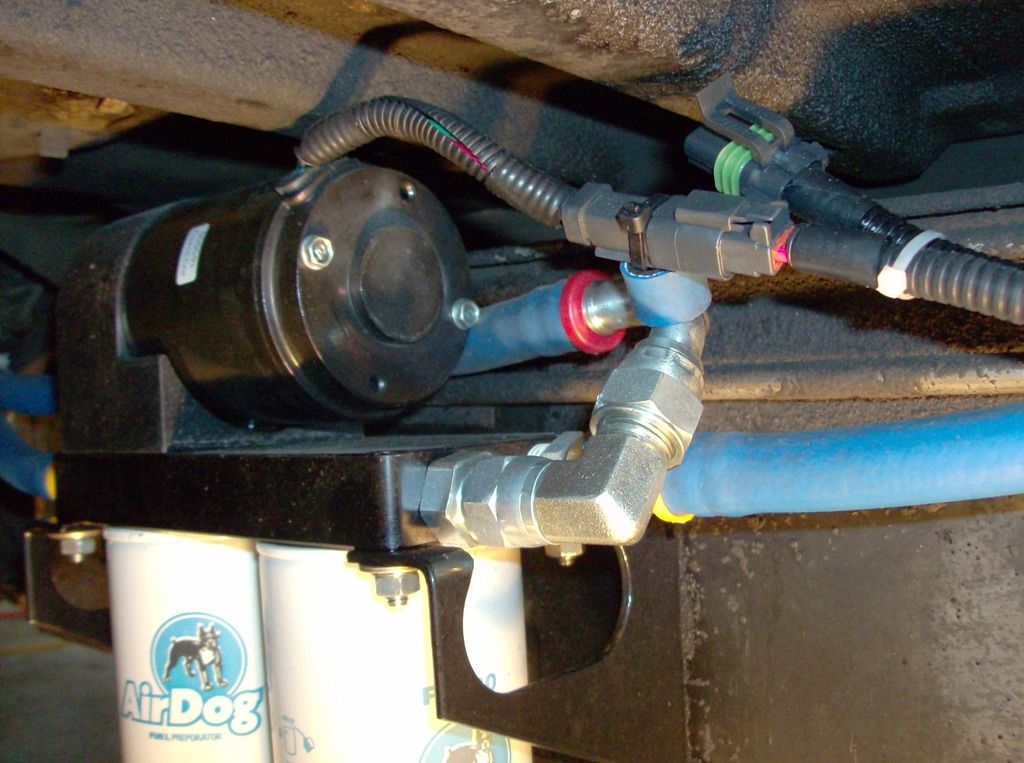
Back to the pump itself drill your pump bracket holes as required and using the supplied hardware or other as needed Mount the pump.
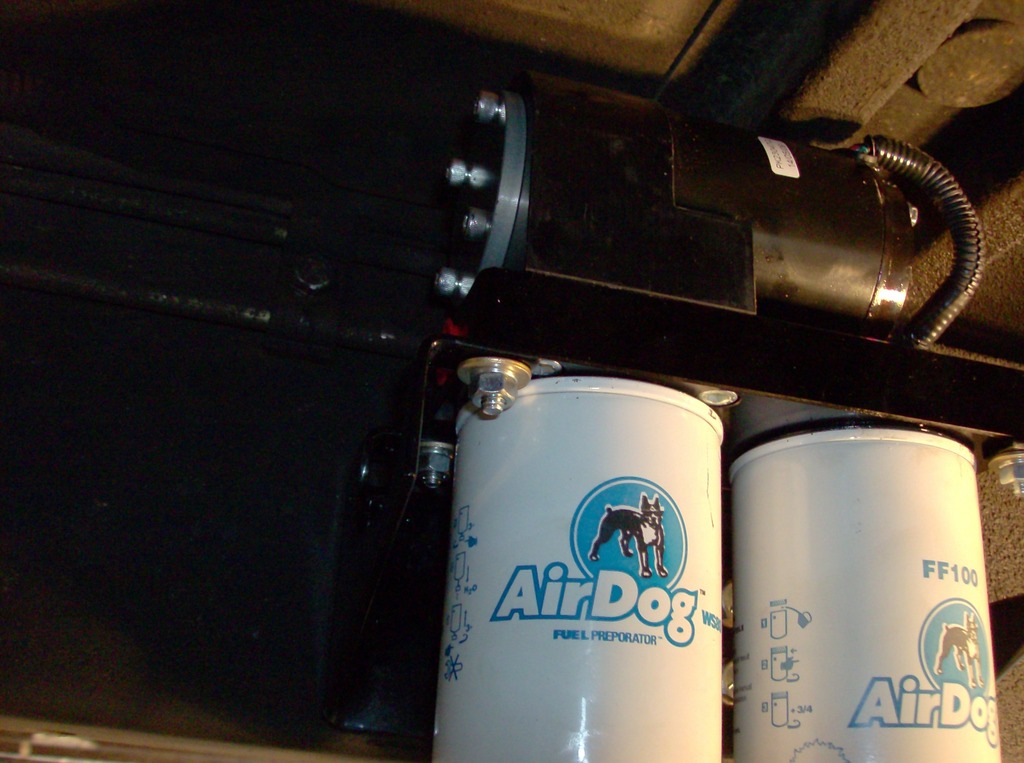
The plumbing is straight forward one outlet on the air dog is pressure and one suction and a return to keep fuel flowing through the pump at all times.
It is important to note that the pump needs constant flow through it to keep it cool.
Not hooking up a return line will damage the pump and or motor and cause problems down the road!!
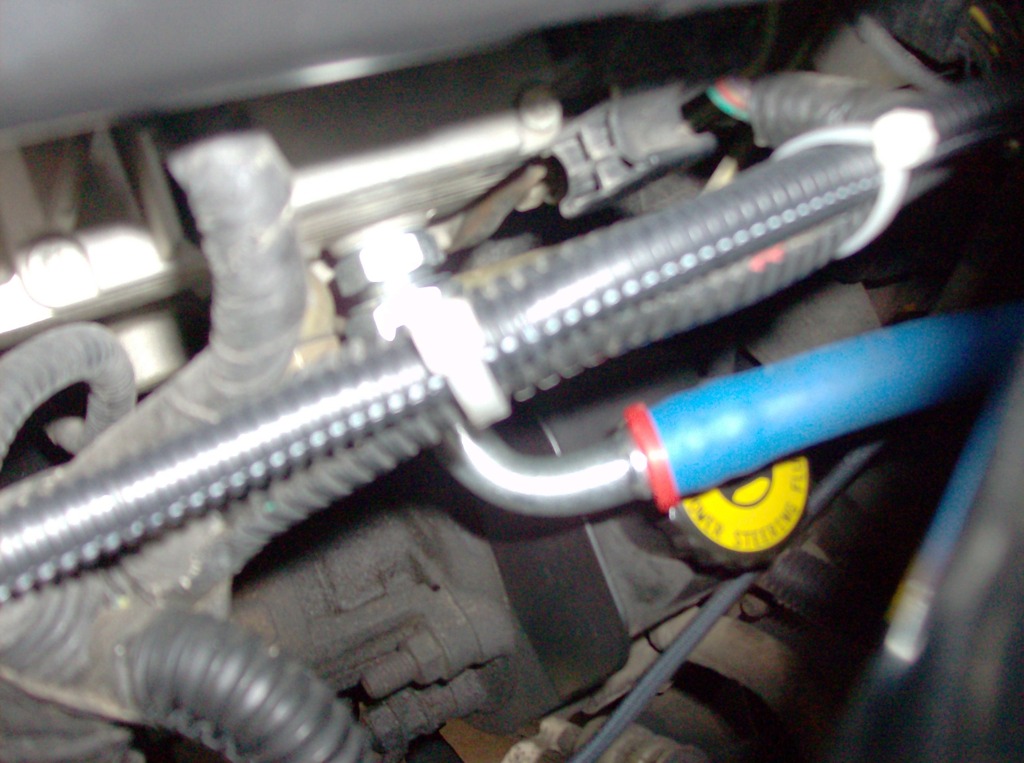
This is suction :
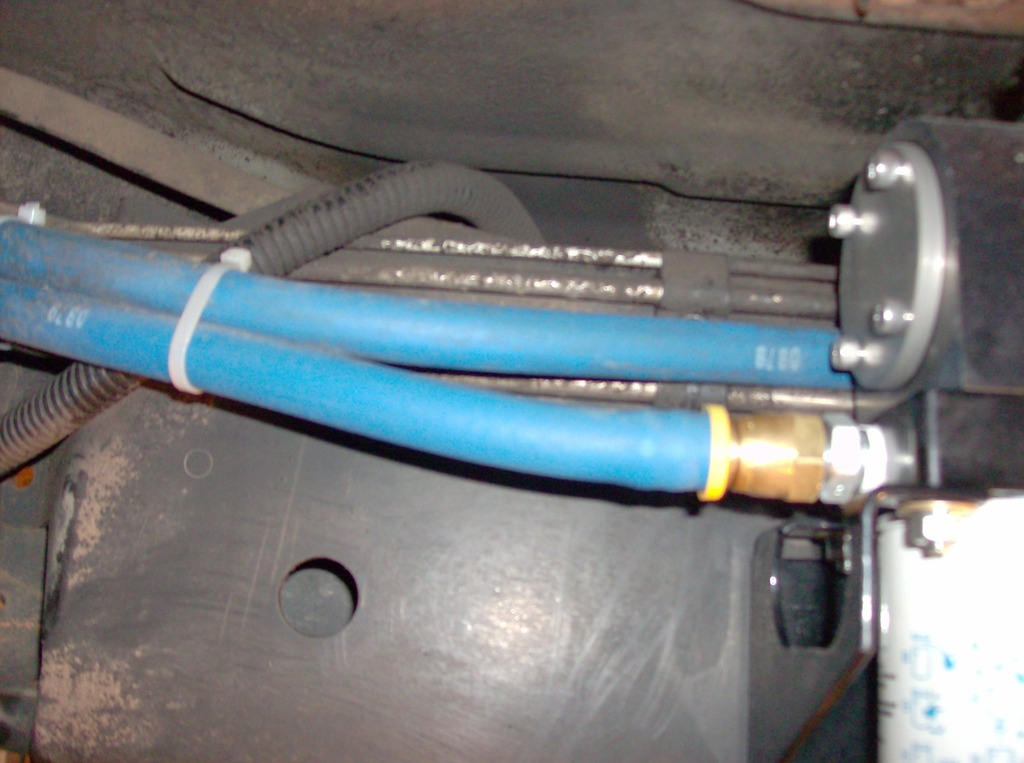
This is the return ( the 180 degree fitting closest in the picture) and the straight fitting next to it hidden is the pressure hose to the VP pump.
If you want now would be a good time to install a tee fitting inline with the pressure supply outlet on the pump for your pressure transducer.
[IMG]http://i849.photobucket.com/albums/ab59/jetafuel_2009/Airdog/family%20pics%20352_zpswh28ymkt.jpg[/IMG
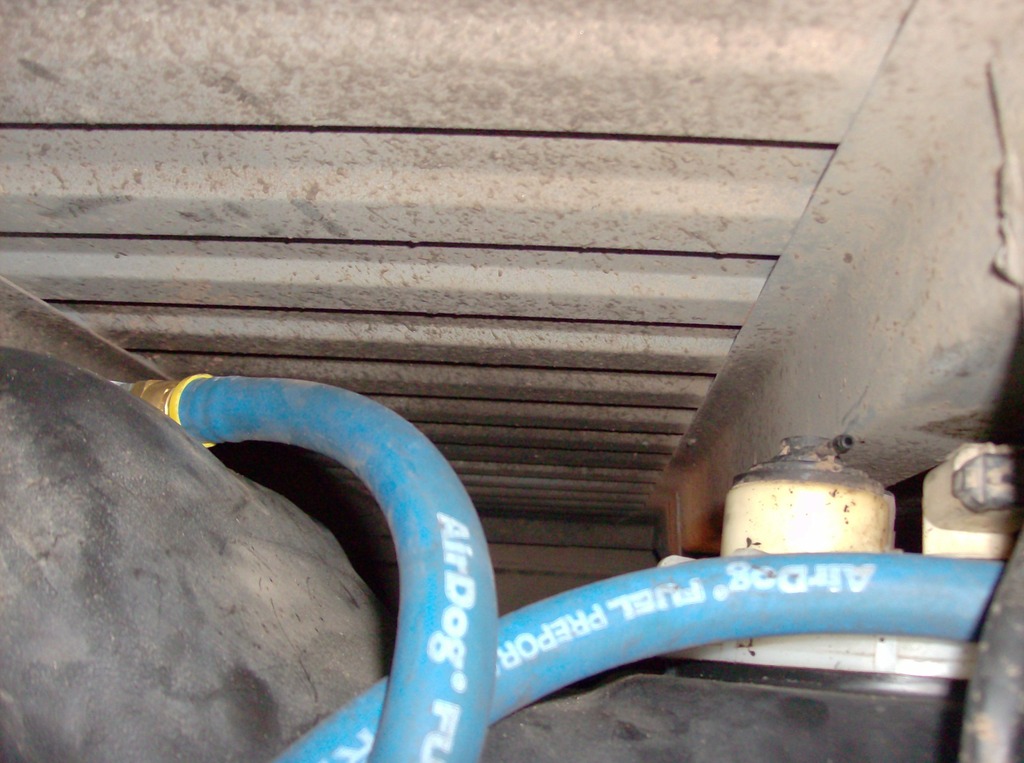
Route your hoses as required I like the inside of the frame rail again for safety reasons.
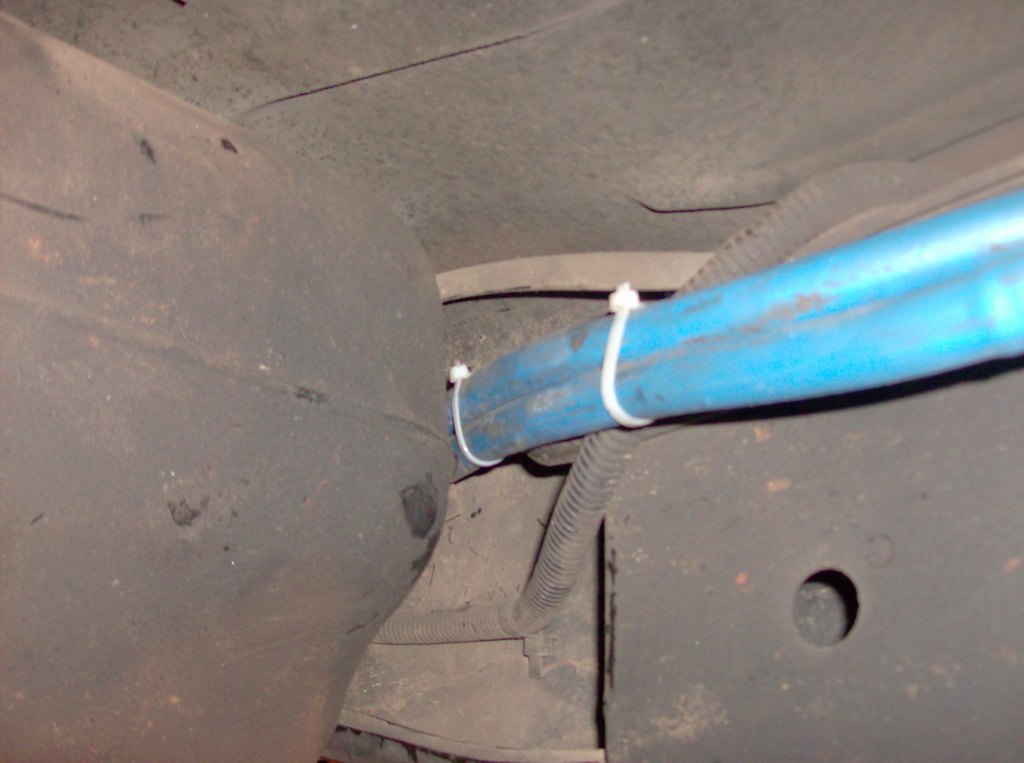
The wiring harness to run the pump can run fwd along with the fuel feed line I spaced them apart with left over hose and also routed the fuel pressure transducer wiring in the runat the same time.
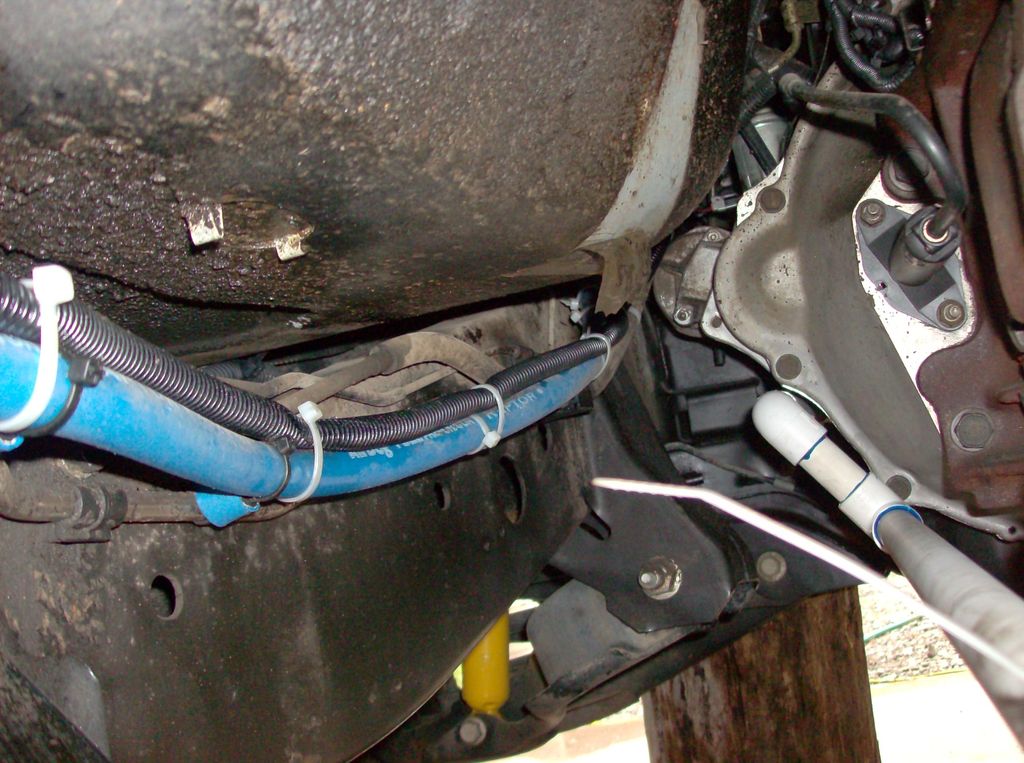
I bypassed the old engine block mounted lift pump and the filter assembly.
Just capped and plugged the ports and removed the lines.
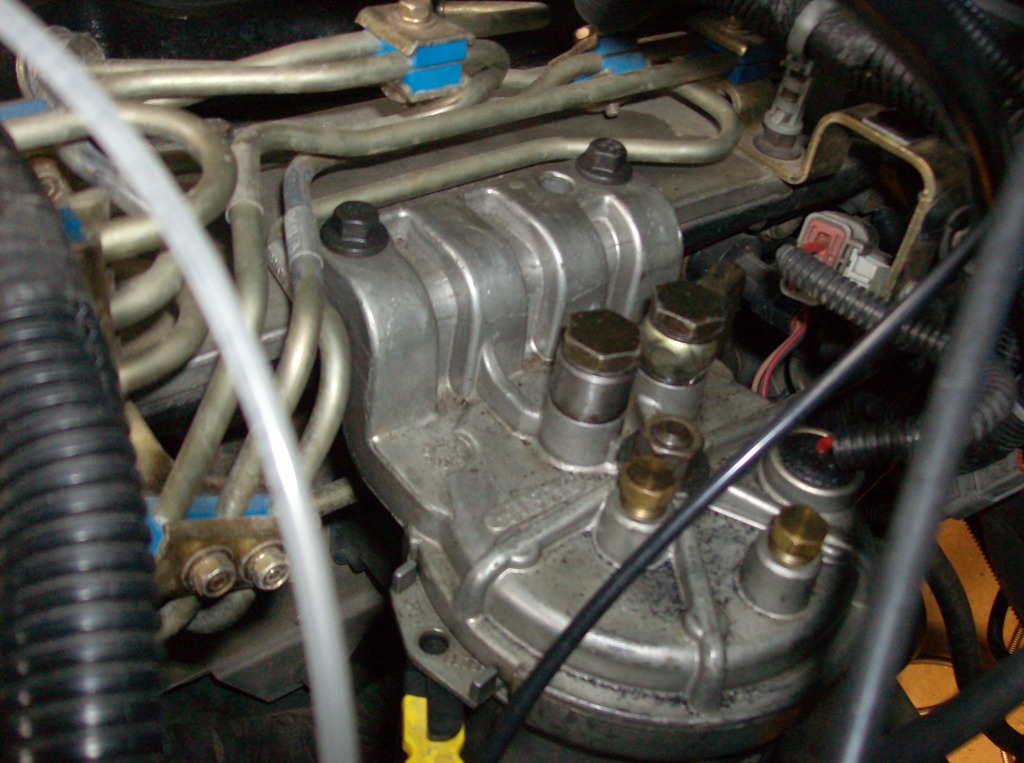
The pressure hose then runs straight to the VP44 injection pump.
Use the supplied Fitting to adapt the new pressure hose to the VP44 Injection pump. Be careful removing the old fitting and Be vary careful installing the new flared fitting not to cross thread it. I scoffed when I read this somewhere but believe me its at a weird angle and hard to tell if its straight.

For hooking up the electrical part:
Your power and ground wires go to the battery junction blocks as required and a suitable ground location.
You will plug in or splice into the old lift pump trigger wire at the old lift pump on the left side of the block below the stock filter housing. This will allow the pump to be on the timer and controlled by the PCM/ECM.
I hope this will help a few people out with at least knowing what they are getting into when installing a performance fuel system.
I like this set up if I am ever in doubt if the pumps running and the gauge is acting up you can always remove the filler cap on the tank and listen for the fuel return running in!
Thanks
Next use care to cut the fuel filler neck large hose at a location that will allow you to install the new fuel return adapter supplied in the AirDog kit and still clear the tank when installed.
Clamp the hose adapter and install the end of the fuel return line.
Reinstall the tank, adjust return line adapter angle as necessary being careful not to pinch a hose, wire ect.
Your hose routing may look like the above picture.
Back to the pump itself drill your pump bracket holes as required and using the supplied hardware or other as needed Mount the pump.
The plumbing is straight forward one outlet on the air dog is pressure and one suction and a return to keep fuel flowing through the pump at all times.
It is important to note that the pump needs constant flow through it to keep it cool.
Not hooking up a return line will damage the pump and or motor and cause problems down the road!!
This is suction :
This is the return ( the 180 degree fitting closest in the picture) and the straight fitting next to it hidden is the pressure hose to the VP pump.
If you want now would be a good time to install a tee fitting inline with the pressure supply outlet on the pump for your pressure transducer.
[IMG]http://i849.photobucket.com/albums/ab59/jetafuel_2009/Airdog/family%20pics%20352_zpswh28ymkt.jpg[/IMG
Route your hoses as required I like the inside of the frame rail again for safety reasons.
The wiring harness to run the pump can run fwd along with the fuel feed line I spaced them apart with left over hose and also routed the fuel pressure transducer wiring in the runat the same time.
I bypassed the old engine block mounted lift pump and the filter assembly.
Just capped and plugged the ports and removed the lines.
The pressure hose then runs straight to the VP44 injection pump.
Use the supplied Fitting to adapt the new pressure hose to the VP44 Injection pump. Be careful removing the old fitting and Be vary careful installing the new flared fitting not to cross thread it. I scoffed when I read this somewhere but believe me its at a weird angle and hard to tell if its straight.
For hooking up the electrical part:
Your power and ground wires go to the battery junction blocks as required and a suitable ground location.
You will plug in or splice into the old lift pump trigger wire at the old lift pump on the left side of the block below the stock filter housing. This will allow the pump to be on the timer and controlled by the PCM/ECM.
I hope this will help a few people out with at least knowing what they are getting into when installing a performance fuel system.
I like this set up if I am ever in doubt if the pumps running and the gauge is acting up you can always remove the filler cap on the tank and listen for the fuel return running in!
Thanks

Thread
Thread Starter
Forum
Replies
Last Post
Jet A Fuel
Tech Article Submission
0
Jun 5, 2015 03:28 PM
RatsMC
Chevy/GMC 6.2L and 6.5L
19
May 4, 2015 05:25 PM


