
Hood Stack


Here are some Photo's...
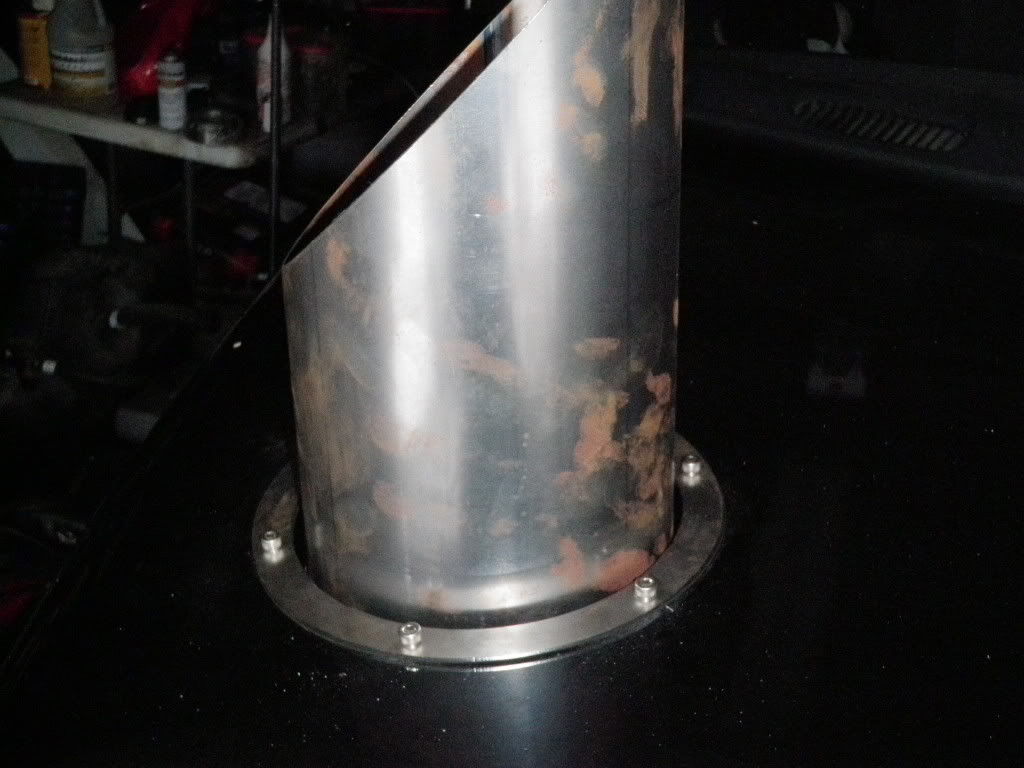
In this photo: This is one of the first revised mount ring. You can see the legs that will attach to the basket. This basket will allow you to adjust the stack to be straight, yet keeping the ring following the contour of the hood.

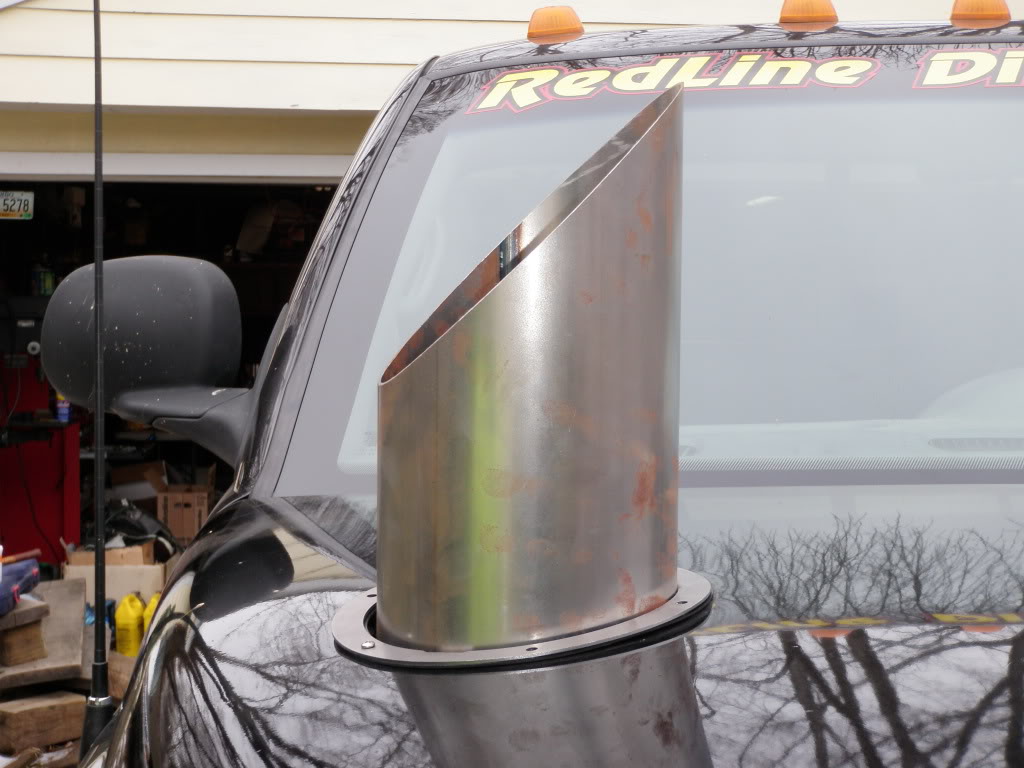
In this photo: Same ring, with stack installed

In this photo: Front view, you can see the stack is straight up and down, and the ring following the hood contour. You can also see the gasket between the hood, and mount ring. This is to allow a more smooth fit.
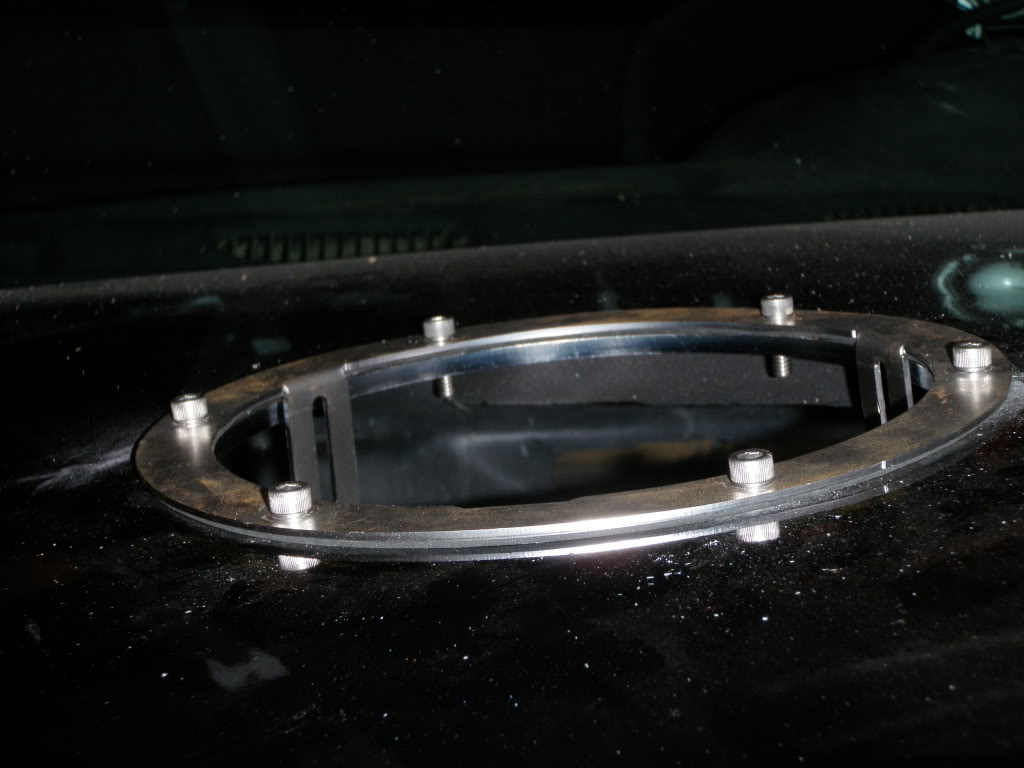
In this photo: Looking down you can see part of the basket. The stack sits in here, no need for a clamp to secure it. HOWEVER we are going to recomend you put a bolt through the stack, and basket to help secure it in case of a turbo blow out.

In this photo: You can see one style of the hardware in these kits. You can either use these shown with a washer, or a flush mount screw. AGAIN this is just the first version of the mount ring, the updated one will be tappered down to allow the flush mount screws to mount flush with the ring, which is the reason you will need the washers for the button head screws if used. You can also see the bolt ring. This ring is used to sandwhich the hood, gasket, and bolt ring together, forming a very tight and solid mount. Since in most applications you will need to cut back some of the hood webbing out, the bolt ring will also re-secure what was cut out.
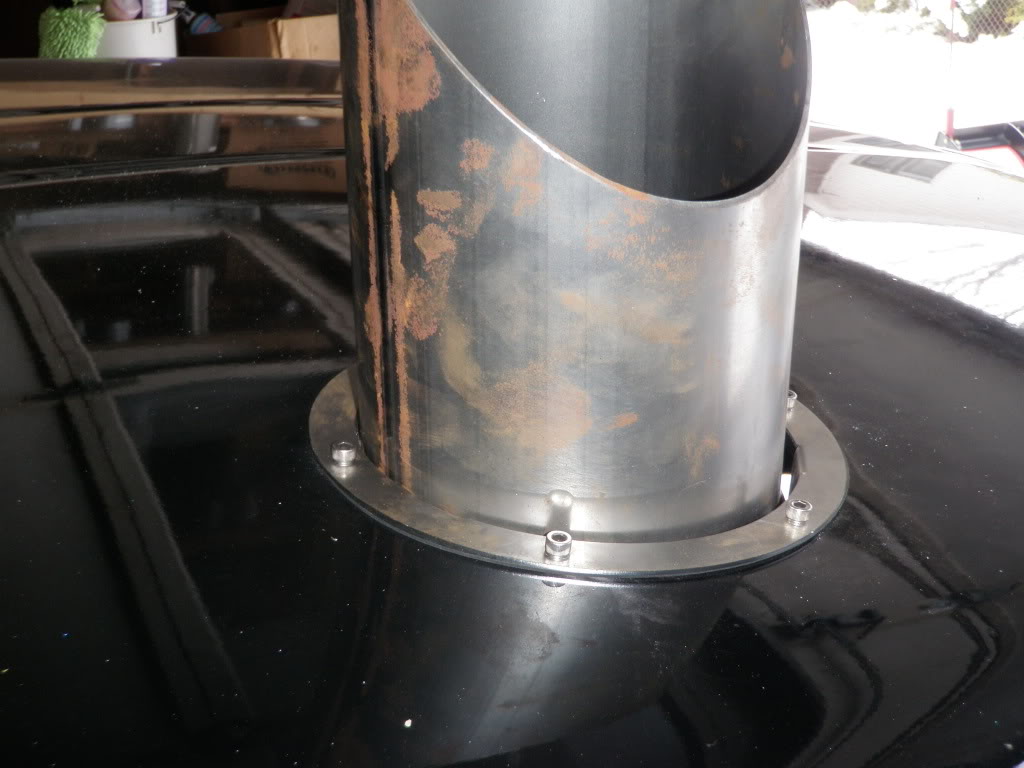
In this photo: Same set up, but with stack installed.
In this photo: Just another point of view.
Now, keep in mind this is just a revised version of the first proto type. The actual ones are a little different, from being fined tuned. These photo's show the ring being aluminized, the actual ring will be 304 stainless. This will allow you to either a.) polish it to a shine, or b.) paint it. I've aske Andy from S.P.I. to hook me up with directions for the correct way to paint the 304 stainless. Special thanks to him for taking the time to do that for us.
I hope when you guys get these you really appriciate the time an effort we put into this product for your truck. If you have any questions...please keep asking them! As soon as I can, I will post pictures of the final version of this set up. Not much has changed, just the mount ring a little bit.
In this photo: This is one of the first revised mount ring. You can see the legs that will attach to the basket. This basket will allow you to adjust the stack to be straight, yet keeping the ring following the contour of the hood.
In this photo: Same ring, with stack installed
In this photo: Front view, you can see the stack is straight up and down, and the ring following the hood contour. You can also see the gasket between the hood, and mount ring. This is to allow a more smooth fit.
In this photo: Looking down you can see part of the basket. The stack sits in here, no need for a clamp to secure it. HOWEVER we are going to recomend you put a bolt through the stack, and basket to help secure it in case of a turbo blow out.
In this photo: You can see one style of the hardware in these kits. You can either use these shown with a washer, or a flush mount screw. AGAIN this is just the first version of the mount ring, the updated one will be tappered down to allow the flush mount screws to mount flush with the ring, which is the reason you will need the washers for the button head screws if used. You can also see the bolt ring. This ring is used to sandwhich the hood, gasket, and bolt ring together, forming a very tight and solid mount. Since in most applications you will need to cut back some of the hood webbing out, the bolt ring will also re-secure what was cut out.
In this photo: Same set up, but with stack installed.
In this photo: Just another point of view.
Now, keep in mind this is just a revised version of the first proto type. The actual ones are a little different, from being fined tuned. These photo's show the ring being aluminized, the actual ring will be 304 stainless. This will allow you to either a.) polish it to a shine, or b.) paint it. I've aske Andy from S.P.I. to hook me up with directions for the correct way to paint the 304 stainless. Special thanks to him for taking the time to do that for us.
I hope when you guys get these you really appriciate the time an effort we put into this product for your truck. If you have any questions...please keep asking them! As soon as I can, I will post pictures of the final version of this set up. Not much has changed, just the mount ring a little bit.

Thanks Marge...It should have been done by now IMO...but so goes office politics 
Not yet. The parts are ordered that have to be ordered. Parts that have to be built here are in getting in the works. I'm guessing 4 weeks, and I should have something by then.
so what is the best way to plumb that without turning the turbo around on a vp44 engine? diagrams help. was hopping to run the stock exhaust (to keep it quiet around people who will complain about it and get me kicked out of my bachelor pad) while plumbing a fully functional hood stack with a butterfly valve for WOT power runs. it seems like a lot of work but if it lets me have my cake and eat it too its worth it.

Diesel Fan
Joined: Nov 2010
Posts: 45
Likes: 1
From: sandwich illlinois
whats going on with the hood stacks i cant seem to find them anywhere im building a new engine for my truck and would love to run a 7in miter i got two in my bed right now but i want on outta the hood


