
Dynatrac install article


Thread Starter
|
Diesel Fan
Joined: Nov 2008
Posts: 57
Likes: 3
Here's an article I wrote up about the installation process for my Dynatrac Free-Spin hub conversion kit. If you're thinking about doing the conversion, maybe this will help you get an idea of how much work is involved. Since the disassembly for the Dynatrac kit is 90% of the disassembly to R/R the ball joints Gregrob and I replaced them too and with the two of us working, we were able to install the conversion kit, R/R the ball joints, and get my truck back on the road in a tick under 9 hours including the time for lunch and breaks. I did pre-assemble the wheel studs into the hub and spindle mounting studs into the spindles but since I made a couple time-consuming mistakes during the big install, the total time required is pretty much a wash. For 3 days prior to the install day I soaked the ball joints, u-joints, and any hardware I could reach with PB-Blaster to make removal easier. The install is the same on the driver's- and passenger's sides so the pictures alternate between the two.
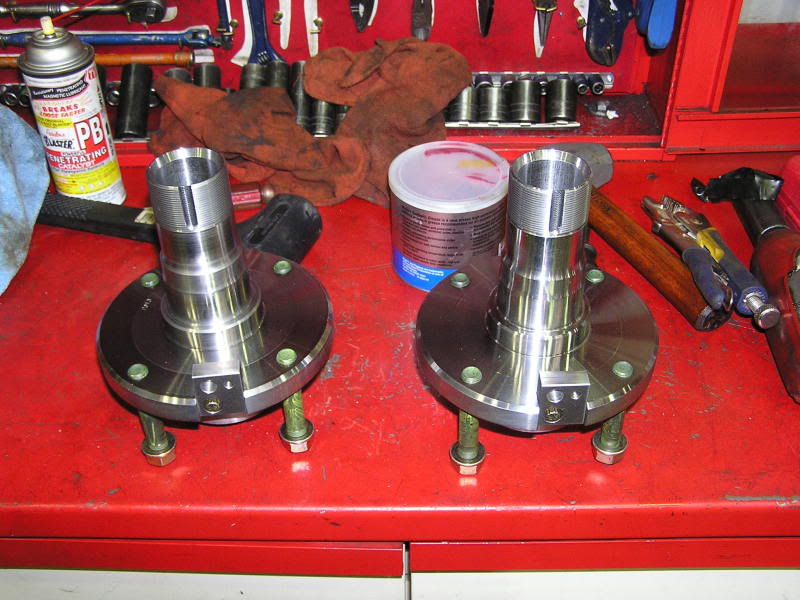
Step 1: Inventory the parts. The kit includes (more-or-less clockwise from 12 o'clock):
* New hubs with the ABS tone rings and bearing races pre-installed (2)
* New forged fixed spindles with needle bearing housing and ABS sensor mounting blocks pre-installed (2)
* Timken inner/outer bearings (4 total--for each side)
* Inner hub seals (2)
* Inner axleshaft seals (2)
* Spanner nuts (4)
* Dana 60 lock washers (2)
* 35-spline outer stub axleshafts (2)
* Brake caliper spacers (8--4 each of thin and thick)
* Wheel mounting studs (16)
* Warn heavy-duty hub locks (2)
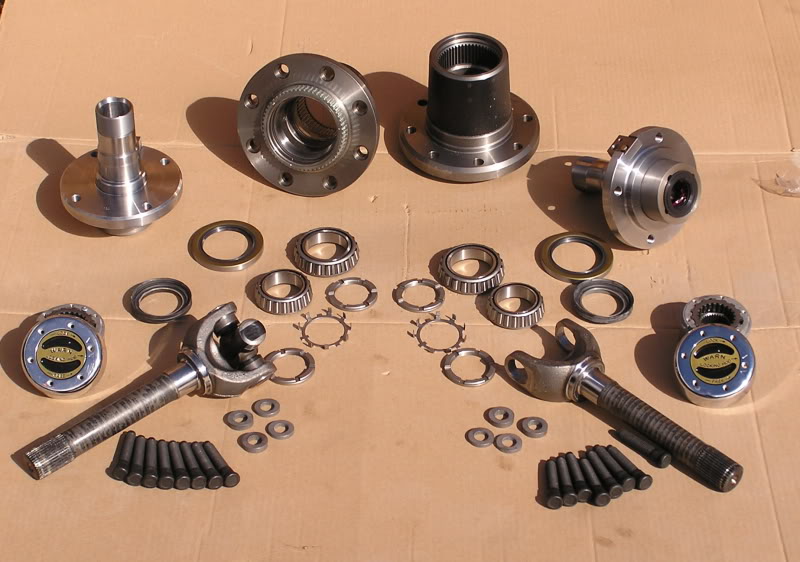
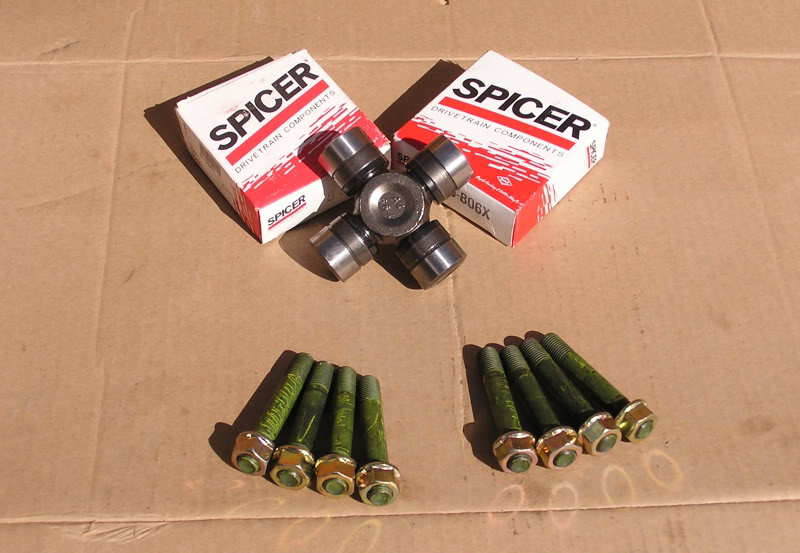
Step 2: Not included but very highly recommended are:
* New axleshaft u-joints since you can pre-assemble the u-joints into the outer stub shafts vs. trying to re-use the old ones
* New spindle mounting studs and nuts--the hassles involved in trying to re-use the old ones just isn't worth the $25 for new ones
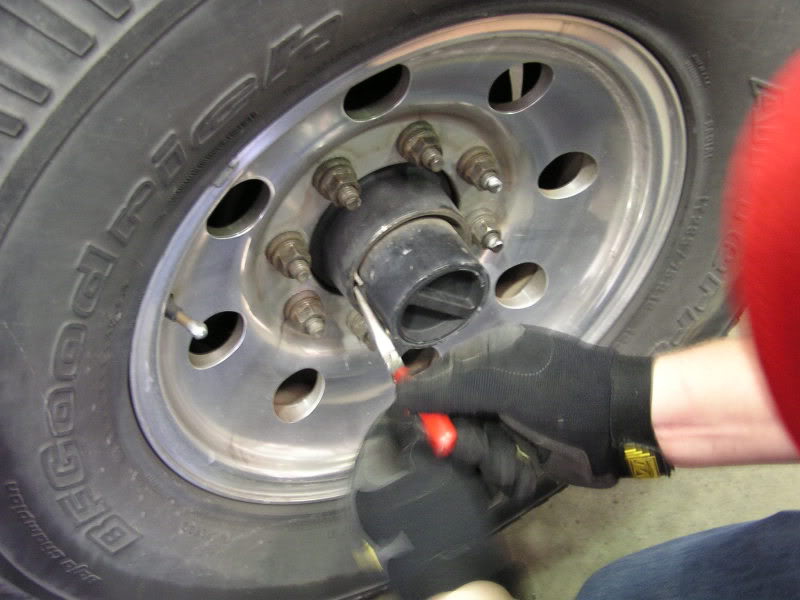
Step 3: Once you have the front end of the truck supported on jack stands, use a pair of needlenose pliers to squeeze the inner snap ring, remove it, then pull stright out on the hub lock to remove it. Once the hub lock is removed, remove the lug nuts and the wheel.
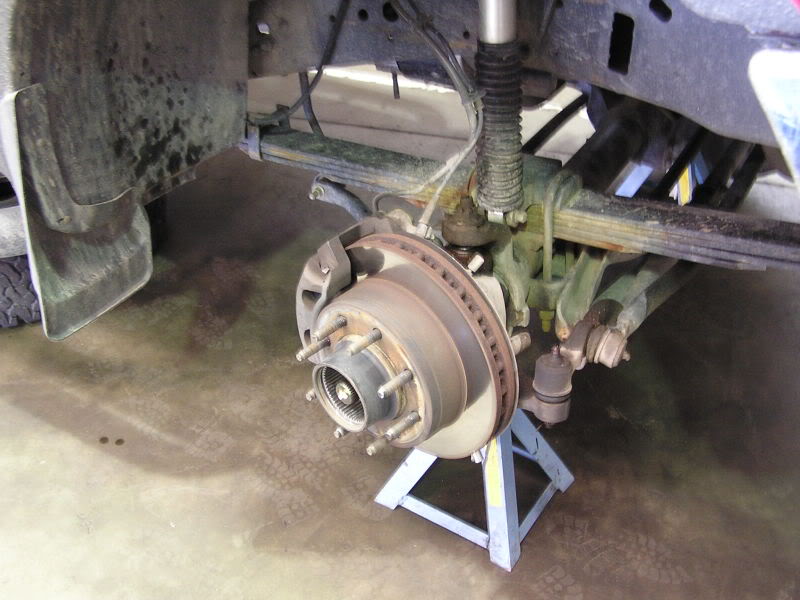
Step 4: Remove the ABS sensors, brake calipers and rotors, securing the calipers to the springs so as to not stress the brake lines. I used ratcheting tiedown straps (forgot the bungee cords at home) but coat hangers or the aforementioned bungee cords will also work. The mounting bolts are very tight so air tools + penetrating lube are worth every penny for this step.

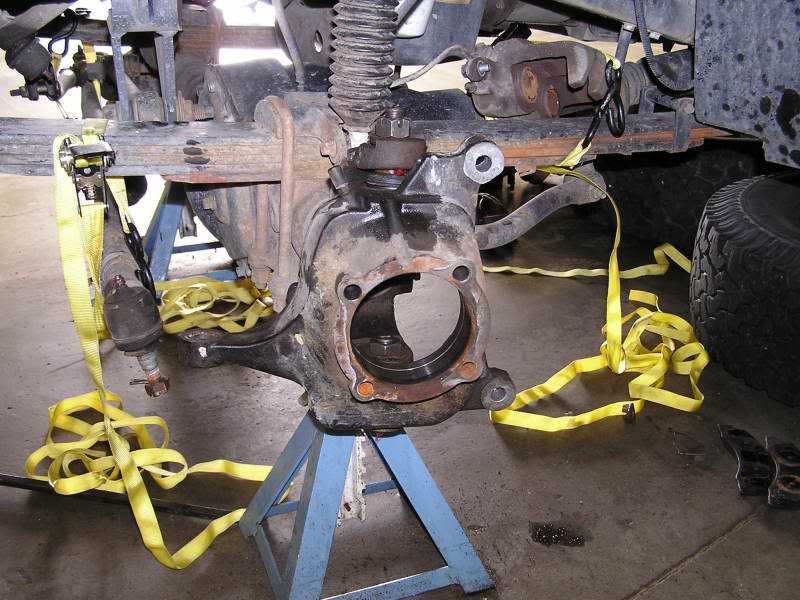
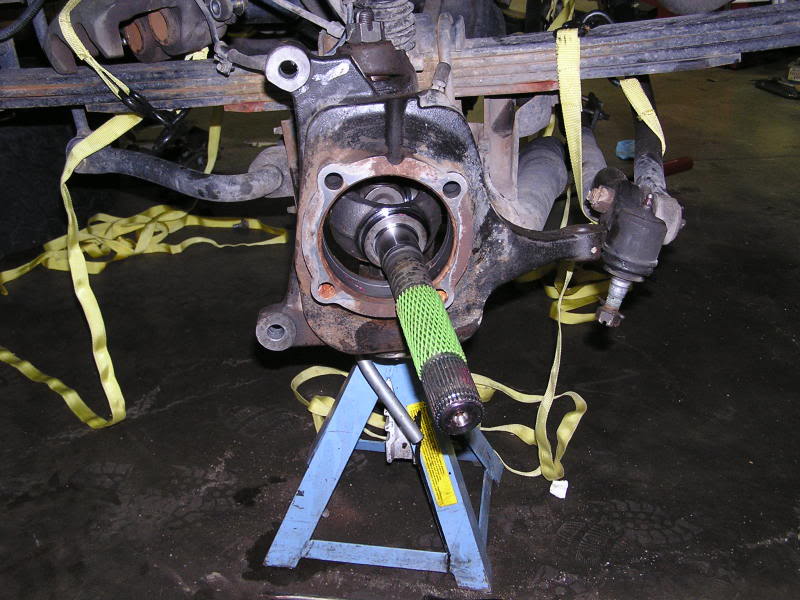
Step 5: Remove the tie rod-end nuts, then using a pitman arm puller pop the tie rod end out of the knuckle on each side. I used more ratcheting tiedown straps to hang the tie rod from the spring pack. This needs to be done so you can turn the knuckle for bettter clearance to the hub bearing nuts. Once that's done, remove the 3 thrust washers around the outer axleshaft then remove the four nuts holding each unit hub bearing to the knuckle. When the unit bearings are removed, using a long prybar between the u-joint yoke and the axle tube, pry the axles outwards and remove them.
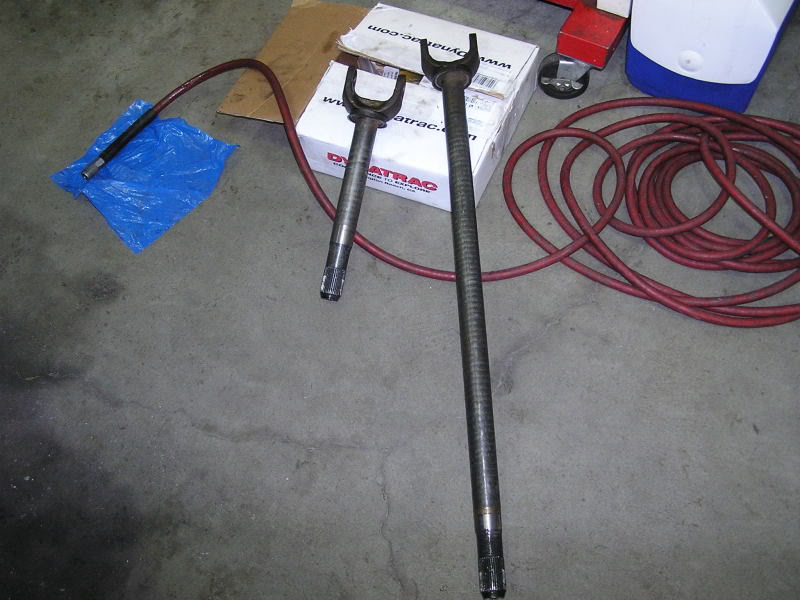
Step 6: Using a u-joint press, a 1/2" impact gun, a BFH, and appropriate punches, press/beat the u-joints out of the stock inner axleshafts. At this step, penetrating lube is your friend since the u-joints are very very snug. Leave the u-joints in the outer stub shafts since they won't be re-used. Once the joints are out, press the new u-joints + outer stub shafts into the inner axleshafts. The outer stubs are identical so it doesn't matter which inner shaft they get attached to.
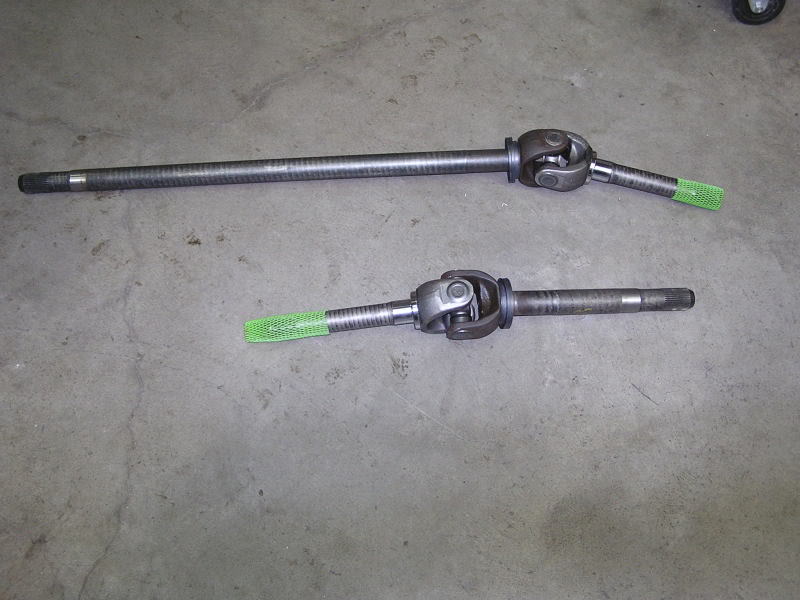
Step 7: I forgot to do this and that required quite a bit of disassembly to fix, but make sure to press new seals on the flange right next to the u-joint yoke on each axleshaft. A thin film of RTV will help hold the seal in place during reassembly.
Step 8: If you're going to R/R the ball joints, this is the point at which you would do that but this article (and my pictures) is about the Dynatrac install so I'll skip how to do the ball joints.
Step 9: Reinstall the axleshafts (should be obvious which shaft assembly goes in which side of the axle tube), making sure to clean the inner axle tube so that you don't force dirt/rust/debris into the axletube and differential.
Step 1: Inventory the parts. The kit includes (more-or-less clockwise from 12 o'clock):
* New hubs with the ABS tone rings and bearing races pre-installed (2)
* New forged fixed spindles with needle bearing housing and ABS sensor mounting blocks pre-installed (2)
* Timken inner/outer bearings (4 total--for each side)
* Inner hub seals (2)
* Inner axleshaft seals (2)
* Spanner nuts (4)
* Dana 60 lock washers (2)
* 35-spline outer stub axleshafts (2)
* Brake caliper spacers (8--4 each of thin and thick)
* Wheel mounting studs (16)
* Warn heavy-duty hub locks (2)
Step 2: Not included but very highly recommended are:
* New axleshaft u-joints since you can pre-assemble the u-joints into the outer stub shafts vs. trying to re-use the old ones
* New spindle mounting studs and nuts--the hassles involved in trying to re-use the old ones just isn't worth the $25 for new ones
Step 3: Once you have the front end of the truck supported on jack stands, use a pair of needlenose pliers to squeeze the inner snap ring, remove it, then pull stright out on the hub lock to remove it. Once the hub lock is removed, remove the lug nuts and the wheel.
Step 4: Remove the ABS sensors, brake calipers and rotors, securing the calipers to the springs so as to not stress the brake lines. I used ratcheting tiedown straps (forgot the bungee cords at home) but coat hangers or the aforementioned bungee cords will also work. The mounting bolts are very tight so air tools + penetrating lube are worth every penny for this step.
Step 5: Remove the tie rod-end nuts, then using a pitman arm puller pop the tie rod end out of the knuckle on each side. I used more ratcheting tiedown straps to hang the tie rod from the spring pack. This needs to be done so you can turn the knuckle for bettter clearance to the hub bearing nuts. Once that's done, remove the 3 thrust washers around the outer axleshaft then remove the four nuts holding each unit hub bearing to the knuckle. When the unit bearings are removed, using a long prybar between the u-joint yoke and the axle tube, pry the axles outwards and remove them.
Step 6: Using a u-joint press, a 1/2" impact gun, a BFH, and appropriate punches, press/beat the u-joints out of the stock inner axleshafts. At this step, penetrating lube is your friend since the u-joints are very very snug. Leave the u-joints in the outer stub shafts since they won't be re-used. Once the joints are out, press the new u-joints + outer stub shafts into the inner axleshafts. The outer stubs are identical so it doesn't matter which inner shaft they get attached to.
Step 7: I forgot to do this and that required quite a bit of disassembly to fix, but make sure to press new seals on the flange right next to the u-joint yoke on each axleshaft. A thin film of RTV will help hold the seal in place during reassembly.
Step 8: If you're going to R/R the ball joints, this is the point at which you would do that but this article (and my pictures) is about the Dynatrac install so I'll skip how to do the ball joints.
Step 9: Reinstall the axleshafts (should be obvious which shaft assembly goes in which side of the axle tube), making sure to clean the inner axle tube so that you don't force dirt/rust/debris into the axletube and differential.
Thread Starter
|
Diesel Fan
Joined: Nov 2008
Posts: 57
Likes: 3
Step 10: Using one nut spun down against a second nut, install the new mounting studs into the spindles. I used blue Loctite but the new studs have some sort of yellowish-green goo on them from the factory that probably works to do the same thing.
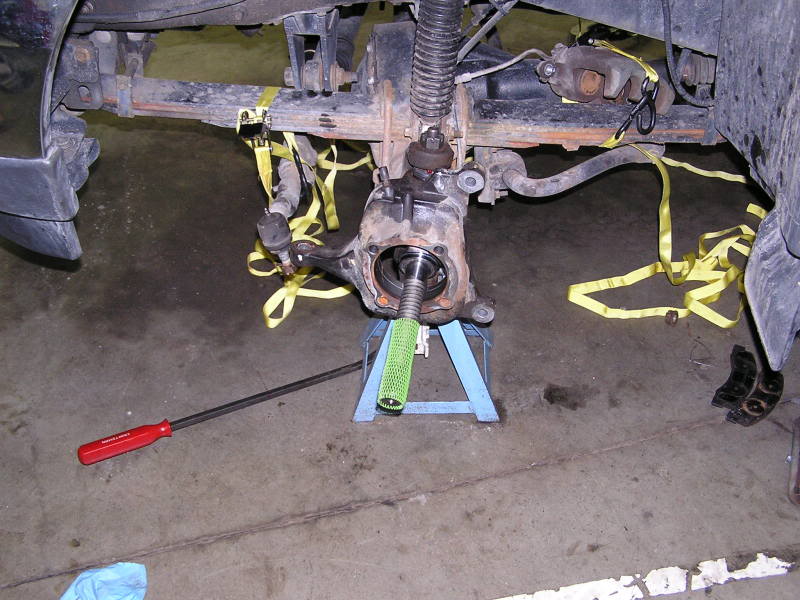
Step 11: Reinstall the brake dust shield, making sure to clock it correctly so that it'll clear the brake caliper. I did this incorrectly and wound up cutting the shield off with a cutoff wheel instead of disassembling everything to turn it 90 degrees. Once the shield is in position, install the spindle on the knuckle with the ABS sensor mounting block in the 12 o'clock position.
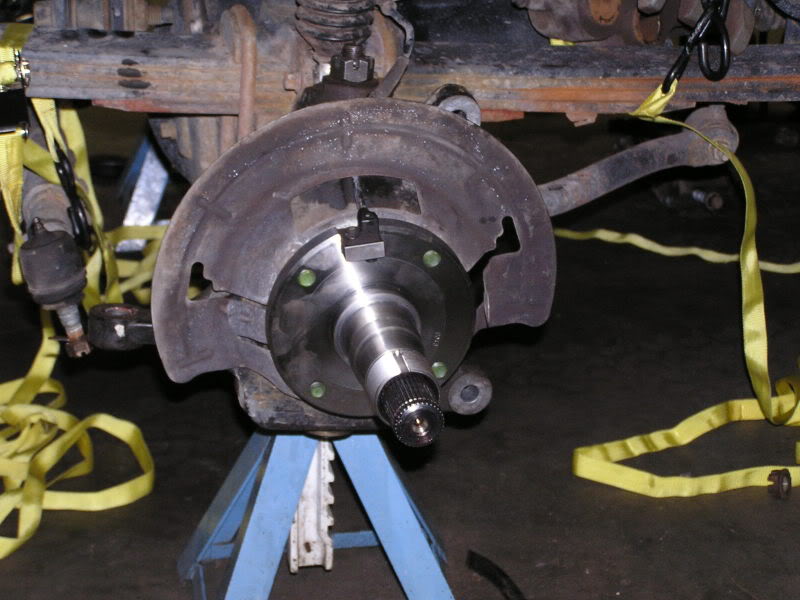
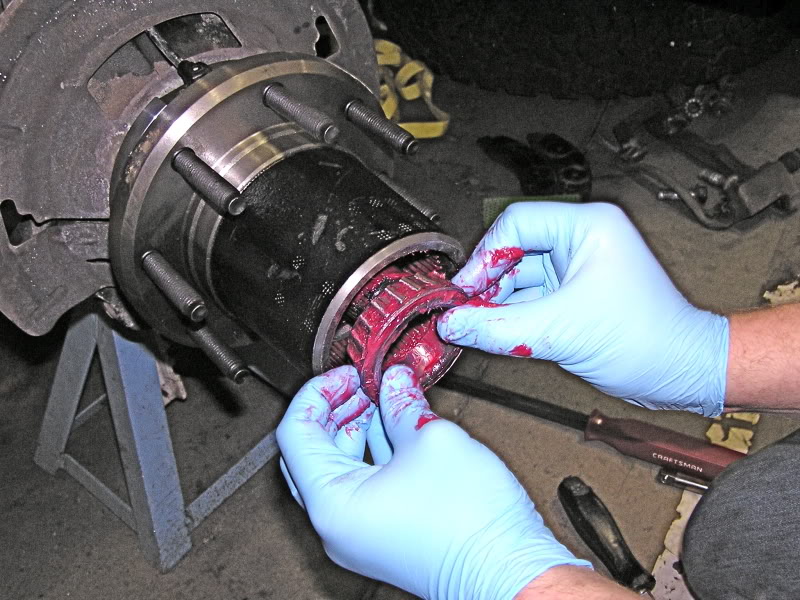
Step 12: Press the new wheel mounting studs into the hubs then pack the inner bearing with grease (I used Mobil1 Synthetic) and install the inner hub seal. Once the seal is installed and the bearings are packed, carefully slide the hub over the spindle making sure not to ding up the seal. When the hubs are in position, pack the outer bearaing and the space between the bearings with grease and push the outer bearing into the hub.
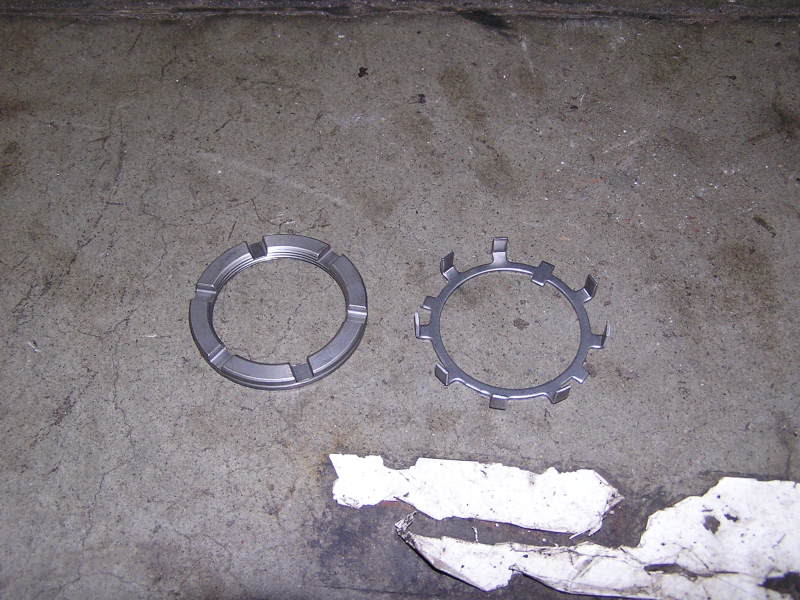
Step 13: Screw the inner spanner nut onto the spindle, then place the lock washer in position with the tabs pointing out, then screw the outer spanner nut onto the spindle and torque to 70 lb/ft + whatever small increment is necessary for the recesses in the outer spanner to line up with the tabs on the lock washer. Press the lock washer tab into the recess on the outer spanner to lock the nut in position and prevent it from loosening.
Step 14: Replace the brake rotors and calipers with the appropriate caliper-mounting spacers that were included in the kit(sorry--I don't have pics of this step). Reinstall the tie rod ends into the knuckles since you don't need the clearance anymore.
Step 15: Replace the wheels on the hubs, tighten the lug nuts, then lower the vehicle off the jack stands.
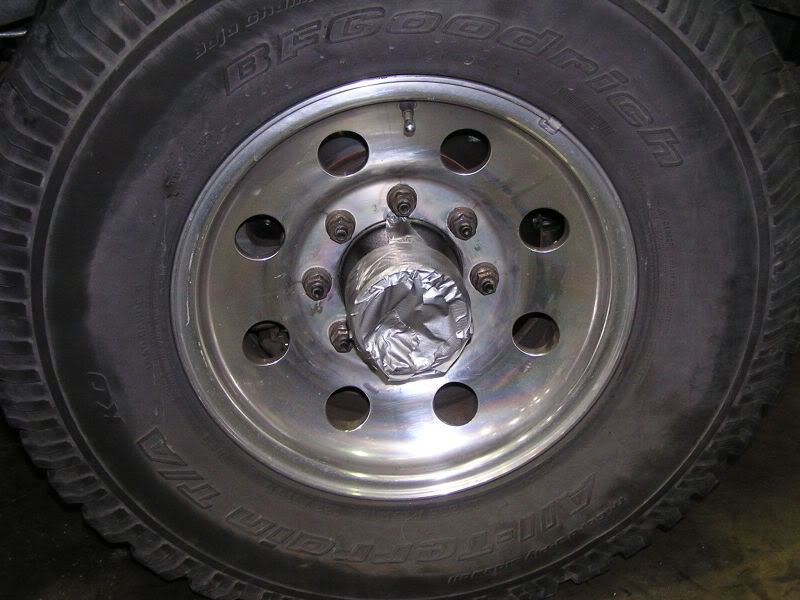
If you run out of time, use field-expedient, temporary hub locks.
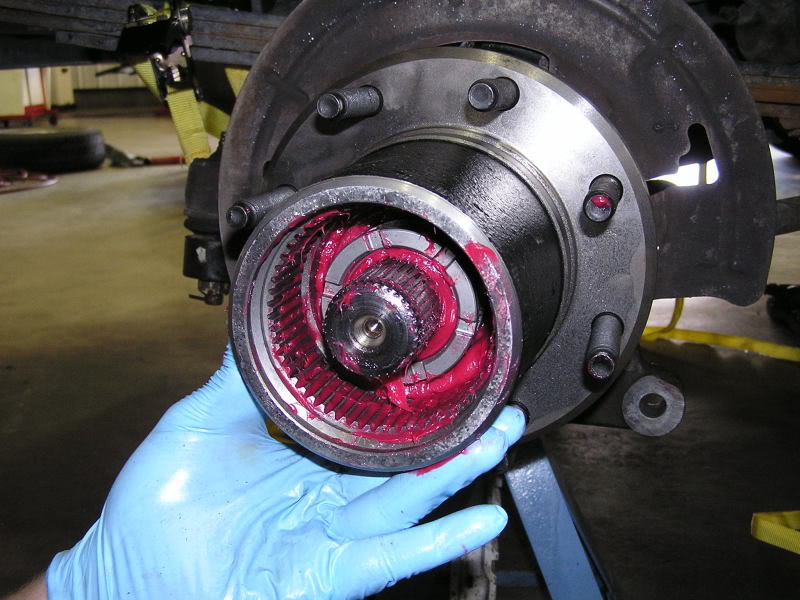
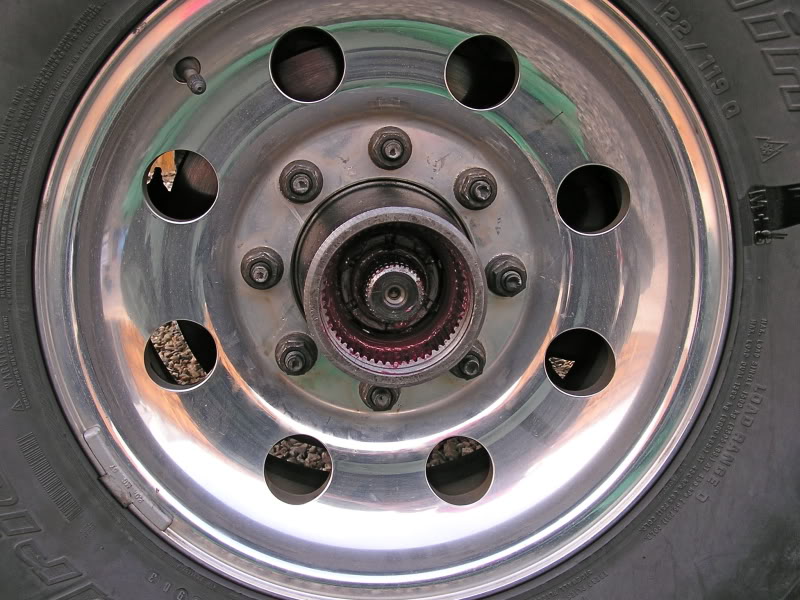
Step 16: Place the Warn gear body into the hub, lightly greasing the splines, and lock the gear body into position with a spiral split lock ring that fits into the slot cut into the inner hub splines.
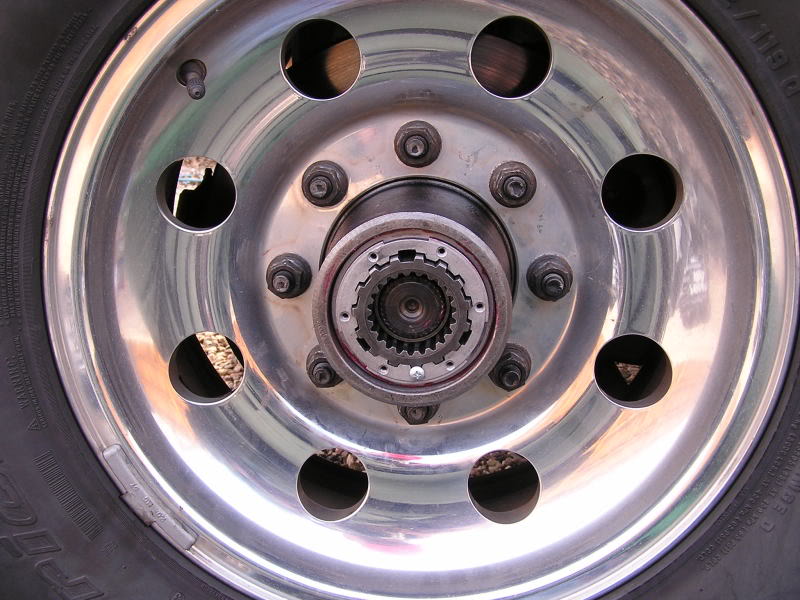
Step 18: When time allows, screw the manual hub lock to the gear body, check for leaks/loose/missing parts, and you're done!
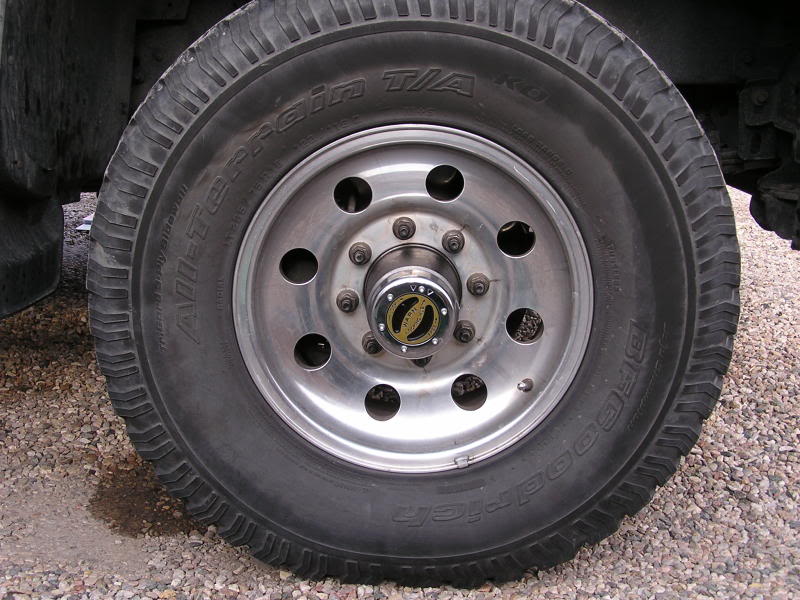
The Dynatrac hubs are larger than the OEM hubs so the stock hub covers won't fit without some work. I had mine machined open to a 5" I.D. but 4.75" I.D. would probably fit tighter and look a little better.

---AutoMerged DoublePost---
I got the new ball joints and new u-joints as Christmas presents last year so that saved ~ $350 or so. The Dynatrac kit cost me $1795, the extra hardware (studs, nuts, etc...) was another ~$40, and I probably had a c-note into all the miscellaneous stuff like extra lock washers, grease, tools (prybar, 6-point spanner nut socket, et. al.) and hub cover machining. My total out-of-pocket was just a shade under $2k but I've recovered a piece of that by selling the OEM manual hub locks and outer stub shafts on Ebay.
Dynatrac raises their prices regularly and since February, the price has jumped from $1795 to $1939 at the same vendor.
It was a metric ton of dough, but I cyphered out that if I lost just one OEM unit bearing somewhere in the middle of BFE and the bearing didn't take out any additional parts (brake rotor, u-joint, axleshafts) when it went, I'd be out ~$1,500 minimum to get it fixed at a dealership when you add up towing, dealership prices for parts/labor, and a couple days worth of hotel, food, etc. I'd rather save up the money and spend it when i was ready and prepared to do so than get surprised with a bill like that when I didn't have enough money to pay it.
I didn't think it was that much of a PITA but it did make for a long day and a lot of work since the install was a pretty complex job. Other than the brake dust shield (100% my fault) my friend and I didn't have to do any filing/grinding/pounding to get the parts to fit since they were all machined accurately and fit properly right out of the box.
Greg said he'd always questioned the price of a Dynatrac kit but when he saw the parts and how nicely machined/finished they were while helping me install them, he understood where the cost came from.
Step 11: Reinstall the brake dust shield, making sure to clock it correctly so that it'll clear the brake caliper. I did this incorrectly and wound up cutting the shield off with a cutoff wheel instead of disassembling everything to turn it 90 degrees. Once the shield is in position, install the spindle on the knuckle with the ABS sensor mounting block in the 12 o'clock position.
Step 12: Press the new wheel mounting studs into the hubs then pack the inner bearing with grease (I used Mobil1 Synthetic) and install the inner hub seal. Once the seal is installed and the bearings are packed, carefully slide the hub over the spindle making sure not to ding up the seal. When the hubs are in position, pack the outer bearaing and the space between the bearings with grease and push the outer bearing into the hub.
Step 13: Screw the inner spanner nut onto the spindle, then place the lock washer in position with the tabs pointing out, then screw the outer spanner nut onto the spindle and torque to 70 lb/ft + whatever small increment is necessary for the recesses in the outer spanner to line up with the tabs on the lock washer. Press the lock washer tab into the recess on the outer spanner to lock the nut in position and prevent it from loosening.
Step 14: Replace the brake rotors and calipers with the appropriate caliper-mounting spacers that were included in the kit(sorry--I don't have pics of this step). Reinstall the tie rod ends into the knuckles since you don't need the clearance anymore.
Step 15: Replace the wheels on the hubs, tighten the lug nuts, then lower the vehicle off the jack stands.
If you run out of time, use field-expedient, temporary hub locks.
Step 16: Place the Warn gear body into the hub, lightly greasing the splines, and lock the gear body into position with a spiral split lock ring that fits into the slot cut into the inner hub splines.
Step 18: When time allows, screw the manual hub lock to the gear body, check for leaks/loose/missing parts, and you're done!
The Dynatrac hubs are larger than the OEM hubs so the stock hub covers won't fit without some work. I had mine machined open to a 5" I.D. but 4.75" I.D. would probably fit tighter and look a little better.
---AutoMerged DoublePost---
I got the new ball joints and new u-joints as Christmas presents last year so that saved ~ $350 or so. The Dynatrac kit cost me $1795, the extra hardware (studs, nuts, etc...) was another ~$40, and I probably had a c-note into all the miscellaneous stuff like extra lock washers, grease, tools (prybar, 6-point spanner nut socket, et. al.) and hub cover machining. My total out-of-pocket was just a shade under $2k but I've recovered a piece of that by selling the OEM manual hub locks and outer stub shafts on Ebay.
Dynatrac raises their prices regularly and since February, the price has jumped from $1795 to $1939 at the same vendor.
It was a metric ton of dough, but I cyphered out that if I lost just one OEM unit bearing somewhere in the middle of BFE and the bearing didn't take out any additional parts (brake rotor, u-joint, axleshafts) when it went, I'd be out ~$1,500 minimum to get it fixed at a dealership when you add up towing, dealership prices for parts/labor, and a couple days worth of hotel, food, etc. I'd rather save up the money and spend it when i was ready and prepared to do so than get surprised with a bill like that when I didn't have enough money to pay it.
I didn't think it was that much of a PITA but it did make for a long day and a lot of work since the install was a pretty complex job. Other than the brake dust shield (100% my fault) my friend and I didn't have to do any filing/grinding/pounding to get the parts to fit since they were all machined accurately and fit properly right out of the box.
Greg said he'd always questioned the price of a Dynatrac kit but when he saw the parts and how nicely machined/finished they were while helping me install them, he understood where the cost came from.
Last edited by jvencius; Dec 14, 2008 at 10:01 AM. Reason: Automerged Doublepost

Diesel Bomber

Joined: Aug 2007
Posts: 6,157
Likes: 371
From: TIKRIT, IRAQ
i would recommend EMS next time, same kit at half the cost.....they sell the ford kits just above thier cost.....they just offer the ford kits as a service, they make thier money on dodge kits.....

Thread
Thread Starter
Forum
Replies
Last Post
JoeyMiR
24 Valve 2nd Gen Dodge Cummins 98.5-02
9
Feb 3, 2018 10:05 PM
Diesel Bombers
General Diesel Related
0
Apr 29, 2015 08:20 AM
Gman30
5.9 Liter CR Dodge Cummins 03-07
2
Dec 27, 2014 12:46 PM
JustAnother_cummins_guy
12 Valve 2nd Gen Dodge Cummins 94-98
4
Nov 10, 2014 09:44 PM


