
towing mirror repairs

Thread Starter
|
Diesel Enthusiast
Joined: Oct 2009
Posts: 375
Likes: 30
From: North Carolina
I did this on my wife's 03, but it should be the same for the second gen mirrors...
sorry, no pics, because I was too pissed off to take any, but I decided tonight to fix my passenger side tow mirror, on the wife's 03. Her mirror was loose, and wouldn't lock in place, it kept drifting in while driving, and was annoying as all get out, so I decided to fix it tonight, before I picked up my 30 ft travel trailer tomorrow. Let me tell you a little about how they work.
1st, I took the mirror off the truck, easy enough. take out the screw in the top of the door trim, and remove the three 10 mm nuts on the backside. disconnect the electrical, and remove mirror from the truck. There will be a piece of foam insulation between the mirror and the door, remember to save that to put it back on.
Now, moving on to the slightly harder part.
I discovered that the plastic trim on the mirror arm will come apart. I'm not sure if I actually needed to do this, but it definitely came in handy (I'll get into that in a minute). the front side just clips on, so if you're careful, you can pop the clips on it, and pull it back a little. Don't do what I did, and remove it completely, since there's a ring that goes around the mirror head-it'll break. :doh: (it actually wasn't that bad, and with the mirror reassembled, you can't tell, but I wouldn't have done it if I had known it was a solid ring)
Second, take the back of the mirror off. Theres 4-5 torxhead screws, you'll need a bit to get to the one by the mirror head. You might not see this one, so at this point, flip the mirror up, and you'll see which one I'm talking about.
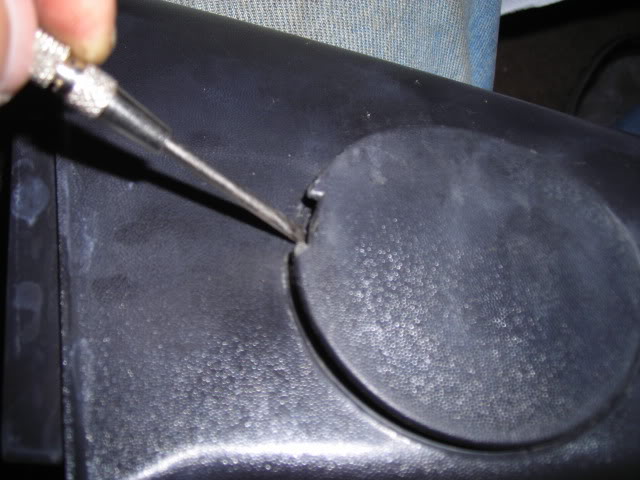
(I popped the round cover off the bottom of the mirror before I did anything else) This is the cover to the pivot assembly.
Here's where it gets really freakishly hard.
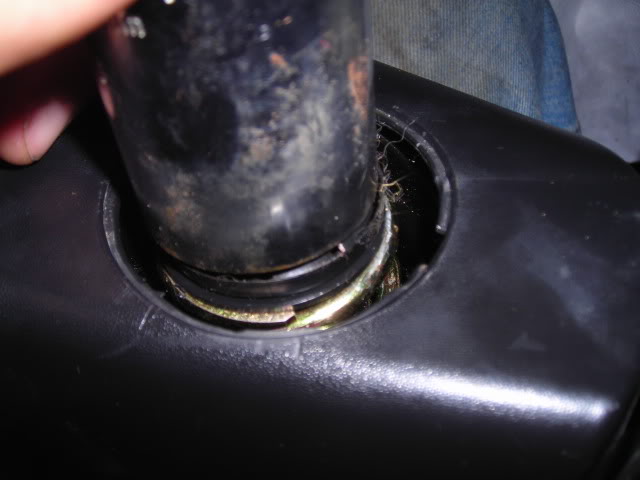
inside the pivot point on the mirror arm, when you look in, you'll see a round retainer clip with locking tabs, holding it to the actual hinge. You'll need to take this off in order to reseat the ball bearings inside the arm. (NOTE!!!!!:::THERE IS A HEAVY DUTY SPRING BENEATH THIS, SO IF YOU DO TAKE IT OFF, BE CAREFUL, BECAUSE THE SPRING WILL SHOOT OUT AT YOU!) ask me how I know....:party018:
Once that locking tab is off, and the spring has shot out and hit you in the face, you can now pull the rest of the hinge out, reseat your bearings, and put it back together.......NOT!
The problem I ran into was that the spring needed to compress into the arm far enough for the locking ring to bite down on the hinge. This proved far more difficult that I originally thought, due to the wiring for the heated and power mirrors running through it.
What I eventually did, and i should have done this in the first place, was cut the wires, and pull them out of the way. Don't even bother trying to work around them, as all you'll do is tear them up. Just cut them, and resplice them later. I resoldered mine, and used heatshrink on the individual wires, and then taped them up when I was done.
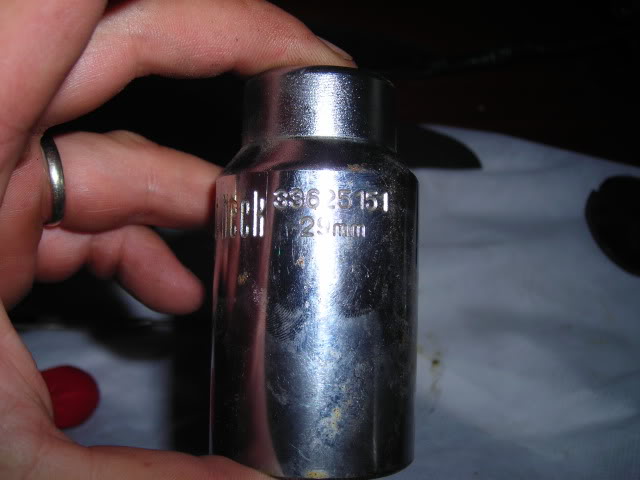
Once you've cut the wires, what worked for me was using a c clamp, and a large enough socket that the socket would fit around the hinge. This is key. if the socket won't fit around the hinge, it will NOT push the locking tab far enough down for it to bite. It took me about 15 minutes to get this on, as the cclamp kept slipping off the socket. Once it bit down, though, it was easy from there.
I resoldered the wires, put the mirror back together, and tested it, and it works fine.
Sorry about the lack of pics, but like I said, I was in no mood to be taking pics when I found out there was a spring in the middle of the arm. Maybe if I have to do it again sometime, I'll take pics then, but at least this should give you an idea of what to do, or what to be looking for.
sorry, no pics, because I was too pissed off to take any, but I decided tonight to fix my passenger side tow mirror, on the wife's 03. Her mirror was loose, and wouldn't lock in place, it kept drifting in while driving, and was annoying as all get out, so I decided to fix it tonight, before I picked up my 30 ft travel trailer tomorrow. Let me tell you a little about how they work.
1st, I took the mirror off the truck, easy enough. take out the screw in the top of the door trim, and remove the three 10 mm nuts on the backside. disconnect the electrical, and remove mirror from the truck. There will be a piece of foam insulation between the mirror and the door, remember to save that to put it back on.
Now, moving on to the slightly harder part.
I discovered that the plastic trim on the mirror arm will come apart. I'm not sure if I actually needed to do this, but it definitely came in handy (I'll get into that in a minute). the front side just clips on, so if you're careful, you can pop the clips on it, and pull it back a little. Don't do what I did, and remove it completely, since there's a ring that goes around the mirror head-it'll break. :doh: (it actually wasn't that bad, and with the mirror reassembled, you can't tell, but I wouldn't have done it if I had known it was a solid ring)
Second, take the back of the mirror off. Theres 4-5 torxhead screws, you'll need a bit to get to the one by the mirror head. You might not see this one, so at this point, flip the mirror up, and you'll see which one I'm talking about.
(I popped the round cover off the bottom of the mirror before I did anything else) This is the cover to the pivot assembly.
Here's where it gets really freakishly hard.
inside the pivot point on the mirror arm, when you look in, you'll see a round retainer clip with locking tabs, holding it to the actual hinge. You'll need to take this off in order to reseat the ball bearings inside the arm. (NOTE!!!!!:::THERE IS A HEAVY DUTY SPRING BENEATH THIS, SO IF YOU DO TAKE IT OFF, BE CAREFUL, BECAUSE THE SPRING WILL SHOOT OUT AT YOU!) ask me how I know....:party018:
Once that locking tab is off, and the spring has shot out and hit you in the face, you can now pull the rest of the hinge out, reseat your bearings, and put it back together.......NOT!
The problem I ran into was that the spring needed to compress into the arm far enough for the locking ring to bite down on the hinge. This proved far more difficult that I originally thought, due to the wiring for the heated and power mirrors running through it.
What I eventually did, and i should have done this in the first place, was cut the wires, and pull them out of the way. Don't even bother trying to work around them, as all you'll do is tear them up. Just cut them, and resplice them later. I resoldered mine, and used heatshrink on the individual wires, and then taped them up when I was done.
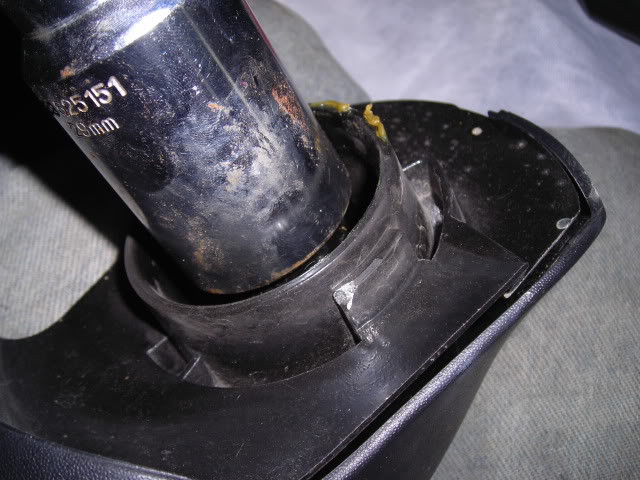
Once you've cut the wires, what worked for me was using a c clamp, and a large enough socket that the socket would fit around the hinge. This is key. if the socket won't fit around the hinge, it will NOT push the locking tab far enough down for it to bite. It took me about 15 minutes to get this on, as the cclamp kept slipping off the socket. Once it bit down, though, it was easy from there.
I resoldered the wires, put the mirror back together, and tested it, and it works fine.
Sorry about the lack of pics, but like I said, I was in no mood to be taking pics when I found out there was a spring in the middle of the arm. Maybe if I have to do it again sometime, I'll take pics then, but at least this should give you an idea of what to do, or what to be looking for.
Thread Starter
|
Diesel Enthusiast
Joined: Oct 2009
Posts: 375
Likes: 30
From: North Carolina
Bump...
I took the original post, and added pics, so heres a slightly better version of it all...
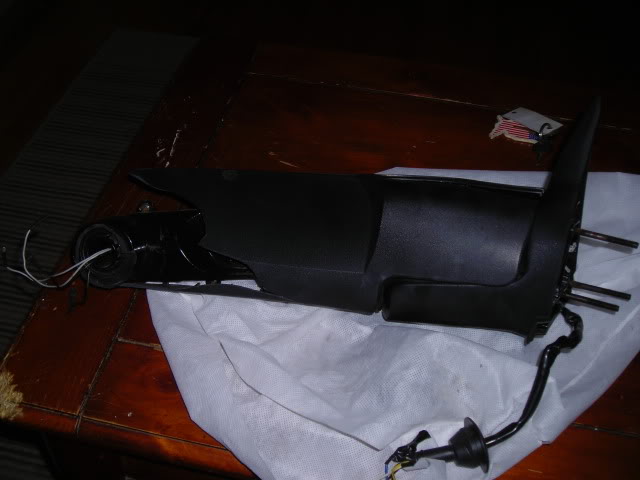
*Updated, with PICS*, because I was too pissed off to take any, but I decided tonight to fix my passenger side tow mirror, on the wife's 03. Her mirror was loose, and wouldn't lock in place, it kept drifting in while driving, and was annoying as all get out, so I decided to fix it tonight, before I picked up my 30 ft travel trailer tomorrow. Let me tell you a little about how they work.
1st, I took the mirror off the truck, easy enough. take out the screw in the top of the door trim, and remove the three 10 mm nuts on the backside. disconnect the electrical, and remove mirror from the truck. There will be a piece of foam insulation between the mirror and the door, remember to save that to put it back on.
*I didn't add pics of this part, but this is probably the easiest part to do. I can't really take pics right now anyways, since the wife's out of town with the 3rd gen. *
Now, moving on to the slightly harder part.
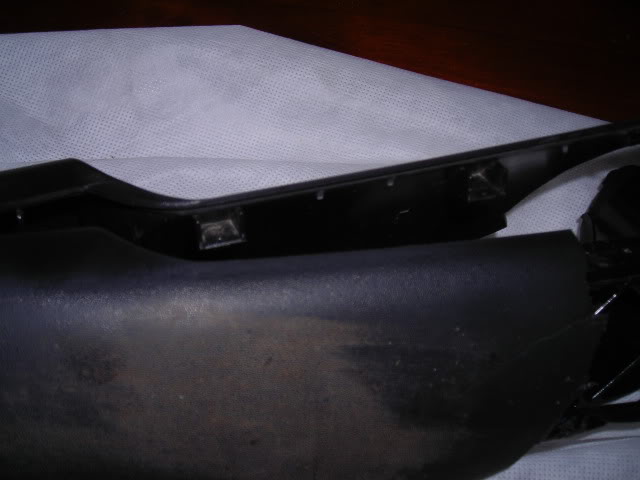
I discovered that the plastic trim on the mirror arm will come apart. I'm not sure if I actually needed to do this, but it definitely came in handy (I'll get into that in a minute). the front side just clips on, so if you're careful, you can pop the clips on it, and pull it back a little. Don't do what I did, and remove it completely, since there's a ring that goes around the mirror head-it'll break. :doh: (it actually wasn't that bad, and with the mirror reassembled, you can't tell, but I wouldn't have done it if I had known it was a solid ring)
*some of these pics aren't going to be exact, due to the fact that my test dummy mirror is a little banged up and missing some stuff...but hopefully this will at least help show you what's what*
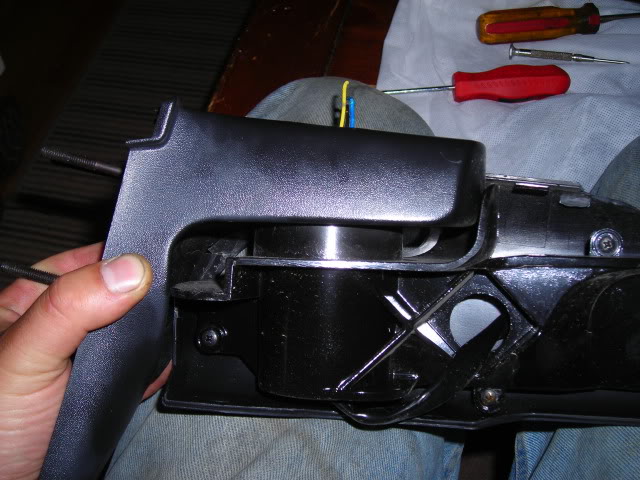
here's where the tabs are supposed to be....
Second, take the back of the mirror off. Theres 4-5 torxhead screws, you'll need a bit to get to the one by the mirror head. You might not see this one, so at this point, flip the mirror up, and you'll see which one I'm talking about.
*This mirror in the pics, is a Koolvue, so it has screws, instead of torxheads. Everything else is the same though.*
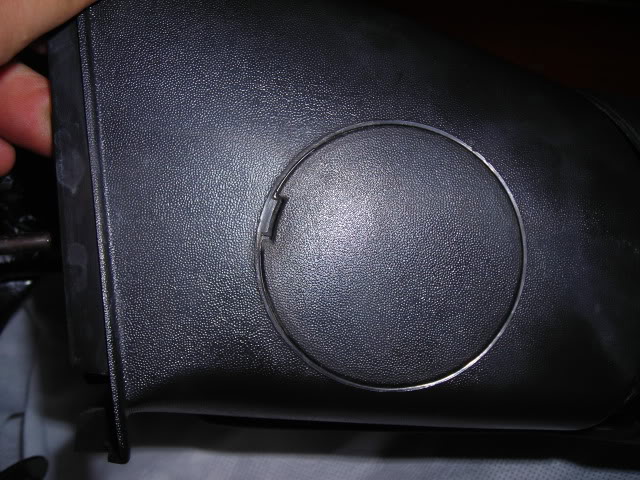
(I popped the round cover off the bottom of the mirror before I did anything else) This is the cover to the pivot assembly.
Here's where it gets really freakishly hard.
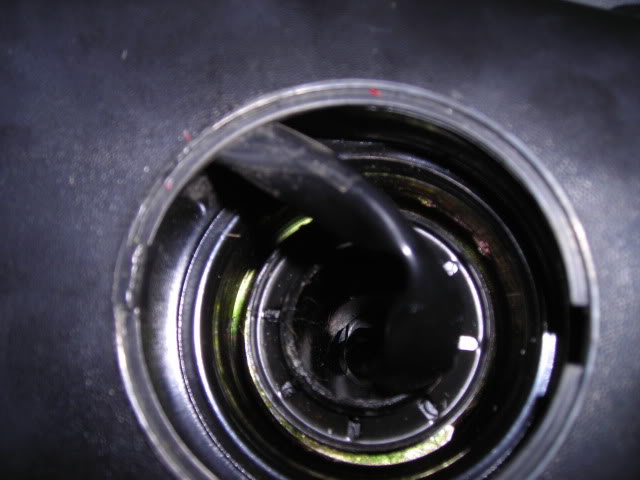
inside the pivot point on the mirror arm, when you look in, you'll see a round retainer clip with locking tabs, holding it to the actual hinge. You'll need to take this off in order to reseat the ball bearings inside the arm. (NOTE!!!!!:::THERE IS A HEAVY DUTY SPRING BENEATH THIS, SO IF YOU DO TAKE IT OFF, BE CAREFUL, BECAUSE THE SPRING WILL SHOOT OUT AT YOU!) ask me how I know....:party018:
Once that locking tab is off, and the spring has shot out and hit you in the face, you can now pull the rest of the hinge out, reseat your bearings, and put it back together.......NOT!
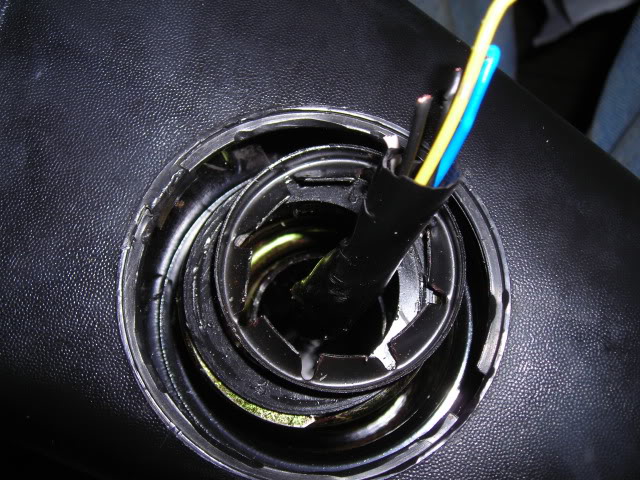
The problem I ran into was that the spring needed to compress into the arm far enough for the locking ring to bite down on the hinge. This proved far more difficult that I originally thought, due to the wiring for the heated and power mirrors running through it.
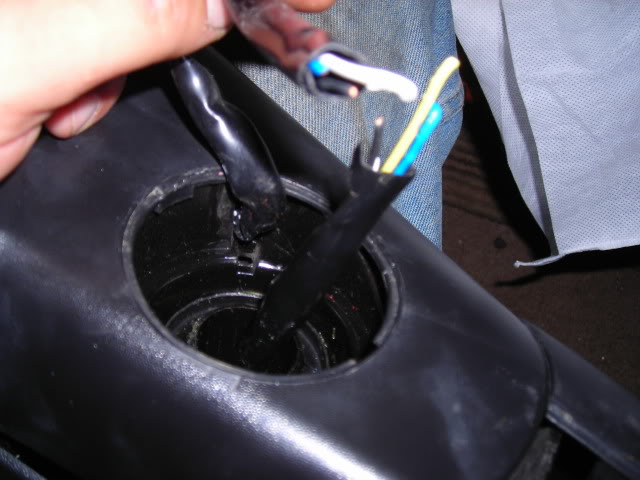
What I eventually did, and i should have done this in the first place, was cut the wires, and pull them out of the way. Don't even bother trying to work around them, as all you'll do is tear them up. Just cut them, and resplice them later. I resoldered mine, and used heatshrink on the individual wires, and then taped them up when I was done.
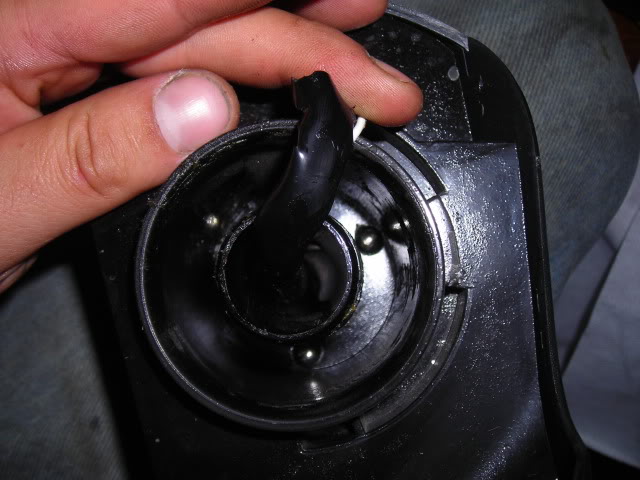
*here's how the spring looks outside of the mirror*
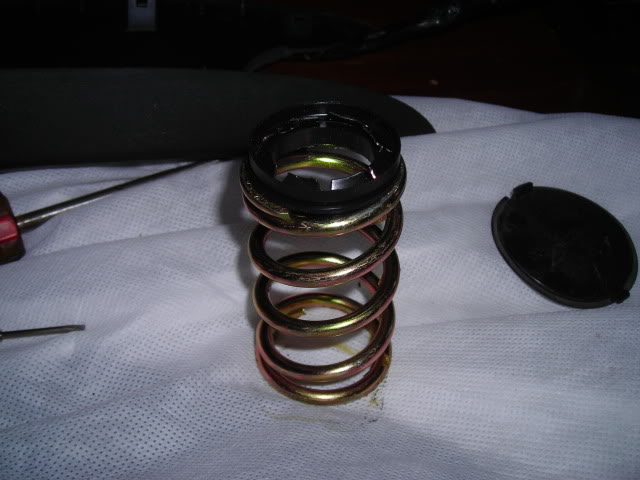
*Also, this is the part that screws up...*
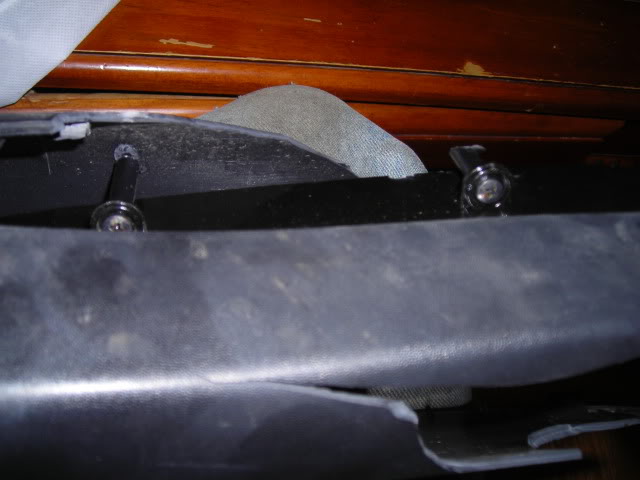
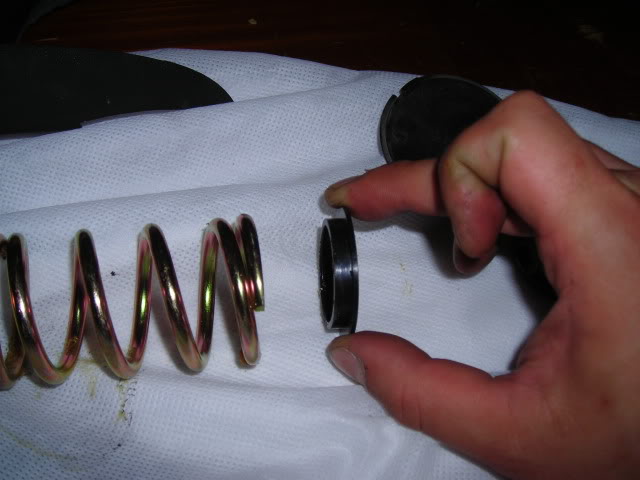
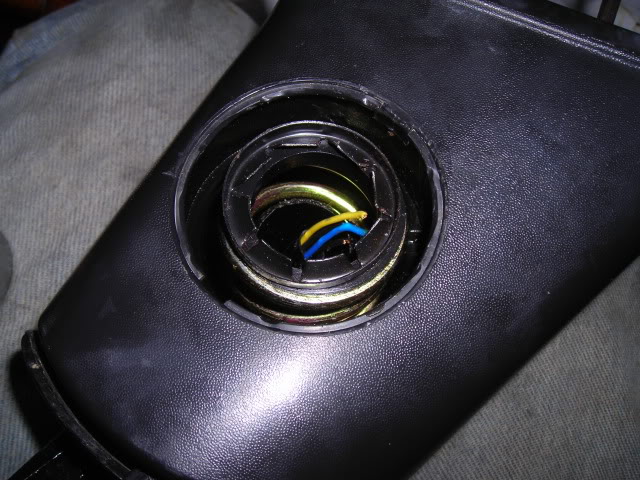
*Here you can see the notches, where the ball bearings are supposed to catch the mirror, to hold it in place...*
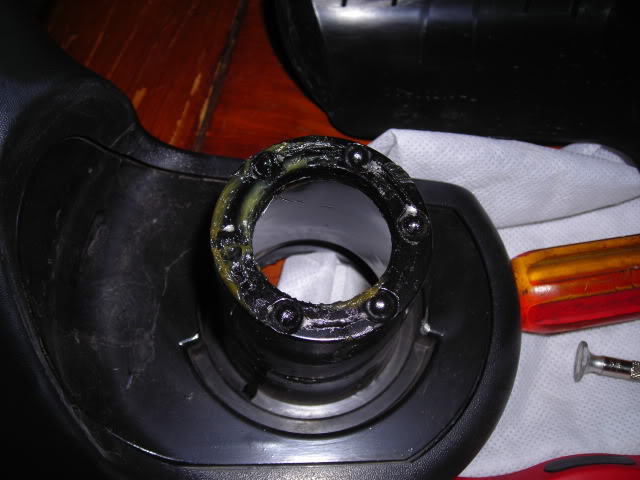
*This is the bearings, in the bottom half of the mirror, in their proper resting places. There's indentions in there, so you'll know exactly where the bearings are supposed to go.*
I took the original post, and added pics, so heres a slightly better version of it all...
*Updated, with PICS*, because I was too pissed off to take any, but I decided tonight to fix my passenger side tow mirror, on the wife's 03. Her mirror was loose, and wouldn't lock in place, it kept drifting in while driving, and was annoying as all get out, so I decided to fix it tonight, before I picked up my 30 ft travel trailer tomorrow. Let me tell you a little about how they work.
1st, I took the mirror off the truck, easy enough. take out the screw in the top of the door trim, and remove the three 10 mm nuts on the backside. disconnect the electrical, and remove mirror from the truck. There will be a piece of foam insulation between the mirror and the door, remember to save that to put it back on.
*I didn't add pics of this part, but this is probably the easiest part to do. I can't really take pics right now anyways, since the wife's out of town with the 3rd gen. *
Now, moving on to the slightly harder part.
I discovered that the plastic trim on the mirror arm will come apart. I'm not sure if I actually needed to do this, but it definitely came in handy (I'll get into that in a minute). the front side just clips on, so if you're careful, you can pop the clips on it, and pull it back a little. Don't do what I did, and remove it completely, since there's a ring that goes around the mirror head-it'll break. :doh: (it actually wasn't that bad, and with the mirror reassembled, you can't tell, but I wouldn't have done it if I had known it was a solid ring)
*some of these pics aren't going to be exact, due to the fact that my test dummy mirror is a little banged up and missing some stuff...but hopefully this will at least help show you what's what*
here's where the tabs are supposed to be....
Second, take the back of the mirror off. Theres 4-5 torxhead screws, you'll need a bit to get to the one by the mirror head. You might not see this one, so at this point, flip the mirror up, and you'll see which one I'm talking about.
*This mirror in the pics, is a Koolvue, so it has screws, instead of torxheads. Everything else is the same though.*
(I popped the round cover off the bottom of the mirror before I did anything else) This is the cover to the pivot assembly.
Here's where it gets really freakishly hard.
inside the pivot point on the mirror arm, when you look in, you'll see a round retainer clip with locking tabs, holding it to the actual hinge. You'll need to take this off in order to reseat the ball bearings inside the arm. (NOTE!!!!!:::THERE IS A HEAVY DUTY SPRING BENEATH THIS, SO IF YOU DO TAKE IT OFF, BE CAREFUL, BECAUSE THE SPRING WILL SHOOT OUT AT YOU!) ask me how I know....:party018:
Once that locking tab is off, and the spring has shot out and hit you in the face, you can now pull the rest of the hinge out, reseat your bearings, and put it back together.......NOT!
The problem I ran into was that the spring needed to compress into the arm far enough for the locking ring to bite down on the hinge. This proved far more difficult that I originally thought, due to the wiring for the heated and power mirrors running through it.
What I eventually did, and i should have done this in the first place, was cut the wires, and pull them out of the way. Don't even bother trying to work around them, as all you'll do is tear them up. Just cut them, and resplice them later. I resoldered mine, and used heatshrink on the individual wires, and then taped them up when I was done.
*here's how the spring looks outside of the mirror*
*Also, this is the part that screws up...*
*Here you can see the notches, where the ball bearings are supposed to catch the mirror, to hold it in place...*
*This is the bearings, in the bottom half of the mirror, in their proper resting places. There's indentions in there, so you'll know exactly where the bearings are supposed to go.*
Thread Starter
|
Diesel Enthusiast
Joined: Oct 2009
Posts: 375
Likes: 30
From: North Carolina
Once you've cut the wires, what worked for me was using a c clamp, and a large enough socket that the socket would fit around the hinge. This is key. if the socket won't fit around the hinge, it will NOT push the locking tab far enough down for it to bite. It took me about 15 minutes to get this on, as the cclamp kept slipping off the socket. Once it bit down, though, it was easy from there.

I resoldered the wires, put the mirror back together, and tested it, and it works fine.
Sorry about the lack of pics, but like I said, I was in no mood to be taking pics when I found out there was a spring in the middle of the arm. Maybe if I have to do it again sometime, I'll take pics then, but at least this should give you an idea of what to do, or what to be looking for.
*One last thing...When I had this ring out, I went ahead with a pair of needlenosed pliers, and bent the tabs back down a bit, to make sure they'd bite the post again.*
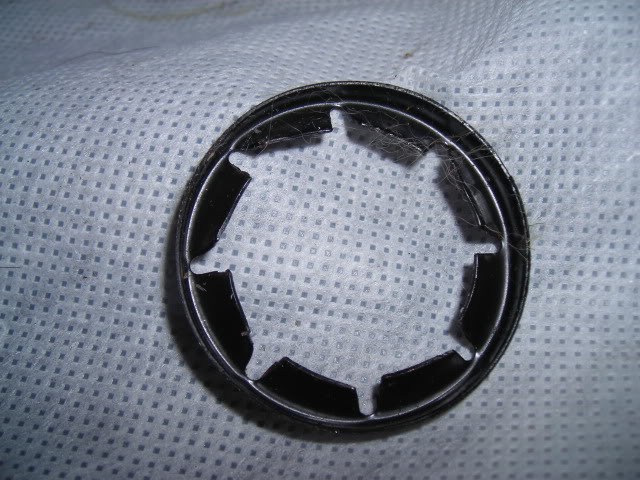
*I didn't actually fully assemble this one, since there's really no reason to*
I resoldered the wires, put the mirror back together, and tested it, and it works fine.
Sorry about the lack of pics, but like I said, I was in no mood to be taking pics when I found out there was a spring in the middle of the arm. Maybe if I have to do it again sometime, I'll take pics then, but at least this should give you an idea of what to do, or what to be looking for.
*One last thing...When I had this ring out, I went ahead with a pair of needlenosed pliers, and bent the tabs back down a bit, to make sure they'd bite the post again.*
*I didn't actually fully assemble this one, since there's really no reason to*


Thread
Thread Starter
Forum
Replies
Last Post
Diesel Bombers
Latest Automotive Industry News
0
Sep 27, 2015 02:10 PM
Diesel Bombers
Latest Automotive Industry News
0
Sep 29, 2014 12:40 PM


