
Blacked out Tail Lights - the right way with pics!

Thread Starter
|
Diesel Fan
Joined: Mar 2012
Posts: 19
Likes: 0
Thought id post some pics of my recent diy... and no its not perfect cause i didn't feel like clearing the paint shop of dust before painting, but it looks a lot nicer then the stuff you buy in a can and has the same (exact) gloss finish as your truck paint, and is more durable..... here ya go
strait off the truck-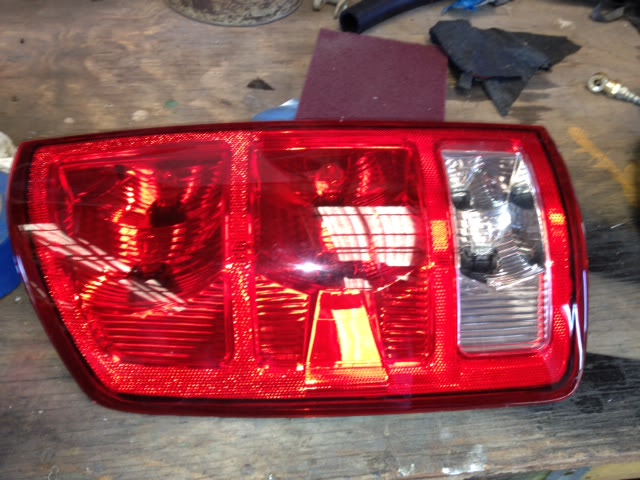
sanded. red scotch brite works fine or use 320,400 or even 600 grit sandpaper -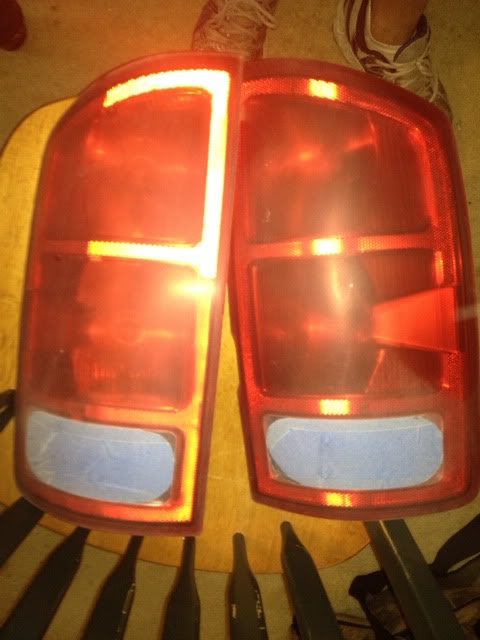
Mixed up some old paint i had- approximately 8-1 ratio 8 parts clear coat and 1 part black. you can play with the mixture on a test light. which ill have to take pics of mine when i go back out to the barn. here is one coat wet (cheap shopline brand)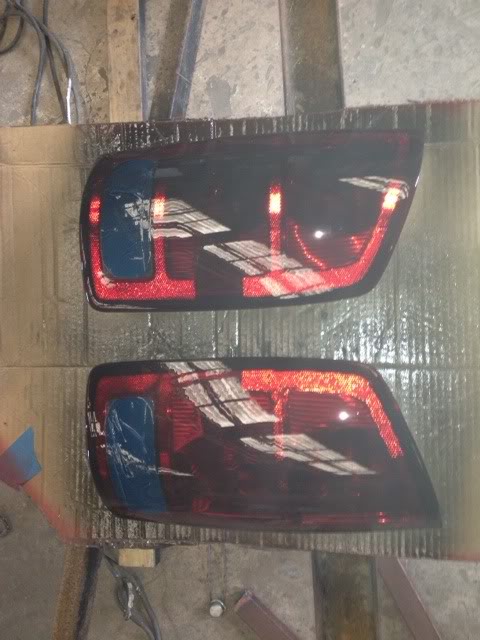
2 coats wet with reverse light tape pulled-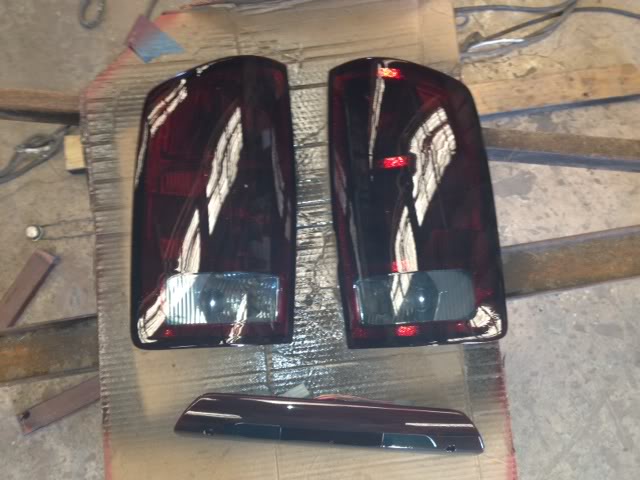
2 coats dry-
Installed light off-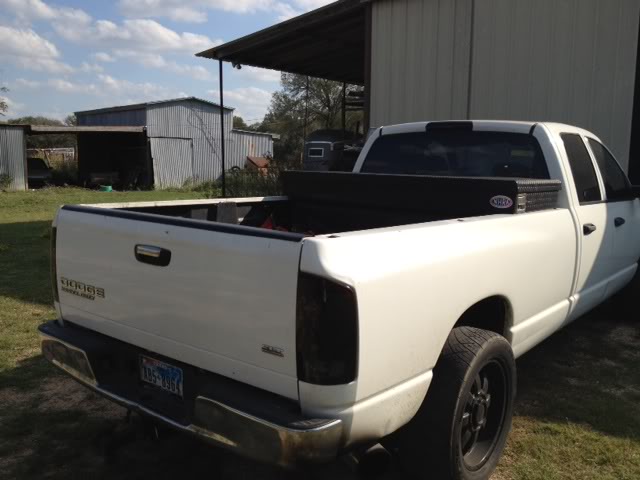
Installed lights on-
overall cost would prob be about 20-50 bucks ( depending on amount of paint) if u don't have any paint, but could paint quite a few lights, i used a $15 harbor freight hvlp gun @ 40psi. if you want to be a perfectionist you can buy clear plastic paint before the shade coat, but it will adhere fine without it, the hard plastic doesn't flex enough with temp to make a difference imo
ill post some night pics tonight- enjoy!!

 Looks Good bro

Thread Starter
|
Diesel Fan
Joined: Mar 2012
Posts: 19
Likes: 0
Thanks guys! Gunna post some pics up of the front when I'm done, I'm painting the backgrounds black then Gunna throw a light coat just get a nice shine but not enough paint to effect lighting
---AutoMerged DoublePost---
Here are some pics and explanations of my headlight blackout while not effecting your lights so you cant see....
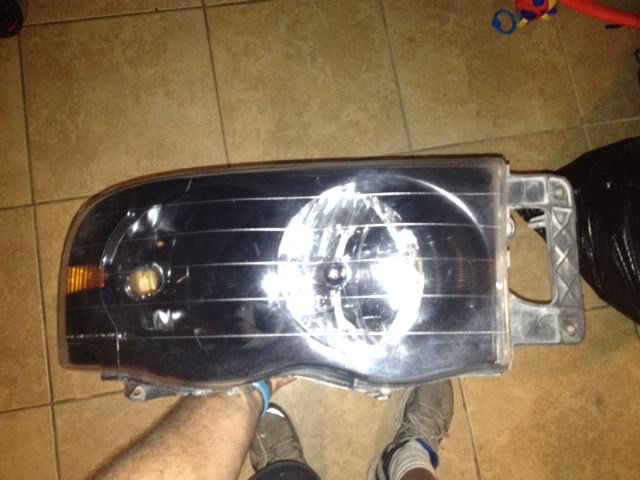
here are the before-
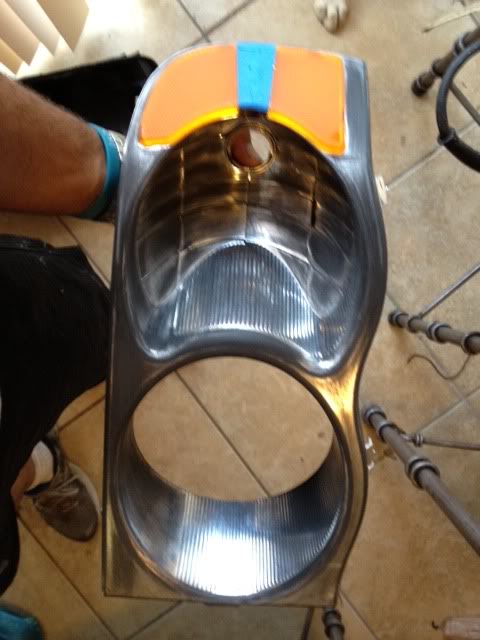
i used a heat gun to disassemble the light because of the stubborn factory sealant, and began to sand! used a wire brush to get in cracks and hard to reach areas (320 grit paper)-
Its important to do 2 or 3 light coats before laying it on when not using primer-
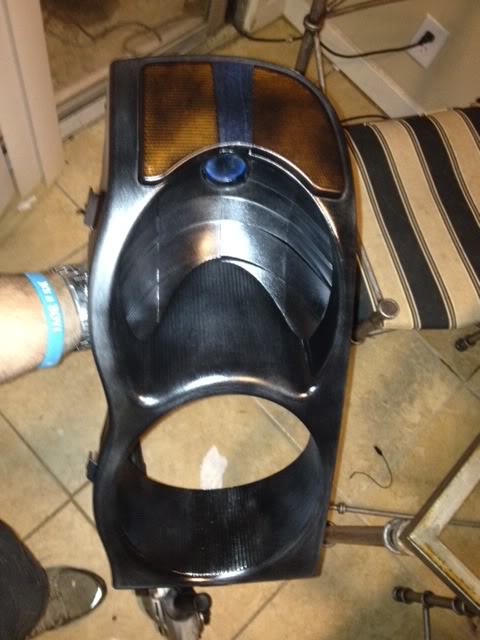
4 coats later and this piece
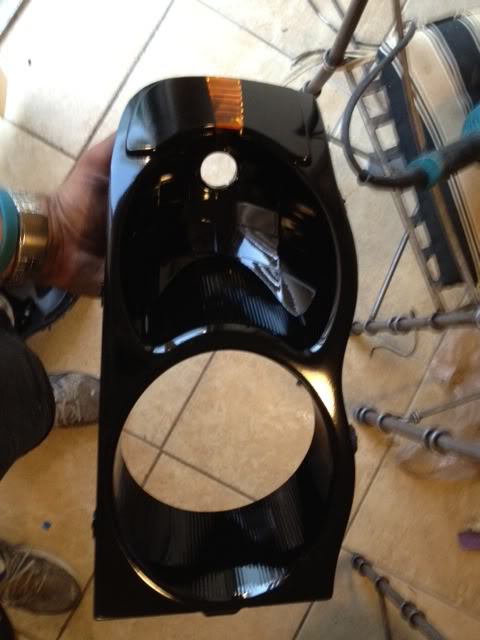 is done!! on to that dirty lense...-
My lights were pretty nasty so i used 220,320,600,1500 grit to get all the scratches and all the haze off-
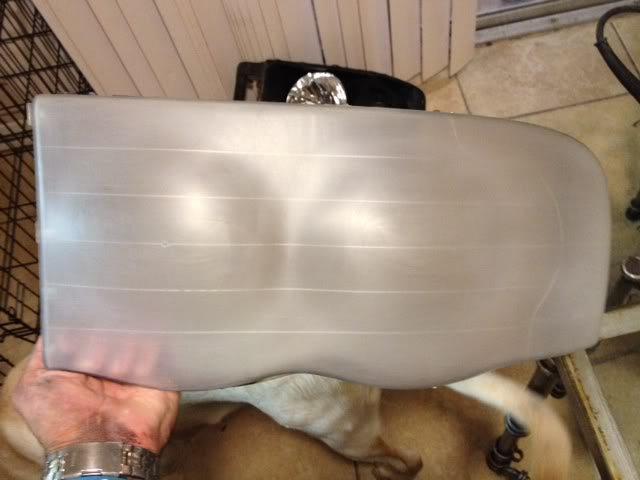
I didnt end up using the buffer it was a little too fast for my taste ( dog ate cord on variable speed grinder that day :spank: ) used and old Mother's powerball with some rubbing compound rated for 1200 grit and worked great-
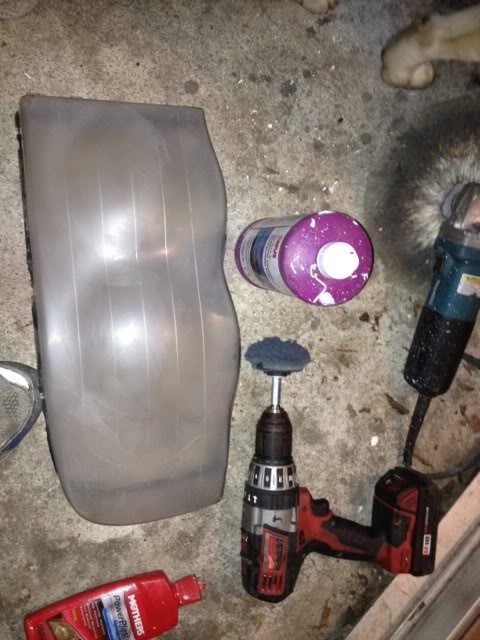
layout-
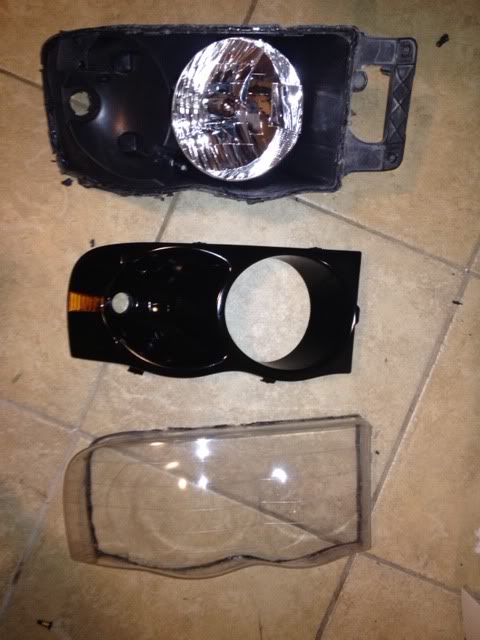
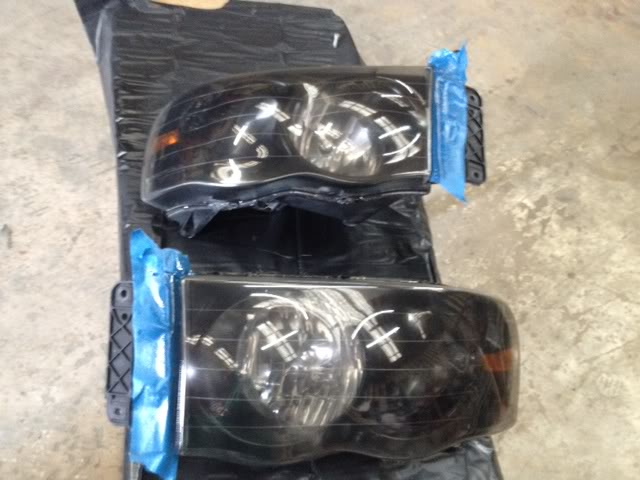
her she is back together!! just used some gasket maker in a few spots, old sealant was still very sticky. But i didn't stop there!!-
The lights didnt quite have to final shine that i wanted, so i decided to drive out to the shop and put some paint on em, had to sand em down with some scotch brite (skip the polish if your going to paint them)-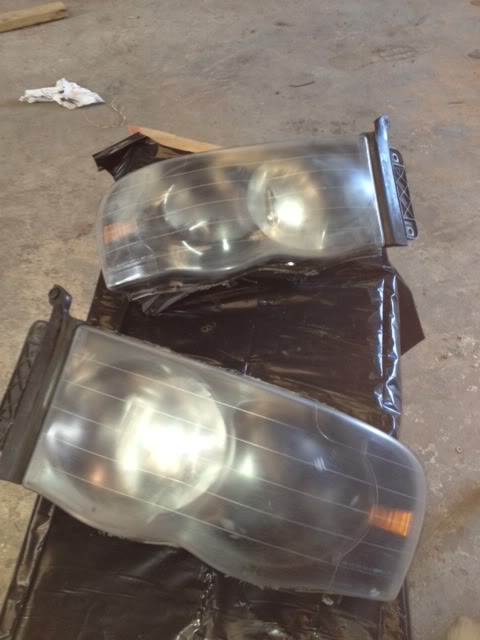
Put one light coat and one heavy of tinted clear, i mixed it maybe 15 to 1-
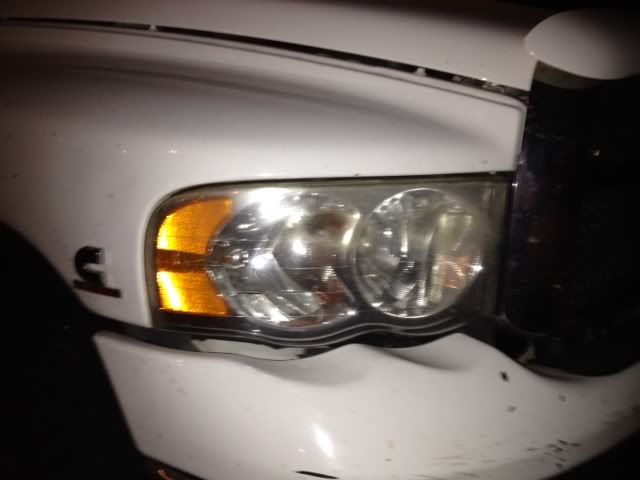
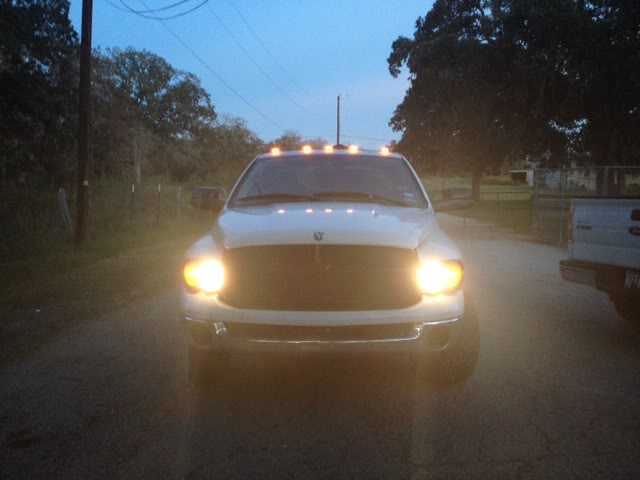
And here we are back in the truck! i actually still gained viability because of all the crap on the headlights-
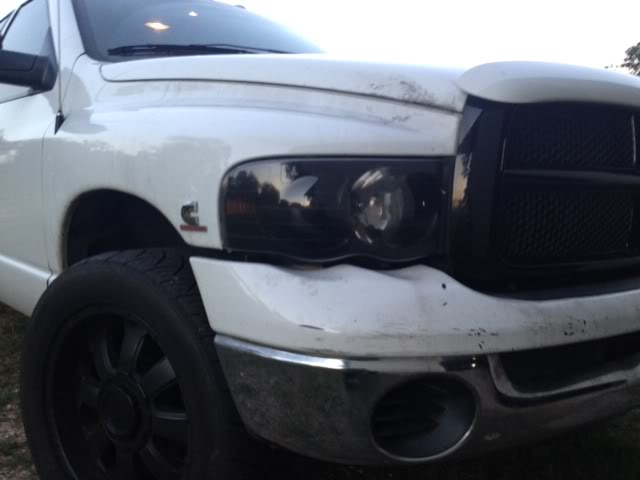
sorry for the ugliness, gunna put some white on that bumper and paint the grill white to give her the sport look along with a few engine parts and ill throw those up upon completion.
then sit back and enjoy your cheap pimped out headlights
---AutoMerged DoublePost---
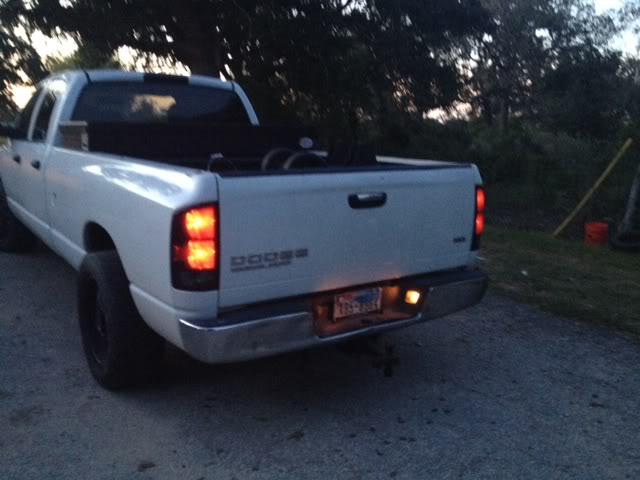
with them on-
taillight at dusk-
---AutoMerged DoublePost---
Here are some pics and explanations of my headlight blackout while not effecting your lights so you cant see....
here are the before-
i used a heat gun to disassemble the light because of the stubborn factory sealant, and began to sand! used a wire brush to get in cracks and hard to reach areas (320 grit paper)-
Its important to do 2 or 3 light coats before laying it on when not using primer-
4 coats later and this piece
is done!! on to that dirty lense...-My lights were pretty nasty so i used 220,320,600,1500 grit to get all the scratches and all the haze off-
I didnt end up using the buffer it was a little too fast for my taste ( dog ate cord on variable speed grinder that day :spank: ) used and old Mother's powerball with some rubbing compound rated for 1200 grit and worked great-
layout-
her she is back together!! just used some gasket maker in a few spots, old sealant was still very sticky. But i didn't stop there!!-
The lights didnt quite have to final shine that i wanted, so i decided to drive out to the shop and put some paint on em, had to sand em down with some scotch brite (skip the polish if your going to paint them)-
Put one light coat and one heavy of tinted clear, i mixed it maybe 15 to 1-
And here we are back in the truck! i actually still gained viability because of all the crap on the headlights-
sorry for the ugliness, gunna put some white on that bumper and paint the grill white to give her the sport look along with a few engine parts and ill throw those up upon completion.
then sit back and enjoy your cheap pimped out headlights
---AutoMerged DoublePost---
with them on-
taillight at dusk-
Last edited by Stevenlittle69; Oct 13, 2012 at 12:35 AM. Reason: Automerged Doublepost
Thread Starter
|
Diesel Fan
Joined: Mar 2012
Posts: 19
Likes: 0
Thanks! i have my newborn son full time right now so as soon as he passes out i hit the shop and find something to mess with  (i have a nifty camera thing i watch him with)
(i have a nifty camera thing i watch him with)

Hell yeah man I dig it! 
How long did you use the heat gun on them before they started to heat up enough to remove the lense? I need to retrofit some projectors in my headlight housings, and I need to separate them without damaging them.
How long did you use the heat gun on them before they started to heat up enough to remove the lense? I need to retrofit some projectors in my headlight housings, and I need to separate them without damaging them.
Thread Starter
|
Diesel Fan
Joined: Mar 2012
Posts: 19
Likes: 0
Thanks!
To be honest, the first one I did I just caveman'ed it apart with some screwdrivers and a razor blade... then I got smart and used the heat gun. I went around the whole light till it was barely able to touch then I pryed it out enough to grab it and heated it as I was pulling, I pulled from inside of headlight to the outside blinker. Let me know how the projectors come out! I might be putting some in in the future...
To be honest, the first one I did I just caveman'ed it apart with some screwdrivers and a razor blade... then I got smart and used the heat gun. I went around the whole light till it was barely able to touch then I pryed it out enough to grab it and heated it as I was pulling, I pulled from inside of headlight to the outside blinker. Let me know how the projectors come out! I might be putting some in in the future...


