
EMS FREE SPIN KIT INSTALLED......FINALLY!!!!!

Diesel Bomber
Joined: Mar 2007
Posts: 3,529
Likes: 169
From: Summerfield,Florida
close Phil........
1996 cummins that runs and moves now with EMS kit bout damn time, did you drive it?
1993 cummins that runs and drives fine, lift pump went out and when my brother replaced it he knocked the wire off the kill solenoid and repeatedly told me that it wasn't the wire Dumb *** brother, sounds about normal
1990 cummins runs and drives fine, now with new injection pump you should let me drive it
1977 D350 with 440, still doesn't have 2nd gear Did you at least get rid of the gay juan deere stuff on it?
1993 Dodge Dakota that has been rolled, yes, rolled about 4 times but still runs and drives just needs a little work to get a windshield in it......... you should give it to me, I want to put a v8 in my truck. But a story is in order
1993 F350 Dually, 460 5 speed, just got fresh valve cover gaskets you should sell it, it no longer leaks. all of your vehicles mark their territory
1986 Chevy blazer mud truck knock the floor out of it yet?
19XX VW powered dune buggy you're to fat to ride in a dune buggy
1989 Ford Crown Victoria wagon party wagon?
brothers 1995 Ford ranger probably doesn't run right either does it?......

Diesel Fan
Joined: Nov 2008
Posts: 28
Likes: 3
From: Marana, Arizona
yeah i did, sorry man, i was so dang busy with everything i forgot to call you, i wanted to go down and hang out with Marv in miami also but didnt get a chance too......i was busy with something every day, i went to 2 short track races, diesel drag race/test and tune, wekiwa springs, picked up my 90 from the injection shop, did the free spin kit and in between there i was usually working on something.......i will be at my work computer day after tomorrow so the pics will be loaded up then.......i didnt drink any alcohol when i was home also.......i guess im just boring  .......i did buy a new gun though.......and the name of the restaurant is MOJO's.......
.......i did buy a new gun though.......and the name of the restaurant is MOJO's....... Logan, what part of FL are ya from? And what is this "Mojo's" place ya'll are talking about?
Thread Starter
|
Diesel Bomber

Joined: Aug 2007
Posts: 6,157
Likes: 371
From: TIKRIT, IRAQ
I live in Lakeland......Mojo's is one of the local restaurants we hang out at and i know alot of the girls, my brother is better friends with them than i am......its kinda like wing house and hooters except no skimpy shorts.....
Diesel Fan
Joined: Nov 2008
Posts: 28
Likes: 3
From: Marana, Arizona
oh ok, I live pretty far south of you then. But I noticed you say something about having a friend in Miami. If you are ever down that way to visit or whatever, hit me up. I am in Pompano Beach, just north of Ft Lauderdale. 
Diesel Bomber
Joined: Mar 2007
Posts: 3,529
Likes: 169
From: Summerfield,Florida

pm me the story on the dakota...
Thread Starter
|
Diesel Bomber
Joined: Aug 2007
Posts: 6,157
Likes: 371
From: TIKRIT, IRAQ
we sold it to stephanie on payments and took her blazer for a trade and she got drunk and rolled it on the Polk Parkway doing 80 drunk as hell and reported it stolen......then her friend told the cops they actually did it so she ran to North Carolina and hid, but its ok cause she got some kind of horrible disease and has this red rash all over her, though im not surprised, she was getting ganged everytime she passed out drunk.......so its setting in the yard now waiting to get the passenger side A post pushed up a little to be fixed.....frame and drivetrain is fine, body is beat up but not bad for being barrel rolled and end over end.....
here are the pictures.....
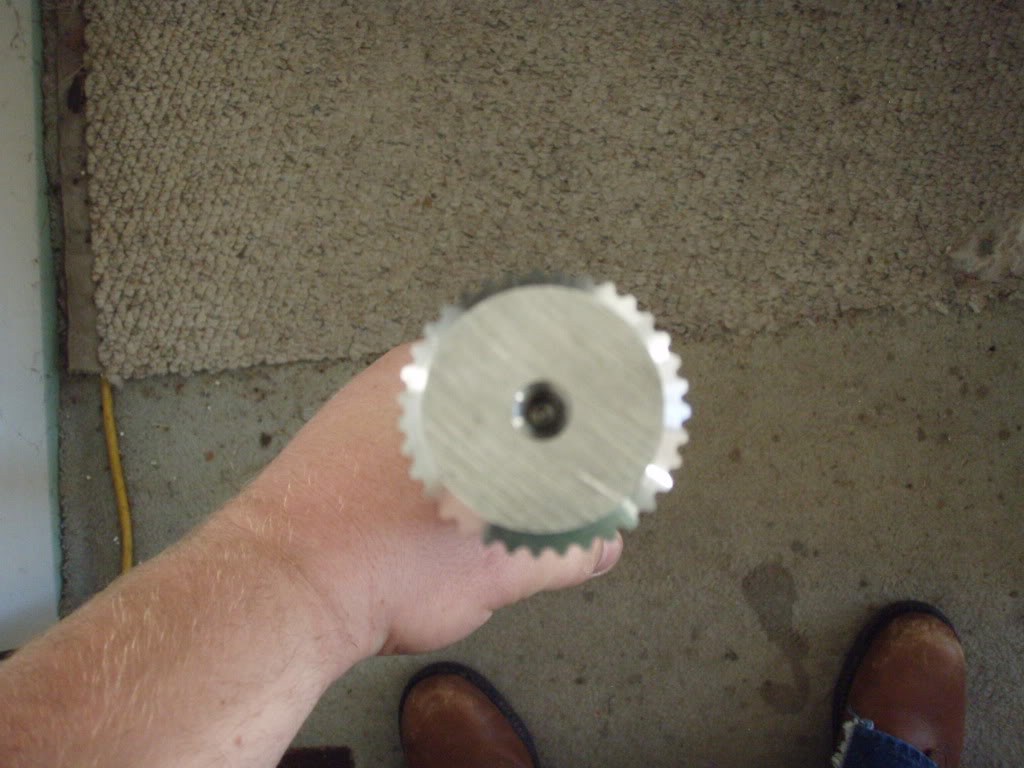
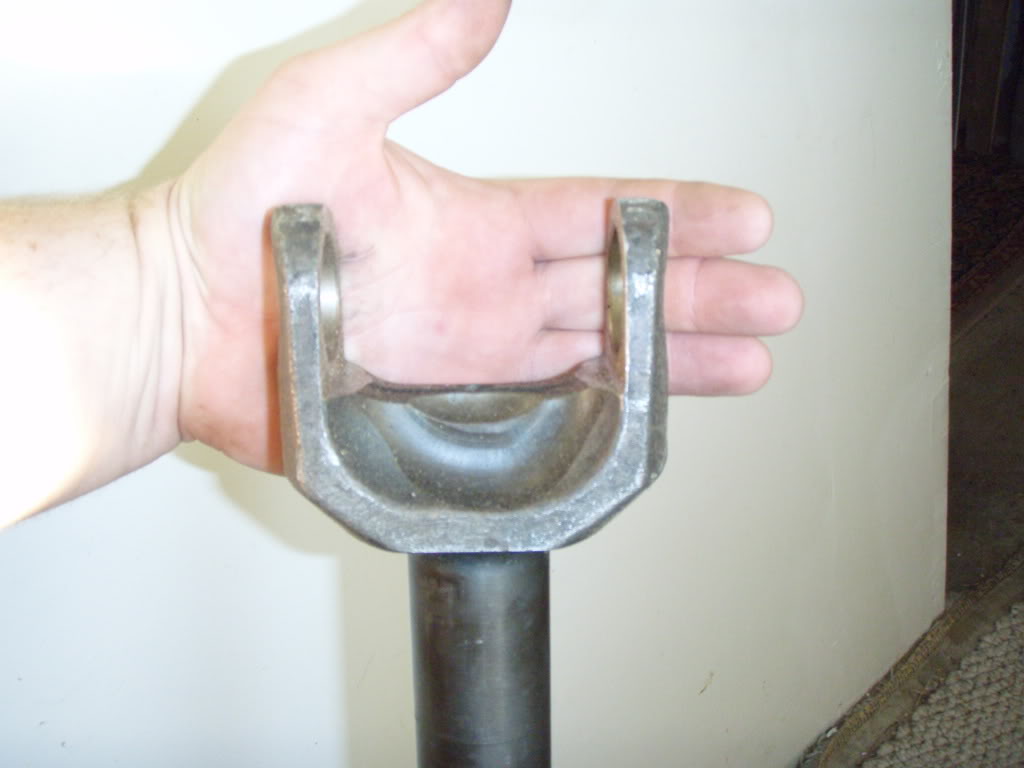
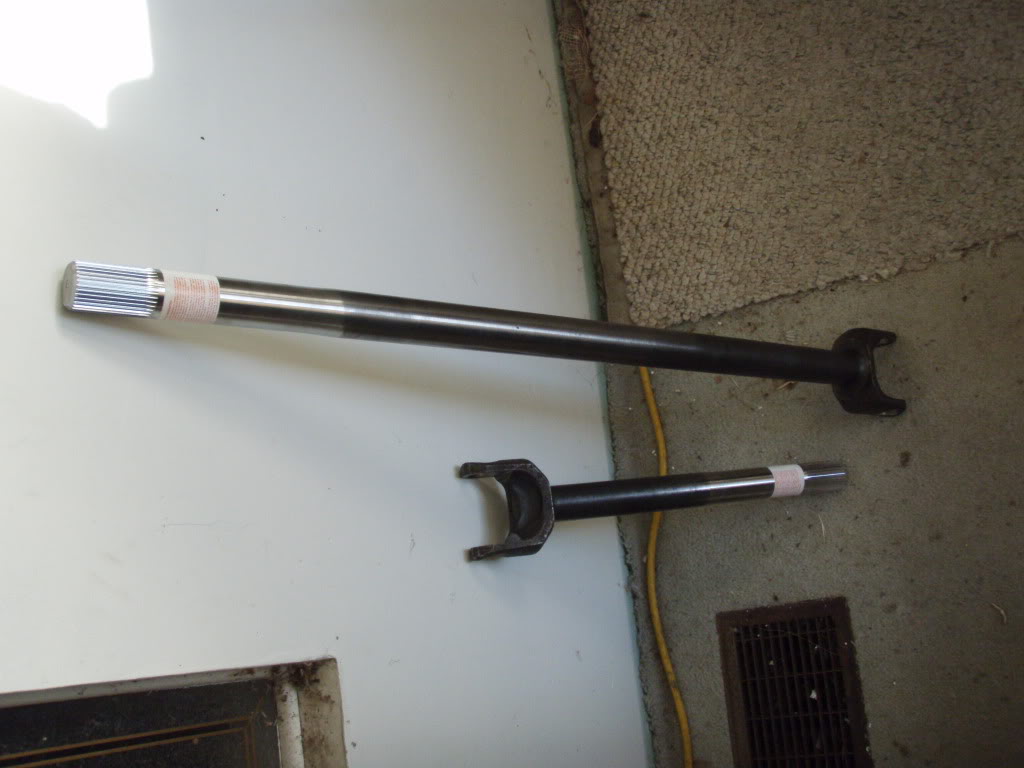
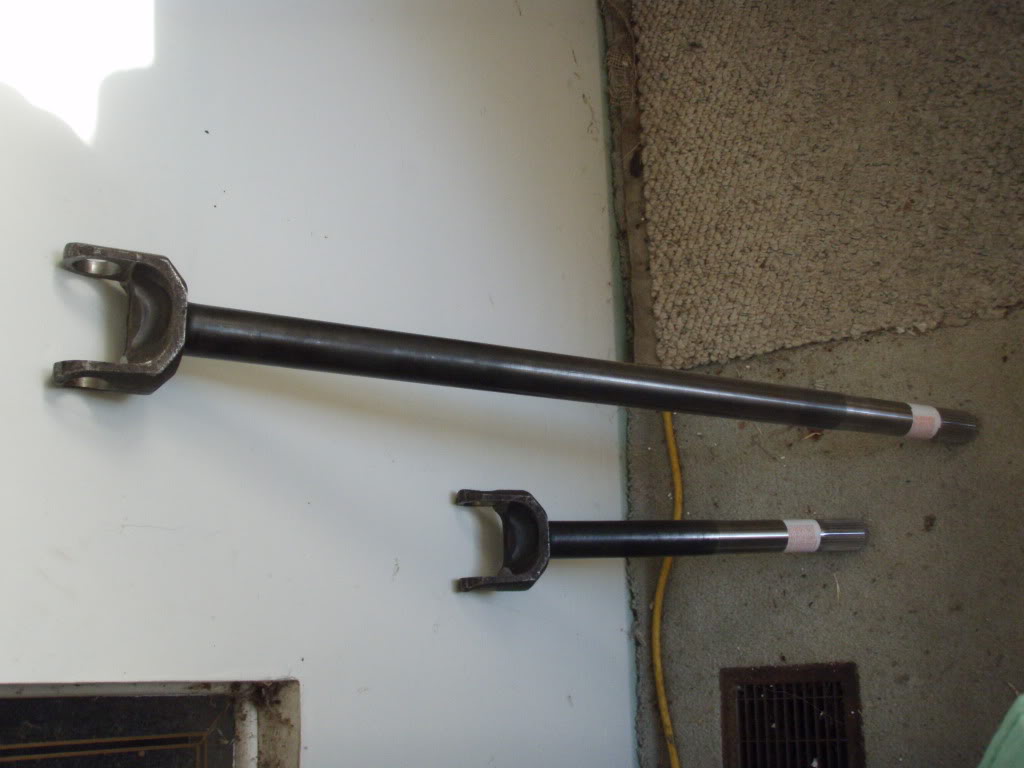
these are the 35 spline inner axles, i hadnt recieved the outters yet cause these were taken in january....
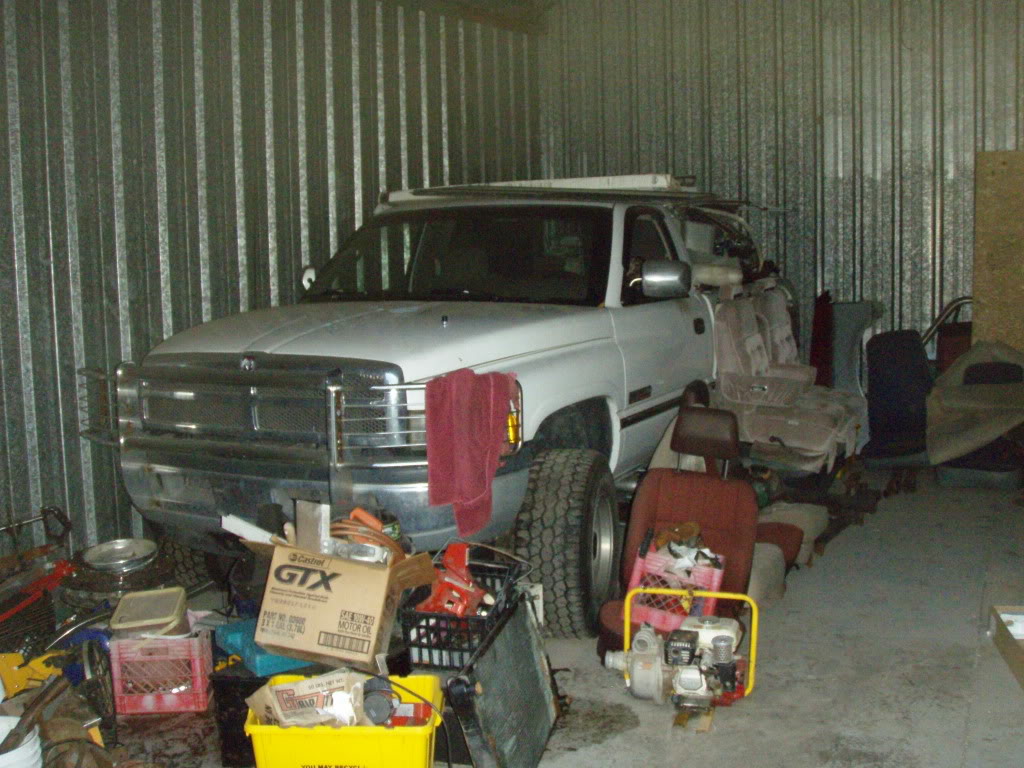
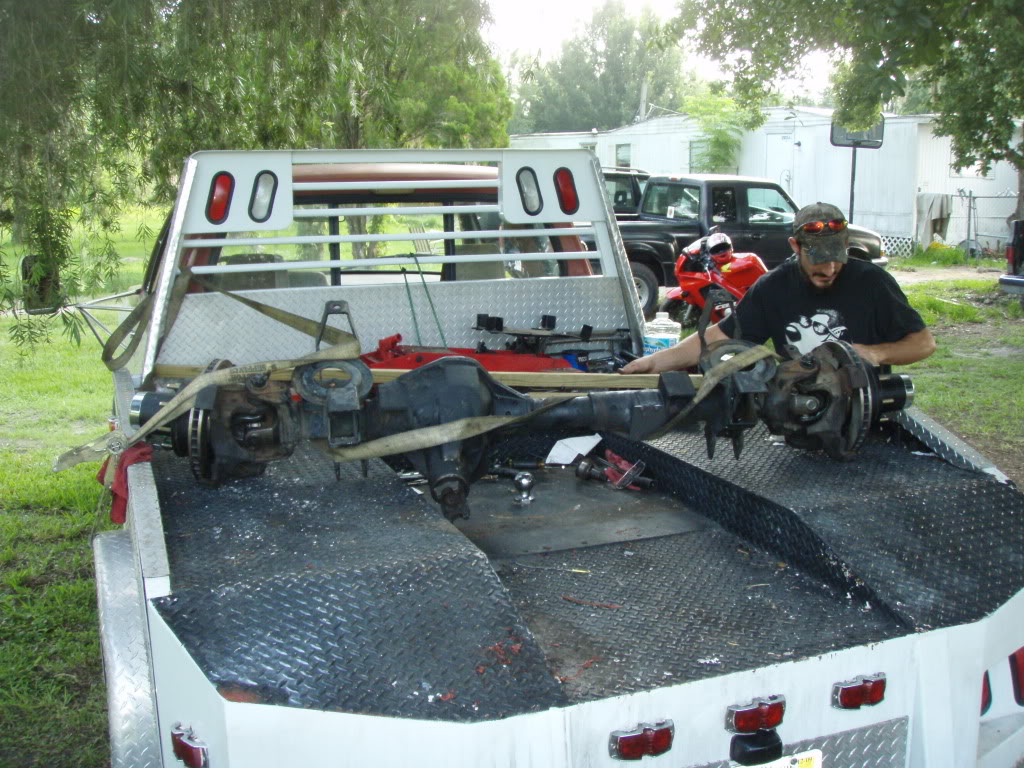
this is my truck as i found it in my storage building, this was my dad and brothers doing, not mine.....we cleaned the stuff out in front of it, jumped the battery and moved it around diagonally so it would be easier to work on.....the truck has developed a pretty substantial tranny leak but thats no big deal, it'll get fixed.....I dropped off my new 35 spline axles to have u joints put in them before i started on this and in about 45minutes the driveline shop had them done, for both SPICER u-joints installed it was 110 bucks, which was the best deal in town, the shop was Central Florida Driveline in Lakeland Florida, located on Combee Rd. and in Orlando.....i assembled this whole axle on the back of my 93 truck on its Western Hauler flatbed.......
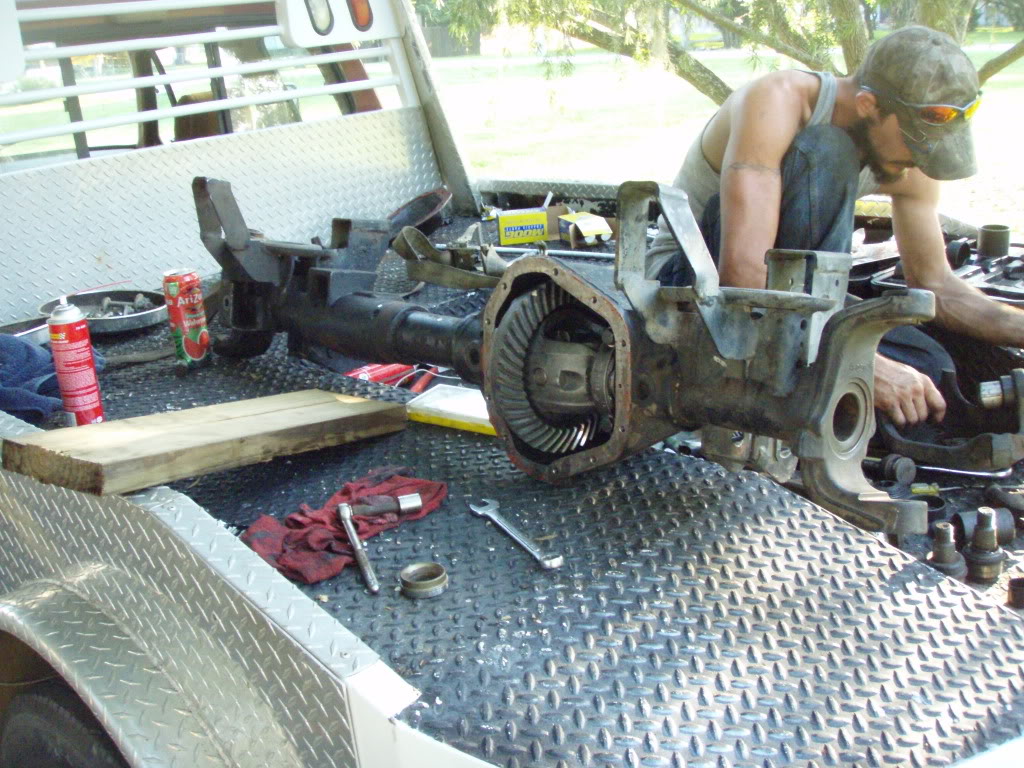
So me and my neighbor Cricket pulled the front axle out from under the truck, i pay Cricket 8 bucks an hour and he will work most men to death and dont complain or whine, he just works.....it was fairly easy cause it was a southern truck, had been apart a little over a year ago and i had a electric impact, dont waste your time on using hand tools, an impact is the only way to go, it took us all of 25minutes to get the axle down, before we took it out though we drained all the fluids, pulled the axles and hubs off, pulled the CAD unit, and dropped the spindles, so all we were working with was the housing and differential, that makes for a light weight, easy to handle axle.......like stated above in my list, just take the 4 bolts out of the back of the hubs and pull the axles and unit bearings as 1 unit, its soooooo much easier than trying to get that nut off, make sure you remove all of your old axle seals when you get the differential out, the new seals are custom made and held in by RTV sealant, SOOOOOO much easier to work with and it lets you decide how much gear oil you want in your axle, the can be installed 3/4 inch from the end of the axle tube all the way up to 3/4 of an inch from the differential, i installed mine 3 inches down each axle tube from the differential, later on when i do my locker and gears im going to pop them out and put a set near the end of the axle tubes, these are nice for you offroaders too cause you can install a set near the diff to seal in the oil and a set near the ends of the axle tubes to keep dirt and mud out of the axles, these are the same type NASCAR uses.....this picture is of the axle after i pulled the differential out, cleaned the bearings and races, and installed the new axle seals......now i had to use a hammer, a block of wood and some wheel bearing grease to get this bad boy back in cause i didnt have a case spreader to do it.....now your stock differential is supposed to come with one of two different types of bolt for your spider gear cross pin, mine had neither, it had a roll pin so after breaking a drill bit and a punch off in it, it finally came out, well the new cross's hole was too big so i ended up using the old cross pin and a new roll pin.....
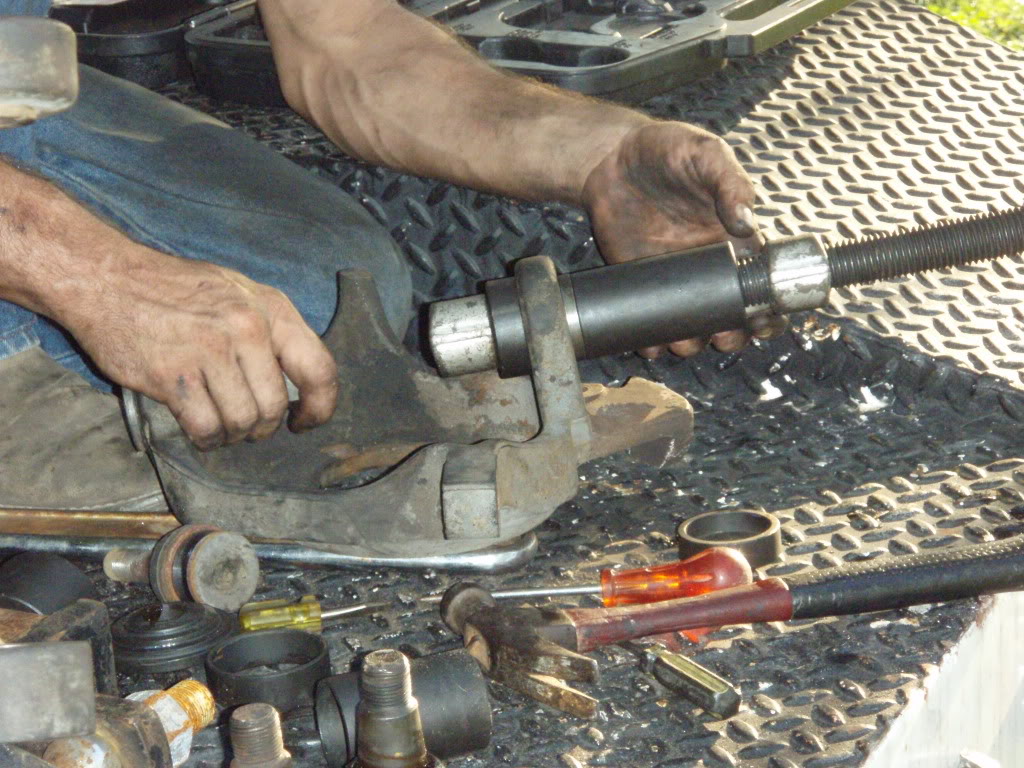
This is us pressing out the ball joints, and like i said, if you plan on using the greasable MOOG's, take the grease fittings out before you install the axles, they came right out and went right in since we was using an impact, i put a light dap of grease on them before the new ones were installed so they would go in easier, and they did, make sure you get them seated good enough to get the snap rings on the lower joints.....
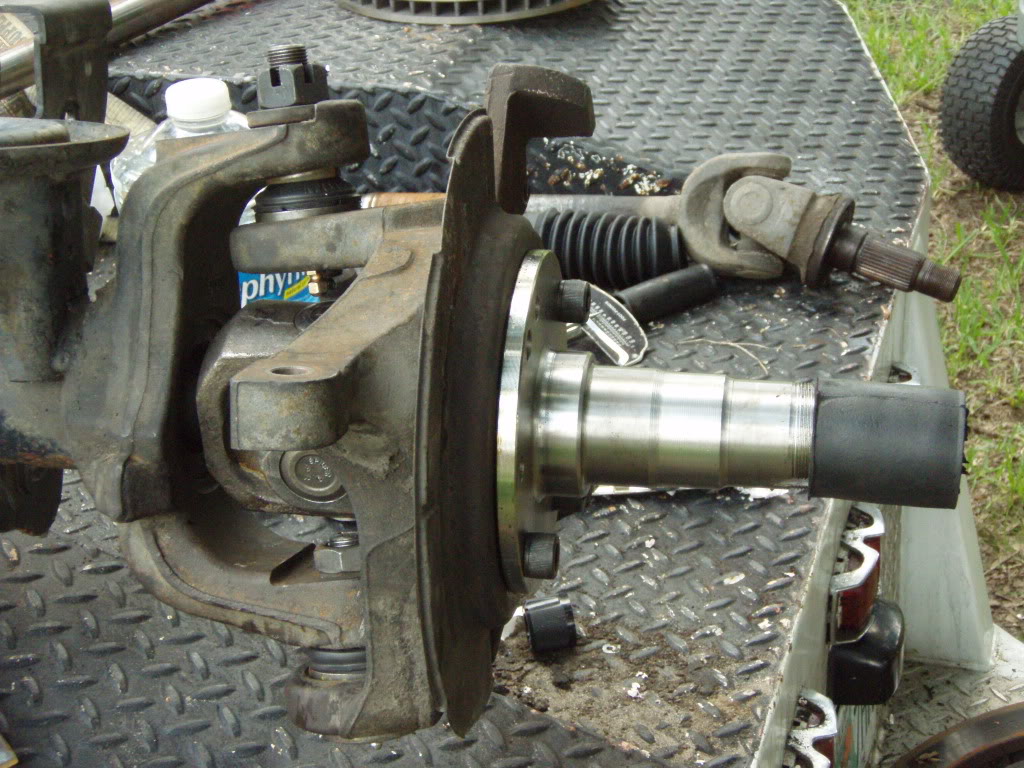
This is the axle with the new spindle and axles installed, you got to put the dust cover down over the stub axle, then the three piece seal, one piece installs on next to the dust cover, one installs on top of that and the final part installs in the back of the spindle, then slip it into the axle housing, be careful not to push or ruin the axle seals you have already installed, i waiting a little bit to let the RTV setup so the seals would be in good, NOW READ THIS CAREFULLY , MAKE SURE YOU HAVE EVERYTHING INSTALLED CORRECTLY OR YOU WILL BE HATING LIFE TRYING TO GET THESE BOLTS OUT AFTER INSTALLING THEM, TRUST ME, I HAD TO DO THIS ON ONE SIDE AND IT WAS MISERABLE, ITS ALMOST DOWN RIGHT IMPOSSIBLE TO GET THEM BACK OFF, now install the spindle lining up the 4 big holes and install your bolts with the supplied Nylocks and red loc-tite, i used the imapct and a 7/8 wrench to do this, its definately a tight fit getting in there with the wrench but you cant use a socket on them cause of the inner lip of the new spindle is in the way......also as you can see in this picture, the evil grease zerk fittings, now in the picture below this one you cant see one anymore, thats because i cut it off and sealed it with RTV sealant, that is the little black glob you see above the u-joint cap.....

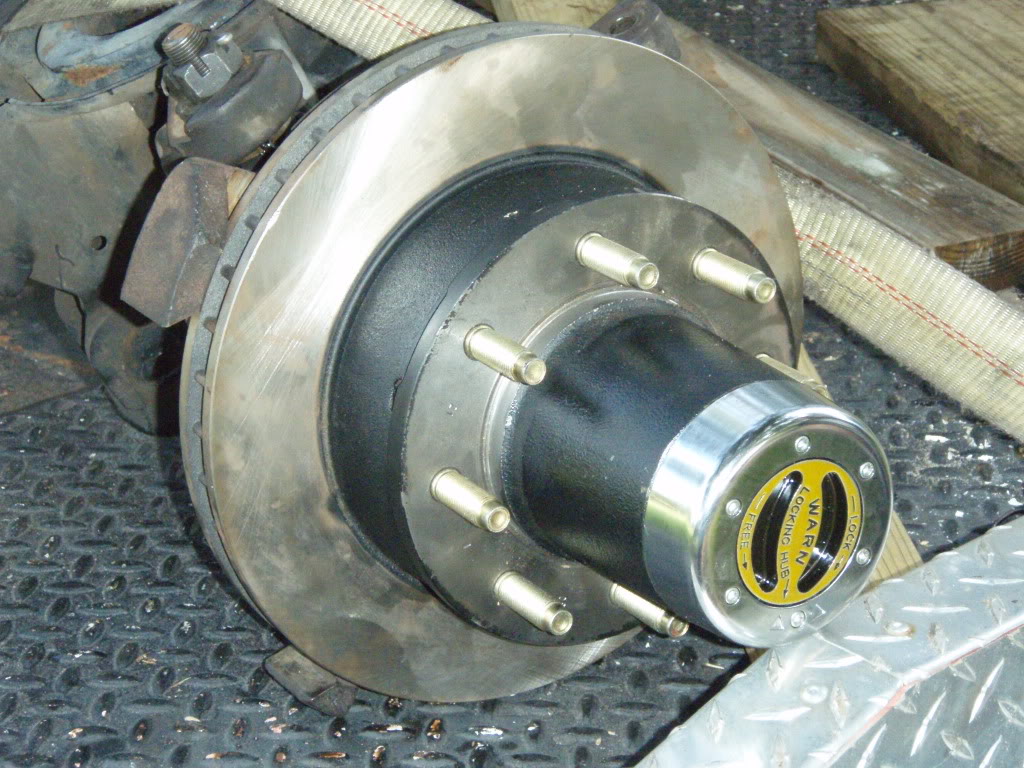
this is the lockout installed, i wasnt going to bore you with step by step pictures on how to install the hubs, plus my hands were covered in wheel bearing grease, first you grease everything really good, packing all the bearings, then you install the inner wheel bearing into the hub, its easy, just grease it and set it on the race, NOW be gentle with this part, you either need a seal driver or a 2X6 block of wood, i used the wood, drive the new wheel seal into the back of the hub, then slip it onto the new spindle, now install the outter bearing onto the spindle and push it in as far as it will go, now you will install the bearing adjuster, lock ring, and lock nut, its simple, run the adjuster nut down til you get a good feel on the wheel bearing (the adjuster nut has a small locking tab on it, not to tight and not to loose, i prefer mine a little tighter cause they will loosen as they wear, now install the lock ring, you may have to tighten or loosen the adjuster nut to get the locking tab to line up with the locking ring, once you get it in correctly install your lock nut and tighten it down til its snug, now for all of this you will either need a 4 prong hub socket you can buy atmost part stores or you can use a hammer and screw driver, i used the hammer and screw driver, now you need to install the splined drive flange part of the lockout, it just slips in, next you need to install the BIG lock ring, i had to use a pair of pliers to push it in but it went, that is pretty common when doing Dana 60's, next i installed the outter snap ring on the end of the stub axle then put the lock-out dial and spring in and tightened down the 6 bolts......
this is the axle all completed and ready to be installed, NOW LISTEN CAREFULLY, your stock axle vent is at the CAD unit and there CAD delete plate has a place for the axle vent in it, BUT i installed my axle seals before the CAD so there is no way to vent the axle unless you want to drill a hole in the housing or in your differential cover and install a vent, so i did neither and i just drilled a very tiny hole in the top right of the cover and im going to use that as a vent because i have a nice shiny new aluminum cover from Pro Comp that im going to use but my dad has to drill and tap it for a vent so for right now the tiny hole in the stock differential cover will have to work i guess.....
here are the pictures.....
these are the 35 spline inner axles, i hadnt recieved the outters yet cause these were taken in january....
this is my truck as i found it in my storage building, this was my dad and brothers doing, not mine.....we cleaned the stuff out in front of it, jumped the battery and moved it around diagonally so it would be easier to work on.....the truck has developed a pretty substantial tranny leak but thats no big deal, it'll get fixed.....I dropped off my new 35 spline axles to have u joints put in them before i started on this and in about 45minutes the driveline shop had them done, for both SPICER u-joints installed it was 110 bucks, which was the best deal in town, the shop was Central Florida Driveline in Lakeland Florida, located on Combee Rd. and in Orlando.....i assembled this whole axle on the back of my 93 truck on its Western Hauler flatbed.......
So me and my neighbor Cricket pulled the front axle out from under the truck, i pay Cricket 8 bucks an hour and he will work most men to death and dont complain or whine, he just works.....it was fairly easy cause it was a southern truck, had been apart a little over a year ago and i had a electric impact, dont waste your time on using hand tools, an impact is the only way to go, it took us all of 25minutes to get the axle down, before we took it out though we drained all the fluids, pulled the axles and hubs off, pulled the CAD unit, and dropped the spindles, so all we were working with was the housing and differential, that makes for a light weight, easy to handle axle.......like stated above in my list, just take the 4 bolts out of the back of the hubs and pull the axles and unit bearings as 1 unit, its soooooo much easier than trying to get that nut off, make sure you remove all of your old axle seals when you get the differential out, the new seals are custom made and held in by RTV sealant, SOOOOOO much easier to work with and it lets you decide how much gear oil you want in your axle, the can be installed 3/4 inch from the end of the axle tube all the way up to 3/4 of an inch from the differential, i installed mine 3 inches down each axle tube from the differential, later on when i do my locker and gears im going to pop them out and put a set near the end of the axle tubes, these are nice for you offroaders too cause you can install a set near the diff to seal in the oil and a set near the ends of the axle tubes to keep dirt and mud out of the axles, these are the same type NASCAR uses.....this picture is of the axle after i pulled the differential out, cleaned the bearings and races, and installed the new axle seals......now i had to use a hammer, a block of wood and some wheel bearing grease to get this bad boy back in cause i didnt have a case spreader to do it.....now your stock differential is supposed to come with one of two different types of bolt for your spider gear cross pin, mine had neither, it had a roll pin so after breaking a drill bit and a punch off in it, it finally came out, well the new cross's hole was too big so i ended up using the old cross pin and a new roll pin.....
This is us pressing out the ball joints, and like i said, if you plan on using the greasable MOOG's, take the grease fittings out before you install the axles, they came right out and went right in since we was using an impact, i put a light dap of grease on them before the new ones were installed so they would go in easier, and they did, make sure you get them seated good enough to get the snap rings on the lower joints.....
This is the axle with the new spindle and axles installed, you got to put the dust cover down over the stub axle, then the three piece seal, one piece installs on next to the dust cover, one installs on top of that and the final part installs in the back of the spindle, then slip it into the axle housing, be careful not to push or ruin the axle seals you have already installed, i waiting a little bit to let the RTV setup so the seals would be in good, NOW READ THIS CAREFULLY , MAKE SURE YOU HAVE EVERYTHING INSTALLED CORRECTLY OR YOU WILL BE HATING LIFE TRYING TO GET THESE BOLTS OUT AFTER INSTALLING THEM, TRUST ME, I HAD TO DO THIS ON ONE SIDE AND IT WAS MISERABLE, ITS ALMOST DOWN RIGHT IMPOSSIBLE TO GET THEM BACK OFF, now install the spindle lining up the 4 big holes and install your bolts with the supplied Nylocks and red loc-tite, i used the imapct and a 7/8 wrench to do this, its definately a tight fit getting in there with the wrench but you cant use a socket on them cause of the inner lip of the new spindle is in the way......also as you can see in this picture, the evil grease zerk fittings, now in the picture below this one you cant see one anymore, thats because i cut it off and sealed it with RTV sealant, that is the little black glob you see above the u-joint cap.....
this is the lockout installed, i wasnt going to bore you with step by step pictures on how to install the hubs, plus my hands were covered in wheel bearing grease, first you grease everything really good, packing all the bearings, then you install the inner wheel bearing into the hub, its easy, just grease it and set it on the race, NOW be gentle with this part, you either need a seal driver or a 2X6 block of wood, i used the wood, drive the new wheel seal into the back of the hub, then slip it onto the new spindle, now install the outter bearing onto the spindle and push it in as far as it will go, now you will install the bearing adjuster, lock ring, and lock nut, its simple, run the adjuster nut down til you get a good feel on the wheel bearing (the adjuster nut has a small locking tab on it, not to tight and not to loose, i prefer mine a little tighter cause they will loosen as they wear, now install the lock ring, you may have to tighten or loosen the adjuster nut to get the locking tab to line up with the locking ring, once you get it in correctly install your lock nut and tighten it down til its snug, now for all of this you will either need a 4 prong hub socket you can buy atmost part stores or you can use a hammer and screw driver, i used the hammer and screw driver, now you need to install the splined drive flange part of the lockout, it just slips in, next you need to install the BIG lock ring, i had to use a pair of pliers to push it in but it went, that is pretty common when doing Dana 60's, next i installed the outter snap ring on the end of the stub axle then put the lock-out dial and spring in and tightened down the 6 bolts......
this is the axle all completed and ready to be installed, NOW LISTEN CAREFULLY, your stock axle vent is at the CAD unit and there CAD delete plate has a place for the axle vent in it, BUT i installed my axle seals before the CAD so there is no way to vent the axle unless you want to drill a hole in the housing or in your differential cover and install a vent, so i did neither and i just drilled a very tiny hole in the top right of the cover and im going to use that as a vent because i have a nice shiny new aluminum cover from Pro Comp that im going to use but my dad has to drill and tap it for a vent so for right now the tiny hole in the stock differential cover will have to work i guess.....
Last edited by LOGANSTANFORTH; Jun 28, 2009 at 03:27 AM. Reason: Automerged Doublepost


Diesel Bomber
Joined: Oct 2008
Posts: 1,474
Likes: 35
From: Pennsylvania
nice write up except why did you take the axle out? i left mine in when i put the lockouts on and it was plenty easy to get to every thing. i wish i would have gotten the 35spline but didnt so im going to have to get it later. one nice thing though was i go to school about a 1/2 hour from the ems shop so i didnt need to pay shipping
Thread Starter
|
Diesel Bomber
Joined: Aug 2007
Posts: 6,157
Likes: 371
From: TIKRIT, IRAQ
nice write up except why did you take the axle out? i left mine in when i put the lockouts on and it was plenty easy to get to every thing. i wish i would have gotten the 35spline but didnt so im going to have to get it later. one nice thing though was i go to school about a 1/2 hour from the ems shop so i didnt need to pay shipping
if i was doing this over for a customer, with the same setup as mine, i would charge about 500 bucks labor to do it and it would take 2 days working outside like i was, but i would invest in a case spreader so the differential would come out ALOT easier.......if i had a shop though it would take one long day, probably 12-14 hours with my neighbor helping me.....
I have owned this truck about 14 months and have driven it a total of about 15 feet......And the parts I have bought for the truck are worth almost twice what I paid for it......
Last edited by LOGANSTANFORTH; Aug 14, 2009 at 12:59 AM.


