59 Chevy/Cummins

#12
 07-28-2012, 06:25 AM

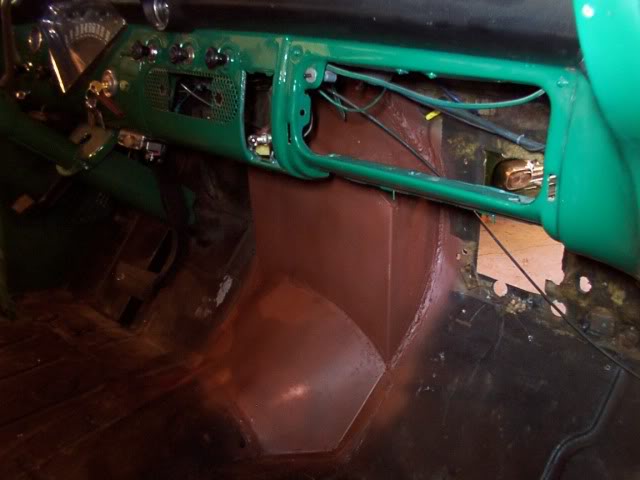
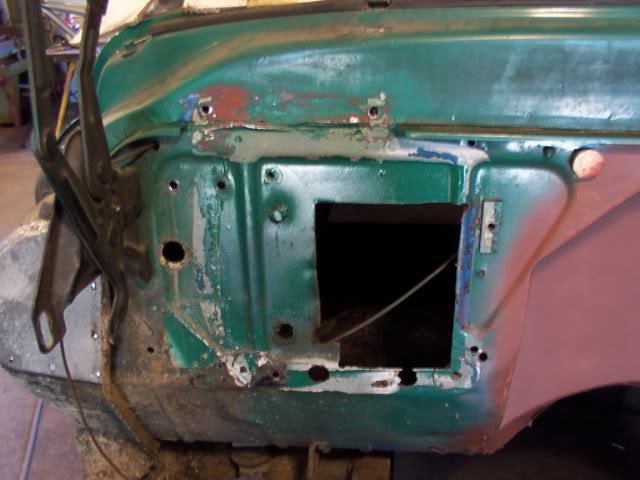
The blower for the heater was mounted out under the fender and drew air from the cab and passed it over the heater core and back into the cab thru the firewall.
The new heat / air conditioning system is designed to fit completely inside the cab and has it's own blower so this one is no longer needed.

The complete blower and housing was removed and the hole was sealed up with galvanized metal.

The sheet metal on the inside was cleaned with enamel reducer and primed.
The rough edges and welds were ground down around the cutout on the firewall.
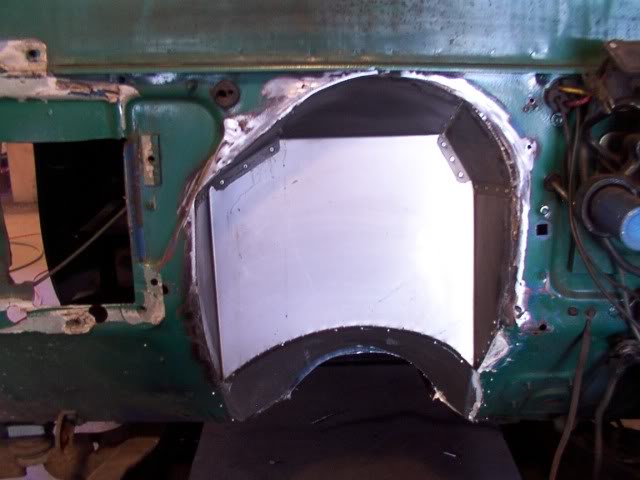
This was then cleaned and primed also and glazing putty was put around the edge to fill any nicks or scratches.
The stock heater on these trucks was a small box heater that sat inside under the dash.
The heater that I used when I first built this back in 95 was a larger heater and the heater core was on the outside of the firewall.
I had to cut away some of the seam lip where the firewall joined the cowl.
Because the heater will no longer be mounted on the outside of the firewall, I have restored that section of lip that was removed.
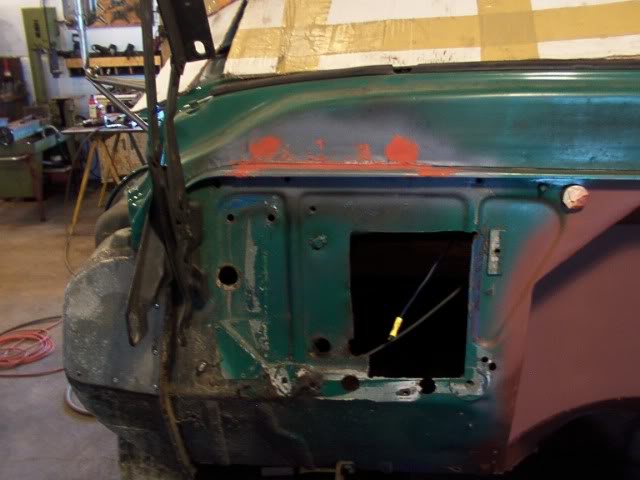
The firewall really looks bad now with all the holes that have been cut into it so I'm going to make a cover panel to fit over it.
The indented areas are filled in with pieces of plywood that are glued to the metal.
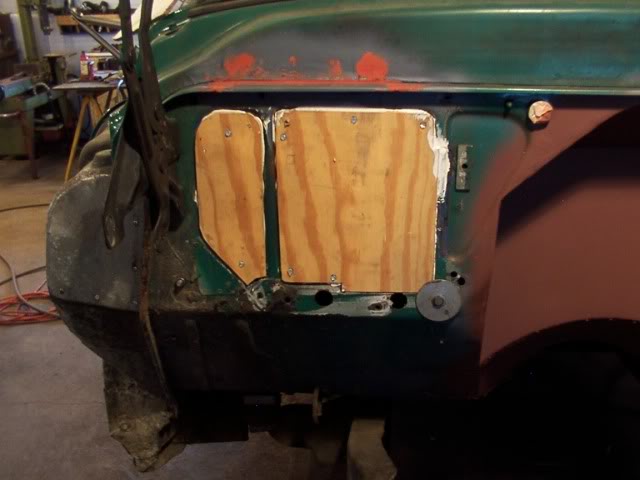
Once the glue has dried , the wood is sanded down so it is flush with the raised parts of the firewall and every thing is primed.
Then I can start making a pattern of for the cover panel.
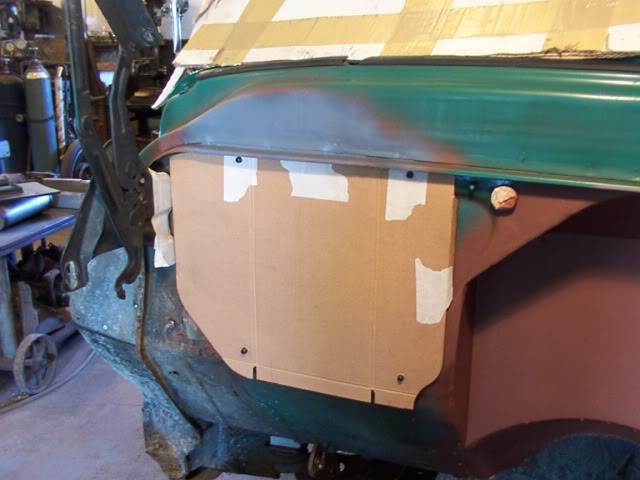
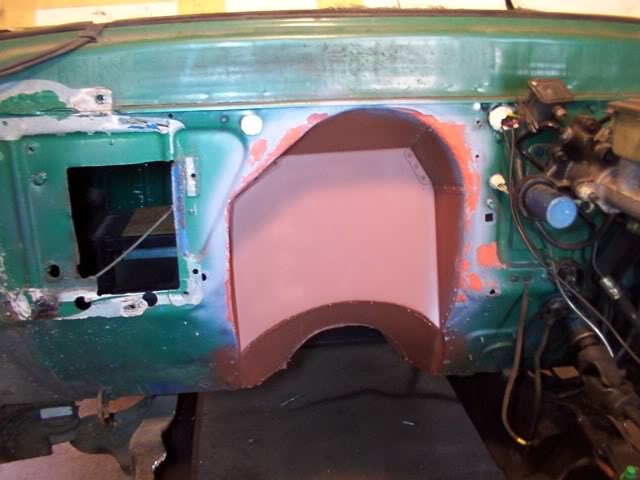
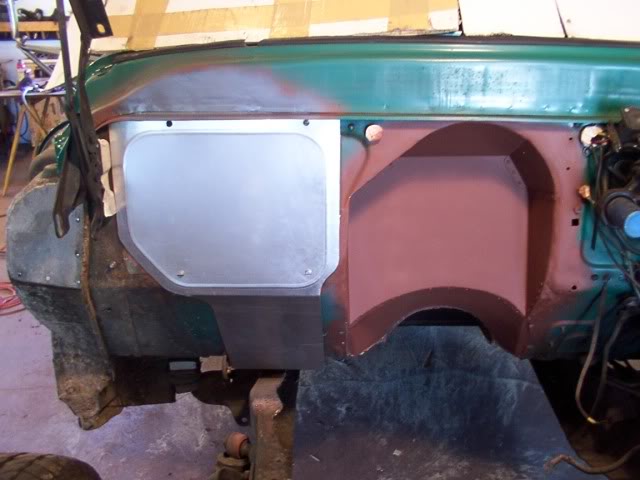
The panel is made out of aluminum and temporarily mounted in place.
This panel is bolted to the firewall using the mounting holes that the stock heater was bolted to.
The new heat / air units also bolt to these same mounting holes.
The upper part fits tight to the firewall but the lower part has about a 1/2 inch air space between it and the floor.
This will help keep the heat from the exhaust pipe away from the floor.
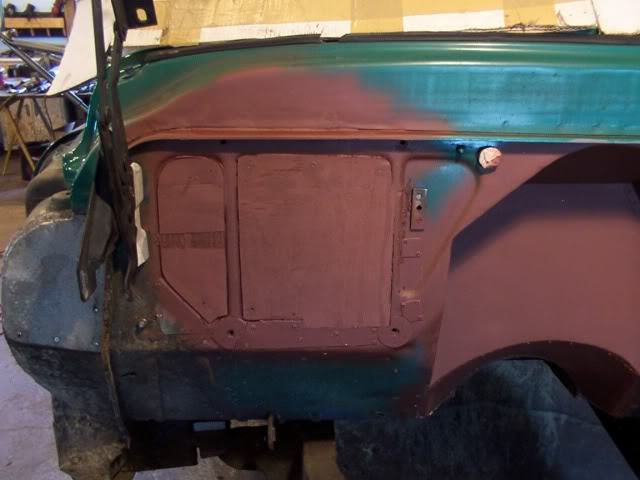
The firewall is masked off and ready for paint.
Here is the first coat.
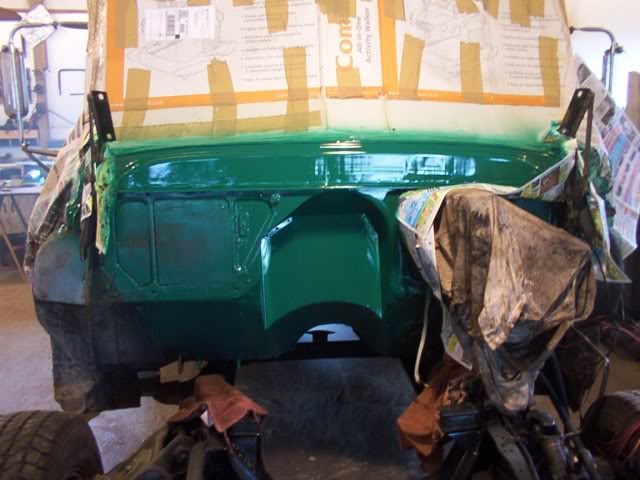
Once the paint was dry enough, I unmasked everything and re-mounted the aluminum cover plate.
Here you can see the air gap between the lower part of the cover plate and the floor.
The new heat / air conditioning system is designed to fit completely inside the cab and has it's own blower so this one is no longer needed.
The complete blower and housing was removed and the hole was sealed up with galvanized metal.
The sheet metal on the inside was cleaned with enamel reducer and primed.
The rough edges and welds were ground down around the cutout on the firewall.
This was then cleaned and primed also and glazing putty was put around the edge to fill any nicks or scratches.
The stock heater on these trucks was a small box heater that sat inside under the dash.
The heater that I used when I first built this back in 95 was a larger heater and the heater core was on the outside of the firewall.
I had to cut away some of the seam lip where the firewall joined the cowl.
Because the heater will no longer be mounted on the outside of the firewall, I have restored that section of lip that was removed.
The firewall really looks bad now with all the holes that have been cut into it so I'm going to make a cover panel to fit over it.
The indented areas are filled in with pieces of plywood that are glued to the metal.
Once the glue has dried , the wood is sanded down so it is flush with the raised parts of the firewall and every thing is primed.
Then I can start making a pattern of for the cover panel.
The panel is made out of aluminum and temporarily mounted in place.
This panel is bolted to the firewall using the mounting holes that the stock heater was bolted to.
The new heat / air units also bolt to these same mounting holes.
The upper part fits tight to the firewall but the lower part has about a 1/2 inch air space between it and the floor.
This will help keep the heat from the exhaust pipe away from the floor.
The firewall is masked off and ready for paint.
Here is the first coat.
Once the paint was dry enough, I unmasked everything and re-mounted the aluminum cover plate.
Here you can see the air gap between the lower part of the cover plate and the floor.
#13
07-29-2012, 06:45 AM
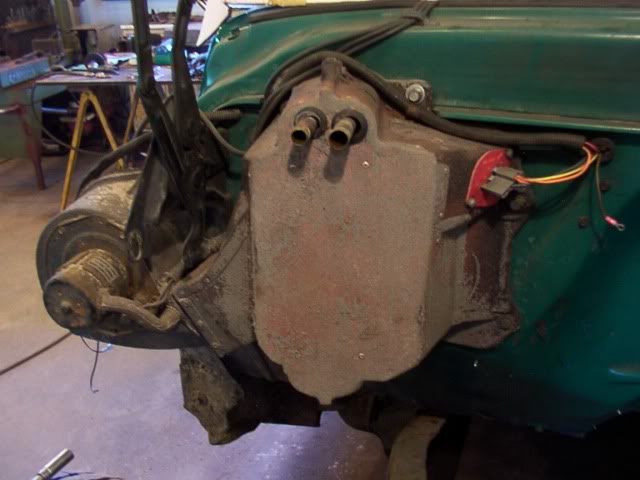
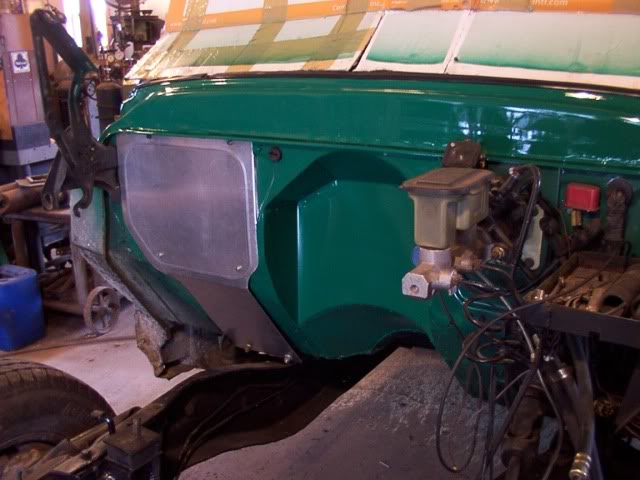
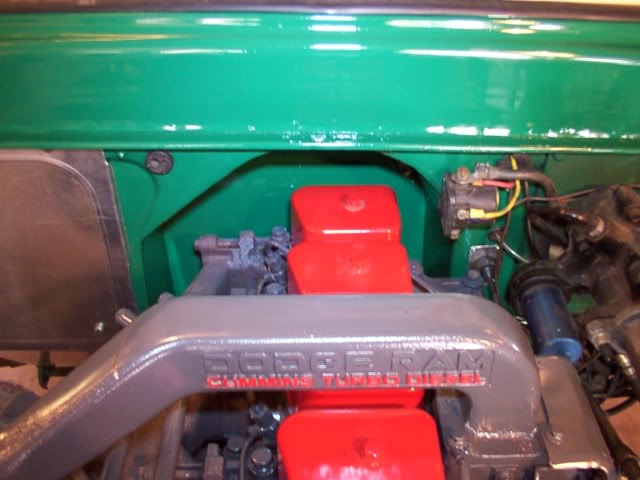
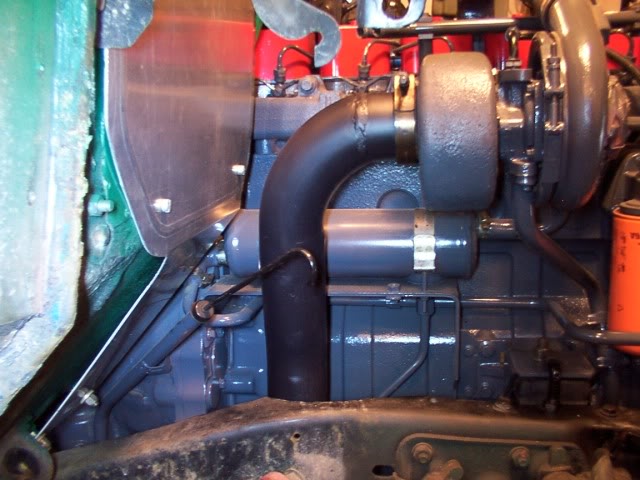
The engine is bolted in place.
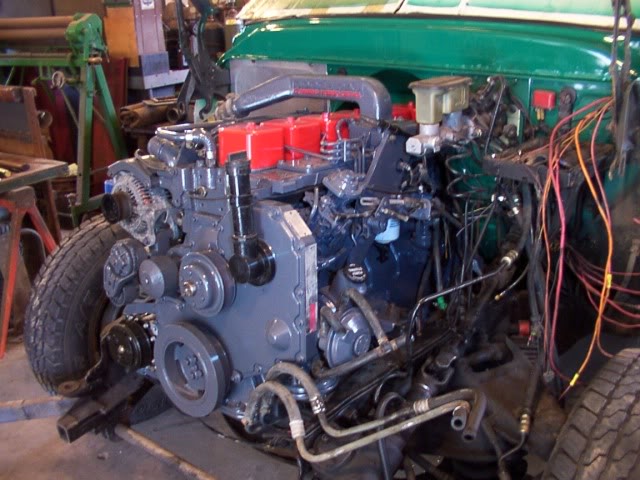
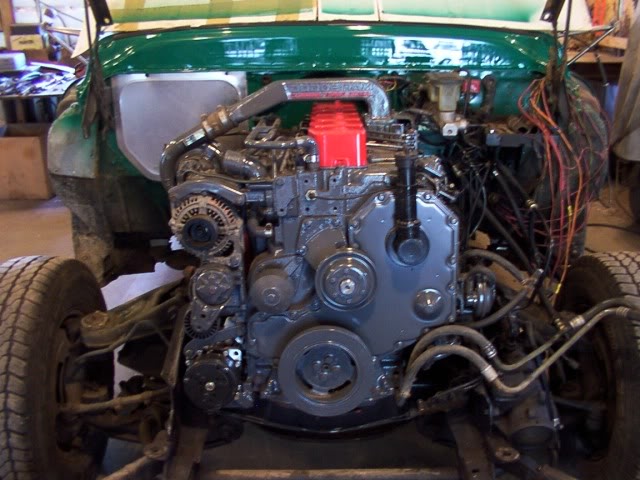
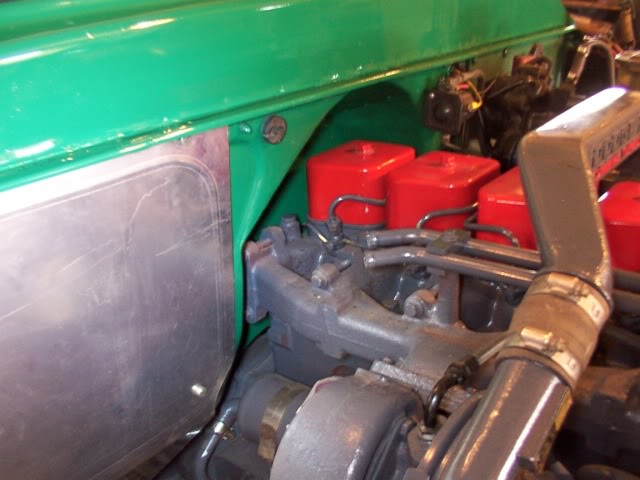
Here is the clearance on the firewall.
There is enough clearance so I can pull the rear valve cover to adjust the valves.
The exhaust manifold can even be taken off with out pulling the engine.
I forgot to put the support bracket back in between the frame rails when I was making the motor mounts so that is being taken care of now.
A piece of 3/16 x 2 inch angle iron is bolted across the underside of the frame rail.
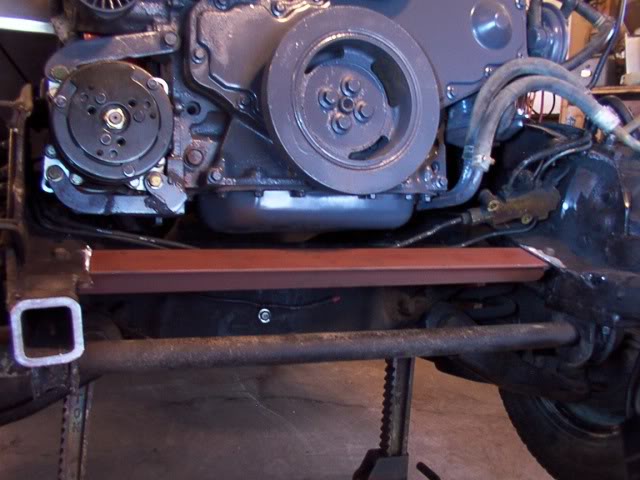
The brake lines that go across the front are clamped to the back side of the angle iron bracket.
A piece of 1/4 x 2-1/2 inch flat steel is welded to the drivers side of the frame and angle iron bracket.
This supports the steering box and the brake proportioning valve is bolted to it.
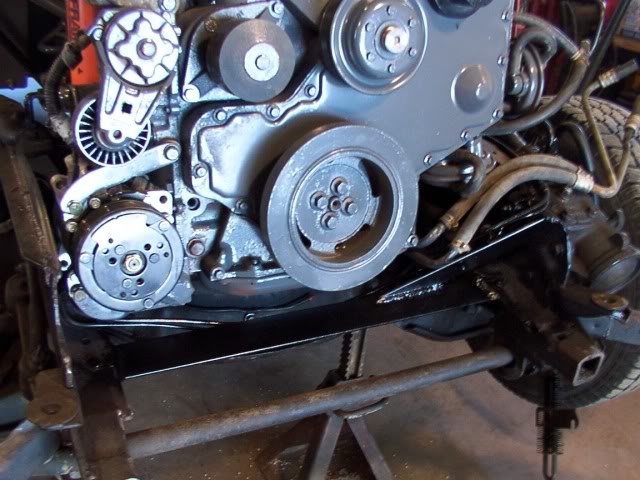
The angle iron cross brace is also welded to the frame rails.
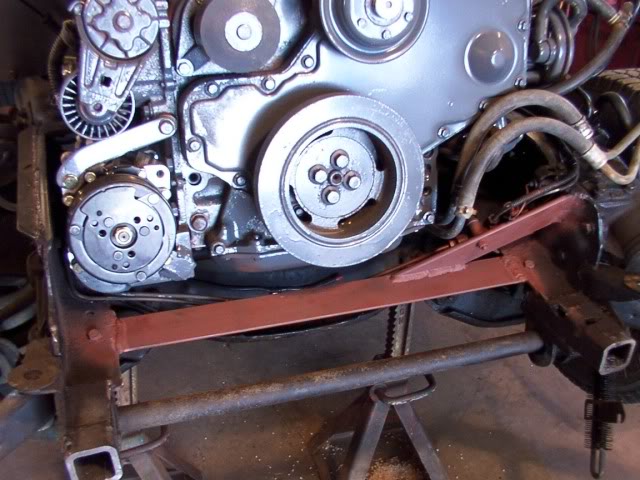
A little paint and it's all finished.
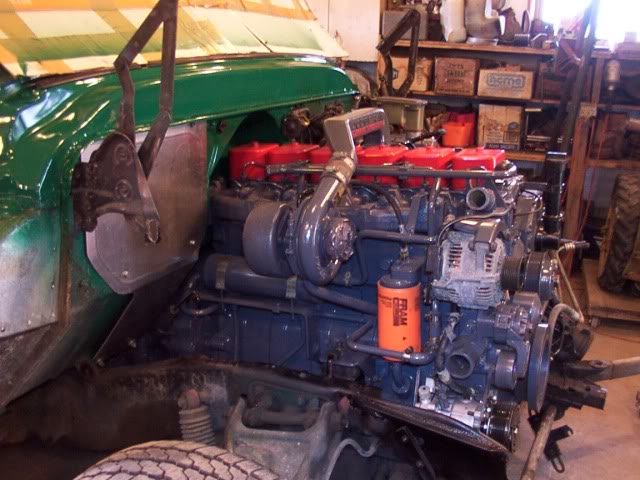
Naturally the exhaust pipe is too long before it makes the bend coming out of the turbo.
I shortened it 2-1/2 inches and it fits good now and clears the firewall.
The Dodge truck had a drive shaft that was in two sections and my truck had a single drive shaft.
My old drive shaft on the truck had a slip U-joint that slid in the back of the transmission.
The Dodge transmission has a U-joint clamp bolted solid on the tail shaft and the slip joint is at the end of the first drive shaft.
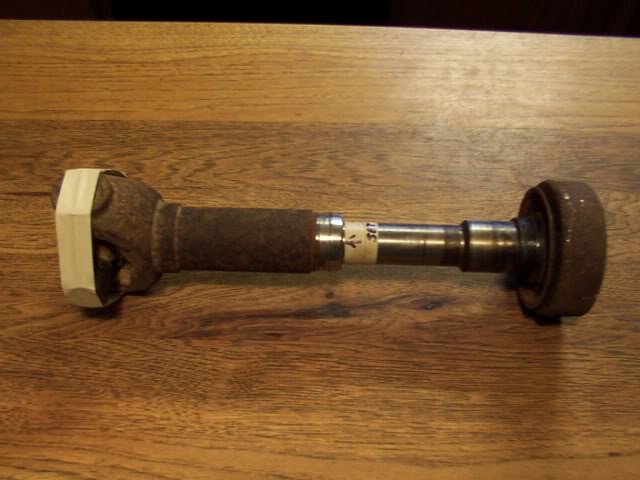
So I need to come up with a single drive shaft that has a slip joint built into it
I cut the slide end off the front of the Dodge drive shaft and separated the U-joint from the second drive shaft.
This gives me a slip joint with a U-joint that fits onto the U-joint clamp on the Dodge transmission and a slide section that can be welded onto the front of a drive shaft.
I'm going to take this down to the local truck repair garage and have them make a drive shaft with this slide joint on one end.
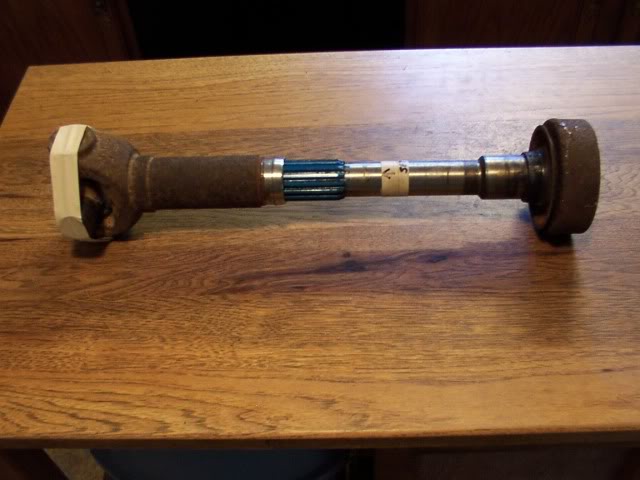
Here it is pulled apart a little so you can see the splines.
There is a rubber boot that fits on this and I'll put that back on once the driveshaft is made.
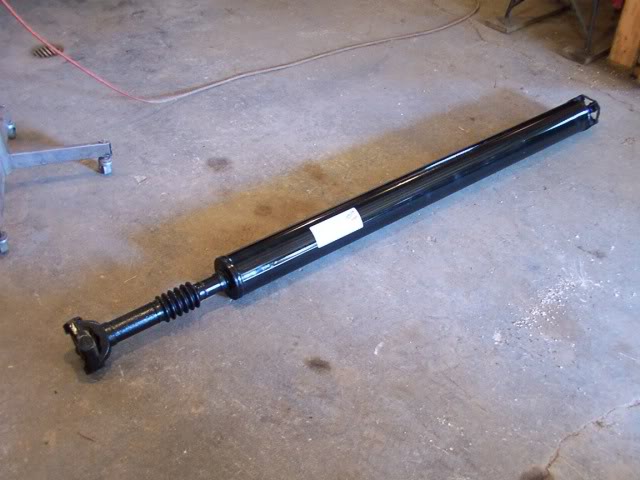
New drive shaft made by Valley Truck Parts.
They cut the old piece of drive shaft off my Dodge slip joint and welded the slip joint to the front of the new tube.
A Chevy yoke was welded to the back of the tube.
New U-joints were installed on both ends and a new rubber sleeve was put on the slip joint.
The whole thing was then balanced.
 [/quote]
When doing a swap like this, it's the little things that can sometimes eat up your time.
I realize that this doesn't look like much but it is the end result of about 3 hours of work.
This is the linkage to connect the shifting rod on the steering column to the shift lever on the transmission.
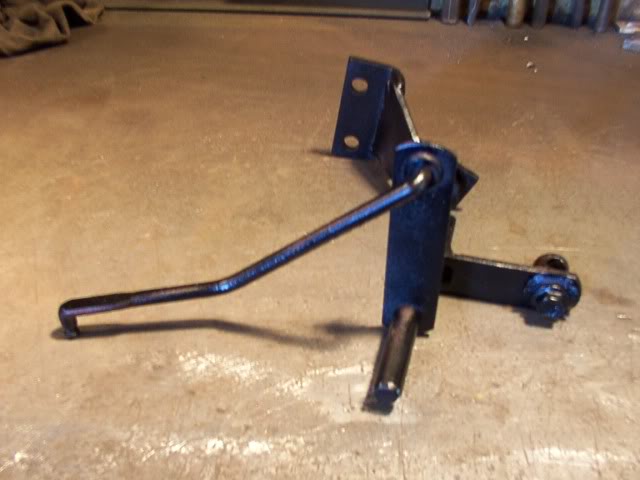
The old Chevy transmission had a shift lever that came out of the side of the transmission and the lever rotated all the way forward for "park" and backward for the gears.
So when you pulled the shift lever down on the steering column, it pushed the transmission lever back to put it in gear and pulling the steering lever all the way up put the transmission in park.
The shift lever on the Dodge transmission comes out of the top of the transmission and it rotates all the way back for "park" and forward for the gears ( just opposite of the Chevy transmission ).
The Dodge uses this linkage to transfer the up & down movement of the steering column shift bar to the forward & backward movement of the transmission lever.
The lever sticking up on the left has a rod that connects to the transmission lever.
I welded on another lever in the center that the steering column shift rod attaches too.
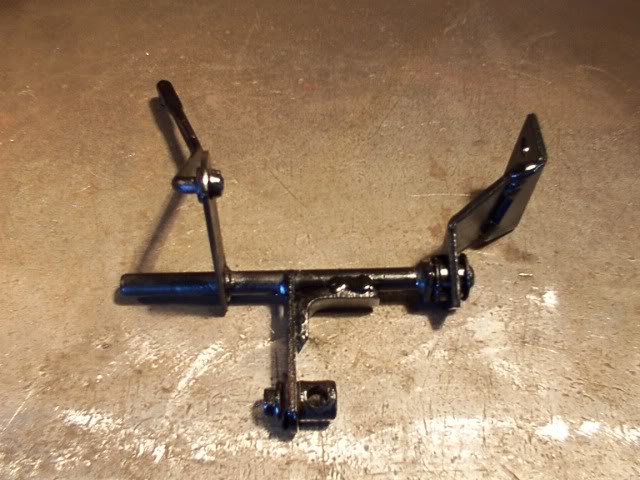
This Dodge shift linkage had to be set up in my frame so it was square to the transmission to prevent it from binding when moving.
The center lever that was welded on had to be in the right location and the correct length so the shift indicator on the steering column would correspond correctly to the gear shift locations in the transmission.
The Dodge frame was formed at an angle where the support bracket bolted to the frame.
My Chevy frame is straight so the support bracket had to be cut and re-welded to fit the frame.
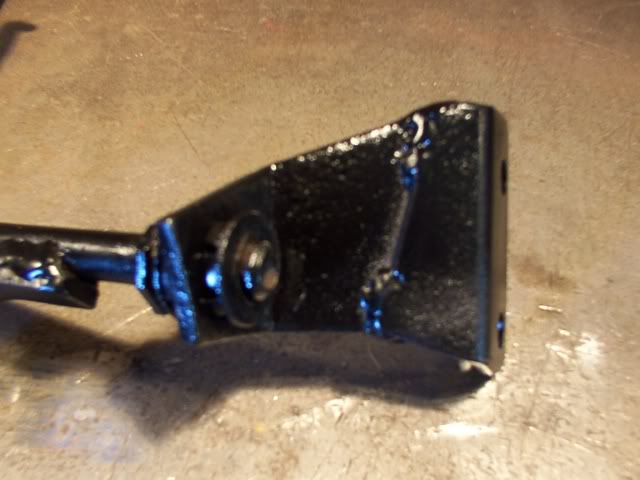
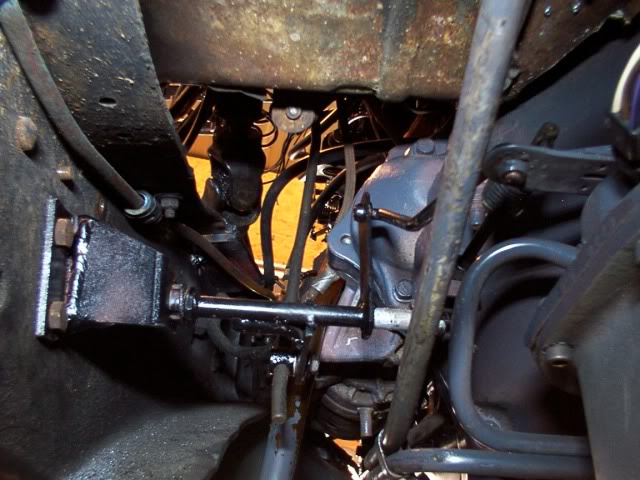
Here's how it looks from under the truck.
Things like this is why it is a good idea to get a complete donor vehicle when doing a swap instead of just buying an engine off someone's garage floor.
Here is the clearance on the firewall.
There is enough clearance so I can pull the rear valve cover to adjust the valves.
The exhaust manifold can even be taken off with out pulling the engine.
I forgot to put the support bracket back in between the frame rails when I was making the motor mounts so that is being taken care of now.
A piece of 3/16 x 2 inch angle iron is bolted across the underside of the frame rail.
The brake lines that go across the front are clamped to the back side of the angle iron bracket.
A piece of 1/4 x 2-1/2 inch flat steel is welded to the drivers side of the frame and angle iron bracket.
This supports the steering box and the brake proportioning valve is bolted to it.
The angle iron cross brace is also welded to the frame rails.
A little paint and it's all finished.
Naturally the exhaust pipe is too long before it makes the bend coming out of the turbo.
I shortened it 2-1/2 inches and it fits good now and clears the firewall.
The Dodge truck had a drive shaft that was in two sections and my truck had a single drive shaft.
My old drive shaft on the truck had a slip U-joint that slid in the back of the transmission.
The Dodge transmission has a U-joint clamp bolted solid on the tail shaft and the slip joint is at the end of the first drive shaft.
So I need to come up with a single drive shaft that has a slip joint built into it
I cut the slide end off the front of the Dodge drive shaft and separated the U-joint from the second drive shaft.
This gives me a slip joint with a U-joint that fits onto the U-joint clamp on the Dodge transmission and a slide section that can be welded onto the front of a drive shaft.
I'm going to take this down to the local truck repair garage and have them make a drive shaft with this slide joint on one end.
Here it is pulled apart a little so you can see the splines.
There is a rubber boot that fits on this and I'll put that back on once the driveshaft is made.
New drive shaft made by Valley Truck Parts.
They cut the old piece of drive shaft off my Dodge slip joint and welded the slip joint to the front of the new tube.
A Chevy yoke was welded to the back of the tube.
New U-joints were installed on both ends and a new rubber sleeve was put on the slip joint.
The whole thing was then balanced.
[/quote]When doing a swap like this, it's the little things that can sometimes eat up your time.
I realize that this doesn't look like much but it is the end result of about 3 hours of work.
This is the linkage to connect the shifting rod on the steering column to the shift lever on the transmission.
The old Chevy transmission had a shift lever that came out of the side of the transmission and the lever rotated all the way forward for "park" and backward for the gears.
So when you pulled the shift lever down on the steering column, it pushed the transmission lever back to put it in gear and pulling the steering lever all the way up put the transmission in park.
The shift lever on the Dodge transmission comes out of the top of the transmission and it rotates all the way back for "park" and forward for the gears ( just opposite of the Chevy transmission ).
The Dodge uses this linkage to transfer the up & down movement of the steering column shift bar to the forward & backward movement of the transmission lever.
The lever sticking up on the left has a rod that connects to the transmission lever.
I welded on another lever in the center that the steering column shift rod attaches too.
This Dodge shift linkage had to be set up in my frame so it was square to the transmission to prevent it from binding when moving.
The center lever that was welded on had to be in the right location and the correct length so the shift indicator on the steering column would correspond correctly to the gear shift locations in the transmission.
The Dodge frame was formed at an angle where the support bracket bolted to the frame.
My Chevy frame is straight so the support bracket had to be cut and re-welded to fit the frame.
Here's how it looks from under the truck.
Things like this is why it is a good idea to get a complete donor vehicle when doing a swap instead of just buying an engine off someone's garage floor.


#16
09-08-2012, 05:22 PM

Diesel Fan

#18
09-28-2012, 10:04 AM
Diesel Fan
Join Date: Sep 2012
Location: At Large ; )
Posts: 12
Likes: 0
Received 0 Likes
on
0 Posts
Brand-new to the forum here, saw THIS and just had to share My thanks for You sharing so-much of such a comprehensive build-project!
I had a '59 Apache 36 back in Hi-School...should've never sold it ~ at least as cheap as I did ~ but then how many of THOSE are there to talk about amongst the likes of Us : ?
I'm lookin' to garner a '59 Panel project -- AGAIN -- someday (it wuz a "Wife-B-Bitchin'" thing... ; ) to put an '83 MBZ 300 SD into...hopefully as a daily-driver running alternative fuel...amongst OTHER "Projects" too : )
AHhhhhaaaaaaaa "Projects"...what ELSE would we do without THEM : ?
Ciao, MAD JAX


