
Diamond Eye 3" Turbo Down Pipe Duramax build thread!

Thread Starter
|
Diesel Enthusiast
Joined: Jul 2009
Posts: 152
Likes: 8
From: Willow Spring, NC
Gonna get a before sound clip right before I head next door to install this thing!
Wish me luck! :cheers:
Pictures and videos to follow! Its going to be a late night!
[QUOTE=dietz4ibanez;88391]Here is a before the install movie... I will have to get the new sound clip tomorrow...
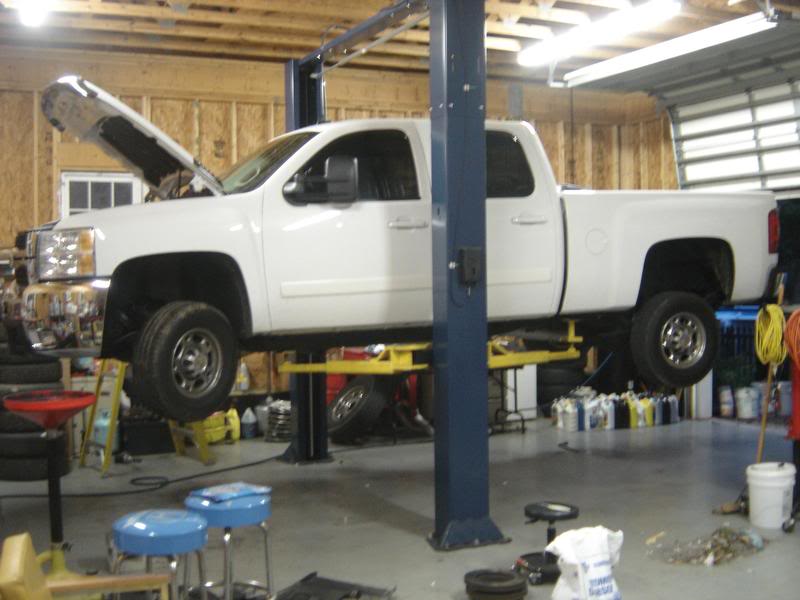
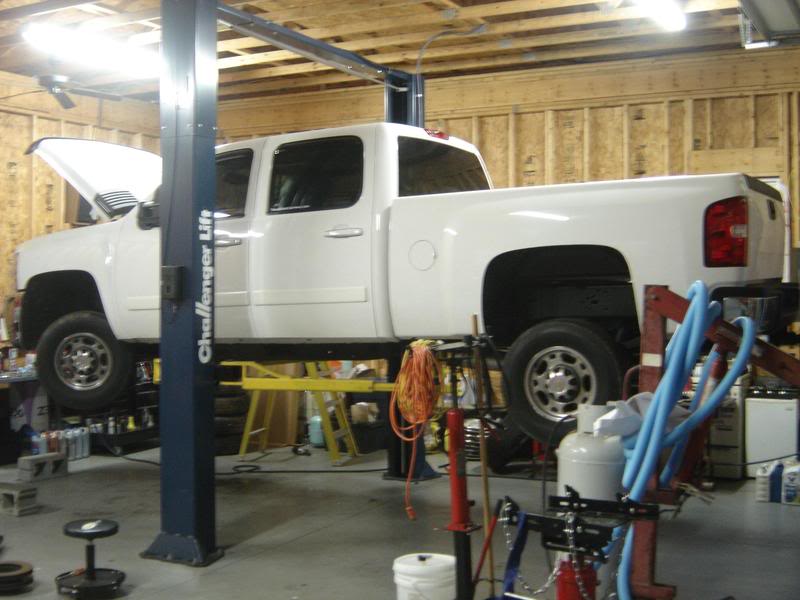
Here is where it all begins!
Big boy on the lift
I removed the plastic fender well with a panel popper and a bunch of 7mm screws... I figured that most would be familiar with this operation that have a Dmax when it comes time for Fuel Filter replacement!
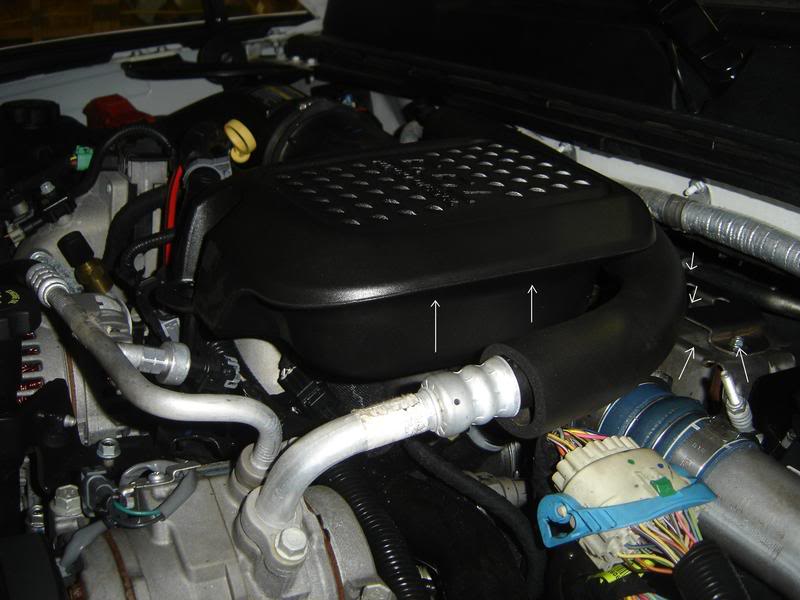
First things that I removed under the hood was the plastic air box that shows the arrows pointing up.. This is done with a torx in the very front and a clamp that I loosened with a flat head screw driver...
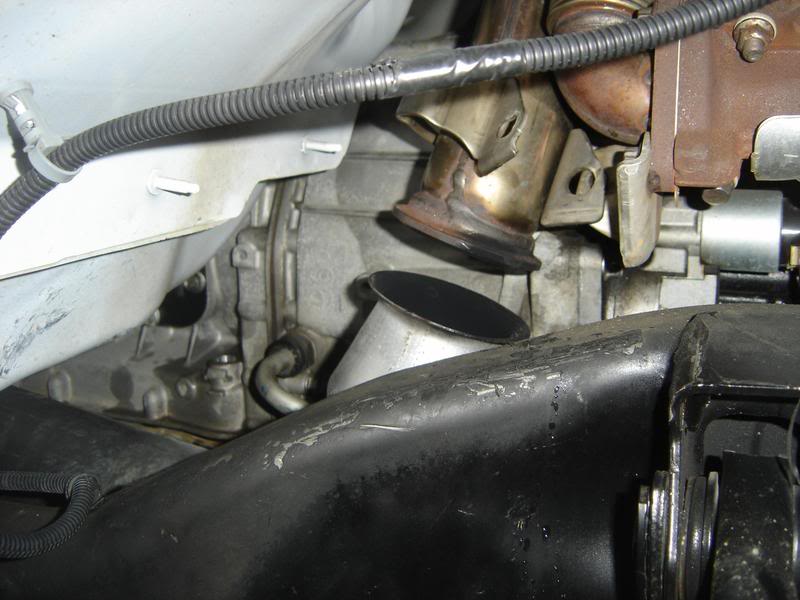
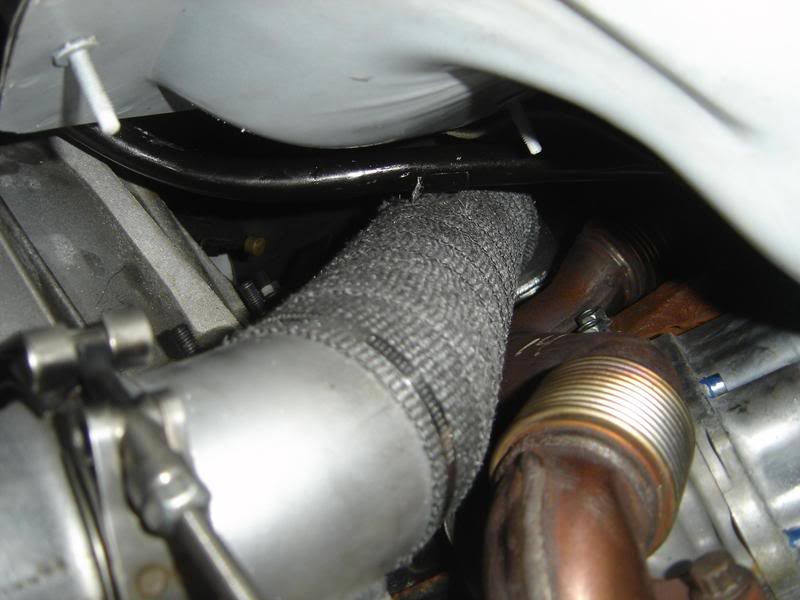
Also behind that is the shroud or heat shield that covers the back of the turbo outlet into the down pipe... Here you will find 4 10mm bolts. 2 in the front, 1 down in the little whole and another in the back by itself close to the firewall.. You will also find a clamp that is fastened to a line with a 10mm nut that will have to be removed... This cover will not come completely out without tin snips.. Some have cut the sucker in half but you can simply pull it forwards to get to the clamp...
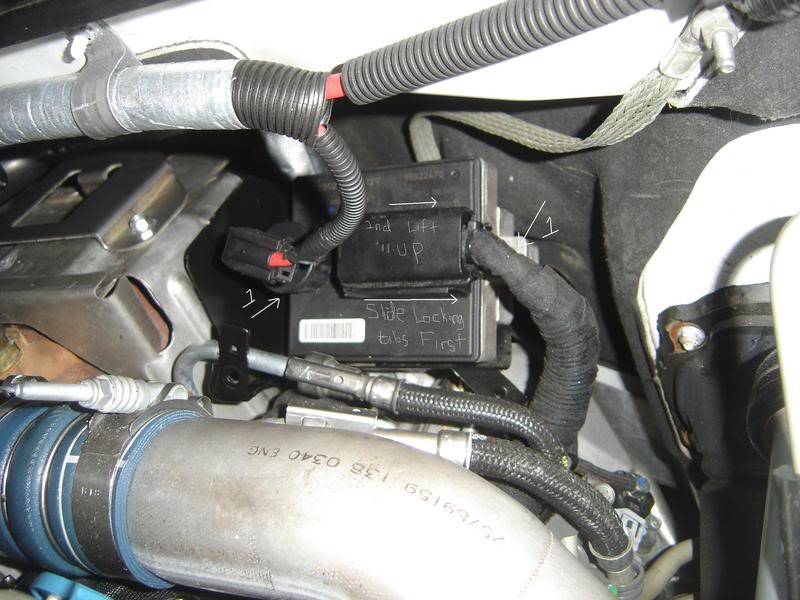
I also moved this module and mounting bracket which made it easier to get to the bolt on the clamp holding the dp on..
This was done by first removing the harness to the right of the module. There were these locking sliders on the side once those were pulled out towards the driver side fender you could pull up on the plug... Then you can proceed to remove 2 10mm bolts that seemed to be grounding this unit. Once this is done you will find 4 12mm bolts holding said black mounting bracket and one nut that fastened a line towards the front with a 10mm nut..
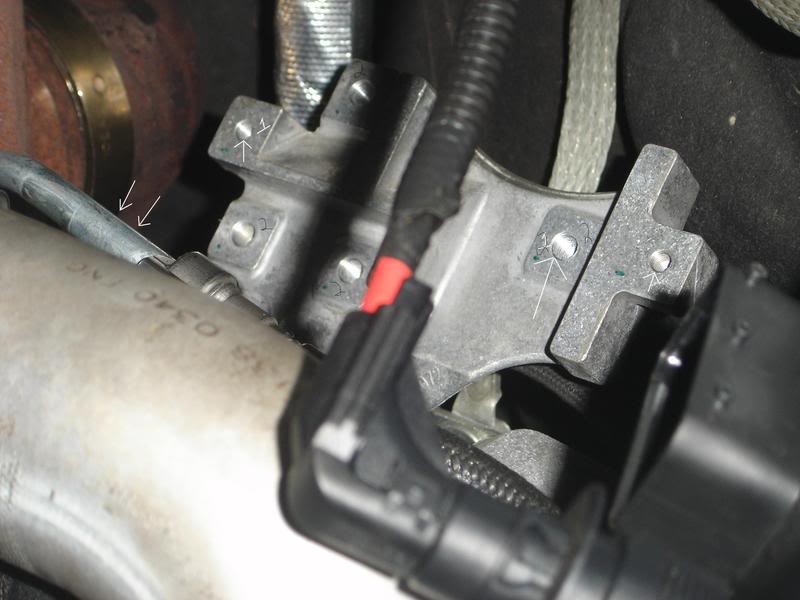
Here is what you will see when you remove the black bracket. Also you will see the 2 arrows pointing to the line that is hiding the stud with 11mm bolt holding on the clamp to the Dp... I know I thought that I had gotten that picture.. :fume:
Wish me luck! :cheers:
Pictures and videos to follow! Its going to be a late night!
[QUOTE=dietz4ibanez;88391]Here is a before the install movie... I will have to get the new sound clip tomorrow...
Here is where it all begins!
Big boy on the lift
I removed the plastic fender well with a panel popper and a bunch of 7mm screws... I figured that most would be familiar with this operation that have a Dmax when it comes time for Fuel Filter replacement!
First things that I removed under the hood was the plastic air box that shows the arrows pointing up.. This is done with a torx in the very front and a clamp that I loosened with a flat head screw driver...
Also behind that is the shroud or heat shield that covers the back of the turbo outlet into the down pipe... Here you will find 4 10mm bolts. 2 in the front, 1 down in the little whole and another in the back by itself close to the firewall.. You will also find a clamp that is fastened to a line with a 10mm nut that will have to be removed... This cover will not come completely out without tin snips.. Some have cut the sucker in half but you can simply pull it forwards to get to the clamp...
I also moved this module and mounting bracket which made it easier to get to the bolt on the clamp holding the dp on..
This was done by first removing the harness to the right of the module. There were these locking sliders on the side once those were pulled out towards the driver side fender you could pull up on the plug... Then you can proceed to remove 2 10mm bolts that seemed to be grounding this unit. Once this is done you will find 4 12mm bolts holding said black mounting bracket and one nut that fastened a line towards the front with a 10mm nut..
Here is what you will see when you remove the black bracket. Also you will see the 2 arrows pointing to the line that is hiding the stud with 11mm bolt holding on the clamp to the Dp... I know I thought that I had gotten that picture.. :fume:
Last edited by dietz4ibanez; Oct 7, 2009 at 11:47 AM.
Thread Starter
|
Diesel Enthusiast
Joined: Jul 2009
Posts: 152
Likes: 8
From: Willow Spring, NC
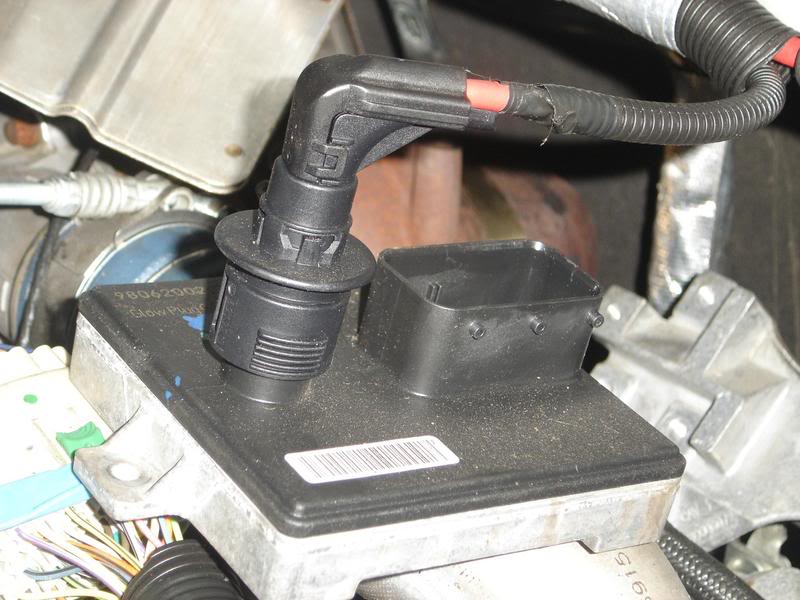
I just set this module off to the side..
Disconnected MBRP exhaust system from stock exhaust
Another view
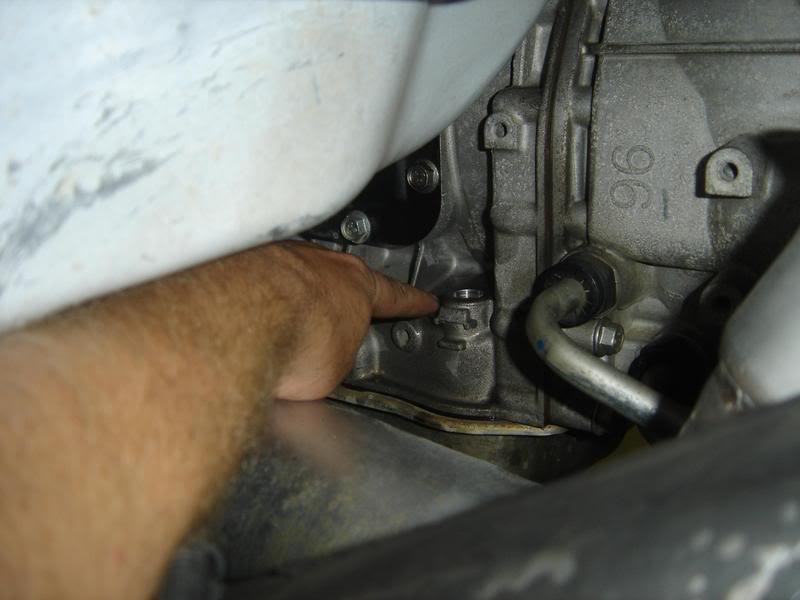
This is where the transmission dip stick goes..
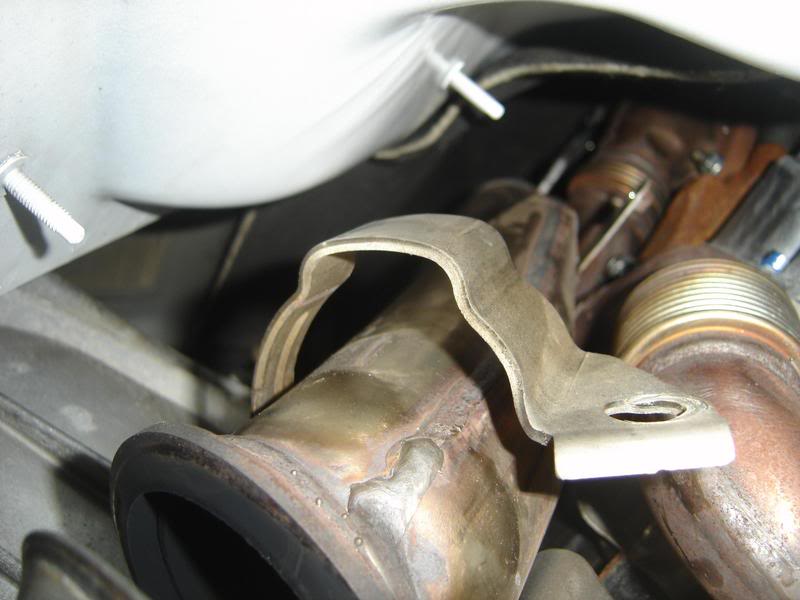
This picture was right before I broke that stupid band clamp loose... Sorry you cant see the stud but like I said before all there was too it was an 11mm nut..
Once that clamp was loose. I just twisted the pipe until it completely exited the turbo outlet and it basically came right out through the wheel well...

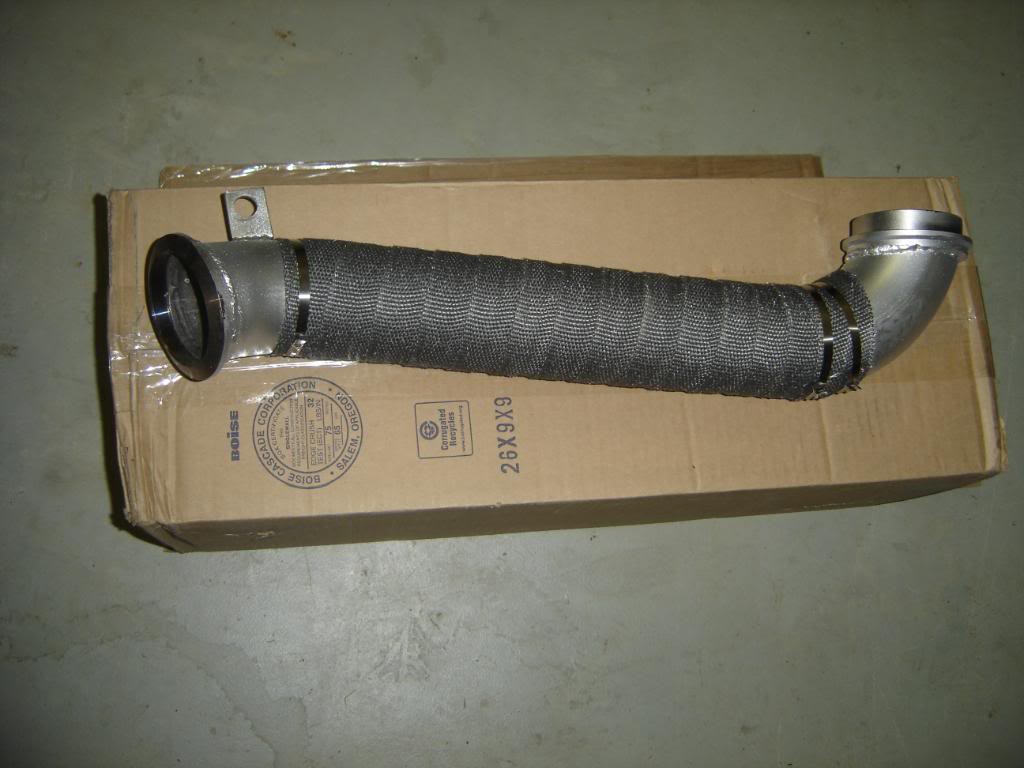
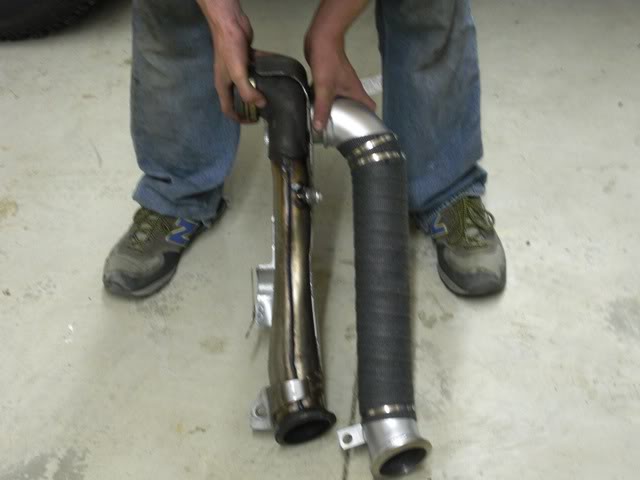
Stock vs Diamond Eye
Tranny line back in placed and to be fastened to firewall...
Another view of Diamond Eye clamped to MBRP!!! YAY!

It seems to be throatier and the turbo seems louder to me... I am sure that under WOT is when I will notice the most difference..
I had to get this video cause all the smoke was building up in the corner of my house!
---AutoMerged DoublePost---
I noticed the biggest difference under WOT! Had a nice deep sound! I like it a lot more!
Disconnected MBRP exhaust system from stock exhaust
Another view
This is where the transmission dip stick goes..
This picture was right before I broke that stupid band clamp loose... Sorry you cant see the stud but like I said before all there was too it was an 11mm nut..
Once that clamp was loose. I just twisted the pipe until it completely exited the turbo outlet and it basically came right out through the wheel well...
Stock vs Diamond Eye
Tranny line back in placed and to be fastened to firewall...
Another view of Diamond Eye clamped to MBRP!!! YAY!
It seems to be throatier and the turbo seems louder to me... I am sure that under WOT is when I will notice the most difference..
I had to get this video cause all the smoke was building up in the corner of my house!
---AutoMerged DoublePost---
I noticed the biggest difference under WOT! Had a nice deep sound! I like it a lot more!
Last edited by dietz4ibanez; Oct 7, 2009 at 06:50 PM. Reason: Automerged Doublepost


Thread Starter
|
Diesel Enthusiast
Joined: Jul 2009
Posts: 152
Likes: 8
From: Willow Spring, NC
---AutoMerged DoublePost---
I wanted a black truck soo bad when I was looking! Your truck looks good! Did you see the MBRP 5" Exhaust 6" tip build thread?
Last edited by dietz4ibanez; Oct 8, 2009 at 01:38 AM. Reason: Automerged Doublepost

Diesel Fan
Joined: Oct 2009
Posts: 21
Likes: 0
From: Alvin, TX
I just finished my install today.. Thanks for the walk-through it really helped!!!  What did you do to remove the heat shield.. And I'm guessing you need to reuse it but I had a hard time getting that off. Now is pretty messed up..
What did you do to remove the heat shield.. And I'm guessing you need to reuse it but I had a hard time getting that off. Now is pretty messed up..
Thread Starter
|
Diesel Enthusiast
Joined: Jul 2009
Posts: 152
Likes: 8
From: Willow Spring, NC
Unless you are talking about the heat shield that goes over top of the actual turbo coming out the back of the engine?
Diesel Fan
Joined: Oct 2009
Posts: 21
Likes: 0
From: Alvin, TX
yea the turbo heat shield... i can salvage mine in the mean time... but i already order a new one. I'm in the middle of the EGR blocker plate... but i couldnt finish last night it was too late.. i should finish today after work and then i get to start er' up! 
Last edited by DMAX86; Oct 12, 2009 at 09:02 AM.


