
Exhaust Housing How-To?

Has anyone here done a write-up on how to change the exhaust housing, with torque specs for everything (if any)? I'll be ordering my 12cm here soon and would like to know if I could do it myself or take it somewhere. Keep in mind I am a mechanic and have access to a fully equipped shop.

Diesel Enthusiast
Joined: Oct 2009
Posts: 346
Likes: 16
From: St George, UT
This is a little more than what you are looking for but give you an idea.
https://www.dieselbombers.com/5-9l-r...-call-h1d.html
This is something else I got thanks to RSWORDS on how to do a rebuild.
http://www.dieseltruckresource.com/d....html?t=226027
---AutoMerged DoublePost---
I apologize , that second link was from "muskrat". The first info was from RSWORDS.
And I thank both of them greatly for their great supply of info.
https://www.dieselbombers.com/5-9l-r...-call-h1d.html
This is something else I got thanks to RSWORDS on how to do a rebuild.
http://www.dieseltruckresource.com/d....html?t=226027
---AutoMerged DoublePost---
I apologize
, that second link was from "muskrat". The first info was from RSWORDS.And I thank both of them greatly for their great supply of info.
Last edited by pewder; Feb 28, 2010 at 10:34 AM. Reason: Automerged Doublepost

Diesel Wrench
Joined: May 2009
Posts: 538
Likes: 39
From: Bitterroot Valley Mt
One thing that seemed to work well for me is,(and it might sound gay) sitting on the floor and holding the turbo with your hands and putting your feet on the exhaust housing. Put preasure on it while a helper with a dead blow taps it off. I've done two this winter and both times, that's what I ended up doing and it works quite well.

With this guide we have a donor charger so Removal of the charger is not included Refer to the Charger Swap Guide for further information
Completion time: Less than 2 Hours
Here's a 16cm Holset Exhaust Housing


 Here's the Exhaust Gasket
 Here's the Oil Return Line Gasket
 Here's the donor charger
This set up is a Holset HX35W with a Modified 21 Cm Exhaust Housing to fit the newer model Cummins that don't have the clamp style Connection to the down pipe
 Separating the charger
 Remove the 4 bolts
the 2 rings will then come off this is what they look like
 Spray a bunch of the best penetrating oil you can find around the connection of the Exhaust Housing and the Compressor Housing and wait for it to penetrate.
You do not want to separate the two parts violently there is a fragile shaft that runs the length of the turbo and connects the compressor wheel and the exhaust turbine
Bend it and you're done for !
Completion time: Less than 2 Hours
Here's a 16cm Holset Exhaust Housing
Here's the Exhaust Gasket Here's the Oil Return Line Gasket Here's the donor chargerThis set up is a Holset HX35W with a Modified 21 Cm Exhaust Housing to fit the newer model Cummins that don't have the clamp style Connection to the down pipe
Separating the charger Remove the 4 boltsthe 2 rings will then come off this is what they look like
Spray a bunch of the best penetrating oil you can find around the connection of the Exhaust Housing and the Compressor Housing and wait for it to penetrate.You do not want to separate the two parts violently there is a fragile shaft that runs the length of the turbo and connects the compressor wheel and the exhaust turbine
Bend it and you're done for !
 Here it is coming apart
Apart picks below:


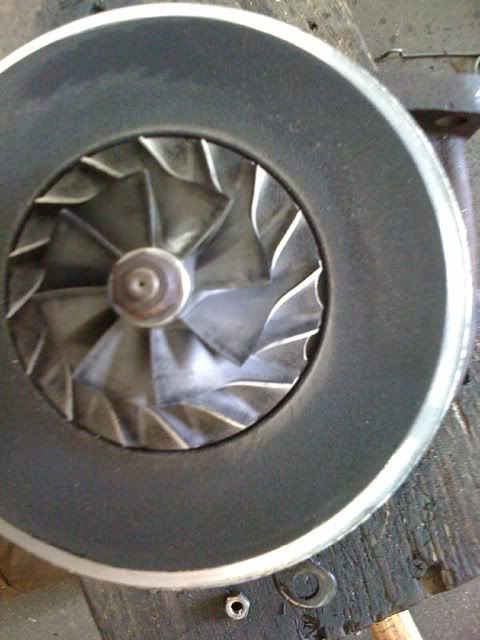
 Here's the exhaust turbine
 Now that its apart take the 16 Cm housing and slide it on over the exhaust turbine
Set one of the rings in place


 You will only use the center hole of the 3 grouped together on the rings
Put each ring on and put the middle bolt in to hold the rings while your putting the other 2 bolts in
The ends of the rings have arcs cut in them and when both rings are on that's where the bolt goes like so
Reference picture only
 Leave the bolts hand tight
 Here's the new set up HX35W With A 16 Cm Exhaust Housing
Put the charger on the truck using the Exhaust Gasket (BUBBLE OUT) and connect the charger to the Exhaust Manifold.
Spin the charger around to where the Intercooler line is perfectly lined up then tighten down all 4 bolts connecting the Exhaust Housing and the Compressor Housing
Finish putting the charger on and you're done
Refer to the Charger Swap Guide for further information
Well I'm now stuck with everything apart and the old housing not wanting to come off the turbo. I've been soaking it with the best oil we have available here at the shop and it hasn't budged.
We use GM Rust Penetrant and Inhibitor here at the shop. We heated it (lightly) with the torch and have been trying to tap it lightly with a hammer, but it still hasn't moved. I also have a bad feeling I may need a new turbo 
---AutoMerged DoublePost---
I took off the compressor housing and notice the compressor wheel has 2 large chunks missing...
---AutoMerged DoublePost---
I took off the compressor housing and notice the compressor wheel has 2 large chunks missing...
Last edited by FRadisi; Mar 7, 2010 at 03:22 PM. Reason: Automerged Doublepost


