water meth

#3
 01-16-2010, 09:52 PM
#4
01-16-2010, 11:17 PM
To build your own system you need...
Pump(s).
Nozzle(s).
One check valve for each nozzle to keep boost pressure from turning your pump into a small generator, and to control dribble as much as possible.
A method of controlling the flow of water from the pump(s) to the nozzle(s).
A reservoir and everything to tie everything together.
The far and away most popular pumps are 12 volt Shurflo's pushing 150-220 PSI. Snow sells 150 and 220 PSI pumps, Cooling Mist sells 150 and 200 PSI pumps; these are rebadged Shurflo's. The other option is to use an AC pressure washer pushing well over 1000 PSI, which requires an DC-to-AC inverter. It also requires you to use heavier solenoids (nitrous or hydraulic solenoids), heavier line (stainless braided), heavier check valves, and a transfer pump (which may be a 150-220 PSI water injection pump pressed into double duty) and may also require you to get an unloader valve to keep pressures under control.
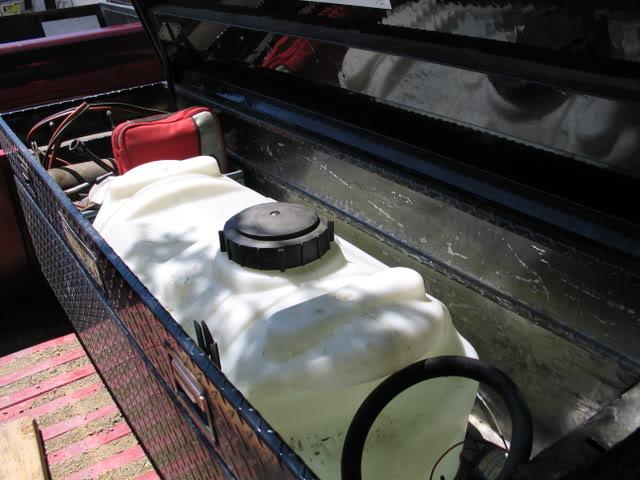
Here we can see a 150 PSI Cooling Mist pump in the front, bottom of the tool box and a 1800 PSI Husky pressure washer in the rear of the tool box. (The little silver pump on the front wall of the tool box is the Harbor Freight transfer pump feeding the pressure washer.)
Another option is to press a hydraulic pump with an electric clutch into duty, which is capable of even higher pressures than a pressure washer. I didn't get that far with my hydraulic pump because it's a more involved install, requires water to be laced with anti-corrosives and lubricants, and steals engine horsepower.
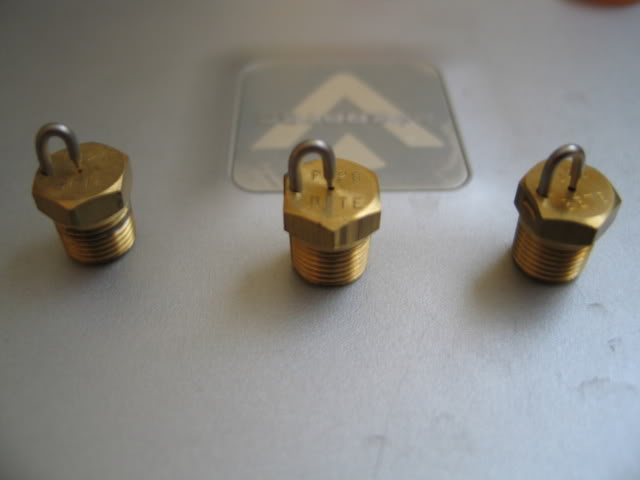
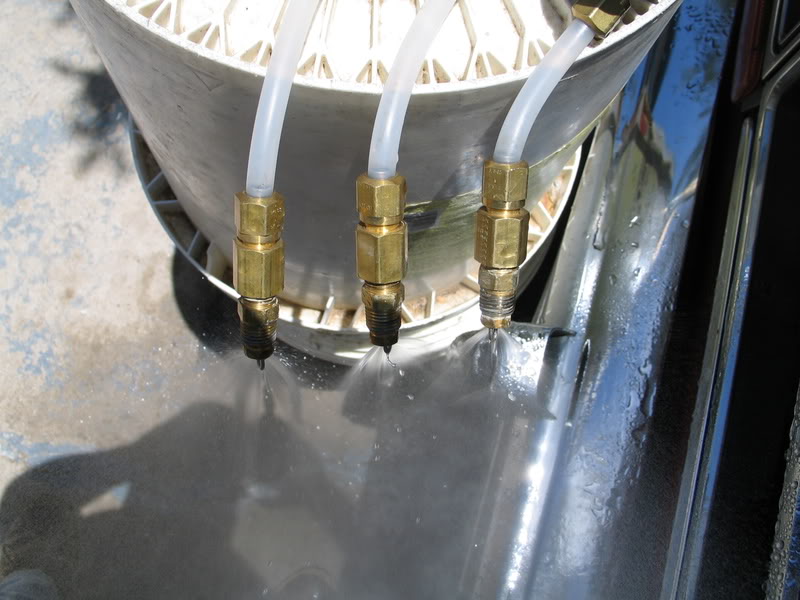
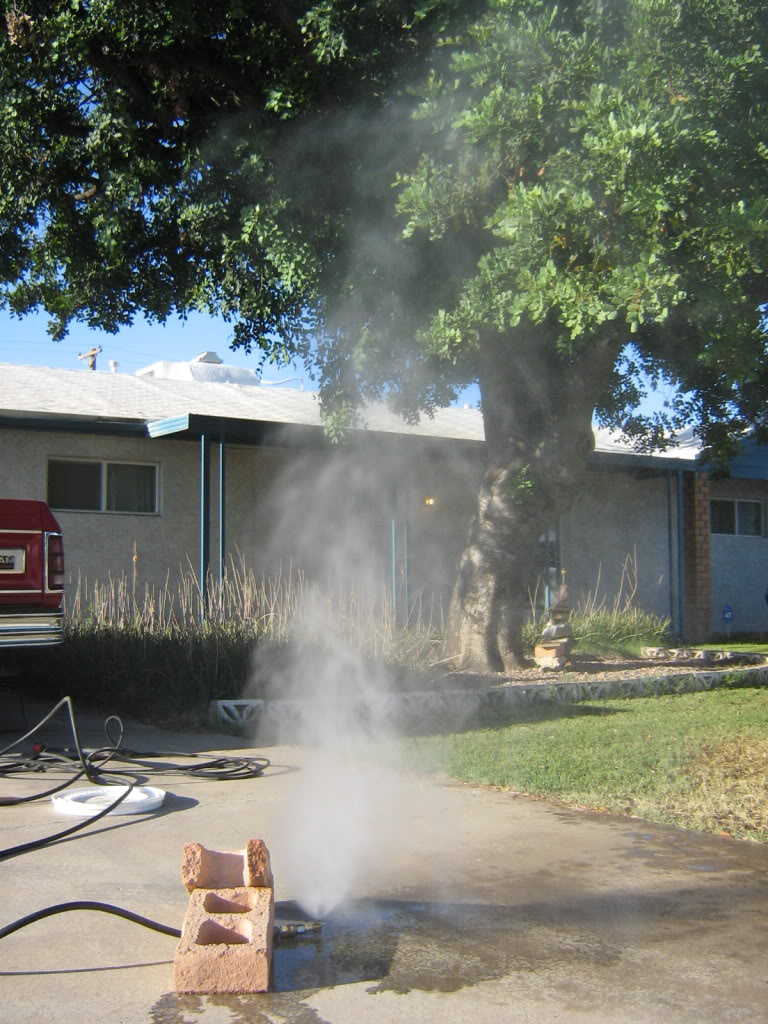
Once you get a pump, you need nozzles. Use these from McMaster-Carr because I need more people to test them for me to make sure the tips don't fly off after a few thousand miles and take valves with them. And because they atomize to an order of magnitude better than the nozzles anybody else runs, and are rated at 1000 PSI.
Check valves can be had from a fitting specialty store, McMaster-Carr or a place like Cooling Mist. I highly recommend Cooling Mist because unless they remain profitable they will probably never re-write their software and my stuff will never work right. They also have great customer support, good prices and the most innovative products.
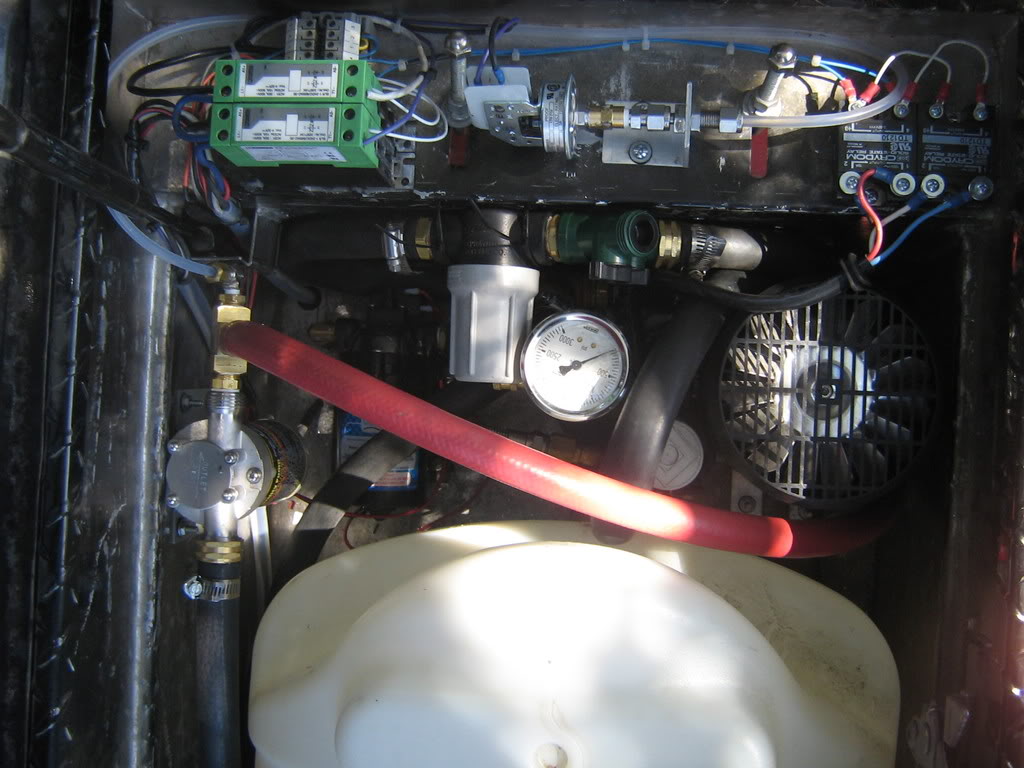
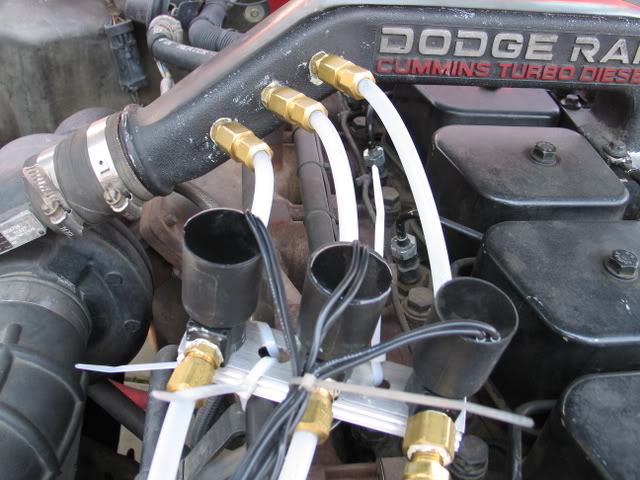
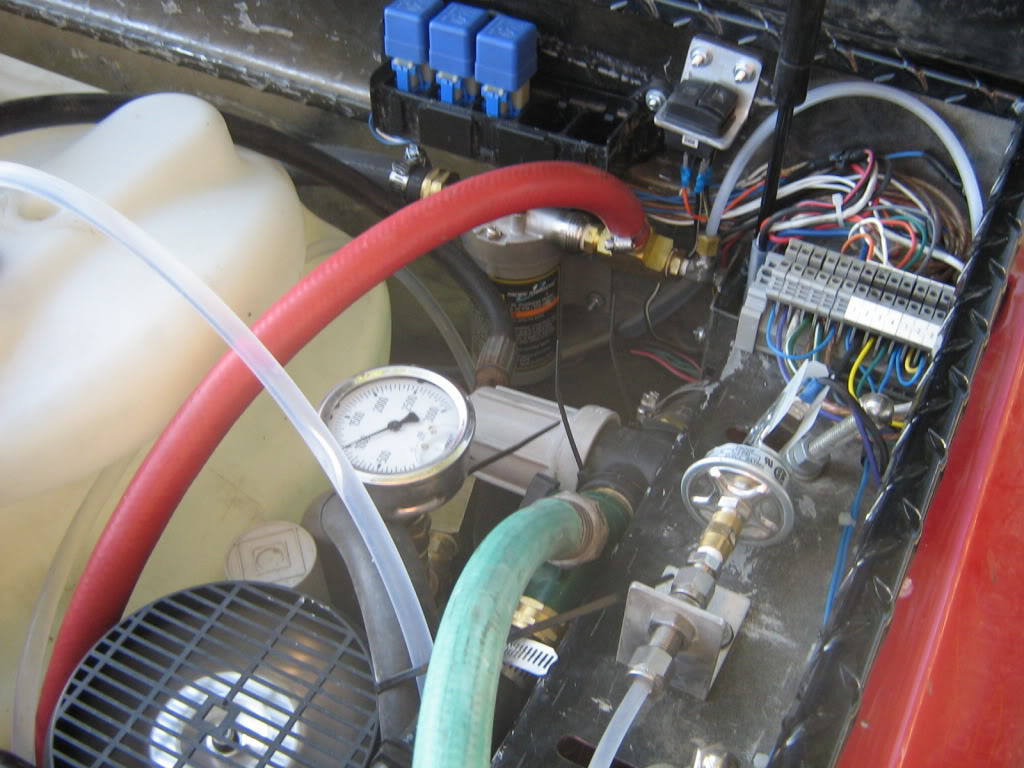
Control systems are where systems really get creative. For one stage, you can get away with only turning the pump on and off, although a solenoid is still recommended to make shut-off crisper. For each additional stage you need a solenoid. For up to 250 PSI, Cooling Mist sells some pretty good solenoids for $40, and it's hard to find 12 volt solenoids good for 200+ PSI for less. They can be seen here. Note that there are no check valves here, because this was a jury-rigged install. The check valves should be as close to the nozzles as possible.
To control the pump(s) and solenoid(s), you will need switches (McMaster-Carr). You can use a toggle or momentary-contact switch directly acting on the solenoid, which leaves you a great opportunity to mess-up and hydrolock your engine. To avoid that from happening, most set-ups use some form of boost referencing.
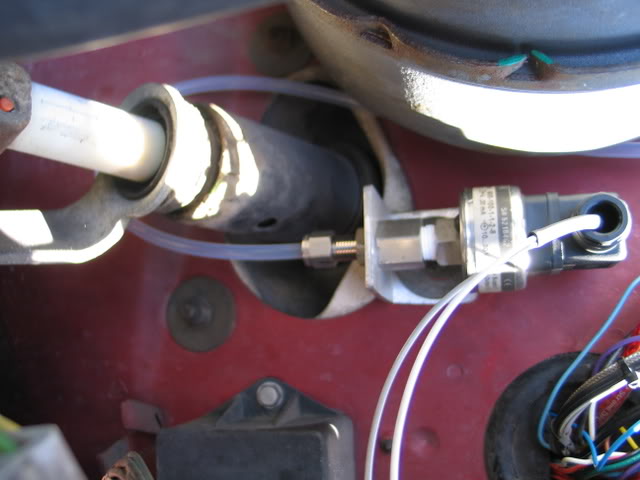
The most simple form of boost referencing is a pressure switch, such as the one in the top middle of the first picture. This will turn something on at a certain set-able pressure; you can turn it to 10 PSI to turn on a pump and solenoid to come on at 10 PSI. You can use more than one switch to control more than one stage; you can turn the pump and solenoid one on at 10 PSI, solenoid two on at 20 PSI, and solenoid three on at 30 PSI.
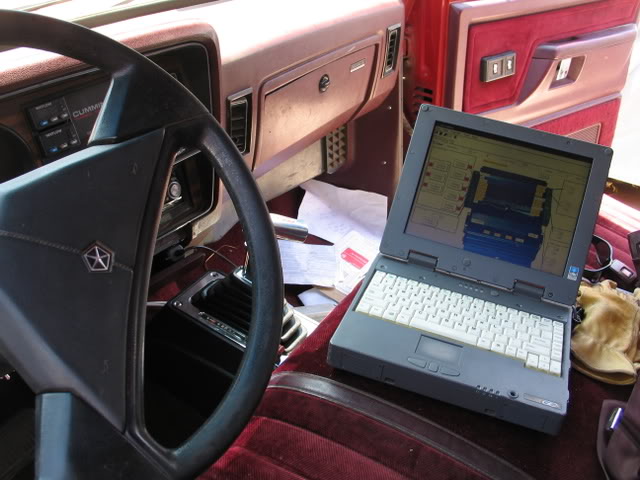
A more advanced form of boost referencing is to use a pressure transducer. I recommend buying these off of eBay. Transducers output a voltage (or a current that you can turn into a voltage) proportional to the pressure they see. You can then use adjustable comparator circuits (RadioShack), or a stand-alone computer-programmable ECM, to turn solenoids and pumps on and off at certain voltages/ pressures.
Cooling Mist makes the only such stand-alone ECM (Smart DMS) specifically for the application, which costs a little over $200 and I highly recommend you getting one so that it is a profitable item and they therefore spend the money to develop better software for it so that my stuff may finally work right some day. It also doubles as a data logger and gauge output.
A more exotic form of control is to use a single stage on a single solenoid, but to turn the solenoid on and off very rapidly (15-100 times a second) at different duty cycles to meter different amounts of water into the engine. You can use any solenoid for this, although some are better at it and last longer than others. A British company called "Wizards of NOS" (which seems to be an obvious infringement on a certain trademarked term to me) markets a "pulseoid" that is supposedly well suited to the application. Solenoids pressed into pulse applications quickly rack up tens of thousands of cycles and need to be rebuilt or replaced accordingly, and they are made more likely to fail, which makes the use of a second safety solenoid recommended.
To control the rapid cycling of the solenoid, you need a voltage-controlled PWM (pulse width modulator) of a sufficiently low frequency. If you're handy with electronics you can modify a Bakatronics PWM. Otherwise, you can buy a PWM designed specifically for the application from Cooling Mist ("Vari-Cool" and "CMGS"), Snow ("Boost Cooler") or you can use any of the progressive nitrous controllers out there (Edelbrock, NOS, NX, Zex). I recommend buying stuff from Cooling Mist so that they have money to rewrite their DMS software so that my stuff could work right some day.
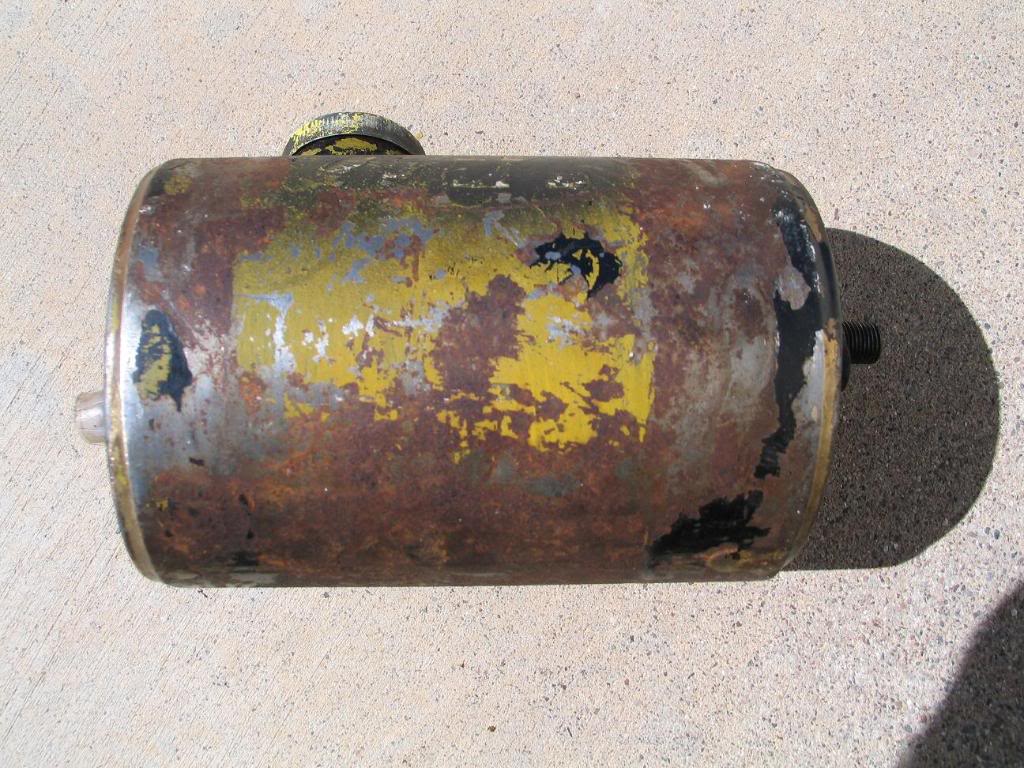
Last you need a reservoir. For a small set-up you can use a bulkhead fitting (McMaster-Carr) stuck through your windshield washer reservoir. For a larger set-up, or one for use over long periods of time, you can go bigger. A bigger reservoir has the advantage of being able to drop lots of ice into it, and it won't overheat as fast if you're using a higher-pressure pump and an unloader valve. This one is from Arizona Spray Equipment.
For the large quantity of money that a company like Snow wants for a system, you can shop around and build one orders of magnitude more effective.
Do NOT run tap water in the system; distilled water only. Methanol is optional, anti-rust water pump lubricant is recommended.
Pump(s).
Nozzle(s).
One check valve for each nozzle to keep boost pressure from turning your pump into a small generator, and to control dribble as much as possible.
A method of controlling the flow of water from the pump(s) to the nozzle(s).
A reservoir and everything to tie everything together.
The far and away most popular pumps are 12 volt Shurflo's pushing 150-220 PSI. Snow sells 150 and 220 PSI pumps, Cooling Mist sells 150 and 200 PSI pumps; these are rebadged Shurflo's. The other option is to use an AC pressure washer pushing well over 1000 PSI, which requires an DC-to-AC inverter. It also requires you to use heavier solenoids (nitrous or hydraulic solenoids), heavier line (stainless braided), heavier check valves, and a transfer pump (which may be a 150-220 PSI water injection pump pressed into double duty) and may also require you to get an unloader valve to keep pressures under control.
Here we can see a 150 PSI Cooling Mist pump in the front, bottom of the tool box and a 1800 PSI Husky pressure washer in the rear of the tool box. (The little silver pump on the front wall of the tool box is the Harbor Freight transfer pump feeding the pressure washer.)
Another option is to press a hydraulic pump with an electric clutch into duty, which is capable of even higher pressures than a pressure washer. I didn't get that far with my hydraulic pump because it's a more involved install, requires water to be laced with anti-corrosives and lubricants, and steals engine horsepower.
Once you get a pump, you need nozzles. Use these from McMaster-Carr because I need more people to test them for me to make sure the tips don't fly off after a few thousand miles and take valves with them. And because they atomize to an order of magnitude better than the nozzles anybody else runs, and are rated at 1000 PSI.
Check valves can be had from a fitting specialty store, McMaster-Carr or a place like Cooling Mist. I highly recommend Cooling Mist because unless they remain profitable they will probably never re-write their software and my stuff will never work right. They also have great customer support, good prices and the most innovative products.
Control systems are where systems really get creative. For one stage, you can get away with only turning the pump on and off, although a solenoid is still recommended to make shut-off crisper. For each additional stage you need a solenoid. For up to 250 PSI, Cooling Mist sells some pretty good solenoids for $40, and it's hard to find 12 volt solenoids good for 200+ PSI for less. They can be seen here. Note that there are no check valves here, because this was a jury-rigged install. The check valves should be as close to the nozzles as possible.
To control the pump(s) and solenoid(s), you will need switches (McMaster-Carr). You can use a toggle or momentary-contact switch directly acting on the solenoid, which leaves you a great opportunity to mess-up and hydrolock your engine. To avoid that from happening, most set-ups use some form of boost referencing.
The most simple form of boost referencing is a pressure switch, such as the one in the top middle of the first picture. This will turn something on at a certain set-able pressure; you can turn it to 10 PSI to turn on a pump and solenoid to come on at 10 PSI. You can use more than one switch to control more than one stage; you can turn the pump and solenoid one on at 10 PSI, solenoid two on at 20 PSI, and solenoid three on at 30 PSI.
A more advanced form of boost referencing is to use a pressure transducer. I recommend buying these off of eBay. Transducers output a voltage (or a current that you can turn into a voltage) proportional to the pressure they see. You can then use adjustable comparator circuits (RadioShack), or a stand-alone computer-programmable ECM, to turn solenoids and pumps on and off at certain voltages/ pressures.
Cooling Mist makes the only such stand-alone ECM (Smart DMS) specifically for the application, which costs a little over $200 and I highly recommend you getting one so that it is a profitable item and they therefore spend the money to develop better software for it so that my stuff may finally work right some day. It also doubles as a data logger and gauge output.
A more exotic form of control is to use a single stage on a single solenoid, but to turn the solenoid on and off very rapidly (15-100 times a second) at different duty cycles to meter different amounts of water into the engine. You can use any solenoid for this, although some are better at it and last longer than others. A British company called "Wizards of NOS" (which seems to be an obvious infringement on a certain trademarked term to me) markets a "pulseoid" that is supposedly well suited to the application. Solenoids pressed into pulse applications quickly rack up tens of thousands of cycles and need to be rebuilt or replaced accordingly, and they are made more likely to fail, which makes the use of a second safety solenoid recommended.
To control the rapid cycling of the solenoid, you need a voltage-controlled PWM (pulse width modulator) of a sufficiently low frequency. If you're handy with electronics you can modify a Bakatronics PWM. Otherwise, you can buy a PWM designed specifically for the application from Cooling Mist ("Vari-Cool" and "CMGS"), Snow ("Boost Cooler") or you can use any of the progressive nitrous controllers out there (Edelbrock, NOS, NX, Zex). I recommend buying stuff from Cooling Mist so that they have money to rewrite their DMS software so that my stuff could work right some day.
Last you need a reservoir. For a small set-up you can use a bulkhead fitting (McMaster-Carr) stuck through your windshield washer reservoir. For a larger set-up, or one for use over long periods of time, you can go bigger. A bigger reservoir has the advantage of being able to drop lots of ice into it, and it won't overheat as fast if you're using a higher-pressure pump and an unloader valve. This one is from Arizona Spray Equipment.
For the large quantity of money that a company like Snow wants for a system, you can shop around and build one orders of magnitude more effective.
Do NOT run tap water in the system; distilled water only. Methanol is optional, anti-rust water pump lubricant is recommended.
The following users liked this post:
dukeboy_318 (01-16-2010)

#6
01-16-2010, 11:59 PM
#7
01-17-2010, 11:09 AM

#8
01-17-2010, 11:33 AM
I have also started looking into my own system. Brother and I got it started but we dont have the nozzles figrued out. The write-up right there looks amazing but way to complicated, there has to be a way to simplify this down even more. Granted i have no idea what is to much spray going in and how much can ruin the engine.... I have started mine straight from my current washer fluid tank and am using the existing system that it has (tubing/pump/tank/ and whatnot) ...Is this feasible?!
#9
01-17-2010, 03:57 PM
Diesel Enthusiast
i ran that kinda setup on my 1st gen. it came on when i push the window cleaner button. work untille i made a lot of boost. then blew back in to the tank , and blew my ww tank lid off. so i got i different pump at tractor suply. it works purdy good.. nozzels i got off of ebay for 20 buckes. i got a 150 nozzel. it was to small so i drilled it out. the motor will let you know if it is to much water.. white smoke will flood out the tail pipe.. and will pop like your pouring water in a gass carberater.. .
now on my second gen i run the snow stage II. 2 600 nozzels drilles out.with 1 bottle of wwf and one bottle of heet. close to a 50/50 mix.
i am on my 3rd head gaskit. to much heet in with wwf will make a good bomb on top of the cylenders. first head gasket went with a mix of 1 bottle of wwf and 4 bottles of heet.. purdy close to 100% . to much timming. it blew a gap on the back side of #6 1 1/2 inches . between 5 and 6 was about a 1/4 inch. front of #1 was about an 1 inch and between 1 and 2 was a bout an 1/2 inch.
second head gasket. was eat up. back of #6 was just gone maybe 2 inches maybe more. a good inch between 5 and 6. and front side of #1 was a big chunk gone.. water was spitting out from the back of engine like a water hose. that mix was a eff up on my part i grabed the wrong container and filled it up with the same mix as the first time i blew it. and was running more timming.. and that was with head studes aswell... so watch your mixes on them... it will blow **** up
Last edited by oklahoma_6speed; 01-17-2010 at 04:08 PM.
#10
01-17-2010, 04:02 PM


