Harder Better Faster Stronger
#21
 11-17-2012, 12:54 PM


I got the pre P7100 filter, summit 40-Micron stainless.
Set my timing to 21*.
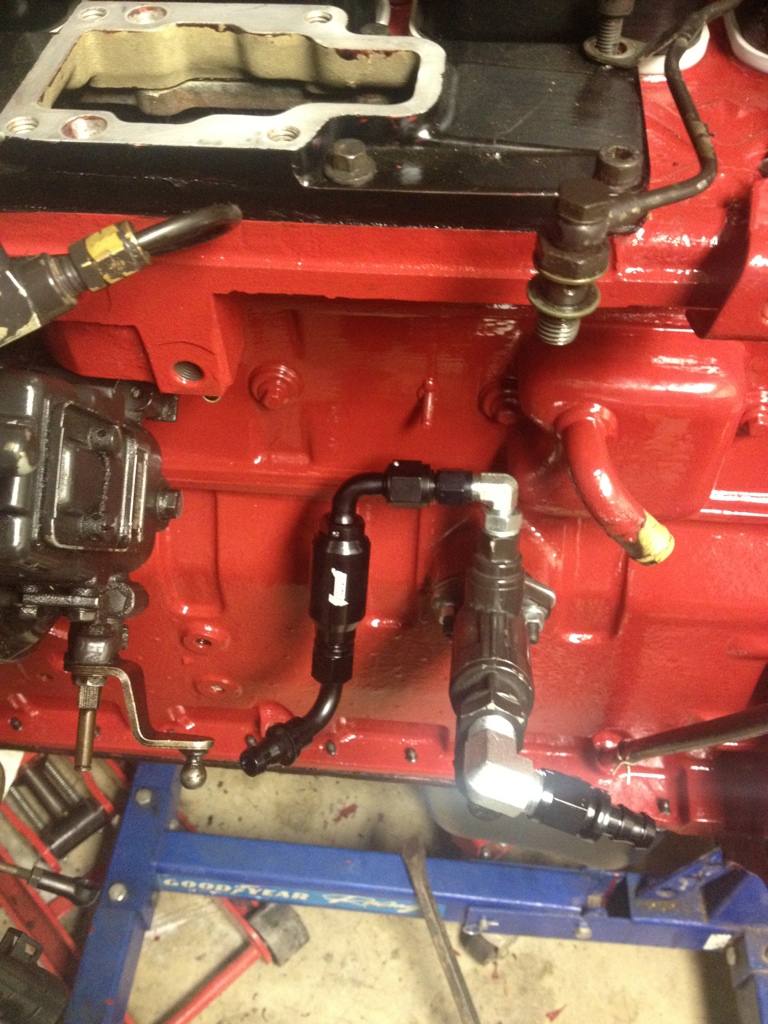
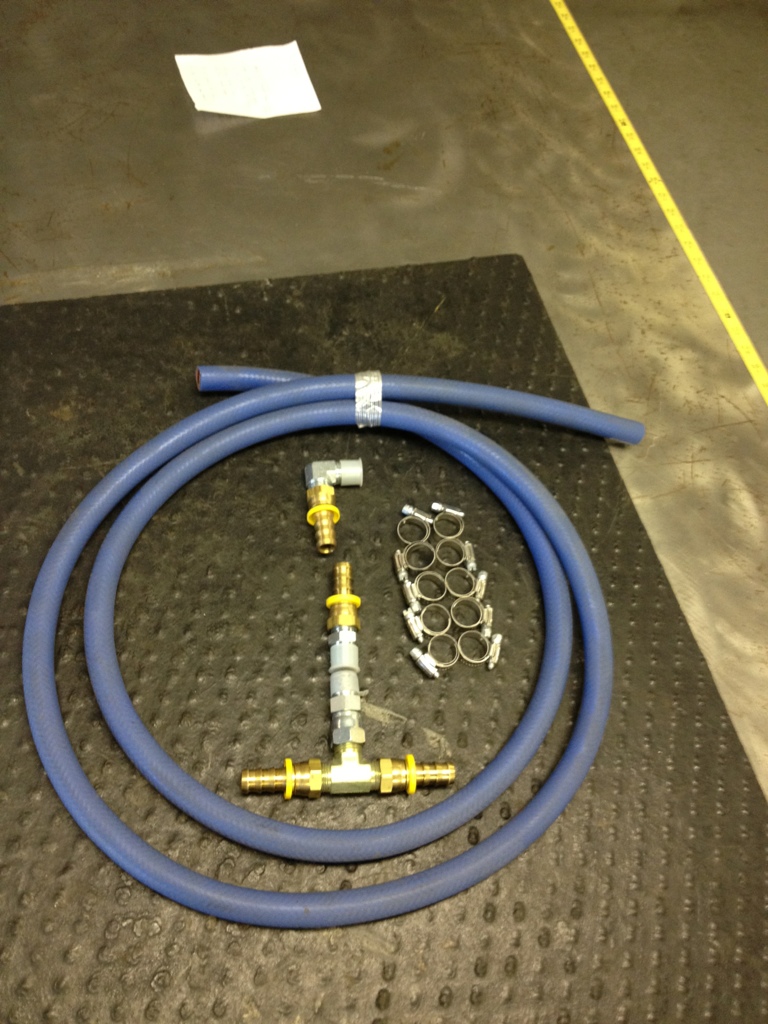
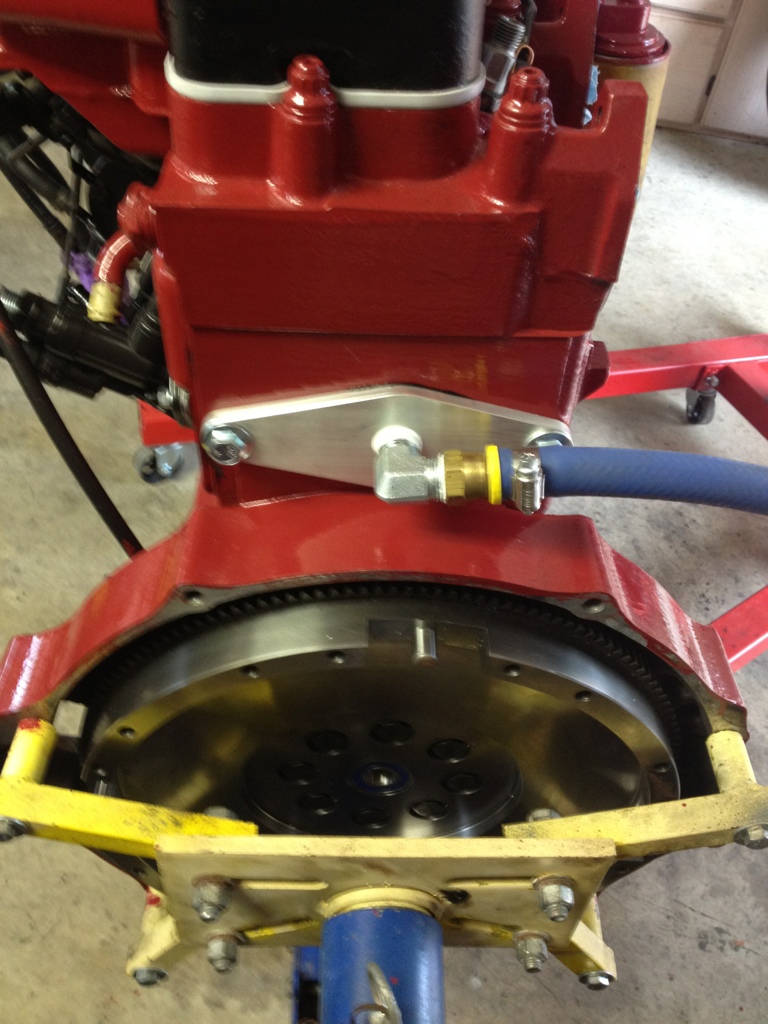
Made my own Coolant bypass setup, Aquatrol 35psi 1/2" valve, Eatsoot.com billet freeze plug plate, and AN Pushlock fittings with Silicone Hose, going to Tee it into heater return line:
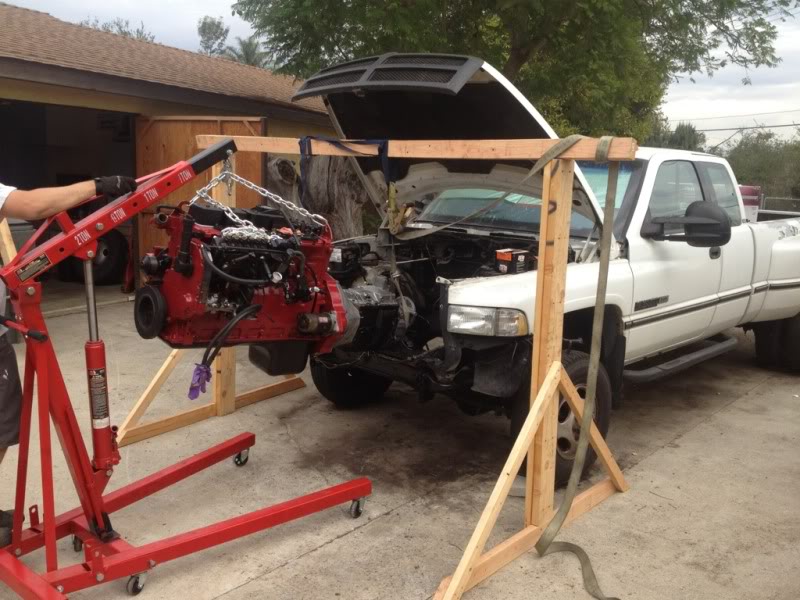
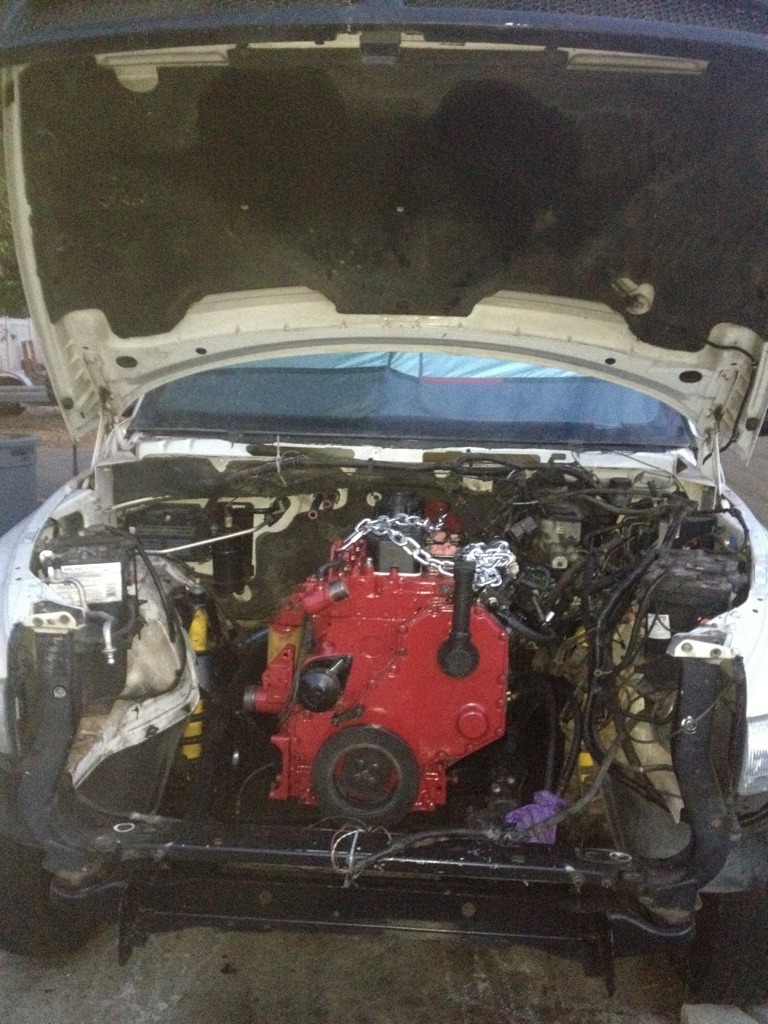
Got around finally to installing the engine. That was a chore. Bolted up the DD clutch, and NV4500 before, but left the transfer case off. Engine was assembled as follows: full long block, head, valve covers (minus 5 & 6), oil pan, p7100, vacuum/power steering pump, lift pump and starter.
I tried everything I could and couldn't get it in that way, was short an inch (thats what she said) and couldn't wiggle, beat, or maneuver it to fit. #6 rocker was rubbing on the cowl, and the trans adapter plate was stuck between the motor mount horns on the frame, couldnt get it to clear.
Removed the starter, it seemed better but still no-go. finally bit the bullet and took the oil pan and pickup off, it slid right in.
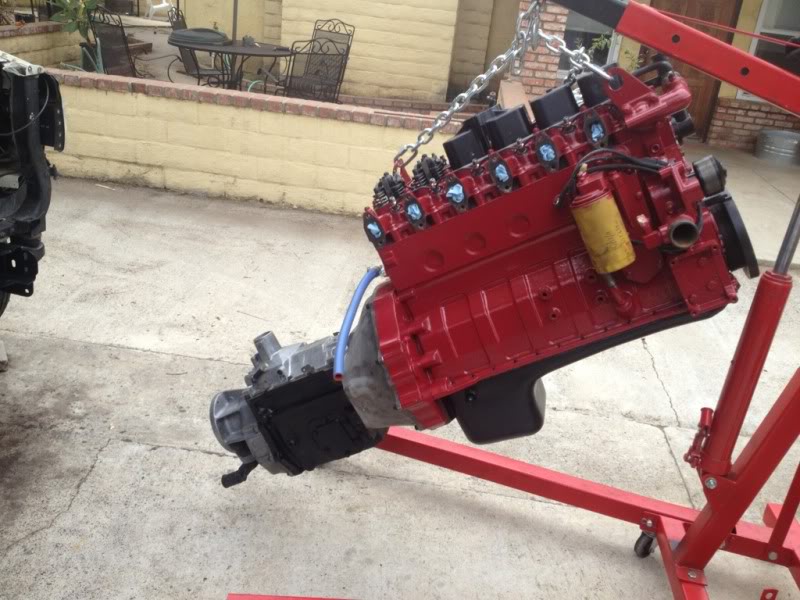
Yes a Jerry-rigged Gantry, it worked...

Set my timing to 21*.
Made my own Coolant bypass setup, Aquatrol 35psi 1/2" valve, Eatsoot.com billet freeze plug plate, and AN Pushlock fittings with Silicone Hose, going to Tee it into heater return line:
Got around finally to installing the engine. That was a chore. Bolted up the DD clutch, and NV4500 before, but left the transfer case off. Engine was assembled as follows: full long block, head, valve covers (minus 5 & 6), oil pan, p7100, vacuum/power steering pump, lift pump and starter.
I tried everything I could and couldn't get it in that way, was short an inch (thats what she said) and couldn't wiggle, beat, or maneuver it to fit. #6 rocker was rubbing on the cowl, and the trans adapter plate was stuck between the motor mount horns on the frame, couldnt get it to clear.
Removed the starter, it seemed better but still no-go. finally bit the bullet and took the oil pan and pickup off, it slid right in.
Yes a Jerry-rigged Gantry, it worked...
#22
11-25-2012, 01:02 PM
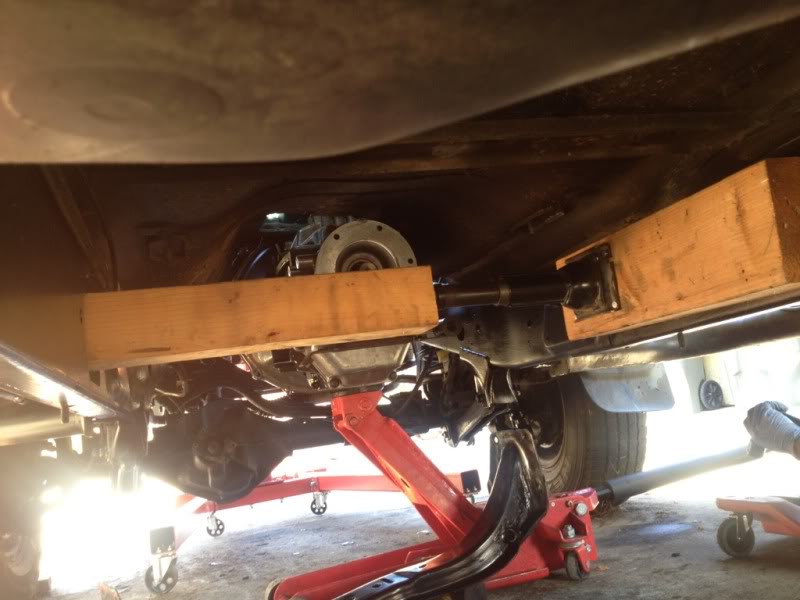
I got the oil pan and all 36 dang bolts back on.
The transmission crossmember was so tight I had to spread the frame rails about 1-2" to slide it in.
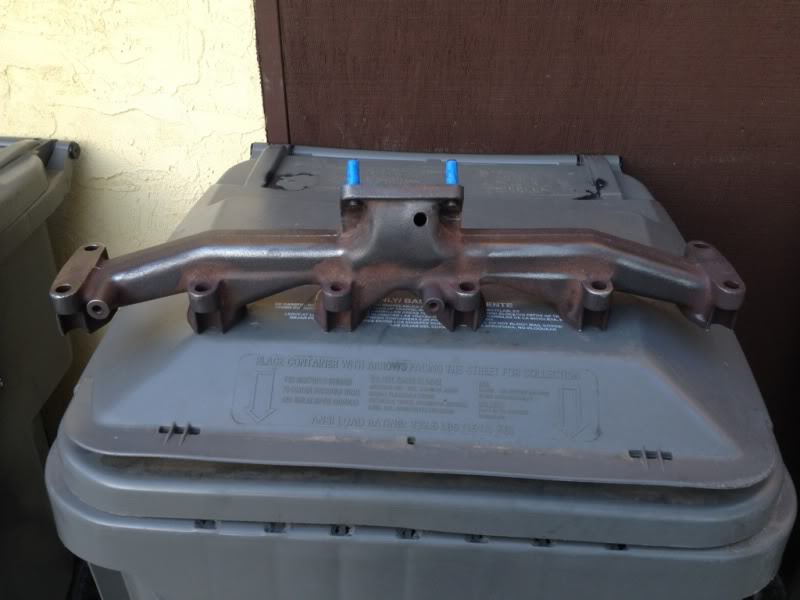
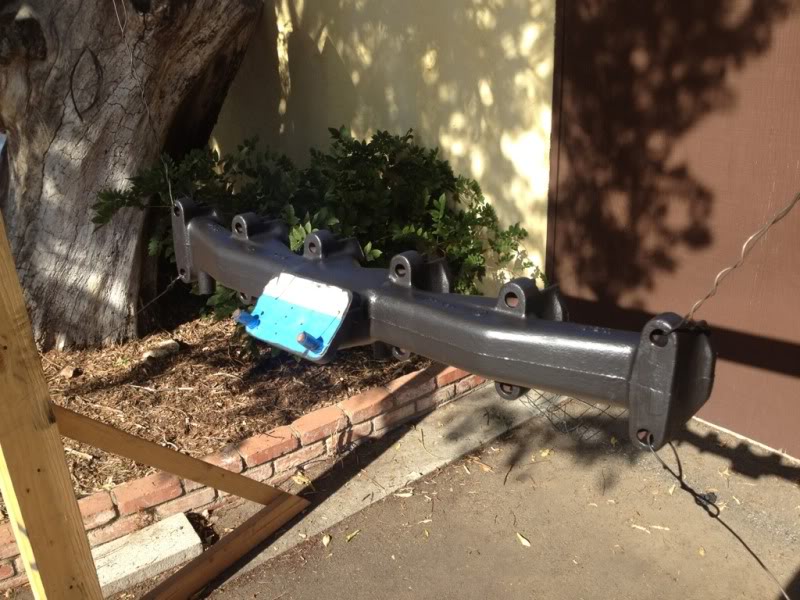
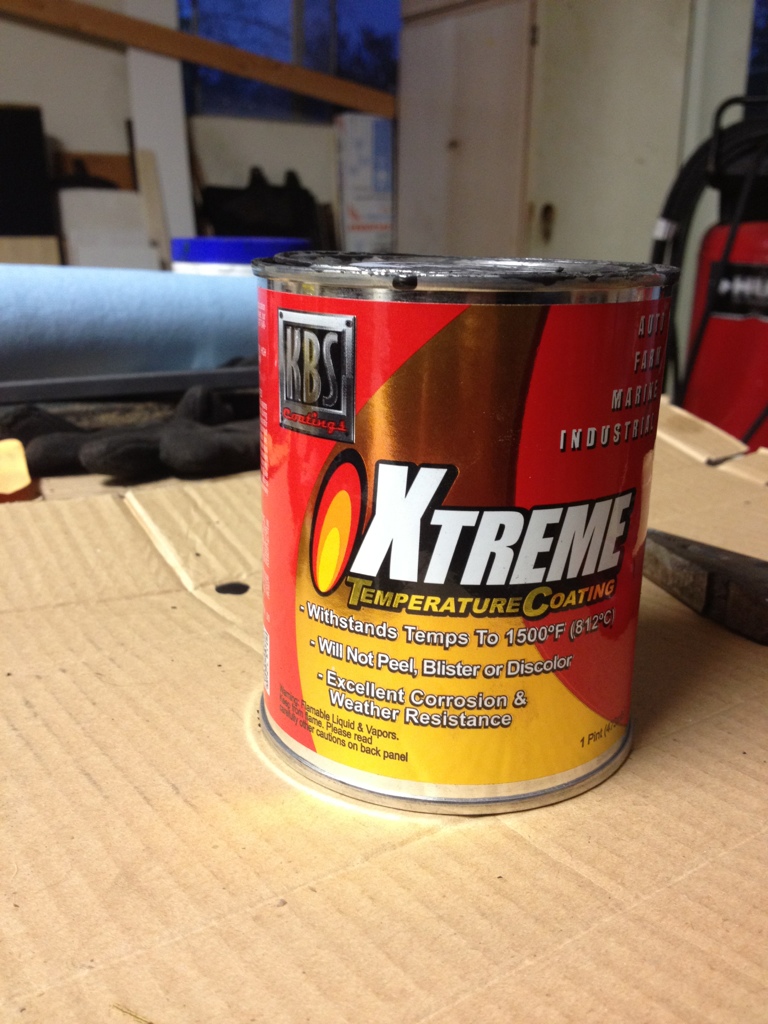
Painted my Manifold with KBS 1500* paint.
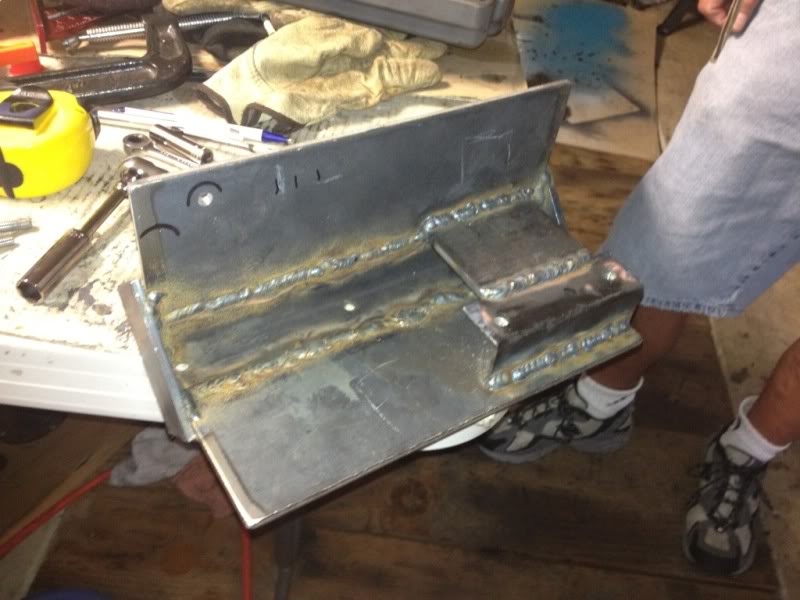
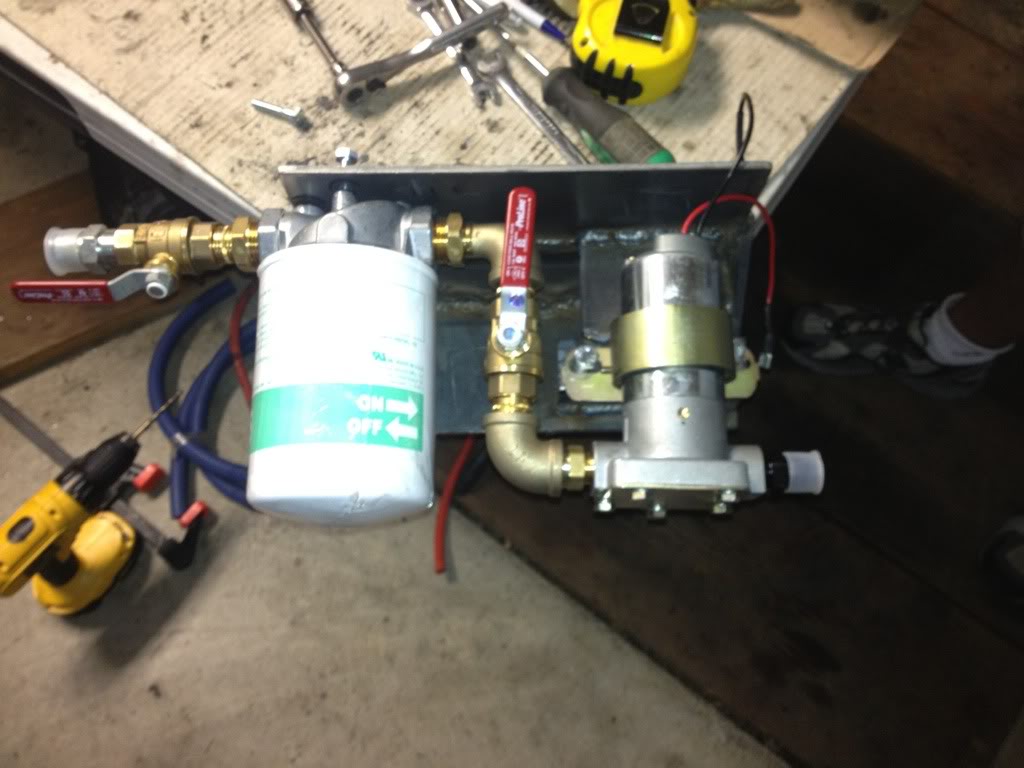
As ugly as it may be (all scrap I had laying around), I made a mount for my fuel filter/Holley Pump setup, going to weld it to the frame because it'll be easier than trying to bolt it on with the tank in the way.
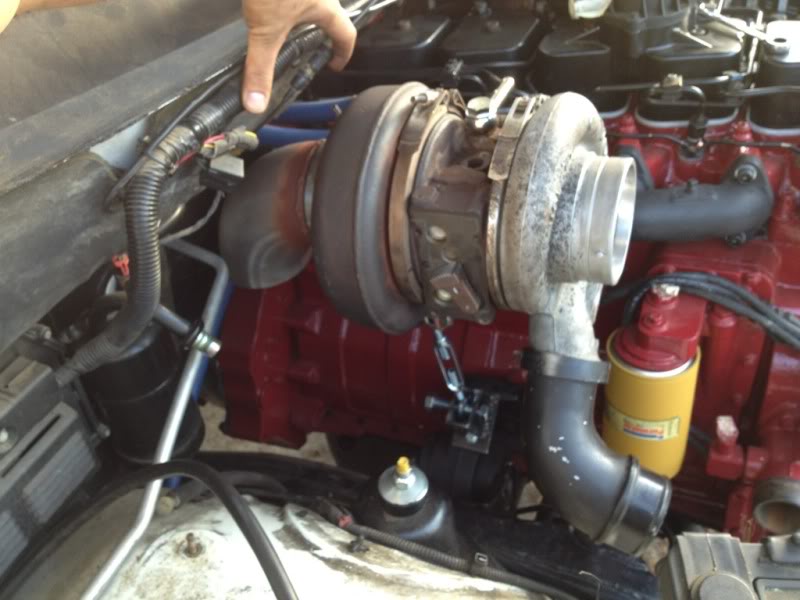
Got my Turbo back from Fleece, all rebuilt and shiny. I just need to make my controller now.

The transmission crossmember was so tight I had to spread the frame rails about 1-2" to slide it in.
Painted my Manifold with KBS 1500* paint.
As ugly as it may be (all scrap I had laying around), I made a mount for my fuel filter/Holley Pump setup, going to weld it to the frame because it'll be easier than trying to bolt it on with the tank in the way.
Got my Turbo back from Fleece, all rebuilt and shiny. I just need to make my controller now.
#24
11-25-2012, 01:49 PM
#26
11-25-2012, 01:54 PM
#29
12-16-2012, 02:15 AM

I just redid my head gasket, we torqued the ARP studs down to 145 ft lb.. and the guy who recommended that torque works at a very reputable diesel shop..
To get the engine in, you don't need to take the oil pan off.. which is a pain if you've siliconed it in place already, what you do is you remove the front 4 cab mounts and then jack the cab up about 4 inches... slides in nicely then...
As for the frame rails, you really shouldn't need to use a jack to spread them, they are tapered where the crossmember sits, so you have to put the crossmember in from the top and then slide it down into place... usually coming in from the tcase side
You got it all in anyhow... good for you!
#30
03-18-2013, 11:56 PM
It's been awhile, so I figure I'll update even though I haven't got a lot done on it, just a bunch of niggly things...
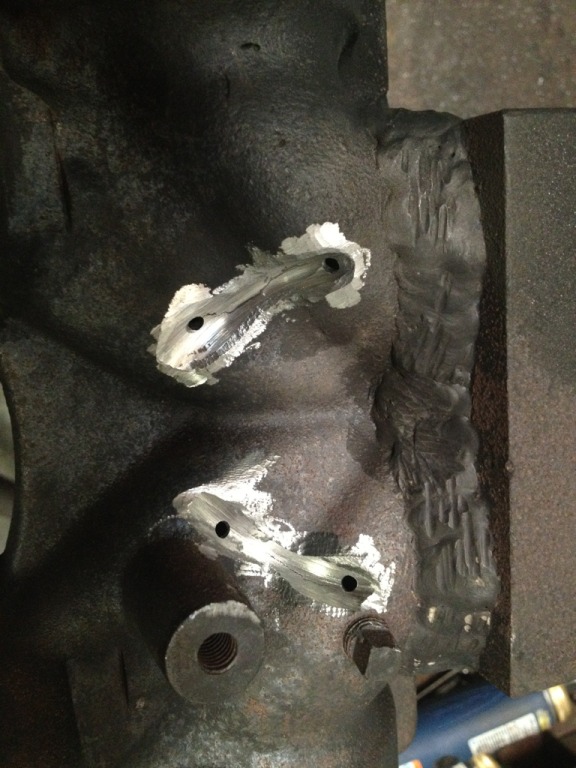
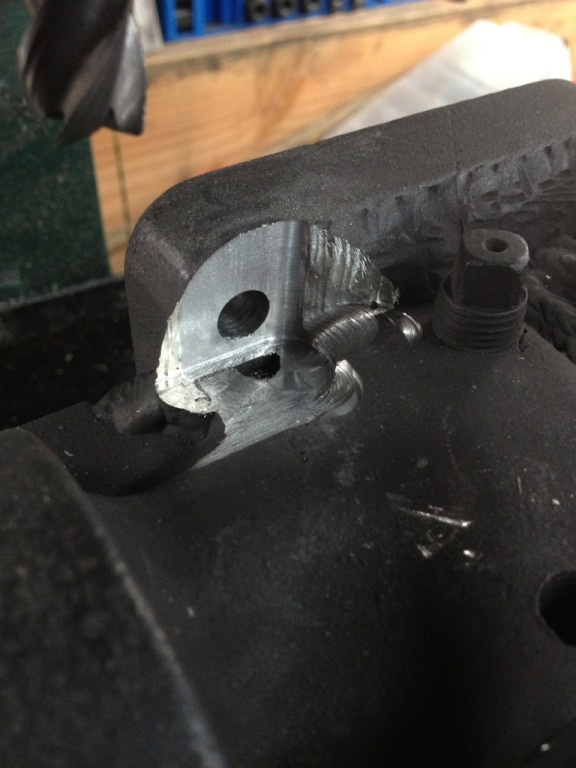
I found a deal on a 3-piece ATS manifold with a T4i flange. That was all great until I found the cracks...
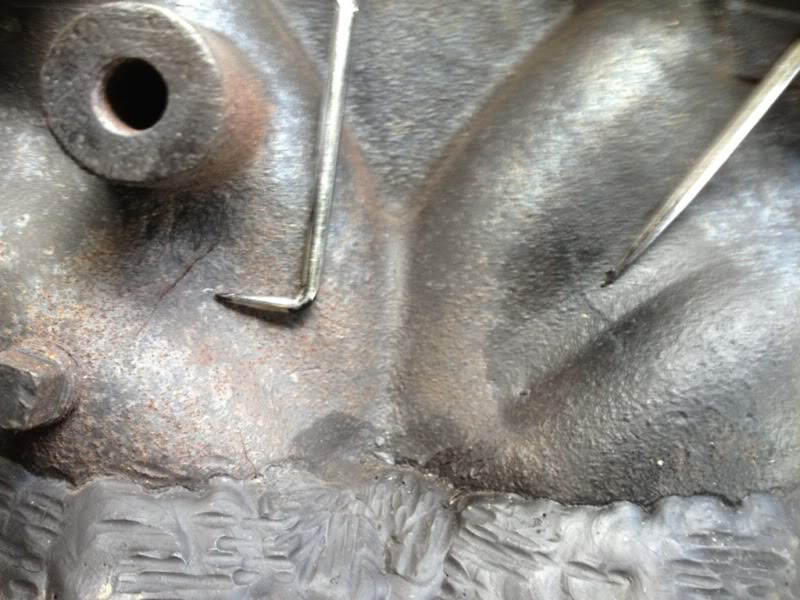
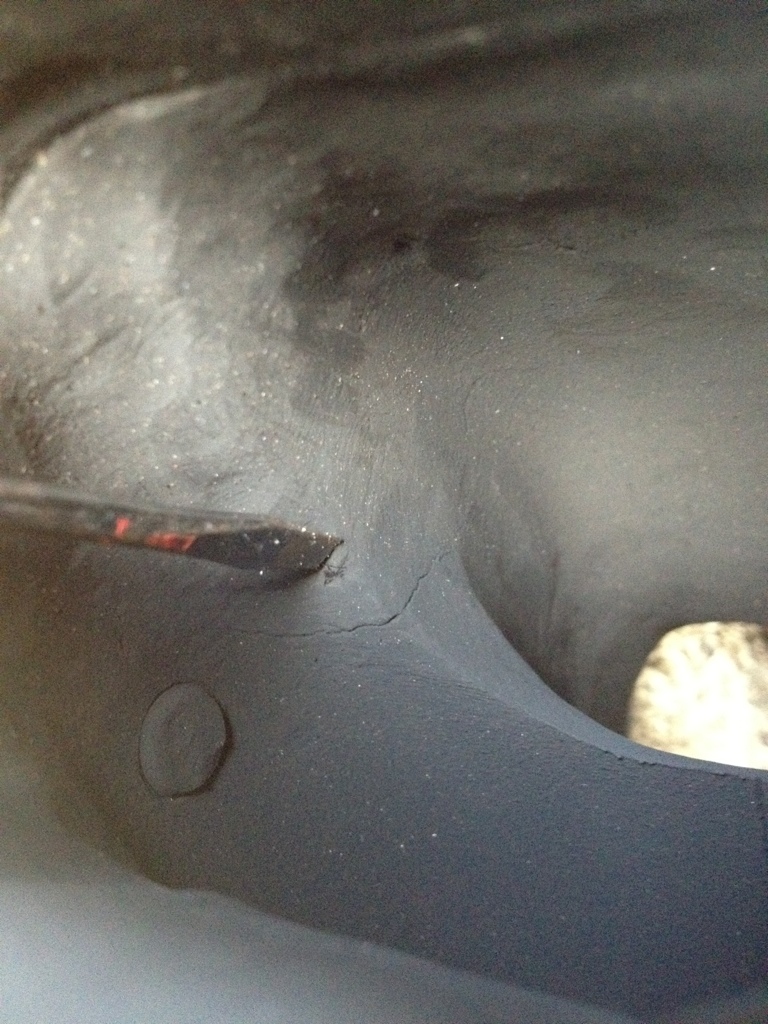
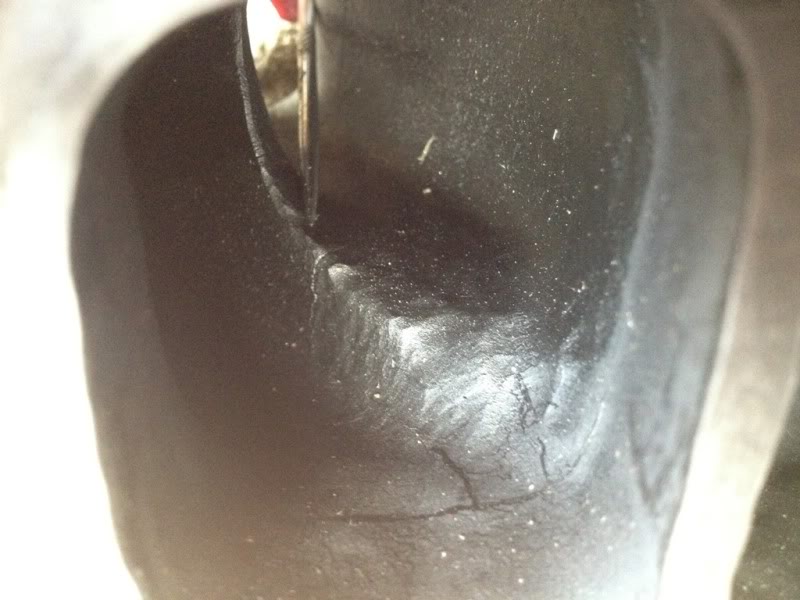
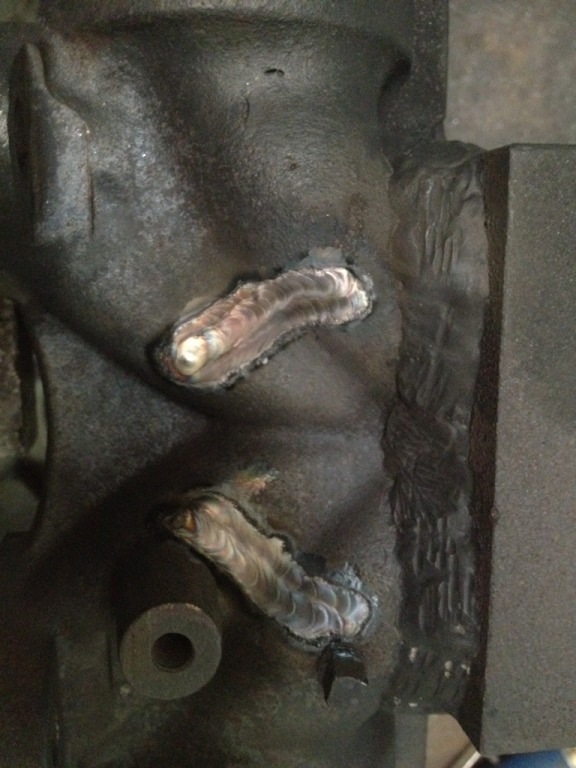
So I had a local-ish welder fix em up for me:
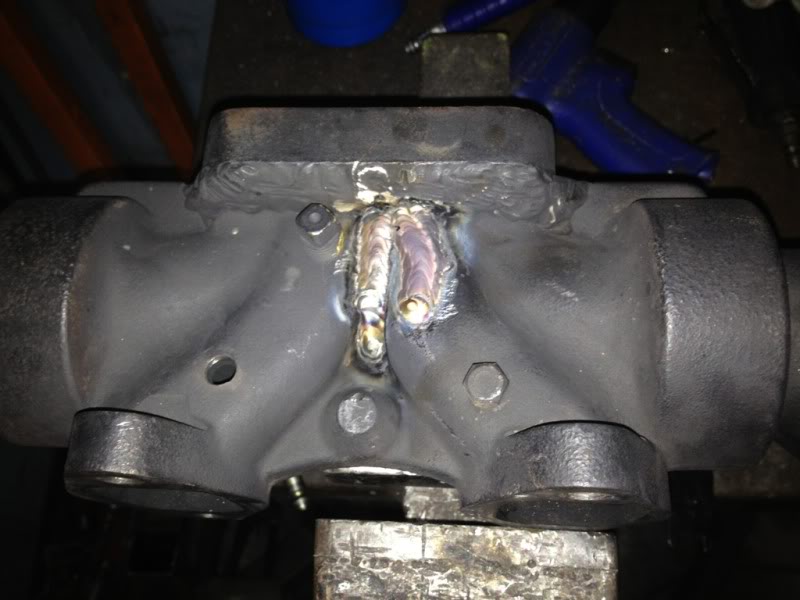
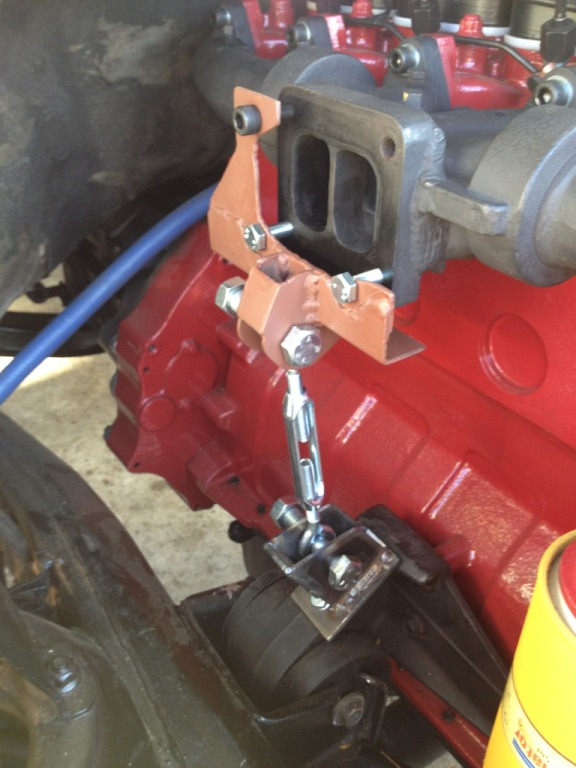
I don't want to trust it to not crack again so I made a ghetto mount for it to help take some weight off of the manifold:
I'm still leaning:

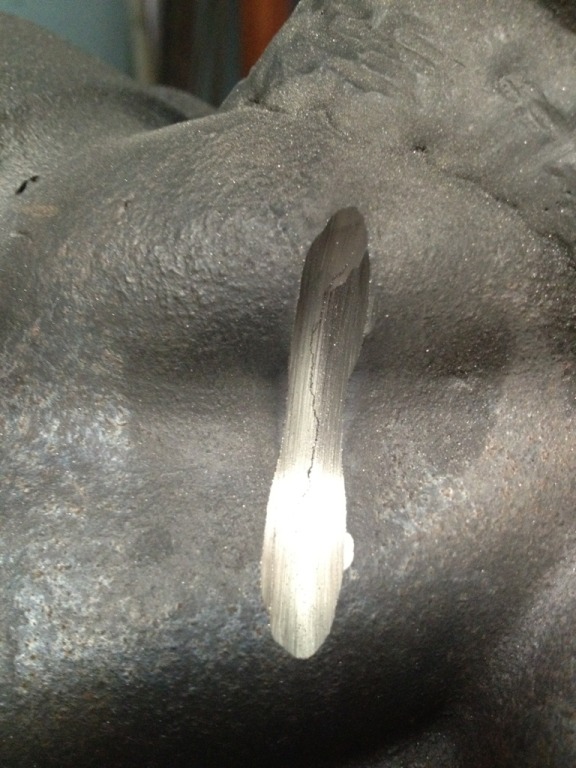
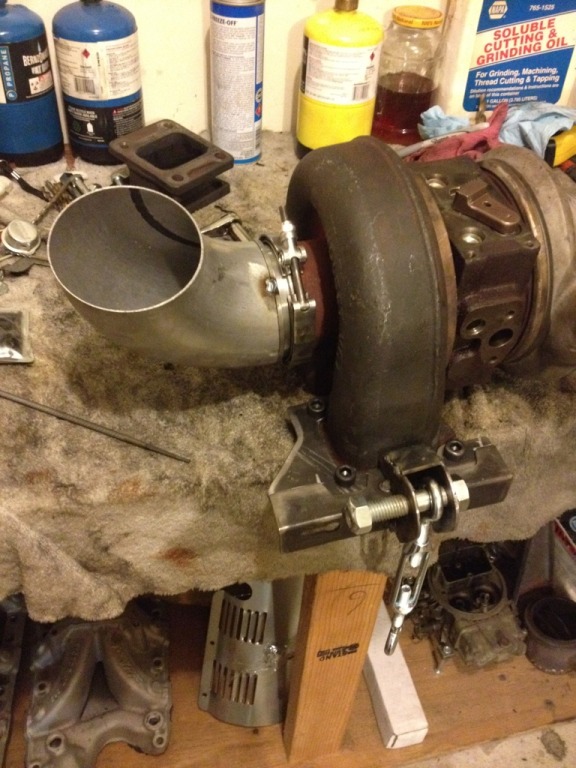
Now I ran into the problem of the actual mounting of the turbo. It has two threaded and two slotted holes. On one of the threaded holes there isn't enough room to get a bolt or anything between it and the vband, so the manifold needed a little Coors Light 3-Handed CNC Lovin'
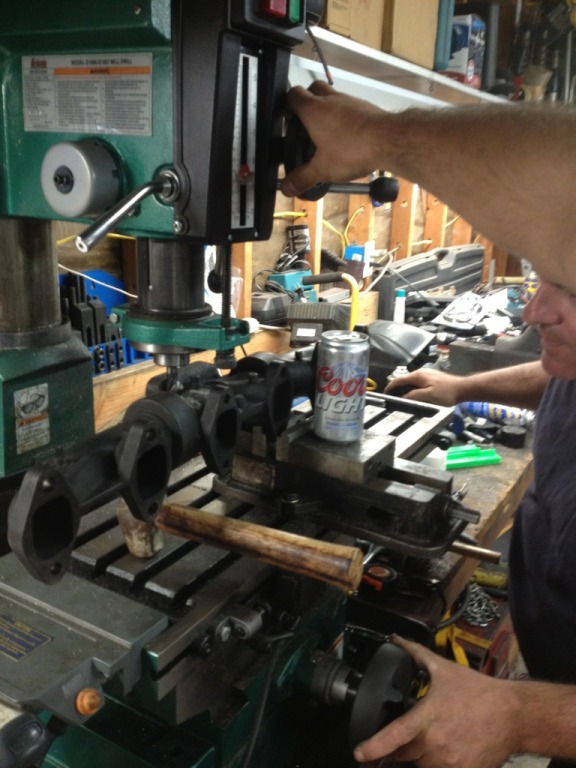
And yes, that was two drunk A-holes controlling it manually...
I think I've figured out my controls, I've been tweaking on it for a bit and I keep changing it.
I want it mechanical in operation, but will allow a simple switch for the EB, so if it fails it'll still run like normal.
I think I have it down but need to test it to be sure, it'll be a single in-cab 3-position switch. Top will be EB mode, Middle normal driving, and down low boost/highway cruising.
I also found someone with a headlight harness, that will save me lots of time from repairing the one my dog ate up.
I found a deal on a 3-piece ATS manifold with a T4i flange. That was all great until I found the cracks...
So I had a local-ish welder fix em up for me:
I don't want to trust it to not crack again so I made a ghetto mount for it to help take some weight off of the manifold:
I'm still leaning:
Now I ran into the problem of the actual mounting of the turbo. It has two threaded and two slotted holes. On one of the threaded holes there isn't enough room to get a bolt or anything between it and the vband, so the manifold needed a little Coors Light 3-Handed CNC Lovin'
And yes, that was two drunk A-holes controlling it manually...
I think I've figured out my controls, I've been tweaking on it for a bit and I keep changing it.
I want it mechanical in operation, but will allow a simple switch for the EB, so if it fails it'll still run like normal.
I think I have it down but need to test it to be sure, it'll be a single in-cab 3-position switch. Top will be EB mode, Middle normal driving, and down low boost/highway cruising.
I also found someone with a headlight harness, that will save me lots of time from repairing the one my dog ate up.


