
Hamilton Cam swap in your driveway!- lots of pics-dyno numbers-mpg numbers

Thread Starter
|
Diesel Fan
Joined: Mar 2012
Posts: 19
Likes: 0
So i decided it was time for a cam so i began searching for a write up on the cam swap and couldn't seem to locate one so i decided i would post my experience. all in all took about 4 hours start to finish. i kinda skipped some beginning pics because i literally dropped my iphone in coffee at hamilton  and i disassemble/cleaned/dried out just in time for the main pictures. ill post the dyno graph asap im waiting for them to email it in. before dyno was 616 dynojet and have not gone back for 2nd yet. ill post the mpg chart too when im done, mpg's b4 were 17.4 80 mile highway trip and 15.9 city (30 gal) with lots of idle time. i might have skipped some little things but here it is
Hamilton Cam-188/220
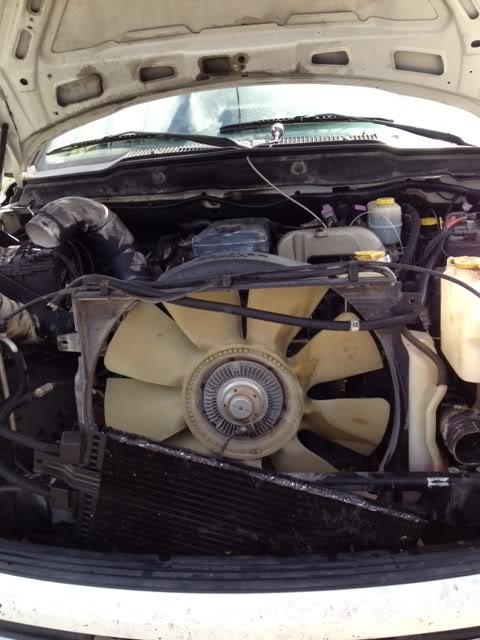
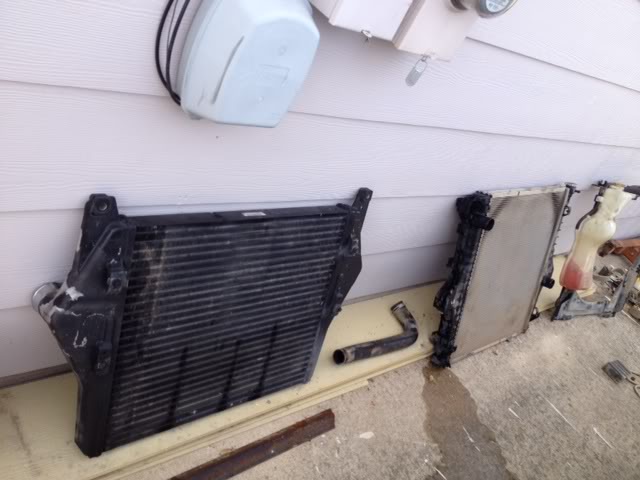
1)alright first take loose the intercooler boots and break them free
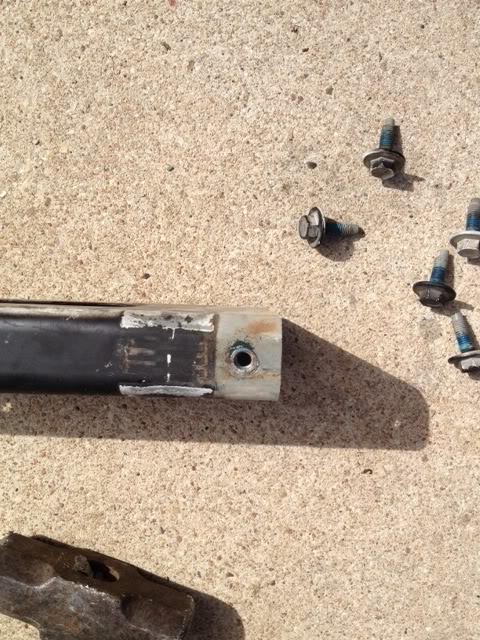
2)take off the 4 13mm bolts that hold on your condenser and move it out of the way (tape cardboard on the front and back for protection if needed)
3)you can now remove the 2 10mm bolts on your intercooler and remove it, carefully
4) drain the coolant out of your radiator at the pet
5) remove coolant hoses and 2 13mm bolts that hold the fan shroud on at the top
6) you can now remove the 4 13mm bolts that hold down the upper core support bar and 2 10mm bolts the hold the radiator on and set the bar off to the driver side of the truck
7)pull the fan shroud up and off of the radiator and rest it in the fan
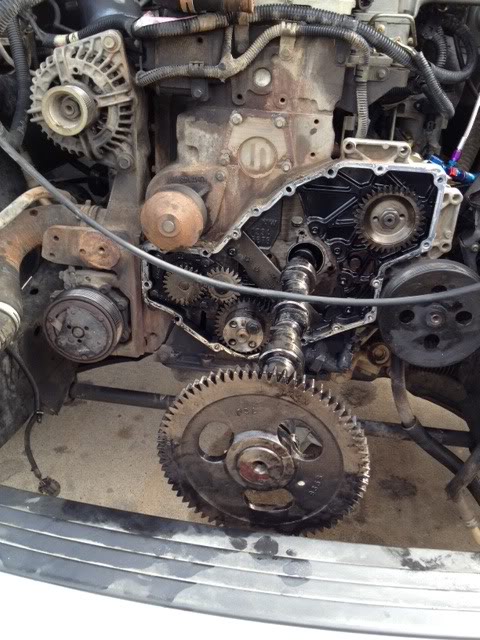
8)remove radiator (its a bit tough to get past intercooler boots)
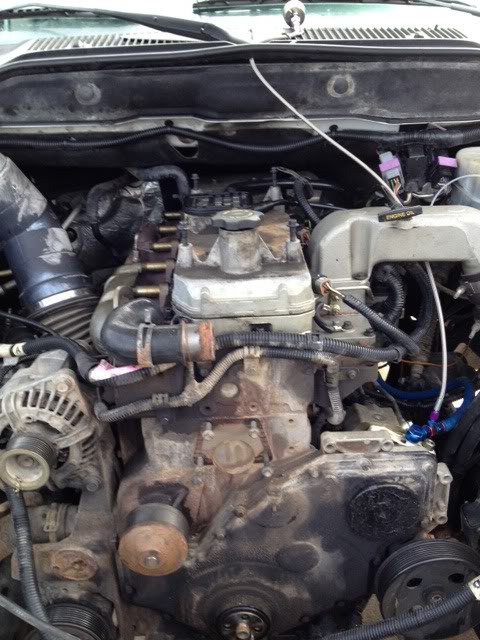
we are now here
9)remove 2 push pins the hold the bottom of the fan shroud together then take apart and unplug the fan
10)remove shroud
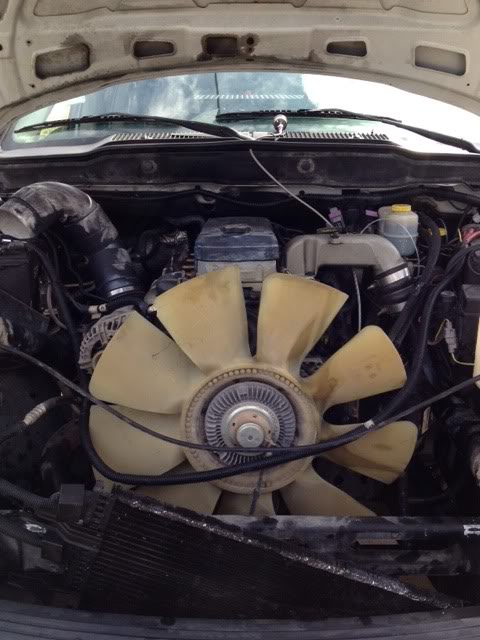
11)remove belt, then remove the 4 10mm bolts that hold down the fan bracket/fan and remove it
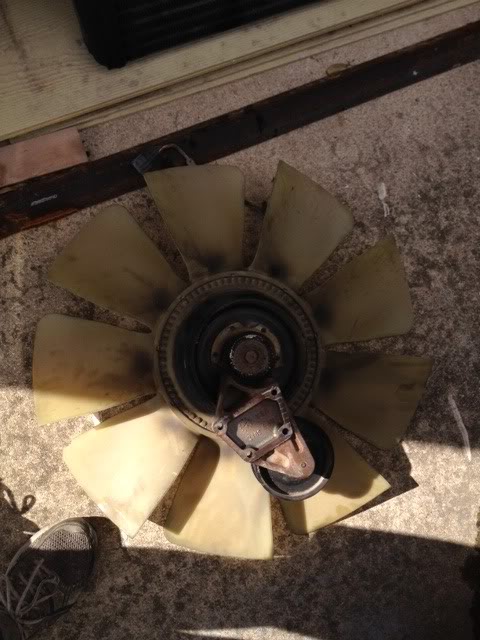
12)remove tensioner i believe its a 15mm
13) remove the 8 bolts that hold the lower core support and hammer it to one side and cut it in between the bolts so it can be removed
14) remove 4 15mm bolts on the dampener and remove it along with crank sensor thing behind it
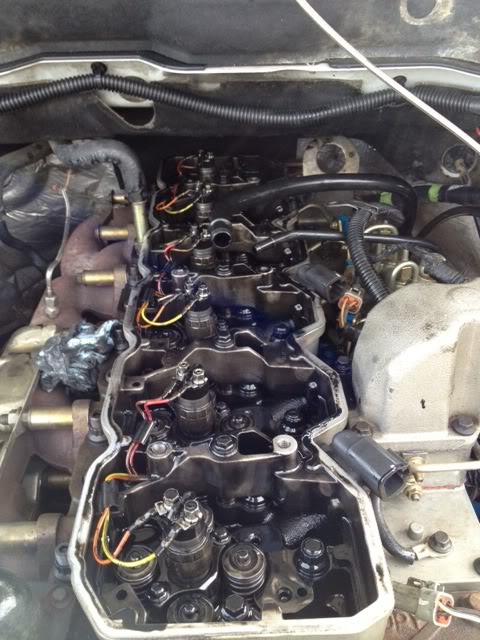
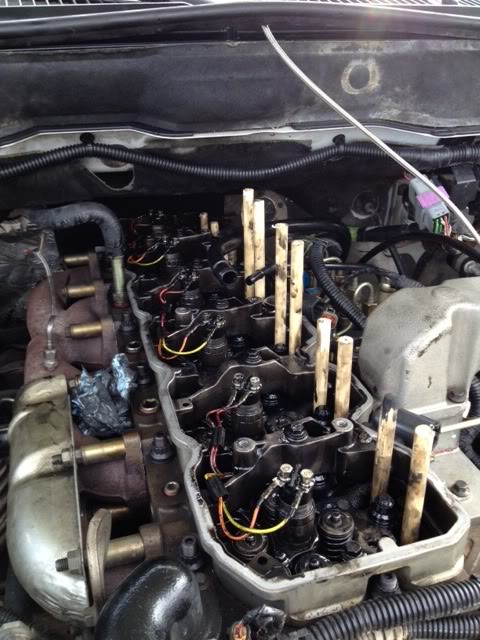
15)remove plastic valve cover (4 10mm) and actual valve cover (6 10mm)
16)now take loose all of the rocker arm bolts and remove them as a unit for each cylinder and keep track of where they came from
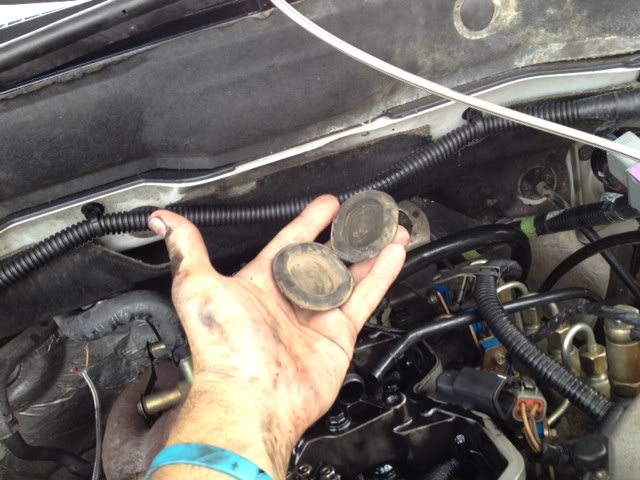
17) remove the 2 rubber plugs that are in the top side of the firewall so you can remove the last 4 push rods
18) remove all push rods and keep track of where they were as well
19) cut your wooden 1/2 dowells about 2-3" longer than the pushrod, i did the last 4 about 1" longer, sand the edges slightly and smooth out the cuts so no wood stays behind. now center them in the tappets and tap them in. about 3/8 of an inch till they bottom out.
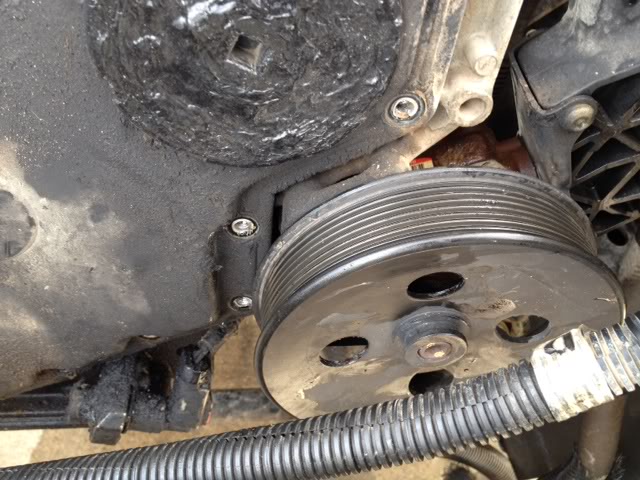
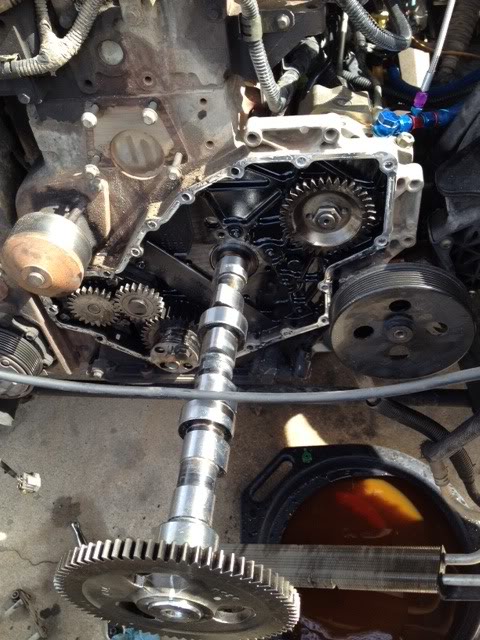
20) the top side is almost ready, now remove all the 10mm bolts on the front cover, in order to remove the 2 bolts behind the p/s pump you need to remove the lower 2 bolts that hold the pump on then loosen the top bolt enough to re-clock it out of the way
21) remove cover
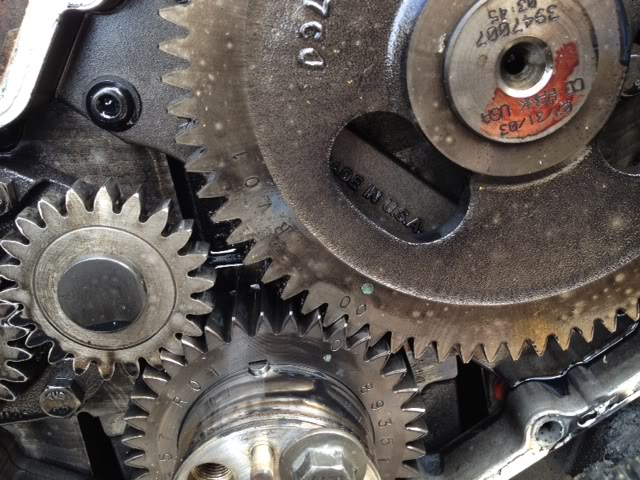
22)low thread in one 15mm crank bolt and turn the engine slowly to TDC, put the 0 on the crank between the 2 0's one the cam gear
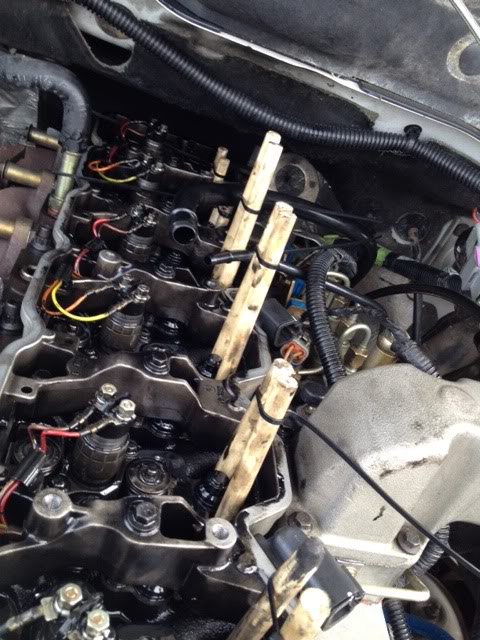
23)now re-tap the dowels in to insure they are in good, then pull them up as far as they will go and zip tie them together
24)now remove the cam, i forgot to tell you that you may need to remove the bolts on one side of the bumper and loosen the other side for clearance
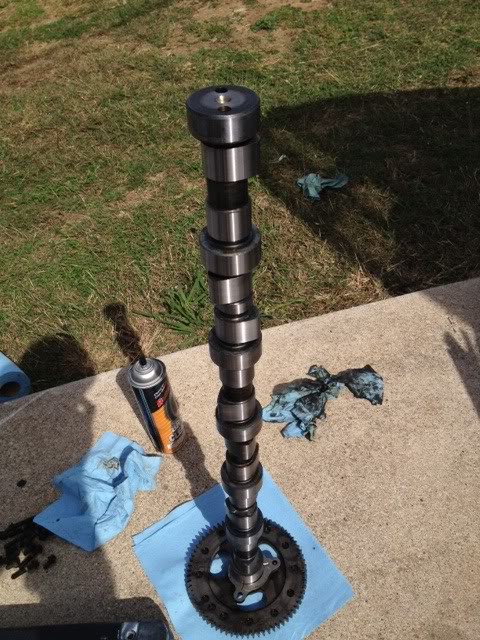
25)now you need to press the old cam gear off and press it back on the new cam, i had hamilton cams do it because i do not have a press
26)now clean the cam very very good and put assembly lube on the first 1/3 of it
27) now push the cam 1/3 of the way in and apply the Assembly lube as you push the cam in
28) you will now need to reset you valves, i used this site Valve adjustment DIY - DodgeForum.com
29-3213) now reassemble
30) at first start up run it at 1500rpm for 5 min then let idle for 25, then after 50miles re adjust valves
and your done! right off the bat the truck seemed to be spooling a lot better in low boost situations and it is more responsive than b4 so i have to be easier on the throttle.
and i disassemble/cleaned/dried out just in time for the main pictures. ill post the dyno graph asap im waiting for them to email it in. before dyno was 616 dynojet and have not gone back for 2nd yet. ill post the mpg chart too when im done, mpg's b4 were 17.4 80 mile highway trip and 15.9 city (30 gal) with lots of idle time. i might have skipped some little things but here it isHamilton Cam-188/220
1)alright first take loose the intercooler boots and break them free
2)take off the 4 13mm bolts that hold on your condenser and move it out of the way (tape cardboard on the front and back for protection if needed)
3)you can now remove the 2 10mm bolts on your intercooler and remove it, carefully
4) drain the coolant out of your radiator at the pet
5) remove coolant hoses and 2 13mm bolts that hold the fan shroud on at the top
6) you can now remove the 4 13mm bolts that hold down the upper core support bar and 2 10mm bolts the hold the radiator on and set the bar off to the driver side of the truck
7)pull the fan shroud up and off of the radiator and rest it in the fan
8)remove radiator (its a bit tough to get past intercooler boots)
we are now here
9)remove 2 push pins the hold the bottom of the fan shroud together then take apart and unplug the fan
10)remove shroud
11)remove belt, then remove the 4 10mm bolts that hold down the fan bracket/fan and remove it
12)remove tensioner i believe its a 15mm
13) remove the 8 bolts that hold the lower core support and hammer it to one side and cut it in between the bolts so it can be removed
14) remove 4 15mm bolts on the dampener and remove it along with crank sensor thing behind it
15)remove plastic valve cover (4 10mm) and actual valve cover (6 10mm)
16)now take loose all of the rocker arm bolts and remove them as a unit for each cylinder and keep track of where they came from
17) remove the 2 rubber plugs that are in the top side of the firewall so you can remove the last 4 push rods
18) remove all push rods and keep track of where they were as well
19) cut your wooden 1/2 dowells about 2-3" longer than the pushrod, i did the last 4 about 1" longer, sand the edges slightly and smooth out the cuts so no wood stays behind. now center them in the tappets and tap them in. about 3/8 of an inch till they bottom out.
20) the top side is almost ready, now remove all the 10mm bolts on the front cover, in order to remove the 2 bolts behind the p/s pump you need to remove the lower 2 bolts that hold the pump on then loosen the top bolt enough to re-clock it out of the way
21) remove cover
22)low thread in one 15mm crank bolt and turn the engine slowly to TDC, put the 0 on the crank between the 2 0's one the cam gear
23)now re-tap the dowels in to insure they are in good, then pull them up as far as they will go and zip tie them together
24)now remove the cam, i forgot to tell you that you may need to remove the bolts on one side of the bumper and loosen the other side for clearance
25)now you need to press the old cam gear off and press it back on the new cam, i had hamilton cams do it because i do not have a press
26)now clean the cam very very good and put assembly lube on the first 1/3 of it
27) now push the cam 1/3 of the way in and apply the Assembly lube as you push the cam in
28) you will now need to reset you valves, i used this site Valve adjustment DIY - DodgeForum.com
29-3213) now reassemble
30) at first start up run it at 1500rpm for 5 min then let idle for 25, then after 50miles re adjust valves
and your done! right off the bat the truck seemed to be spooling a lot better in low boost situations and it is more responsive than b4 so i have to be easier on the throttle.


