Replace Your Camshaft, Lifters 'n Stuff*
#1
 01-10-2010, 09:08 PM

Folks, this post is in response to a request from Bobby (RSWORDS).
With this work, I'm installing an after-market camshaft along with upgraded (for this engine) valve lifters. The work is being done to the typical 1993 Dodge W250 sporting the mighty Cummins (12 valve w/Automatic Trans). NOTE: This should be applicable to ALL 12v 5.9BT CTDs (with or without Inter-cooled and ought to cover the 4BT I think).
You may be looking to simply replace a cam that's got a worn lift-pump lobe or worse, the KDP got the cam gear. This article should be seen as a general over-view of the work involved with removing/replacing the engine's camshaft and lifters with the engine in the truck.
If you're not sure of a step or procedure regarding YOUR truck, start a thread and ask away. That's why we're here . . .. right?
As always ~ SAFETY FIRST!!
- Disconnect the Negative cable of your battery system.
- Chock the wheels and set the parking brake.
- Have a known good fire extinguisher close by.
- Have good lighting.
- Have a clean and orderly work area.
- Always exercise good working practice with your tools.
- Use safety goggles, gloves, masks, etc where appropriate.
- RTFM!
- I always clean the area I plan on working in the night before. Use the engine cleaner of your choice (follow the directions) and forcefully flush everything with a strong garden hose.
Finally know that I'm using the Chrysler Corporation 1993 Service Manual for the D&W 150-350 Ramcharger RWD truck and the Cummins Shop Manual for the B Series engine as my guide in ensuring I hit all the bases. This thread is not to be considered "The Authoritive How-To" regarding working on your mess.
Okay?
First, we're gonna have to make some tools. I didn't want to invest in a bunch that I'm only gonna use once (I think).
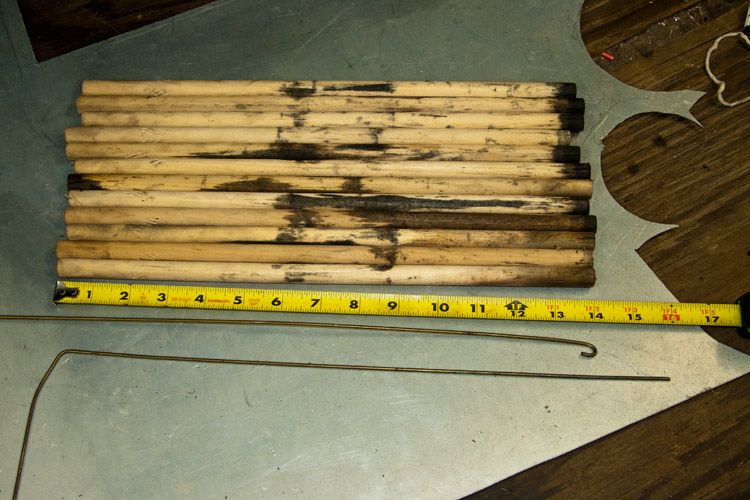
- We need twelve (12) 1/2" OD wooden dowels (Wooden Posts). I got four (4) from Lowes that were 4' long. Cut them so they are at least 14" long.
- Get a coat-hanger and cut a piece about 20" long. Bend it into an "L" shape with the leg about 4" long (L-Tool).
- Get a another coat-hanger and cut a piece about 30" long. Bend a small hook in one end with about a 3/16"" opening (Hook-Tool). It's not critical.
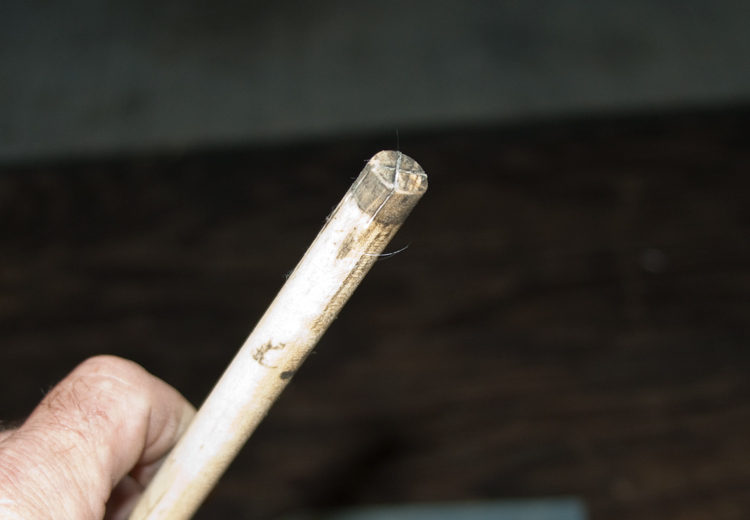
>Pardon the oil stains<
- I used a regular hand-held hack-saw to cut a cross in one end of each post. It's hard to see with the oil but I cut the slots as deep as the hack-saw blade is tall (about 1/2").
- I then slightly beveled the end so as to help it slip into the lifter.
Now we need to make the Trough that will be used to catch/hold the lifters as we work with them.
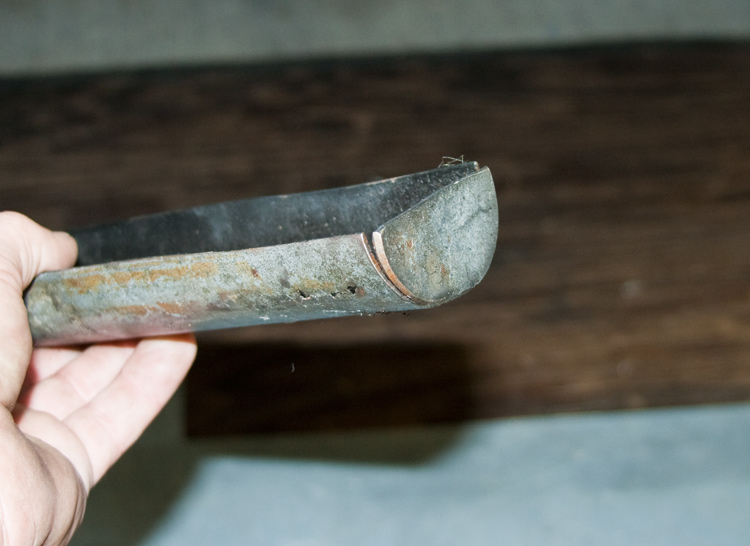
Some have suggested using a piece of 2" PVC pipe for this. The cam journal is a shade under 2 1/8" in diameter. I don't have any 2" PVC.
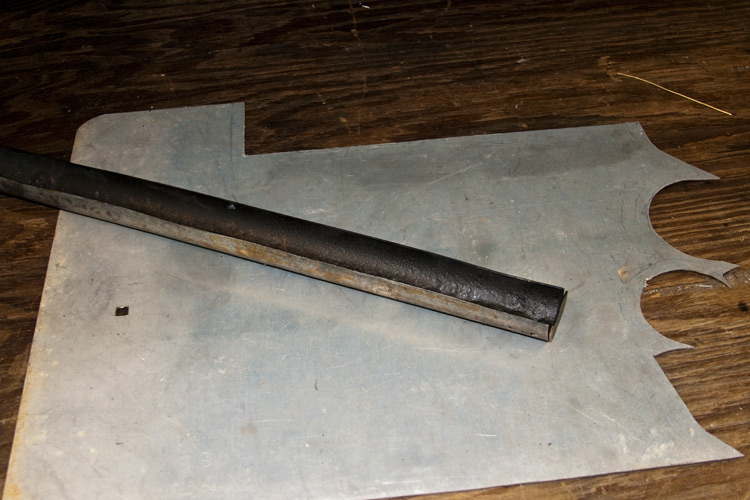
Rooting around under the barn I found a piece of 2" EMT electrical conduit.
- I cut a piece about 36" long and cut it in halve lengthwise.
- I then laid one piece on its side and using a hammer, narrowed the trough such that it was right at 2" wide.
- At one end of the Trough, I then made two cuts about an inch from the end. Starting at each side, I cut into the Trough till I had about 3/4" to 1/2" left in the middle. I flattened that small strip of metal and cut it round shaped like this . . . .
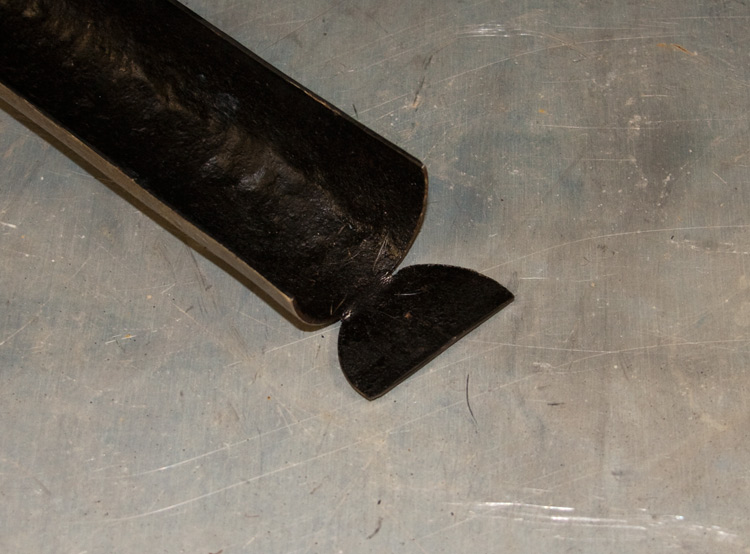
- I then folded that piece up to meet the sides of the Trough thus making an end wall so to speak. From there, I smoothed everything VERY well so as not to scratch the cam bearings. VERY smooth folks.
- With that, I painted the interior of the Trough so that the lifters wouldn't pick up any debris while sliding through the trough.
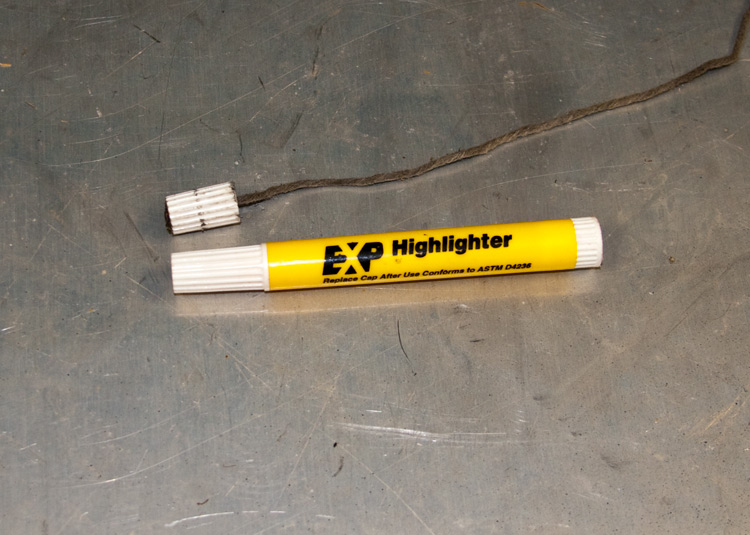
Finally, we need to make the tool that is used to pull the lifters back into their bores of the block. The FSM shows an image of what looks like a small hardwood dowel perhaps 1/2" to 3/4" long with a small Eye-Bolt in one end. Unfortunately, I had soft wood used for the lifter dowels and I figured that wouldn't work. That and I didn't have a small Eye-Bolt.
Here's what I did . . . .
Come to find out that a lid from a common high-lite marker fits perfectly into the push-rod end of the lifters. Huh.
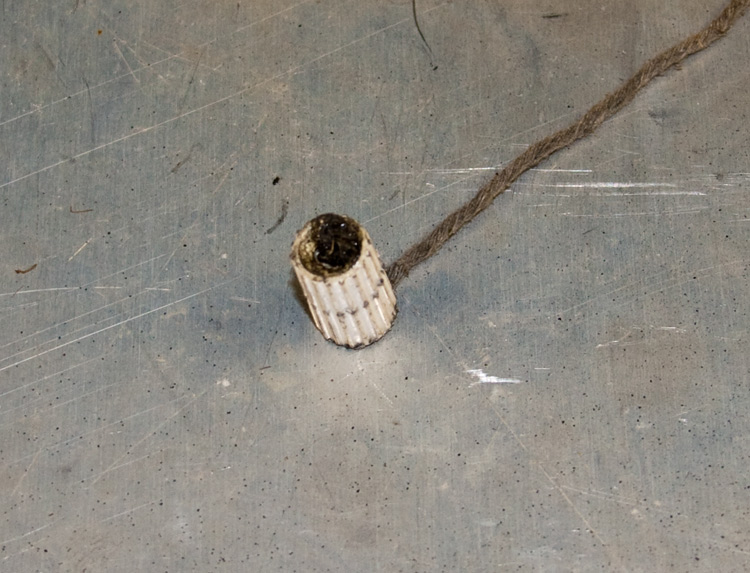
- I shortened the lid so it was now about 3/4" long.
- I then drilled a tiny hole in the closed end just big enough to poke a heavy string through it. Be sure to use string that can repeatedly withstand 10 ~ 15 pounds pull. I made the knot double in size and for good sport, put a booger of contact cement over it all so as to lock it in place. It's as pretty as a rock but it works.
- Now sneak into the woman's hair stuff and get 12 of the simple hair rubber-band thingys. The ones that look like cord but stretch. We'll need them to hold the lifter posts in place when we lift the lifters. Large rubber bands should work just fine but I was concerned the engine oil might mess up the rubber and have the bands fail at the worst time. You'll see.
With this work, I'm installing an after-market camshaft along with upgraded (for this engine) valve lifters. The work is being done to the typical 1993 Dodge W250 sporting the mighty Cummins (12 valve w/Automatic Trans). NOTE: This should be applicable to ALL 12v 5.9BT CTDs (with or without Inter-cooled and ought to cover the 4BT I think).
You may be looking to simply replace a cam that's got a worn lift-pump lobe or worse, the KDP got the cam gear. This article should be seen as a general over-view of the work involved with removing/replacing the engine's camshaft and lifters with the engine in the truck.
If you're not sure of a step or procedure regarding YOUR truck, start a thread and ask away. That's why we're here . . .. right?
As always ~ SAFETY FIRST!!
- Disconnect the Negative cable of your battery system.
- Chock the wheels and set the parking brake.
- Have a known good fire extinguisher close by.
- Have good lighting.
- Have a clean and orderly work area.
- Always exercise good working practice with your tools.
- Use safety goggles, gloves, masks, etc where appropriate.
- RTFM!
- I always clean the area I plan on working in the night before. Use the engine cleaner of your choice (follow the directions) and forcefully flush everything with a strong garden hose.
Finally know that I'm using the Chrysler Corporation 1993 Service Manual for the D&W 150-350 Ramcharger RWD truck and the Cummins Shop Manual for the B Series engine as my guide in ensuring I hit all the bases. This thread is not to be considered "The Authoritive How-To" regarding working on your mess.
Okay?
First, we're gonna have to make some tools. I didn't want to invest in a bunch that I'm only gonna use once (I think).
- We need twelve (12) 1/2" OD wooden dowels (Wooden Posts). I got four (4) from Lowes that were 4' long. Cut them so they are at least 14" long.
- Get a coat-hanger and cut a piece about 20" long. Bend it into an "L" shape with the leg about 4" long (L-Tool).
- Get a another coat-hanger and cut a piece about 30" long. Bend a small hook in one end with about a 3/16"" opening (Hook-Tool). It's not critical.
>Pardon the oil stains<
- I used a regular hand-held hack-saw to cut a cross in one end of each post. It's hard to see with the oil but I cut the slots as deep as the hack-saw blade is tall (about 1/2").
- I then slightly beveled the end so as to help it slip into the lifter.
Now we need to make the Trough that will be used to catch/hold the lifters as we work with them.
Some have suggested using a piece of 2" PVC pipe for this. The cam journal is a shade under 2 1/8" in diameter. I don't have any 2" PVC.
Rooting around under the barn I found a piece of 2" EMT electrical conduit.
- I cut a piece about 36" long and cut it in halve lengthwise.
- I then laid one piece on its side and using a hammer, narrowed the trough such that it was right at 2" wide.
- At one end of the Trough, I then made two cuts about an inch from the end. Starting at each side, I cut into the Trough till I had about 3/4" to 1/2" left in the middle. I flattened that small strip of metal and cut it round shaped like this . . . .
- I then folded that piece up to meet the sides of the Trough thus making an end wall so to speak. From there, I smoothed everything VERY well so as not to scratch the cam bearings. VERY smooth folks.
- With that, I painted the interior of the Trough so that the lifters wouldn't pick up any debris while sliding through the trough.
Finally, we need to make the tool that is used to pull the lifters back into their bores of the block. The FSM shows an image of what looks like a small hardwood dowel perhaps 1/2" to 3/4" long with a small Eye-Bolt in one end. Unfortunately, I had soft wood used for the lifter dowels and I figured that wouldn't work. That and I didn't have a small Eye-Bolt.
Here's what I did . . . .
Come to find out that a lid from a common high-lite marker fits perfectly into the push-rod end of the lifters. Huh.
- I shortened the lid so it was now about 3/4" long.
- I then drilled a tiny hole in the closed end just big enough to poke a heavy string through it. Be sure to use string that can repeatedly withstand 10 ~ 15 pounds pull. I made the knot double in size and for good sport, put a booger of contact cement over it all so as to lock it in place. It's as pretty as a rock but it works.
- Now sneak into the woman's hair stuff and get 12 of the simple hair rubber-band thingys. The ones that look like cord but stretch. We'll need them to hold the lifter posts in place when we lift the lifters. Large rubber bands should work just fine but I was concerned the engine oil might mess up the rubber and have the bands fail at the worst time. You'll see.
Last edited by BC847; 01-10-2010 at 09:30 PM.

Thread
Thread Starter
Forum
Replies
Last Post
JHALL30
Chevy/GMC Duramax 01-04 LB7
0
09-08-2015 07:00 PM
Diesel Bombers
General Diesel Related
0
08-26-2015 09:40 AM
D K
Ford Powerstroke 99-03 7.3L
0
05-17-2015 11:27 AM
ERK
24 Valve 2nd Gen Dodge Cummins 98.5-02
3
03-04-2015 01:04 AM


