Walbro 392 Electric Fuel Pump And 3/8" Fuel Line Install
#1
 04-15-2009, 06:45 PM


Well Being able to draw your fuel pressure down to 0 at will is never a good thing, between the weak/old factory lift pump, small stock fuel lines, and the large amounts of fuel I was pulling, the factory set-up was no match for my right foot. Anything over half throttle would quickly pull all the fuel pressure out of the system and cause the truck to run and sound sick.
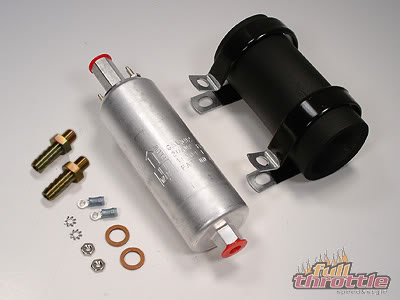
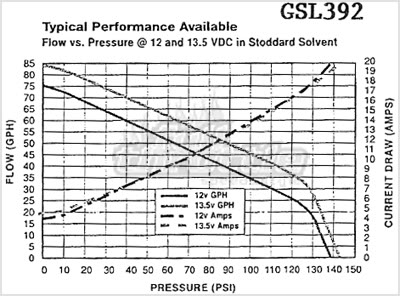
In searching for the "perfect" lift pump there are some options, I could have went with a piston lift pump off of a later model truck and swapped out my old diaphragm pump but this still left me with the stock lines. I could have went with one of the name brand pumps like a FASS or AirDog, and while they are REALLY nice and I would love to run one it was just out of my budget. So after some searching, reading, and taking advice from those smarter then me I decided on a Walbro 392 electric fuel pump. Here is a generic picture of the pump and its flow chart.
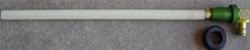
To address the small factory fuel lines I upgraded to 3/8" lines while I was doing all this. No point in installing larger lines though and still try and pick up all that fuel through the factory pickup tube. So off to Vulcan Performance i went for a draw straw II.
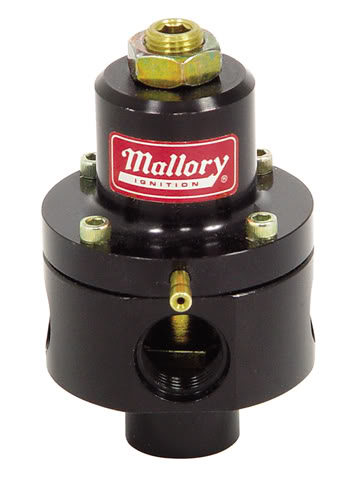
Also Because the pump I was using was capable of putting out WAY more fuel pressure the the front seal on the little VE pump would like (the seals don't like more then about 15psi) I need a regulator to bring the pressure down. After searching for a few days I settled on the Mallory 4307M, its a 4-Port Regulator with boost compensation and adjustable pressure from 4-25 psi, also it is less then $100 if you look around, EXACTLY what I was looking for!
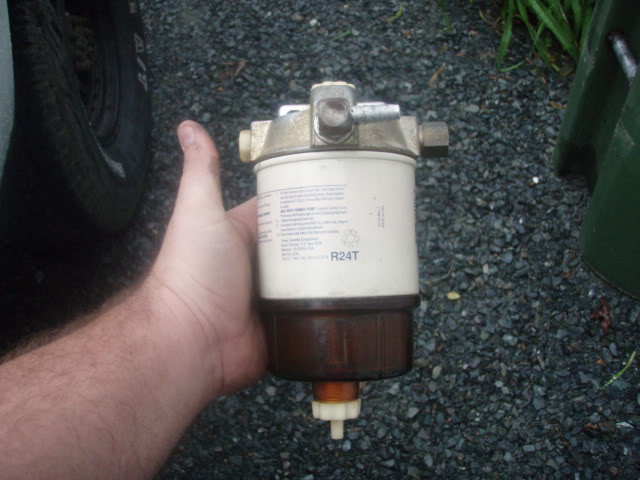
Then the last little piece of my puzzle is a fuel filter/water separator, I got lucky and my dad had just pulled one off of a boat re-power he was doing at work.
Now that we have all the pieces we can start! As always I find my installs go a little easier with a few cold adult beverages, seeing as how it has warmed up outside I've switched to my summertime favorite!

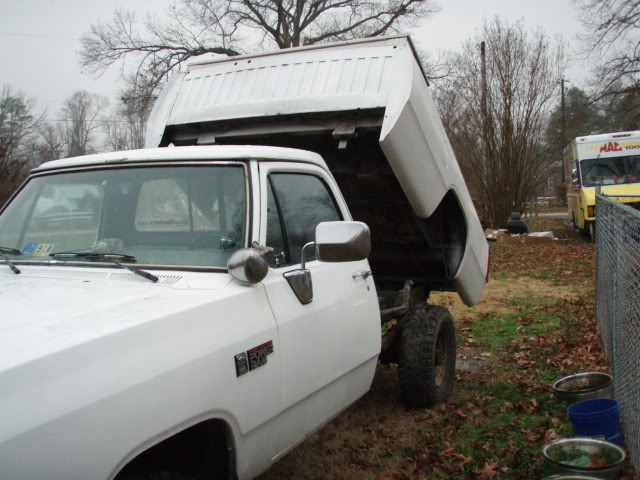
The first step is going to be gaining access to the top of the fuel tank, So most of you will have to drain and drop your tank, an extra set of hands helps alot in this situation, myself I cheat!
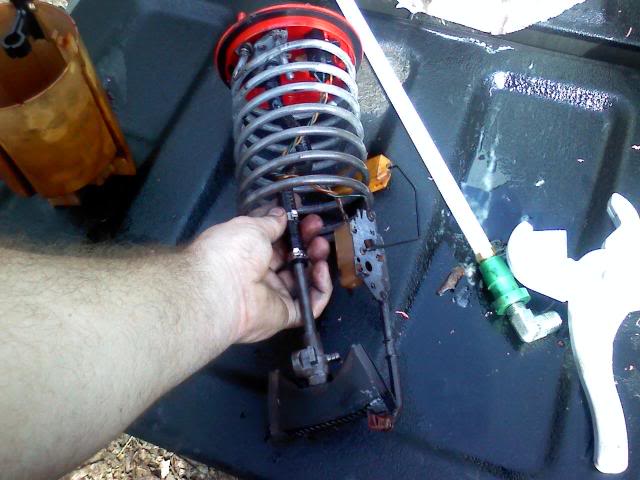
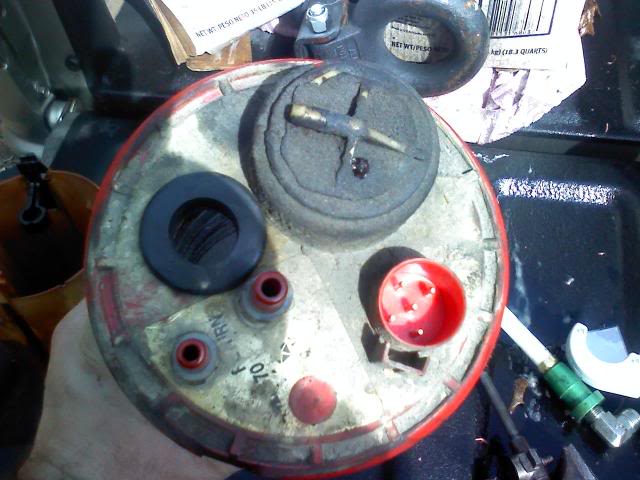
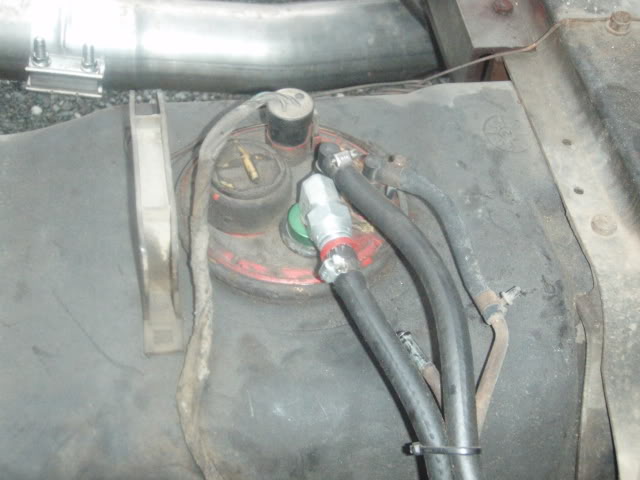
Once you get the tank down this is what you have. The fuel line on the right is the stock pick up, The one on the left is the stock return for the injection pump.

Undo the clamp that hold the sending unit to the tank, disconnect the wiring harness and fuel lines and remove it from the tank.
I had to cut the factory pick up off at the soft line so that I would have room for the Draw Straw to make it all the way to the bottom
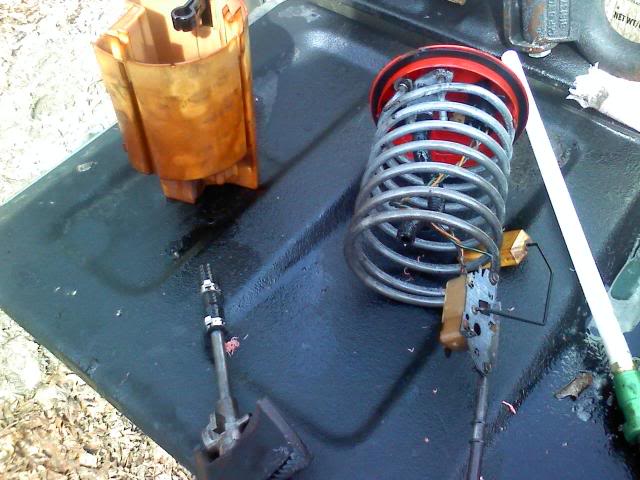
Then after looking over your specific application find a spot to drill the hole for the draw straw, drill it out and install the grommet that came with it.
In searching for the "perfect" lift pump there are some options, I could have went with a piston lift pump off of a later model truck and swapped out my old diaphragm pump but this still left me with the stock lines. I could have went with one of the name brand pumps like a FASS or AirDog, and while they are REALLY nice and I would love to run one it was just out of my budget. So after some searching, reading, and taking advice from those smarter then me I decided on a Walbro 392 electric fuel pump. Here is a generic picture of the pump and its flow chart.
To address the small factory fuel lines I upgraded to 3/8" lines while I was doing all this. No point in installing larger lines though and still try and pick up all that fuel through the factory pickup tube. So off to Vulcan Performance i went for a draw straw II.
Also Because the pump I was using was capable of putting out WAY more fuel pressure the the front seal on the little VE pump would like (the seals don't like more then about 15psi) I need a regulator to bring the pressure down. After searching for a few days I settled on the Mallory 4307M, its a 4-Port Regulator with boost compensation and adjustable pressure from 4-25 psi, also it is less then $100 if you look around, EXACTLY what I was looking for!
Then the last little piece of my puzzle is a fuel filter/water separator, I got lucky and my dad had just pulled one off of a boat re-power he was doing at work.
Now that we have all the pieces we can start! As always I find my installs go a little easier with a few cold adult beverages, seeing as how it has warmed up outside I've switched to my summertime favorite!
The first step is going to be gaining access to the top of the fuel tank, So most of you will have to drain and drop your tank, an extra set of hands helps alot in this situation, myself I cheat!
Once you get the tank down this is what you have. The fuel line on the right is the stock pick up, The one on the left is the stock return for the injection pump.
Undo the clamp that hold the sending unit to the tank, disconnect the wiring harness and fuel lines and remove it from the tank.
I had to cut the factory pick up off at the soft line so that I would have room for the Draw Straw to make it all the way to the bottom
Then after looking over your specific application find a spot to drill the hole for the draw straw, drill it out and install the grommet that came with it.
Last edited by RSWORDS; 04-15-2009 at 07:07 PM.
#2
04-15-2009, 06:46 PM
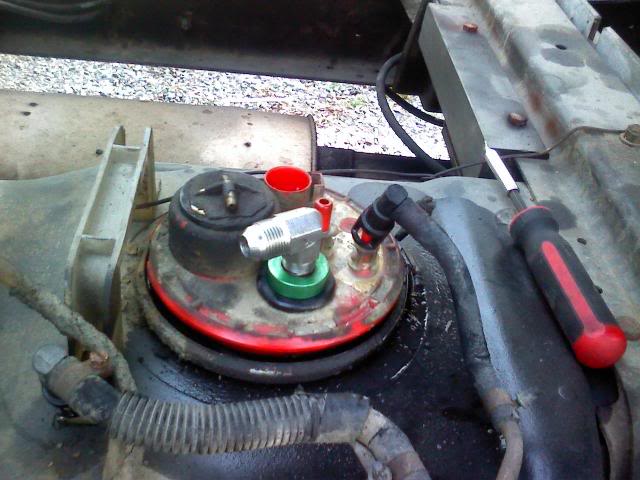
You will have to trim the Draw Straw to length, remember measure twice cut once! Put the Draw Straw in the hole and reinstall the sending unit. Reconnect the wiring harness and the return line for the injection pump. The injection pump uses this return line to help regulate the timing of the pump, for this reason we will be leaving this line stock.
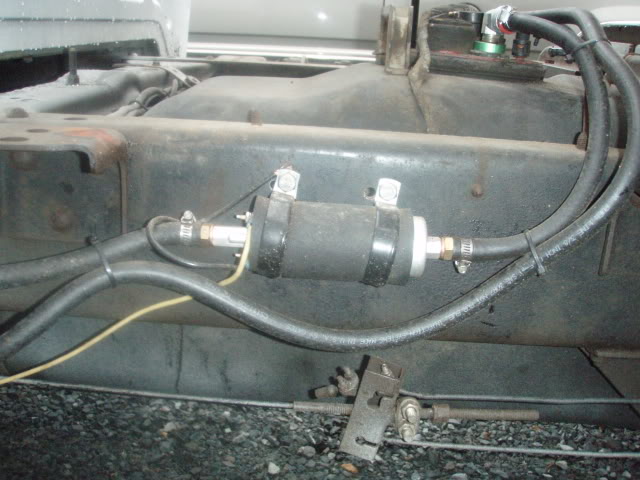
From here on out it is really pretty simple, Find a spot to mount your pump, I drilled and tapped holes in the frame rail. Tapping the holes instead of using nuts on the bolts will allow me to remove the pump in the future without having to drop the fuel tank again. (oh and as you can see from my extra set of holes, make sure you grab the correct drill bit for your tap) Using a relay you can get at any parts store wire it up so that the pump will be powered when the key is in the run position as well as the start position.
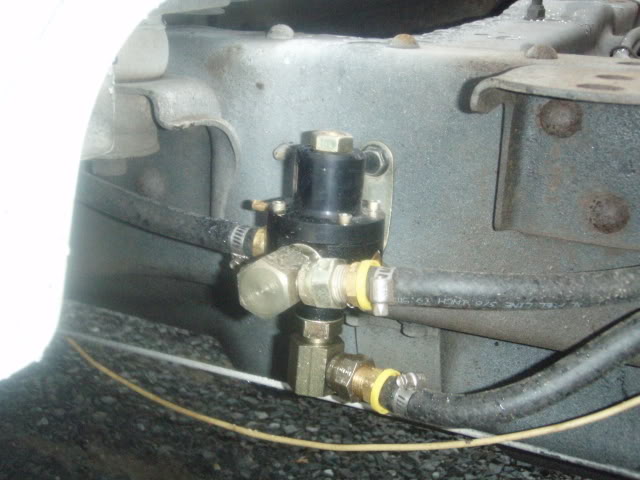
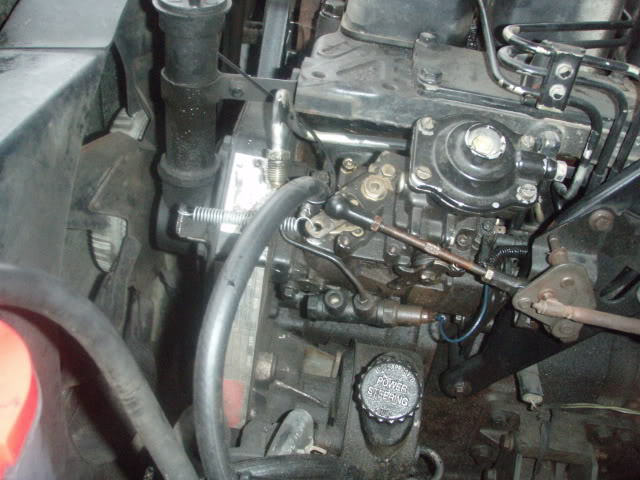
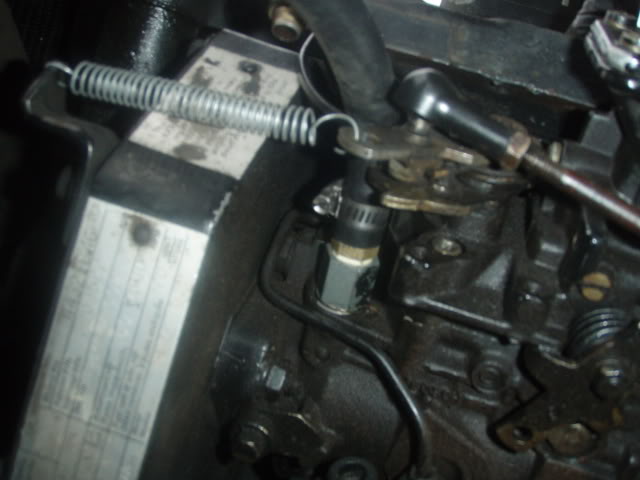
Next find a spot to mount your regulator, the direction say to mount it as close to the injection pump as possible but I have a cramped engine compartment as is so I decided to put mine on the frame rail next to the fuel pump. This also saved me on some fuel line and kept the amount of fuel line that is under full pressure from the pump to a minimum. The line coming in from the right on top is the feed line from the electric pump, the line on the bottom is the bypass line that sends fuel back to the tank, and the line to the left is the feed line to the injection pump. I used fitting from the local hardware store to connect all the lines. I also mounted my filter on the frame rail under the cab, I have no pictures of that though.
The lines back at the tank are as follows. The feed line for the electric pump gets hooked up to the Draw Straw. I then hooked the bypass line up to the factory pickup line. I used the little 90* plastic connector and some hose clamps. Works real well and I didn't have to drill any extra holes in the tank. Again you can see that the factory return line from the injection pump is still hooked up.
Now I just ran the line up to the injection pump and using a 3/8" nipple with a little bevel on it i was able to get a good seal into the injection pump. Very straight forward.
All that is left to do is start the truck and adjust the regulator to 15psi and enjoy your new found fuel pressure! I know for a fact that my truck runs alot smoother under load and at high RPMS then it did before.
From here on out it is really pretty simple, Find a spot to mount your pump, I drilled and tapped holes in the frame rail. Tapping the holes instead of using nuts on the bolts will allow me to remove the pump in the future without having to drop the fuel tank again. (oh and as you can see from my extra set of holes, make sure you grab the correct drill bit for your tap
) Using a relay you can get at any parts store wire it up so that the pump will be powered when the key is in the run position as well as the start position.Next find a spot to mount your regulator, the direction say to mount it as close to the injection pump as possible but I have a cramped engine compartment as is so I decided to put mine on the frame rail next to the fuel pump. This also saved me on some fuel line and kept the amount of fuel line that is under full pressure from the pump to a minimum. The line coming in from the right on top is the feed line from the electric pump, the line on the bottom is the bypass line that sends fuel back to the tank, and the line to the left is the feed line to the injection pump. I used fitting from the local hardware store to connect all the lines. I also mounted my filter on the frame rail under the cab, I have no pictures of that though.
The lines back at the tank are as follows. The feed line for the electric pump gets hooked up to the Draw Straw. I then hooked the bypass line up to the factory pickup line. I used the little 90* plastic connector and some hose clamps. Works real well and I didn't have to drill any extra holes in the tank. Again you can see that the factory return line from the injection pump is still hooked up.
Now I just ran the line up to the injection pump and using a 3/8" nipple with a little bevel on it i was able to get a good seal into the injection pump. Very straight forward.
All that is left to do is start the truck and adjust the regulator to 15psi and enjoy your new found fuel pressure! I know for a fact that my truck runs alot smoother under load and at high RPMS then it did before.
Last edited by RSWORDS; 04-15-2009 at 08:12 PM.
The following users liked this post:
Billy D (06-09-2010)

#5
04-15-2009, 11:54 PM
Good write up!
I will make this one suggestion, and that is that you put a strainer or filter on the suction side of your Walbro.
Nothing too fancy, or restrictive, or you run the risk of burning up the pump, but if you don't pre-filter the Walbro, it most definitely will fail due to debris.
I will make this one suggestion, and that is that you put a strainer or filter on the suction side of your Walbro.
Nothing too fancy, or restrictive, or you run the risk of burning up the pump, but if you don't pre-filter the Walbro, it most definitely will fail due to debris.
#6
04-16-2009, 08:38 AM
Good write up!
I will make this one suggestion, and that is that you put a strainer or filter on the suction side of your Walbro.
Nothing too fancy, or restrictive, or you run the risk of burning up the pump, but if you don't pre-filter the Walbro, it most definitely will fail due to debris.
I will make this one suggestion, and that is that you put a strainer or filter on the suction side of your Walbro.
Nothing too fancy, or restrictive, or you run the risk of burning up the pump, but if you don't pre-filter the Walbro, it most definitely will fail due to debris.
Last edited by RSWORDS; 04-16-2009 at 09:28 AM.
#7
04-27-2009, 09:54 PM
Diesel Bomber
What did you spend on all that. I'm probably gonna need to do something like that before long. Man i wish I had some money, I've been readin alot and wanna play with my truck 
#8
04-28-2009, 06:42 AM
The following users liked this post:
jasonfriedlin (04-28-2009)


