How To: Replace DMAX water pump in 1hr
#1
 01-30-2011, 03:14 PM


Ooooo the water pump. Everybody either bitches about it, or is scared of it. And those who let fear get the best of them will sometimes get raped by people charging hundreds and even thousands to replace it. Why does everybody bitch or charge a lot of money? Because one of the mounting nuts for the pump got put behind the harmonic balancer so you have to remove the balancer. people can bitch all they want but the bottom line is that some engineer got a vacation to hawaii for doing that, and you didnt.
Now many of you who have done it may be saying an hour? BS. Well that depends. If you have some good beats, some good drinks and a reason to do it, you can get it done in an hour ish.
1000 ways to skin a cat, this is the way i do it, you dont like it do it your way.
This is for an 02-04 LB7, 01s are slightly different and the newer ones I dont know off hand. But the water pump is still in the same spot just different stuff to move
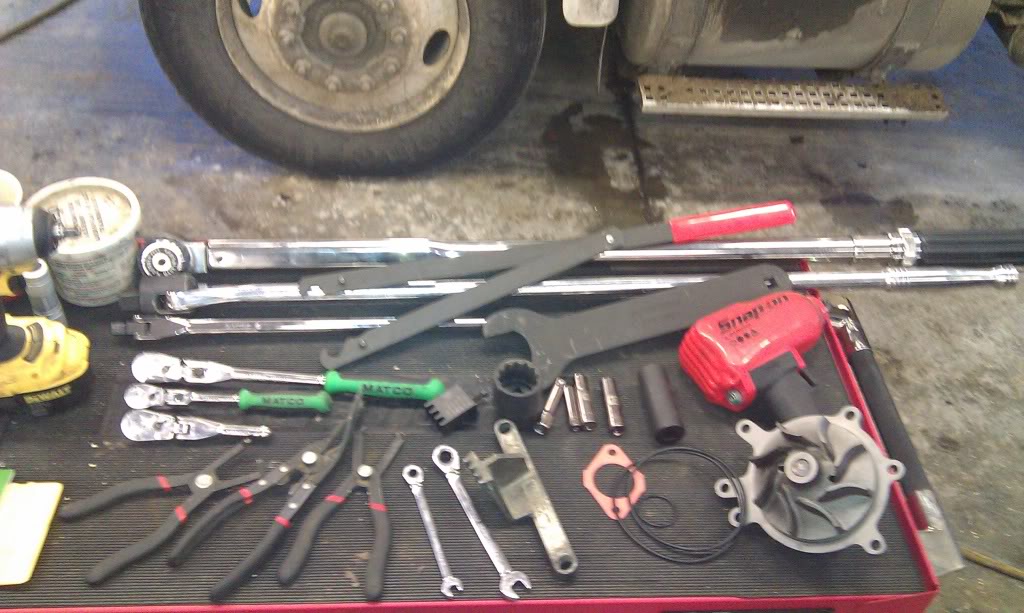
Here is the stuff you will need.
Supplies:
Water pump: NAPA PN: WP58595 You dont have to buy a NAPA one but your local autoparts store can cross this number.
A Couple extra gallons of Dex-Cool
Drink(s) of choice
Motivator (Girlfriend, Boyfriend, wife, dog, etc etc.)
Normal Tools Needed:
8mm,10mm,12mm,22mm(7/8"), 36mm 12pt sockets
Various ratchets and extensions to your taste
1/2" breaker bar or ratchet or 3/8" adapted to 1/2"
8mm and 12mm wrench, reversible ratchet wrenchs will make life easier
Big torque wrench (needs to go to 260lb-ft)
Impact wrench (optional)
Mini Impact Wrench (optional)
Floor jack and stand or car lift
Topside creeper (optional, but worth it)
Specialish Tools you will need to borrow or buy if you dont already have:
Fan Clutch service tools. you will need to 47mm wrench, and the holder with pins.
Flywheel hold tool whether it is the Lisle 22100 (comes with 36mm socket), the factory tool, or a socket with an extension that you stick onto a torque converter bolt. More on this later.
Body Clip Removal tools
HOW TO DO IT!!!
1. Get all of the parts and tools around.
2. Get a reason to do it in 1 hr
3. Get some liquid for of energy if needed.

4. Get some motivational beats pumpin
5. Jack truck up and put on jack stands or lift it up on your lift
6. Remove passenger side wheel and hubcap using impact wrench and 22mm or 7/8" socket.

7. Remove fender liner using body clip tools
8. Drain cooling system by removing radiator drain plug which is directly below CAC tube on passenger side. Use a 90* elbow of some sort to channel it into a clean pail, then remove overflow bottle cap to speed things up.
9. Disconnect batterys using 8mm wrench (just for extra safety)
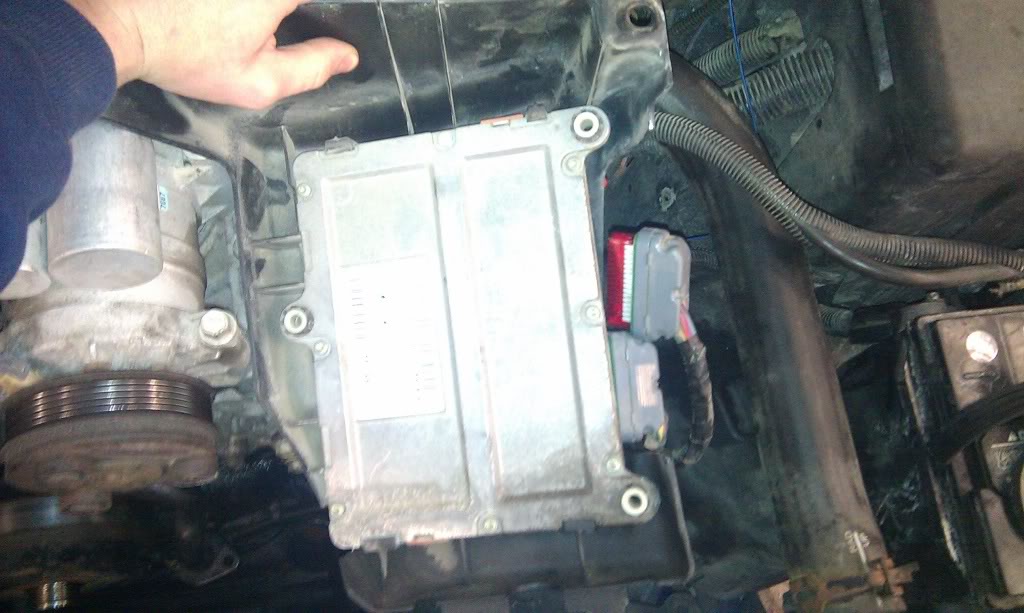
10. Remove TCM by removing the two bolts holding it using 10mm on and then unplugging the two connectors.
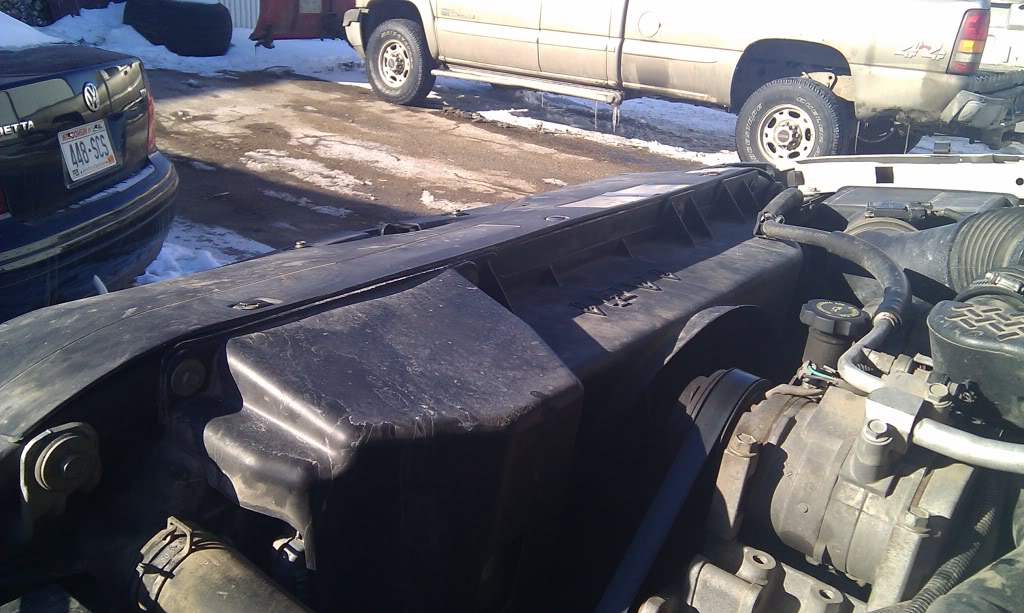
11. Remove upper fan shroud by removing the two remaining bolts using a 10mm, then using the body clip tools to remove the 4 body clips holding it to the lower fan sheild (2 on each side)

12. Using fan clutch service tools, remove fan clutch. It is normal right hand threaded.
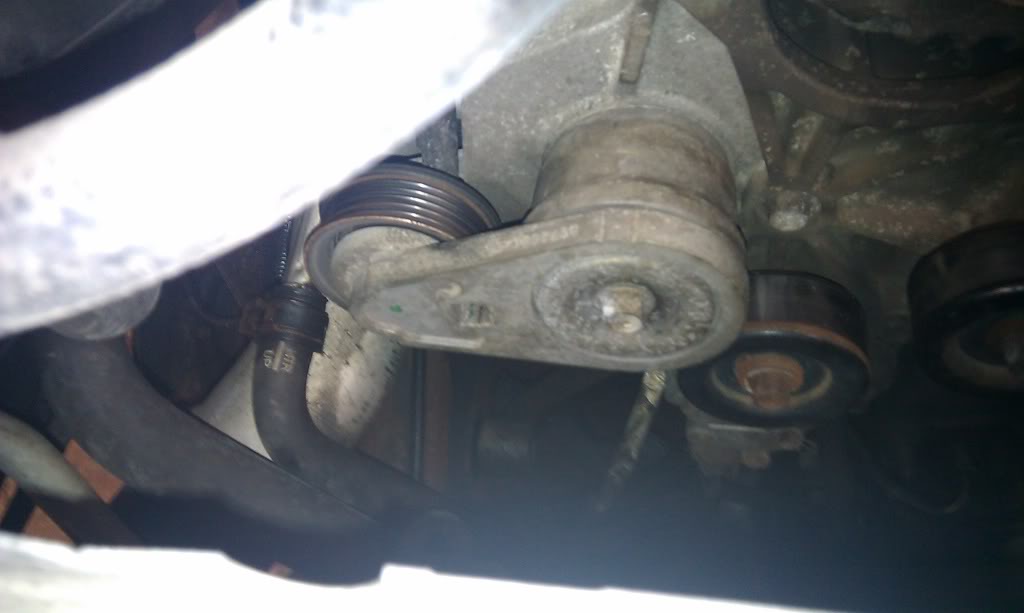
13.Remove serpentine belt by inserting 1/2" breaker bar into the hole on the tensioner, 01s require 3/8"
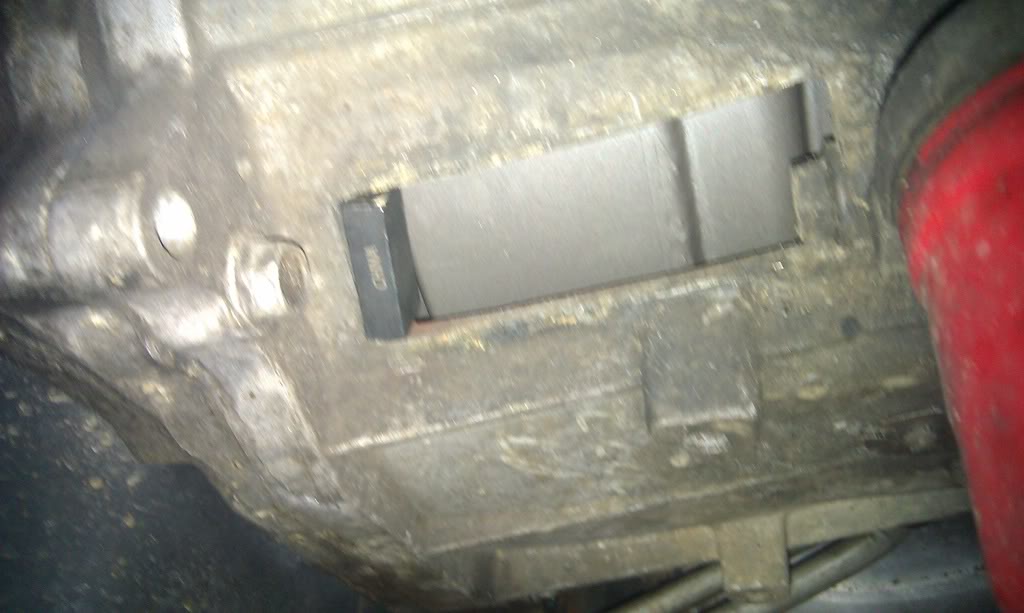
14. Now we need to lock the flywheel. There are a few ways to do this. The fastest and easiest way is to use the Lisle tool which you insert through the inpection hole in the bellhousing. It is very fast. The other way is to remove the start. To remove the starter you just need to remove the two mounting bolts using a 15mm, then lay it to the side out of the way. You can leave the wires connected. Now there are two ways to lock your flywheel this way. You can use the factory flywheel hold tool, J-44643, or you can use a 15mm socket and extension on one of the torque converter bolts, then when you rotate the crank it will contact the bellhousing and hold the flywheel. For any of these methods you may need to turn the crank to get them to engage fully. And if using lisle tool, remember to remove before trying to crank engine.
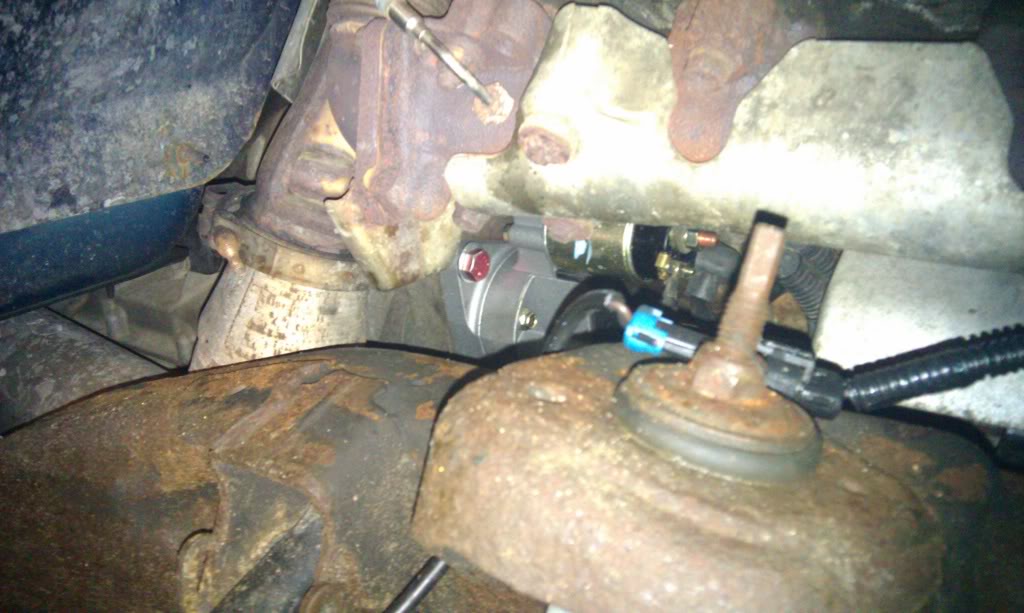
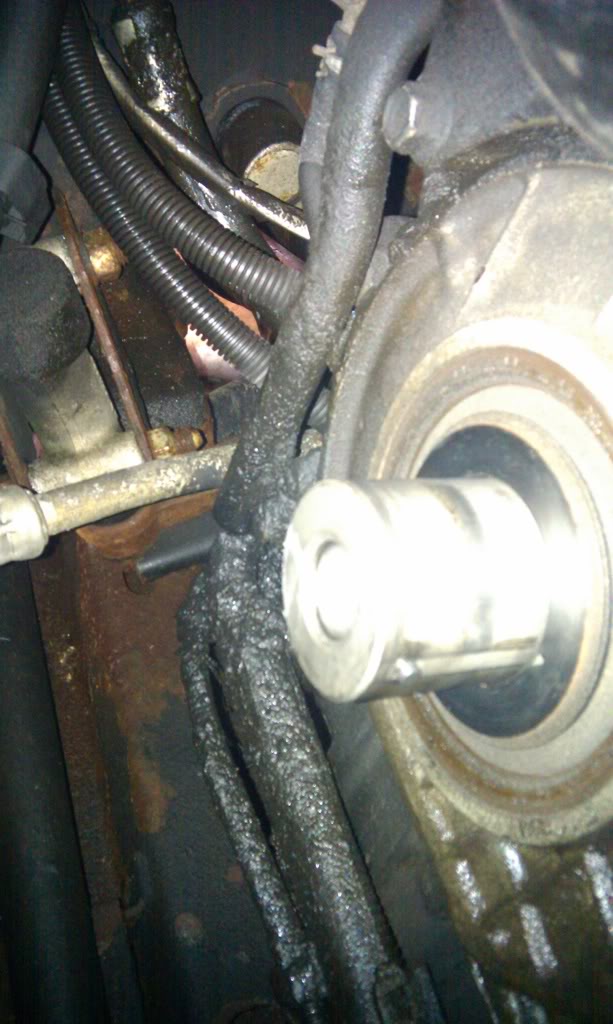
15. Now you need to grow a pair of ***** and put your 36mm 12pt socket on the harmonic balancer bolt and using the biggest breaker bar you have, with a cheater pipe if needed, remove the bolt. Then remove the balancer. (yes the water pump is removed at the time of this picture)
Now many of you who have done it may be saying an hour? BS. Well that depends. If you have some good beats, some good drinks and a reason to do it, you can get it done in an hour ish.
1000 ways to skin a cat, this is the way i do it, you dont like it do it your way.
This is for an 02-04 LB7, 01s are slightly different and the newer ones I dont know off hand. But the water pump is still in the same spot just different stuff to move
Here is the stuff you will need.
Supplies:
Water pump: NAPA PN: WP58595 You dont have to buy a NAPA one but your local autoparts store can cross this number.
A Couple extra gallons of Dex-Cool
Drink(s) of choice
Motivator (Girlfriend, Boyfriend, wife, dog, etc etc.)
Normal Tools Needed:
8mm,10mm,12mm,22mm(7/8"), 36mm 12pt sockets
Various ratchets and extensions to your taste
1/2" breaker bar or ratchet or 3/8" adapted to 1/2"
8mm and 12mm wrench, reversible ratchet wrenchs will make life easier
Big torque wrench (needs to go to 260lb-ft)
Impact wrench (optional)
Mini Impact Wrench (optional)
Floor jack and stand or car lift
Topside creeper (optional, but worth it)
Specialish Tools you will need to borrow or buy if you dont already have:
Fan Clutch service tools. you will need to 47mm wrench, and the holder with pins.
Flywheel hold tool whether it is the Lisle 22100 (comes with 36mm socket), the factory tool, or a socket with an extension that you stick onto a torque converter bolt. More on this later.
Body Clip Removal tools
HOW TO DO IT!!!
1. Get all of the parts and tools around.
2. Get a reason to do it in 1 hr
3. Get some liquid for of energy if needed.
4. Get some motivational beats pumpin
5. Jack truck up and put on jack stands or lift it up on your lift
6. Remove passenger side wheel and hubcap using impact wrench and 22mm or 7/8" socket.
7. Remove fender liner using body clip tools
8. Drain cooling system by removing radiator drain plug which is directly below CAC tube on passenger side. Use a 90* elbow of some sort to channel it into a clean pail, then remove overflow bottle cap to speed things up.
9. Disconnect batterys using 8mm wrench (just for extra safety)
10. Remove TCM by removing the two bolts holding it using 10mm on and then unplugging the two connectors.
11. Remove upper fan shroud by removing the two remaining bolts using a 10mm, then using the body clip tools to remove the 4 body clips holding it to the lower fan sheild (2 on each side)
12. Using fan clutch service tools, remove fan clutch. It is normal right hand threaded.
13.Remove serpentine belt by inserting 1/2" breaker bar into the hole on the tensioner, 01s require 3/8"
14. Now we need to lock the flywheel. There are a few ways to do this. The fastest and easiest way is to use the Lisle tool which you insert through the inpection hole in the bellhousing. It is very fast. The other way is to remove the start. To remove the starter you just need to remove the two mounting bolts using a 15mm, then lay it to the side out of the way. You can leave the wires connected. Now there are two ways to lock your flywheel this way. You can use the factory flywheel hold tool, J-44643, or you can use a 15mm socket and extension on one of the torque converter bolts, then when you rotate the crank it will contact the bellhousing and hold the flywheel. For any of these methods you may need to turn the crank to get them to engage fully. And if using lisle tool, remember to remove before trying to crank engine.
15. Now you need to grow a pair of ***** and put your 36mm 12pt socket on the harmonic balancer bolt and using the biggest breaker bar you have, with a cheater pipe if needed, remove the bolt. Then remove the balancer. (yes the water pump is removed at the time of this picture)
Last edited by gunman41mag; 03-31-2012 at 02:11 AM. Reason: Removing of pictures as per OP
#2
01-30-2011, 03:15 PM
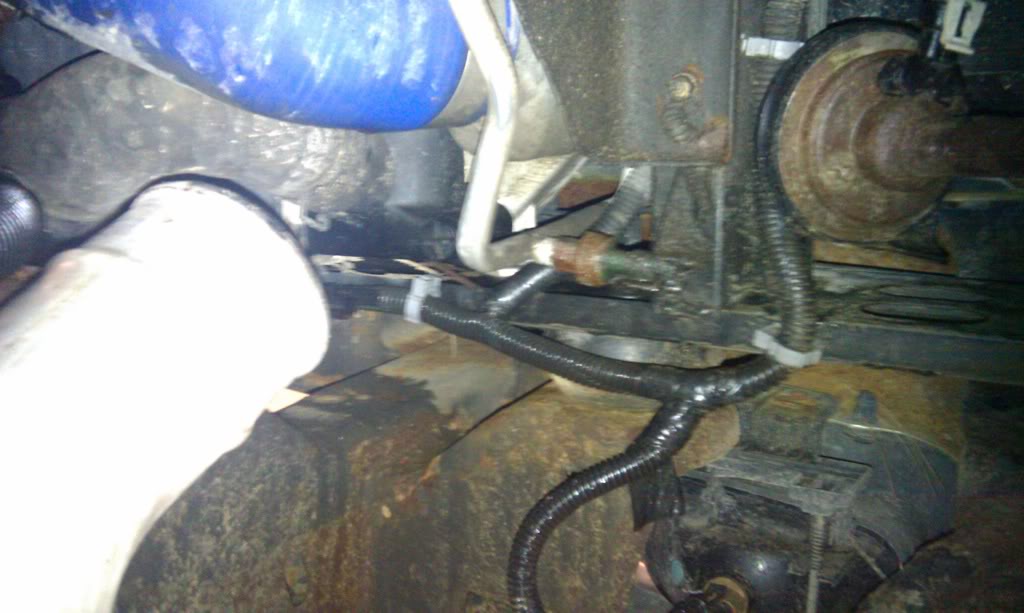
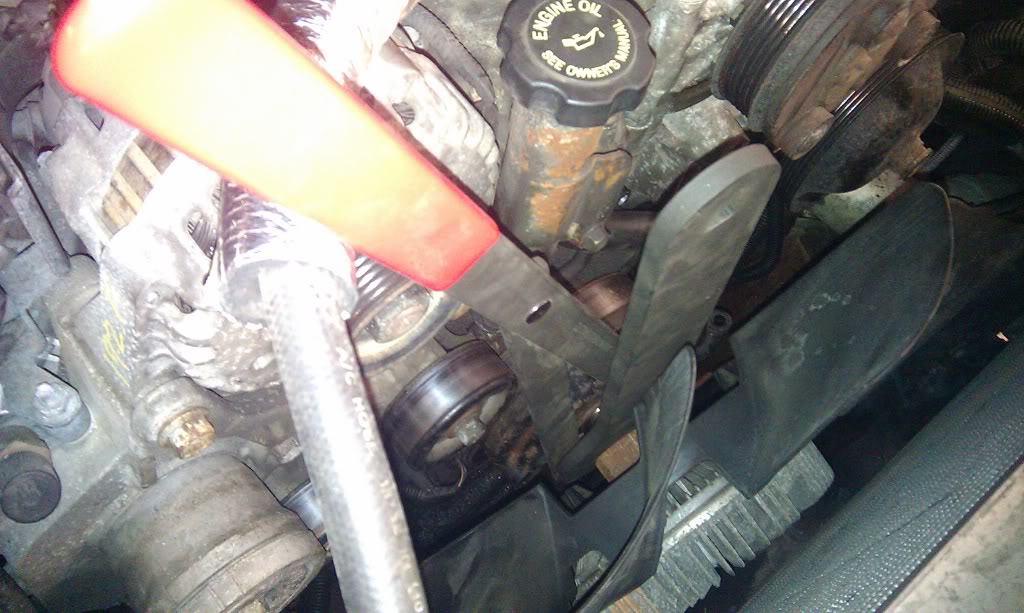
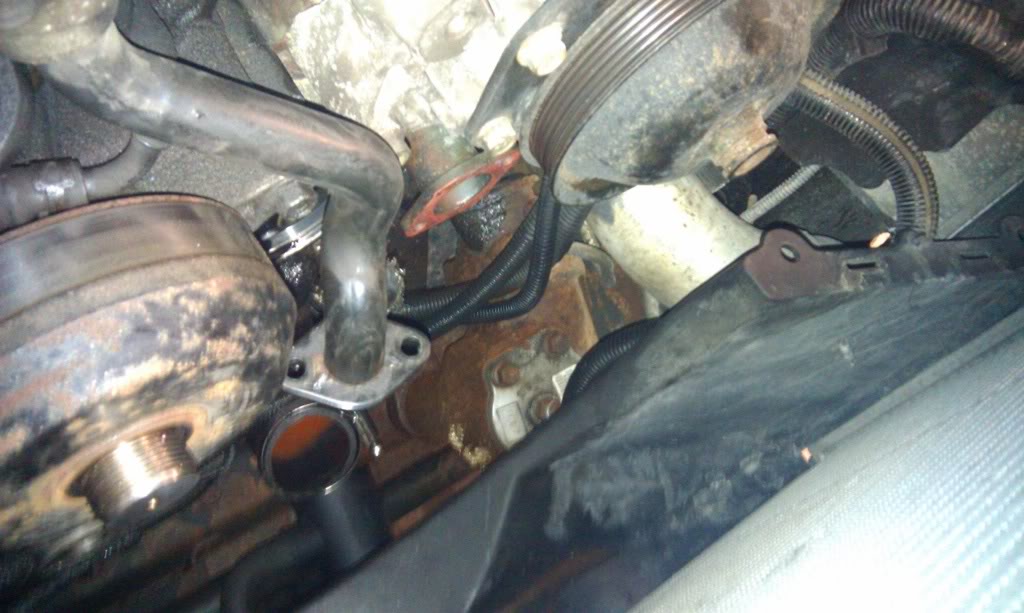
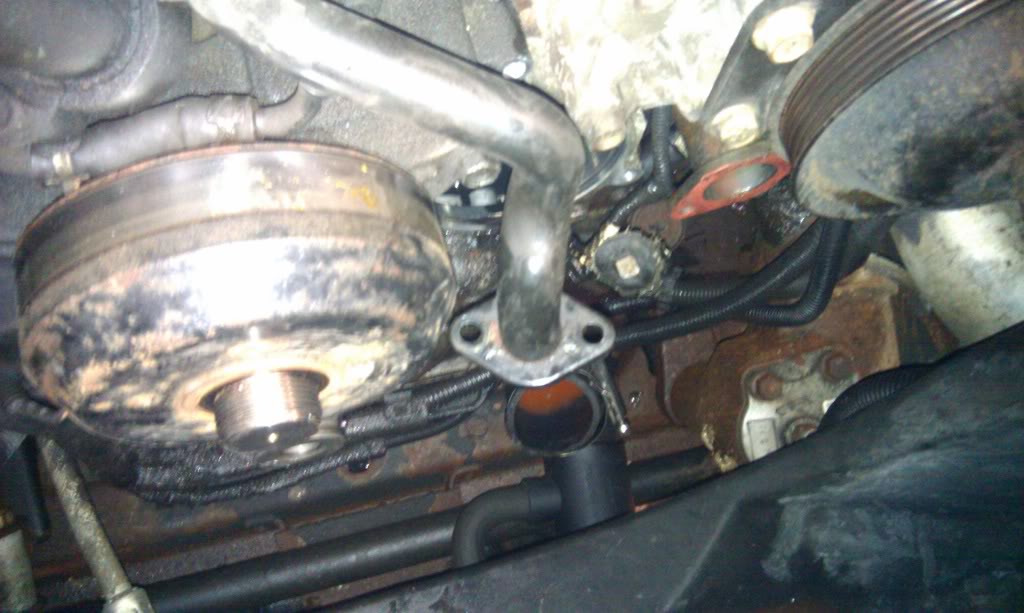
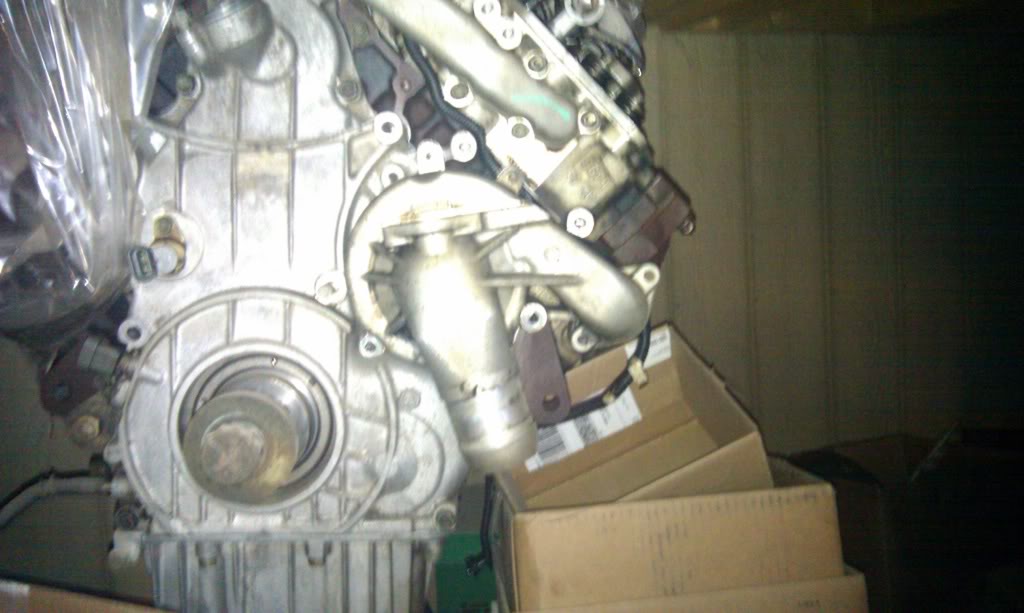
16. Now you want to remove the coolant crossover pipe nuts with the 12mm wrench, you have to do this blind. You can remove the driversside wheel liner to gain better access if needed and you will be able to see them. The coolant pipe is visble in this picture, it has the orange gasket on it. (Water pump is removed in this picture).
17. Next remove the lower radiator hose using an 8mm. No picture for this one, should be pretty self-explanatory
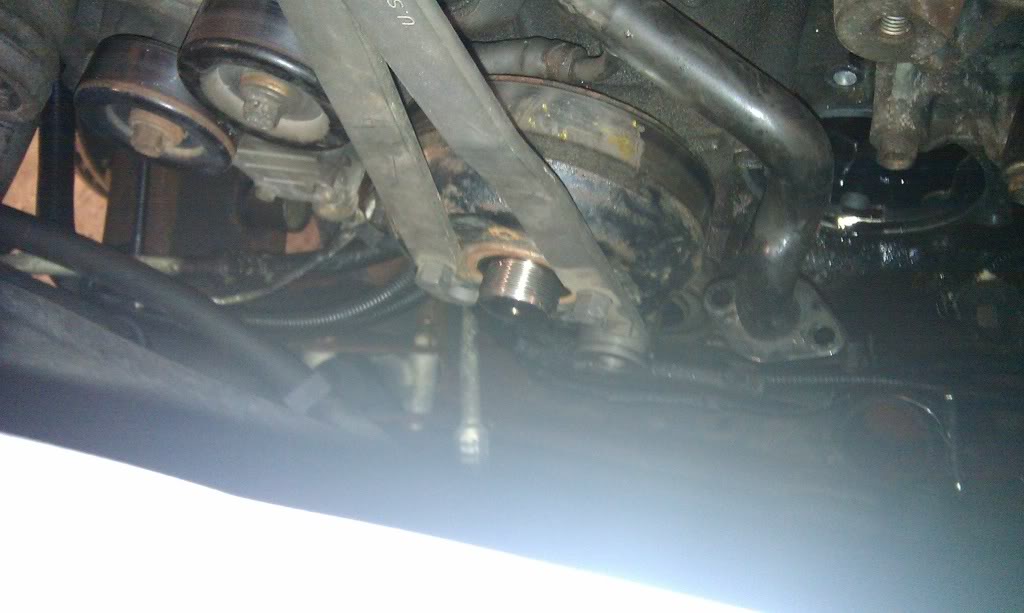
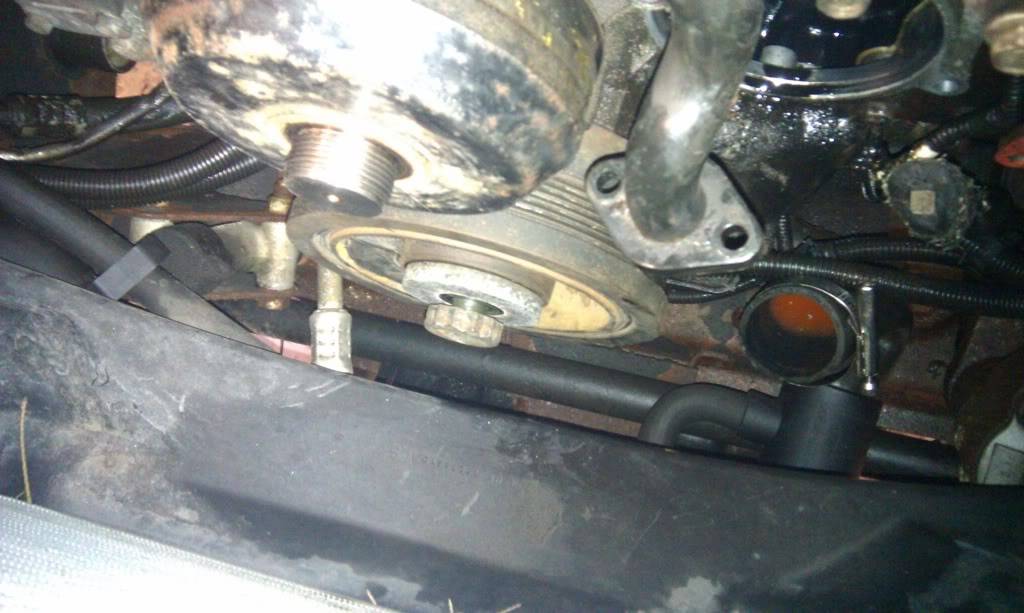
18. Remove the two bolts that hold the coolant bypass pipe to the top of the water pump using 12mm then swing the pipe out of the way towards the front of the truck. (black pipe in the middle of this picture)
19. No remove the two bolts and one nut that hold the pump to the motor, using a 12mm. Then remove pump from truck. (picture is of motor on a stand for better view.
20. Now remove the three bolts that hold the pump to the housing to seperate the two. I didnt take a picture but once you get your housing off you will notice a big pit in it that looks bad. Its normal, they all have it.

21. Now install the new pump into the housing by lubricating the Biggest o ring of the three and then reinstalling the three bolts
21. Now reinstall the pump into the truck by lubricating the middle sized o raing and installing it over the pump, then using transgel, vaseline, or grease to hold the coolant cross over pipe to the studs, and waiting to install the smallest o ring till later. Torque bolts to 15-18lb-ft
22. Now reinstall coolant bypass pipe after lubricating the smallest o ring and installing it into the groove in the water pump. Take extra caution to make sure the o ring doesnt get pinched during this process. Install two bolts to 18lb-ft
23. Now reinstall the two nuts on the crossover pipe to 18lb-ft
24. Now reinstall the lower radiator hose
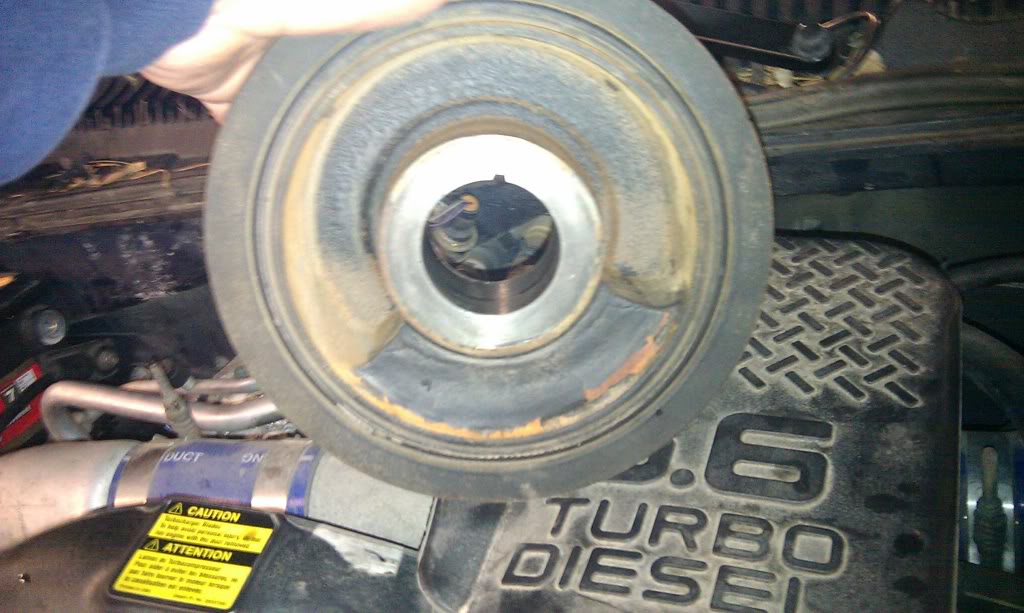
25. Now reinstall the harmonic balancer making sure you put it on facing the right direction and making sure to line up the keyway with the crank pin. The picture below shows the face that should be towards the crank, it is the face that is flush with the outer edge of the balancer, the recessed face goes towards the bolt and washer. Install the bolt and torque to 260lb-ft.
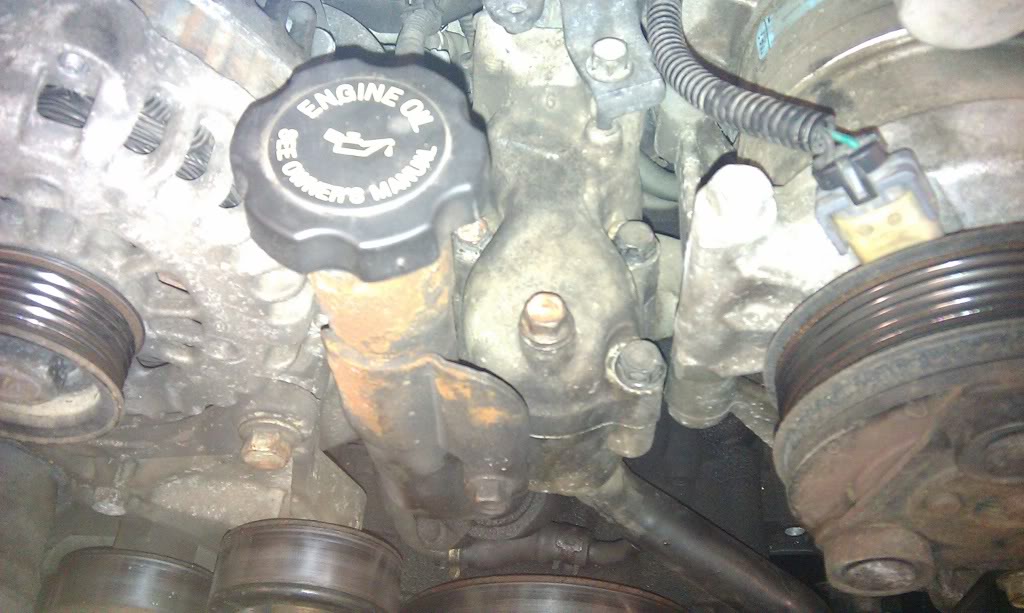
26. Now reinstall everything else and then fill the cooling system up by removing the vent with a 12mm. Its the bolt in the middle of this picture.
Now you should be good to go, check for leaks, and check coolant level.
If you have overheating issues soon afterwards you may have gotten a bad pump that the impeller fell off of, I just had this happen to me. In that case you will need to go back to the autoparts store and request a new pump and housing at no cost.
Hope this helped.
Vinny
17. Next remove the lower radiator hose using an 8mm. No picture for this one, should be pretty self-explanatory
18. Remove the two bolts that hold the coolant bypass pipe to the top of the water pump using 12mm then swing the pipe out of the way towards the front of the truck. (black pipe in the middle of this picture)
19. No remove the two bolts and one nut that hold the pump to the motor, using a 12mm. Then remove pump from truck. (picture is of motor on a stand for better view.
20. Now remove the three bolts that hold the pump to the housing to seperate the two. I didnt take a picture but once you get your housing off you will notice a big pit in it that looks bad. Its normal, they all have it.
21. Now install the new pump into the housing by lubricating the Biggest o ring of the three and then reinstalling the three bolts
21. Now reinstall the pump into the truck by lubricating the middle sized o raing and installing it over the pump, then using transgel, vaseline, or grease to hold the coolant cross over pipe to the studs, and waiting to install the smallest o ring till later. Torque bolts to 15-18lb-ft
22. Now reinstall coolant bypass pipe after lubricating the smallest o ring and installing it into the groove in the water pump. Take extra caution to make sure the o ring doesnt get pinched during this process. Install two bolts to 18lb-ft
23. Now reinstall the two nuts on the crossover pipe to 18lb-ft
24. Now reinstall the lower radiator hose
25. Now reinstall the harmonic balancer making sure you put it on facing the right direction and making sure to line up the keyway with the crank pin. The picture below shows the face that should be towards the crank, it is the face that is flush with the outer edge of the balancer, the recessed face goes towards the bolt and washer. Install the bolt and torque to 260lb-ft.
26. Now reinstall everything else and then fill the cooling system up by removing the vent with a 12mm. Its the bolt in the middle of this picture.
Now you should be good to go, check for leaks, and check coolant level.
If you have overheating issues soon afterwards you may have gotten a bad pump that the impeller fell off of, I just had this happen to me. In that case you will need to go back to the autoparts store and request a new pump and housing at no cost.
Hope this helped.
Vinny

Thread
Thread Starter
Forum
Replies
Last Post
klein444
Chevy/GMC 6.2L and 6.5L
3
03-08-2015 08:19 AM
Lawrence D. Sanders Sr
5.9 Liter CR Dodge Cummins 03-07
3
12-16-2014 11:52 PM
mpcampers
24 Valve 2nd Gen Dodge Cummins 98.5-02
6
12-04-2014 08:24 PM


